Chocolate-Dipped Vanilla Ice Cream Bliss
- Indulging in Chocolate-Dipped Vanilla Ice Cream Bliss
- Your Essential Ingredients Guide to Ice Cream Bliss
- Mastering the Art of Professional Cooking: Your Guide to Chocolate-Dipped Vanilla Ice Cream Bliss
- Look into Into Chocolate-Dipped Vanilla Ice Cream Bliss!
- Frequently Asked Questions
- 📝 Recipe Card
Indulging in Chocolate Dipped Vanilla Ice Cream Bliss
You ever have one of those days where the sun is shining, and you just want something sweet to make it even better? i had one of those days recently.
Picture me, lounging outside, trying to soak in every bit of summer, when my eyes fell on a container of vanilla ice cream in my freezer.
Oh my gosh, it hit me! how about i dip vanilla ice cream in chocolate bliss ? that’s right, folks! the creamy goodness of vanilla, wrapped in a crunchy chocolate coat it’s like a summer party in your mouth!
The Story Behind the Treat
Let me take you back a bit. chocolate covered anything is a classic, right? ice cream bars, especially, have been around forever, making summers that much sweeter.
This recipe, while simple, brings a nostalgic feel think homemade ice cream bars your grandma might have made. nowadays, they’re making a comeback, not just in ice cream parlors, but at home too! it’s the perfect way to cool off, especially if you have a gang of kids (or simply a sweet tooth to feed).
So, how tough is it to whip these up? honestly, it’s super easy . you’re looking at around 50 minutes total time, most of which is just chilling in the freezer.
And, trust me, the hardest part is just melting chocolate! with minimal cooking techniques involved, even the most novice cooks can rock this out.
Plus, it’s budget friendly. you might spend a few bucks on some chocolate and ice cream, but it yields four servings of creamy, crunchy happiness.
Why You’ll Love It
Now, let’s get a bit serious for a sec. there are some serious health benefits to making your treats at home.
You can customize everything! want fewer additives? boom! use quality vanilla ice cream. you can even go for healthier ice cream alternatives if that’s your jam.
Each bar is well packaged with vitamins and minerals from the ingredients you choose, minus those nasty preservatives you find in store-bought ones.
It’s not just about health, though. these chocolate dipped bars are the perfect way to celebrate any occasion summer birthdays, backyard bbqs, or simply as a family friendly dessert after dinner.
And let’s face it, they’re even great while binge watching your favorite show. whether you’re a kid or just a kid at heart, who doesn’t love that sweet and salty crunch?
Oh, and don’t get me started on ice cream flavor combinations ! you can easily switch up the ice cream: cookies and cream, mint chocolate chip, you name it! you could even experiment with toppings think chopped nuts, sprinkles, or flaky sea salt for that sweet savory kick.
All About the Ingredients
Before diving into the recipe, let’s quickly run through what you’ll need. grab some of that creamy vanilla ice cream , as much as you can handle, and then some semi sweet chocolate chips (because chocolate is life!).
A touch of coconut oil is going to help you get that perfect melting point for the chocolate coating, and optional toppings can add that finishing touch.
Ready to jump into the fun part? Let’s scoop, dip, and chill our way to dessert heaven. Get your stretchy pants on; you won't want to miss out on this.
Stay tuned as we dive further into the ingredients and step-by-step magic of making your very own Chocolate Dipped Vanilla Ice Cream Bliss! Trust me; your taste buds will thank you later!
Your Essential Ingredients Guide to Ice Cream Bliss
Alright, friends, let’s talk about what makes every dessert, especially our chocolate dipped vanilla ice cream bliss , really sing. whether you're whipping up a no-churn ice cream or making homemade ice cream bars , having the right essentials in your kitchen is key.
Grab your apron; we're diving in!
Premium Core Components
To kick things off, let’s chat about premium core components . This ain't your ordinary grocery checklist. Here’s what you need:
Measurements matter : for the true pros and home chefs, i’m talking both us and metric. so you’ll want about 4 cups (960ml) of vanilla ice cream and 1 cup (170g) of semi sweet chocolate chips.
Consistency is everything, right?
Quality Indicators : Always look for fresh and fruity vanilla ice cream with simple ingredients. Check those labels for anything weird. If it has more than five ingredients, maybe keep looking!
Storage guidelines and shelf life : ice cream stays good in your freezer for about 2-3 months if you keep it in an airtight container.
Chocolates? well, they can last up to a year! just remember, air is the enemy of both.
Freshness Tips : When you pick fruits or other add-ins, go for vibrant colors and a firm feel. A dull apple? Pass! Whole vanilla beans? Yes, please!
Signature Seasoning Blend
While we love our vanilla, sometimes we need that extra oomph . Here’s where the magic happens:
Essential Spice Combinations : Think of that blend of cinnamon or nutmeg added to your vanilla. It’s the secret handshake of flavors.
Herbs and Pairings : Fresh mint or a dash of lavender can take your easy ice cream desserts to the next level. Don't be shy experiment!
Regional Variations : Go southern with pecans or northeast with fresh berries. Depending on where you are, feel free to switch it up.
Smart Substitutions
Now, let's be real. Life happens and sometimes you don't have everything on hand. No worries, here’s how to handle it like a pro:
Common Alternatives : Don’t have chocolate chips? Use cocoa powder with a touch of oil instead!
Dietary Modifications : Need to go dairy-free? Try coconut ice cream or any almond based alternatives. Trust me, you won’t miss a beat.
Emergency Replacements : No chocolate? Melting peanut butter can offer that sweet coated feeling without the chocolate. Yes, please!
Seasonal Options : Using fresh strawberries in the summer? Just slice them up and toss them into your ice cream mix. Instant fresh flavor!
Kitchen Equipment Essentials
You ready for the tools of the trade? Here's what you gotta have:
Must Have Tools : You’ll need a baking sheet lined with parchment paper, a heatproof bowl (or a microwave for the bold!), and a spatula. Pretty simple stuff!
Preparation Tips : Cooling time, y’all! Putting your ice cream bars in the freezer for about 30 minutes ensures they won't melt when you dip them in chocolate.
Storage Solutions : Make sure you have a solid container. That’s what keeps your ice cream bliss properly frozen and free from ice crystals.
We've gone through all this goodness, but one of the best parts is what you do next! you have everything you need for some stunning culinary adventures, whether you're planning easy dessert recipes or throwing an ice cream party .
Look into into your ice cream making journey with my easy-to-follow instructions next. trust me, when you dip vanilla ice cream in chocolate bliss , it’s gonna be a hit with the whole family perfect for those summer treats and a fun way to spice up any gathering.
Let's go make some magic happen!
Mastering the Art of Professional Cooking: Your Guide to Chocolate Dipped Vanilla Ice Cream Bliss
Cooking can be intimidating, but it doesn’t have to be! whether you're a seasoned pro or just starting out, mastering professional cooking methods can elevate your food game, especially when you want to whip up something sweet like chocolate dipped vanilla ice cream bliss .
Let’s dive into how to get organized, prep like a boss, and avoid common kitchen pitfalls. you know you want that homemade ice cream sensation sitting pretty in your kitchen!
Essential Preparation Steps
First things first: mise en place. this french term basically means “everything in its place.” gather all your ingredients and tools before you start cooking.
For this recipe, you’ll need vanilla ice cream , chocolate chips , and some coconut oil for that perfect chocolate coating.
Got that? awesome!
Time management is key! start with melting your chocolate while the ice cream shapes are chilling. thanks to a little multitasking, you can be both efficient and effective! speaking of efficiency, keep your workspace organized like, a clean countertop is your friend.
Plus, let’s not forget safety: don’t leave around hot pots, and always be careful with sharp kitchen tools.
Step-by-step Process
Alright, let’s get into the nitty gritty of making those dreamy ice cream bars.
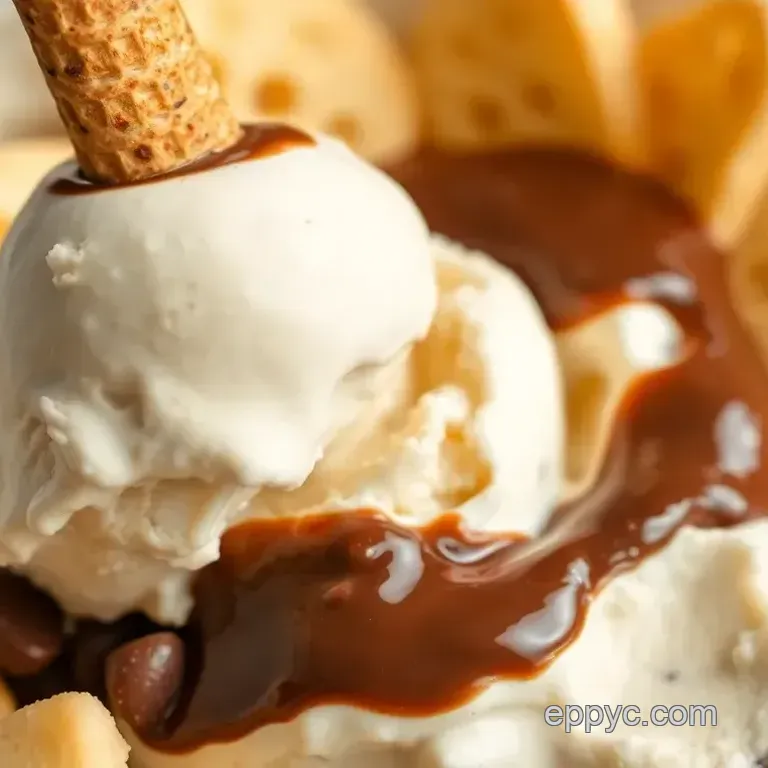
Prepare the ice cream bars: use a scoop to shape your softened vanilla ice cream into bars about 2” x 4” .
Place them on a lined baking sheet. then, freeze them for at least 30 minutes this is crucial for shape holding.
Melt the chocolate: choose your melting method double boiler or microwave. just melt together 1 cup (170g) of semi sweet chocolate chips and 1 tablespoon (15ml) of coconut oil.
Stir until it’s all melted down and smooth .
Dip the Ice Cream: Once those ice cream bars are firm, it's showtime! Dip each bar halfway into the melted chocolate. Let that excess chocolate drip off nobody likes a soggy bottom!
Add Optional Toppings: Want to be extra? Sprinkle on some chopped nuts or flaky sea salt while the chocolate is still warm. It adds a nice crunch and flavor contrast!
Chill to Set: Pop those dipped beauties back into the freezer for another 15- 20 minutes to let that chocolate harden.
Expert Techniques
True mastery of your kitchen comes with a few pro tips. always choose high-quality chocolate; it really makes a difference.
Want a thicker coating? skip the oil or use a different melting technique. pay close attention to timing it’s a game changer for successful ice cream bars!
If you notice that your chocolate is thickening faster than you’d like, just gently reheat this is your chance for a little troubleshooting.
And don’t forget to ask yourself: do you want to experiment with flavors? chocolate ice cream or a hint of mint might just blow your mind!
Success Strategies
Let’s discuss some common mistakes. one biggie? forgetting to freeze the ice cream bars long enough. trust me, you don’t want a melting puddle of ice cream when you dip.
Another is not working quickly enough; the melted chocolate will harden, making dipping tricky.
A sweet trick? Keep the making dates flexible by attempting make-ahead options. You can create these earlier in the week and freeze them until your next ice cream party!
Getting the Yummy Results
Your success isn’t just down to following steps but also to quality control. after dipping, periodically check that the chocolate isn't cracking or melting into the ice cream.
And if you’re looking for easy dessert recipes that impress, these homemade ice cream bars hit the sweet spot!
So there you have it a complete guide to turning simple vanilla ice cream recipes into something extraordinary with a lovely chocolate coating and fun toppings.
Wrap these up for a neighborhood ice cream party or keep them all to yourself for those hot summer nights no judgment here!
As we transition into additional sections, just picture yourself digging into those chocolate dipped treats , & remember the satisfaction that comes with whipping together homemade sweet delights.
Who’s ready to master the art of desserts?
Look into Into Chocolate Dipped Vanilla Ice Cream Bliss!
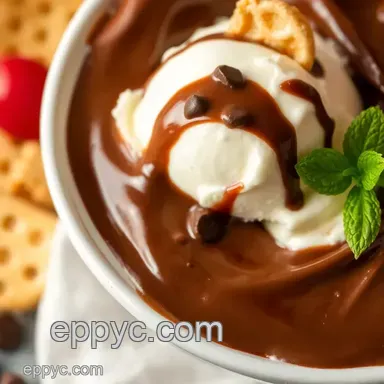
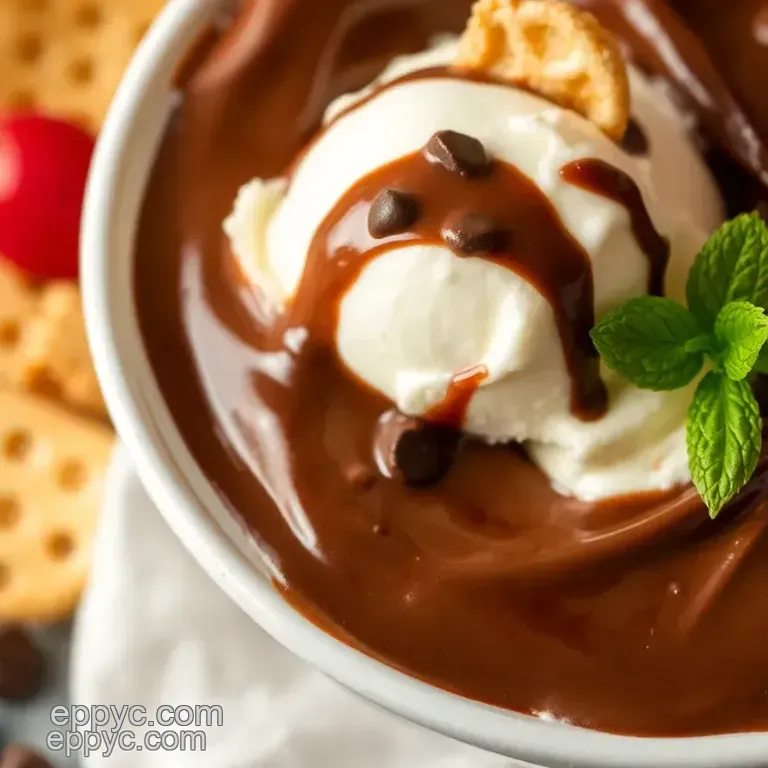
Oh my gosh, friends! if you're looking for a creamy, dreamy dessert that will make your taste buds sing, then you gotta dip vanilla ice cream in chocolate bliss .
Trust me, this recipe is like a sweet hug on a hot summer day. perfect for any ice cream party or just a chill night relaxing on your couch.
Let’s talk about all the tasty details you’ll need for this delightful treat!
Pro Tips & Secrets
Before we dive into the delicious steps, let me share some chef secrets! first off, choose high-quality chocolate. it's simple: better chocolate means a rich flavor.
If you've got access to gourmet chocolate, go for it! it’ll really make a difference.
Time saving technique? while you’re melting that chocolate, pop those ice cream bars in the freezer. no one likes to wait around while chocolate cools.
Plus, the colder the ice cream, the better it holds its shape when you dip it. you don’t want a chocolate pool, right?
When it comes to enhancing that flavor, a sprinkle of flaky sea salt over the chocolate right after dipping can transform it into something heavenly.
And let’s not overlook presentation. you gotta serve it up right! a simple but creative plating technique will wow your crowd.
Perfect Presentation
You know what they say first impressions matter! when you're ready to dish out your easy ice cream desserts , take a moment to make it look fabulous.
Here’s what i do: i place each dipped bar on a colorful plate. you can even set them atop fresh berries or a dollop of whipped cream.
For a fun garnish, think sprinkles or chopped nuts. all those color combinations will draw people in like moths to a flame! grab a couple of mint leaves and plop those on the side for an added pop of color.
Your friends will think you're a professional dessert maker!
Storage & make-ahead
Got leftovers? no worries! for optimal flavor and freshness, store those dipped bars in a plastic container with parchment paper between each layer.
Keep them in the freezer, and they'll last about two weeks. but let's be real; they probably won’t stay around that long!
When it’s time to indulge again, just let them sit out for a few minutes before you dig in. that way, you'll avoid breaking a tooth on frozen chocolate (not fun, trust me!).
Reheating isn’t necessary here, but if you want to bring them back to life, just let the bars thaw a bit before serving.
Creative Variations
Feeling adventurous? There are so many fun paths you can take with this recipe. If you’re in the mood, you could swap out the vanilla ice cream for mint chocolate chip, or even a rich cookies and cream! Who wouldn’t love that combo?
Then there’s the transformation of the chocolate itself. want a sweeter vibe? try white chocolate! you can even get whimsical with toppings think crushed candy bars or a sprinkle of crushed pretzels for that sweet and salty game.
Complete Nutrition Guide
Okay, let’s chat about nutrition because balance is key, even with desserts! these chocolate covered ice cream bars come in at about 300 calories each, with a moderate amount of fat coming from the chocolate and coconut oil.
For a treat, that’s not too shabby!
Consider portion sizes, too. one or two bars is just enough to satisfy without going overboard. if you want a healthier version, you can look for no-churn ice cream made from bananas or greek yogurt.
It’s doable, and still super delicious!
Final Thoughts
So there you have it, folks! you’re on your way to creating your own chocolate covered ice cream masterpieces that’ll wow everyone.
Remember, sometimes the best moments happen around delicious food, and ice cream just has that magical way of bringing people together.
Now it’s time for you to make these dipped ice cream bars for your next gathering or just a fun night at home.
Enjoy every lick, drizzle, and dip. your taste buds will thank you, and so will your friends! happy dessert making!
Frequently Asked Questions
What is the best way to Dip Vanilla Ice Cream in Chocolate Bliss without it melting?
To prevent the ice cream from melting while you dip it in chocolate, ensure your ice cream is very firm by freezing it for at least 30 minutes before dipping. Additionally, work quickly when dipping each bar to minimize exposure to warmth and time out of the freezer.
Can I make my own chocolate coating for the Chocolate Dipped Vanilla Ice Cream Bliss?
Absolutely! You can make your own chocolate coating by melting high-quality chocolate (dark, milk, or white) with a touch of coconut or vegetable oil for a smoother consistency. Just melt the chocolate carefully, and ensure it’s not too hot before dipping for the perfect coating.
How should I store leftovers after I Dip Vanilla Ice Cream in Chocolate Bliss?
Store any leftover chocolate dipped bars in a freezer safe plastic container. To avoid freezer burn, make sure they are tightly wrapped or sealed. They can keep well in the freezer for up to a month.
What toppings can I add to make my Chocolate Dipped Vanilla Ice Cream Bliss more exciting?
You can get creative with toppings like chopped nuts, sprinkles, or flaky sea salt for added texture and flavor. You can also try crushed cookies or candy pieces to give a fun and crunchy twist!
Is there a way to make this recipe healthier without losing flavor?
For a healthier variation, consider using low-fat or dairy-free ice cream, and a dark chocolate with a higher cocoa content. You can also reduce the amount of sugar used in toppings or opt for natural sweeteners to maintain delicious flavors while cutting down on calories.
Can I use different flavors of ice cream for this recipe?
Yes, you can absolutely use different flavors of ice cream to create your version of Chocolate Dipped Bliss! Flavors like strawberry, cookies and cream, or mint chocolate chip work wonderfully and can make your dessert even more exciting.
Dip Vanilla Ice Cream In Chocolate Bliss