Bake Chocolate Cake: Deliciously Classic Treat
A Slice of Nostalgia: Bake Chocolate Cake - Deliciously Classic Treat
Oh my gosh, can we all just agree that nothing compares to the aroma of a bake chocolate cake: deliciously classic treat wafting through the kitchen? i remember the first time i baked a chocolate cake.
I was about twelve, covered in flour, and well... let’s just say it didn’t look like a pinterest masterpiece. but that rich, cocoa filled scent brought my family running! sure, my cake might’ve looked like a frisbee that rolled down the hill, but they loved it.
It was a sweet moment, and it started my lifelong obsession with baking. you know what i mean? there’s just something about the whole process that warms your soul and fills your home with love.
Now, let's talk about this chocolate cake. not only is it a classic chocolate cake everyone recognizes, but it’s perfect for all those special moments .
Birthdays, anniversaries, or just because this cake has got your back!
What Makes This Recipe Stand Out?
Historically, chocolate cake has been around for ages, dating back to the 18th century. but let’s be real, it has gone through quite the glow-up over the years! from being a rare treat to a household staple, this cake has come to symbolize celebrations and fun.
And nowadays? it’s on every dessert table across america, becoming the star of the show.
So, how long will this take you? you should be all set in about 50 to 55 minutes , with 20 minutes for prep and 30 to 35 minutes for baking.
It’s medium difficulty , but don’t let that scare you! if you can whip up scrambled eggs, you can definitely handle this cake.
The satisfaction of cutting into a moist chocolate cake is totally worth it, trust me.
The Delicious Benefits
When you're thinking about desserts for celebrations, this cake not only looks impressive but is also packed with health benefits ! okay, maybe health is a stretch.
But think about it dark chocolate has antioxidants, and when you whip up your own frosting, you can control the ingredients.
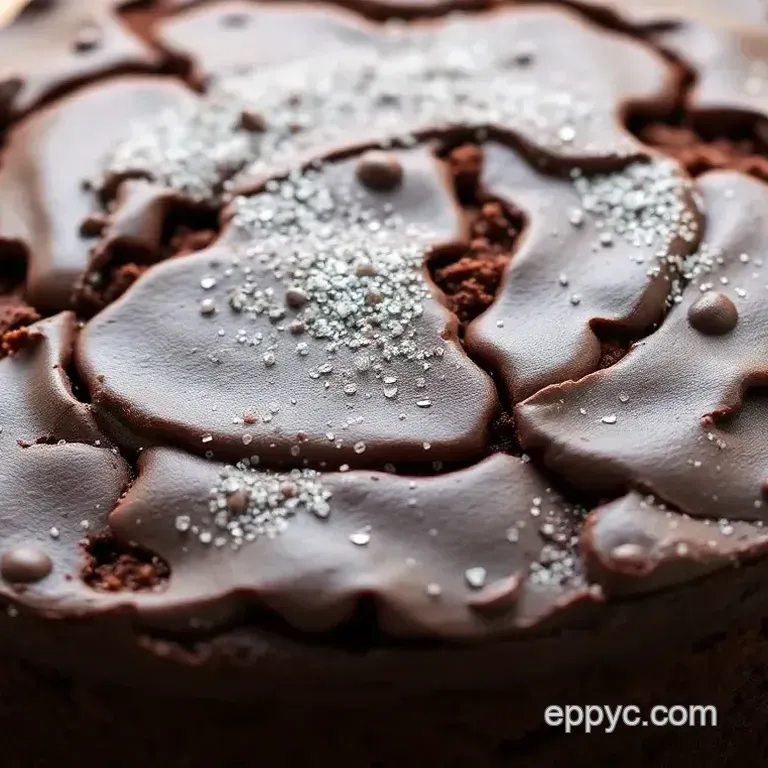
The moist chocolate cake stands out with its rich cocoa flavor, and let’s be real; who doesn’t love a decadent dessert?
Also, it's super versatile! whether you're going all out with layered chocolate cake or keeping it simple with buttercream frosting, you can switch it up to reflect the occasion.
It’s a crowd pleaser that works well for birthday parties or family get-togethers. plus, let’s not forget that you can easily turn this into a dairy-free or gluten-free dessert recipe depending on your guests’ preferences.
Tips That Will Make You a Baking Pro
Oh, and have I mentioned some sizzling tips for baking a cake?
Room Temperature Ingredients : Make sure your eggs and milk are at room temp. Trust me, it makes a world of difference in mixing.
Sifting is Key : Sift that cocoa powder, my friends! It prevents those pesky clumps.
Keep an Eye on Timing : Nothing feels worse than a dry cake. Use a toothpick; if it comes out clean, it’s time to pull that beauty from the oven.
So, are you ready to dive into the ingredient list? this is where the magic really begins. get ready to unleash your inner baker and have fun decorating! whether you go with classic chocolate frosting or ramp it up with some whipped chocolate ganache, your cake will look straight out of a magazine and taste even better.
You know what they say; life is short have dessert first! Let’s start gathering those ingredients, and I’ll meet you in the kitchen!
Essential Ingredients Guide
When whipping up something as delightful as a bake chocolate cake: deliciously classic treat , having the right ingredients is key.
You'll want to get the most flavor and satisfaction from each bite, so let's break down the essentials. here’s your go-to guide to navigate through the world of baking ingredients like a pro!
Premium Core Components
Let’s kick it off with those Premium Core Components . You’ve got your staples, and knowing how to measure them can really elevate your chocolate cake recipe .
Detailed measurements: always remember, for every recipe, precise measurement is crucial. for example, when you're dealing with flour, you’ll need 1 ¾ cups (220 g) .
In teaspoons, think of 1 tsp salt it truly makes a difference!
Quality Indicators: Look for unsweetened cocoa powder that’s dark and rich. The color can be your guide. If it’s light, it might not pack that rich cocoa flavor you're after.
Storage guidelines: store your dry ingredients like flour and cocoa in a cool, dark place. keep them tightly sealed. you want each ingredient fresh for your baking adventure.
Most of them will last about 6-12 months if stored correctly.
Freshness Tips: Always check expiry dates. Fresh ingredients make all the difference in achieving that moist chocolate cake .
Signature Seasoning Blend
Now, let's spice things up with some Signature Seasoning Blends . The right blend of herbs and spices can take your chocolate cake from ordinary to extraordinary!
Essential Spice Combinations: While this cake calls for basic ingredients, consider adding a pinch of espresso powder to enhance that chocolate depth. Trust me, it's a game changer!
Herb Selections: Mint can be a lovely pairing, adding a refreshing twist if you dabble in chocolate dessert ideas .
Flavor Enhancers: Vanilla extract is your best buddy here. It complements chocolate beautifully, adding a bit of warmth to your birthday cake recipe .
Regional Variations: For a Southern twist, try a little buttermilk instead of regular milk. It adds tanginess and moistness the kind that makes your cake unforgettable.
Smart Substitutions
Life is unpredictable, and sometimes you just don’t have all the ingredients on hand. That’s where Smart Substitutions come in!
Common Alternatives: If you're out of buttermilk, make your own! Simply add a tablespoon of vinegar or lemon juice to whole milk , and let it sit for a minute.
Dietary Modifications: Allergy concerns? Go for dairy-free chocolate cake by swapping whole milk for almond milk, and replace butter with coconut oil. It works wonders!
Emergency Replacements: Out of eggs? You can use 1/4 cup of applesauce in your batter. It’ll keep it moist and tender.
Seasonal Options: If it's summer, throw in some fresh berries in between the layers for a pop of color and tang.
Kitchen Equipment Essentials
Now that we have our ingredients sorted, let’s chat about what you’ll need in the kitchen. Kitchen Equipment Essentials can make your baking process smoother.
Must have tools: you can't go wrong with mixing bowls, measuring cups, and spoons. an electric mixer is great but not necessary.
Honestly, a good old whisk will do the job just fine for this easy chocolate cake !
Alternative Equipment Options: If you don’t have cake pans, you can use a 13x9-inch baking dish . Just keep an eye on baking time it might differ a bit.
Preparation Tips: Always grease and flour your pans. That’s the secret to cakes sliding right out without a hitch.
Storage Solutions: Keep your tools organized. Designate a space where your cookie sheets and baking pans can hang out, ready for your next indulgent dessert.
There you have it, a solid rundown of essential ingredients and tools for baking that decadent dessert . Ready to get your hands dirty? Let’s dive into how to whip up that classic chocolate cake next!
Professional Cooking Method for Baking a Chocolate Cake
When it comes to whipping up a bake chocolate cake: deliciously classic treat , mastering a few professional cooking methods can make all the difference.
To help you feel like a kitchen rockstar, i’m sharing some insights on crucial preparation steps, follow-up processes, and expert techniques .
So, let’s dive in!
Essential Preparation Steps
First things first: you gotta get your mise en place down. it’s a fancy french term for having everything in its place.
Set out your ingredients : flour, sugar, cocoa powder, and all that good stuff. measure them precisely. trust me, this will save you from a huge mess later!
Time management is key, too. since our cake bakes at 350° f ( 175° c) for 30- 35 minutes , you can start prepping your frosting while the cake is in the oven.
Talk about multitasking!
step-by-step Process
Let’s break it down. Here’s a step-by-step to keep you organized.
Preheat the Oven: Turn it on to 350° F ( 175° C) .
Prepare the Pans: Grease and flour your 9 inch cake pans. Wondering why? It prevents the cake from sticking like my dog on a pair of socks!
Mix Dry Ingredients: In a bowl, combine flour, sugar, cocoa powder, baking powder, and salt.
Combine Wet Ingredients: In another bowl, beat eggs, then mix in milk, vegetable oil, and vanilla extract.
Merge the Mix: Gradually add wet to dry. Mix until just combined.
Add Boiling Water: Be careful! This will make your batter thin. But that’s what makes it moist and yummy!
Bake: Pour into pans and pop them in the oven for 30- 35 minutes . Check for doneness with a toothpick; if it comes out clean, you're golden.
Cool Down: Let the cakes sit for 10 minutes, then move them to a cooling rack.
Expert Techniques
Now that you’ve got the basics, let’s finesse those baking skills.
A big one is keeping your temperature control in check. the oven needs to be preheated no surprises there. when you put the cakes in, don’t open the oven door too soon.
Air in there is like a diva; it can throw your bake off!
Timing precision is equally crucial. I can’t stress enough the importance of checking that baking time. Set a timer to ensure you don’t end up with a dry cake.
Also, pay attention to visual cues for doneness . Your cake should spring back gently when you touch it. And if it looks flat, well, you might be in for some troubleshooting.
Success Strategies
Nobody’s perfect, and we all mess up now and then. Common mistakes? Overmixing the batter or not measuring ingredients right.
For quality assurance , I always recommend a taste test (yeah, I said it!). Sneak a spoonful of batter for quality control it's part of the fun!
Are you planning this for a birthday or celebration? think ahead! you can bake the cake a day in advance and keep it wrapped.
Frost it just before the party to ensure it stays moist .
Wrapping It Up
Baking a classic chocolate cake doesn’t have to be a daunting journey. with the right method and a bit of practice, you'll whip up that decadent dessert like a pro.
Just remember to take your time, follow the steps, and most importantly, have fun with it. you can dress it up with buttercream frosting or a cute ice cream scoop, and you’ve got a winner at your table.
In our next section, i’ll share some additional information and tips on baking techniques, other flavor variations, and how to make this chocolate cake even more indulgent.
Stick around because more sweet treats are coming your way!
Bake Chocolate Cake: Deliciously Classic Treat
Oh my gosh, if you’re looking for a chocolate cake recipe that just screams comfort , you’re in the right place! let’s chat about my favorite way to whip up this bake chocolate cake: deliciously classic treat .
Trust me, it’s all about indulgence and that rich cocoa flavor that gets you every time.
Pro Tips & Secrets
Let’s spill some secrets, shall we?
Time saving techniques: want to cut down on prep time? measure your ingredients the night before! it’s a game changer when you’re itching to bake but don’t want to waste time rummaging through the pantry.
Flavor enhancement tips: if you really wanna elevate that moist chocolate cake, add a splash of coffee into your mix.
It draws out the chocolate flavor and turns a good cake into a great one!
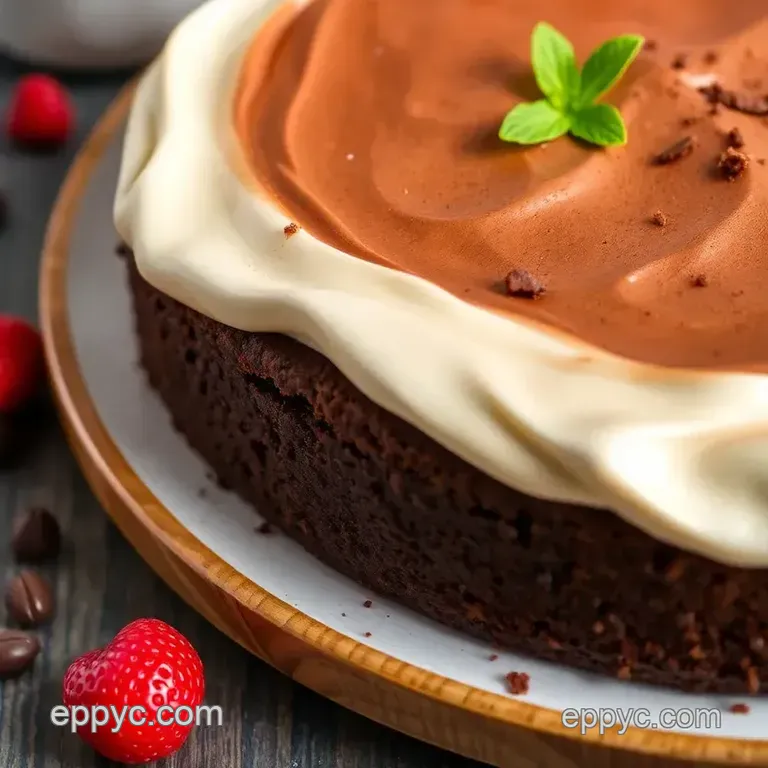
Presentation advice: don’t skimp on the frosting, y’all! generously frost in between the layers and smooth it out on top.
Lessee, i like to add some chocolate shavings or even a few fresh berries for an elegant touch that makes it look like something out of a bakery.
Perfect Presentation
Speaking of looks... let’s talk about how to make this beauty pop!
Plating Techniques: Place your cake on a nice platter to make it stand out. A big, colorful plate makes a big impact!
Garnish Ideas: Ever tried dusting cocoa powder or powdered sugar over the top? It looks fancy and super easy!
Color Combinations: Pair that rich, dark chocolate cake with a vibrant raspberry sauce. Not only does it taste divine, it looks stunning, too!
Storage & make-ahead
You might wind up with leftovers (or not, because it’s that good), so here’s how to keep everything fresh:
Storage Guidelines: Store your cake in an airtight container at room temperature. It’ll actually keep for 3-4 days!
Reheating Instructions: If you’re like me and love a warm dessert (especially with a scoop of ice cream), pop a slice in the microwave for about 10-15 seconds .
Creative Variations
Let’s get creative!
Flavor Adaptations: Swap in some peanut butter frosting for an indulgent twist. Seriously, the combo of chocolate and peanut butter is pure magic.
Dietary Modifications: Need a gluten-free dessert recipe ? Use a gluten-free baking blend and you’re good to go!
Seasonal Twists: How about adding some orange zest? It gives a refreshing kick perfect for spring gatherings!
Complete Nutrition Guide
Alright, let’s break it down. Here’s what you’re looking at:
- Calories: Roughly 350 per slice.
- Health Benefits: Yes, you read that right! Dark chocolate has antioxidants. Who knew indulging could be a little healthy too?
Expert FAQ Solutions
Got questions? I got answers!
Common Questions: “Why is my cake dry?” Make sure your ingredients are at room temperature and avoid overmixing.
Success Tips: Always follow the bake times! A few minutes can mean the difference between a dry cake and a perfectly moist chocolate masterpiece.
Wrap-up
So, there you have it everything you need to whip up a stunning layered chocolate cake that’s perfect for any celebration (or just because!).
Whether it’s a birthday cake recipe or a saturday evening treat with coffee, this chocolate cake will never let you down.
Get ready to wow your friends and loved ones with this decadent dessert! happy baking, y’all!
Bake Chocolate Cake Deliciously Classic Treat
Ingredients:
Instructions:
Nutrition Facts:
| Calories | 350 |
|---|---|
| Protein | 4 g |
| Fat | 15 g |
| Carbs | 54 g |
| Fiber | 1 g |
| Sugar | 34 g |
| Sodium | 200 mg |
