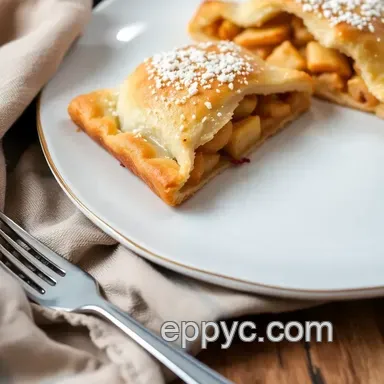
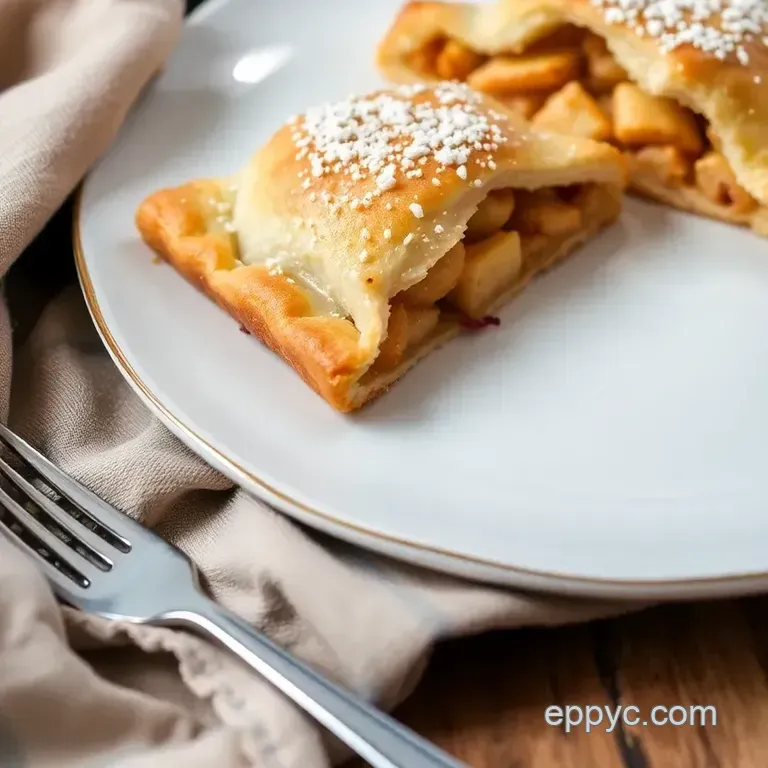
Flaky Apple Pastries Ready in Just 30 Minutes!
- The Simple Joy of Apple Pastries
- A Closer Look at the Recipe
- Why You’ll Love These Pastries
- Cooking with Apples Made Easy
- Essential Ingredients Guide for Quick and Flaky Apple Pastries
- Discover Professional Cooking Methods for Flaky Apple Pastries
- Secrets to Making Perfectly Flaky Apple Pastries
- 📝 Recipe Card
The Simple Joy of Apple Pastries
Oh my gosh! the first time i decided to make pastries, i thought i was headed for disaster. i can still remember the flour clouding up my kitchen and a pastry dough that was sticking to everything but the rolling pin! but then, i found this recipe where i learned how to bake flaky apple pastries in 30 minutes .
Y’all, it saved my baking dreams! imagine the scent of cinnamon and warm apples wafting through your home pure bliss!
If you’re like me, a quick apple dessert is always a hit, especially during the fall when those apples are at their peak.
Honestly, what could be better than a heavenly pastry that’s flaky on the outside and filled with a luscious apple filling? you know? it’s like a warm hug in pastry form!
A Closer Look at the Recipe
So, where did this gem come from? it’s inspired by traditional french apple pastries, but we've simplified it to make it an easy pastry recipe you can whip up at a moment’s notice.
In fact, it’s grown pretty popular lately because we all know how much people love quick baking recipes that deliver on flavor without hours spent in the kitchen.
Time wise, you’re looking at around 30 minutes from start to finish this includes 10 minutes of prep time and 10 minutes of baking .
It’s super straightforward, making it perfect for both seasoned chefs and kitchen newbies alike. plus, the ingredient list is short, and i promise it won’t break the bank.
You’ll have about 8 delicious pastries out of this, which is great for satisfying family cravings or serving at brunch!
Why You’ll Love These Pastries
Now, let's get to the good stuff. these flaky apple pastries bring some serious health perks to the table! did you know apples are loaded with fiber and vitamin c? this makes them not just a tasty treat but also a nutty snack idea that your body will appreciate.
What sets these pastries apart? the combination of flaky dough and spiced apples wrapped in a glaze makes them a hit at any gathering.
Whether it’s a sunday brunch or a sweet snack after dinner, you can’t go wrong serving these scrumptious apple snacks! plus, they’re an excellent alternative to traditional apple pie, especially for those who might not want to deal with crust making dilemmas.
And let’s not forget that the cinnamon apple filling offers that nostalgic comfort we often seek in dessert. What other dessert can come together so quickly and deliver on the cozy vibes of a rustic apple dessert?
Cooking with Apples Made Easy
Are you ready to dive into some cooking with apples? by the end of this adventure, you’ll have perfected some flaky dough techniques, and the kitchen will be filled with the sweet, enticing aroma of warm apple pastries .
I mean, who wouldn’t want that?
Next up, let’s get into the ingredients you’ll need to bring these delightful pastries to life. grab your puff pastry, apples, and just a few more ingredients that you likely have lying around.
Don’t worry this is about to get fun, and i promise you’ll impress anyone you share them with!
You’ll love how easy this turns out, and you might even find yourself experimenting with creative pastry fillings in future bakes. So grab your apron, folks let’s make some magic happen!
Essential Ingredients Guide for Quick and Flaky Apple Pastries
When it comes to making quick and flaky apple pastries , a few key ingredients can make or break your culinary adventure.
You’ll find that using quality components not only enhances the flavor but also gives your pastries that irresistible texture we all crave.
Trust me; a little know how goes a long way!
Premium Core Components
Detailed measurements are your best friends in baking, so here’s the scoop for our apple pastries!
- Puff Pastry : You’ll need 1 sheet (approx. 250g) . It’s the magic behind that flaky, buttery goodness.
- Diced Apples : Grab 2 medium apples (about 300g). I love using tart varieties like Granny Smith for that zing!
- Granulated Sugar : Events get a little sweeter with 2 tablespoons (25g) .
- Cinnamon : Just a teaspoon (5g) kicks the flavor up a notch.
- Lemon Juice : A splash of 1 tablespoon (15ml) brightens everything right up!
- Egg : Just 1 large egg for the wash, helping that golden finish shine.
Quality indicators are so important! Look for puff pastry that’s golden and feels soft but not sticky. For apples, they should be firm and fragrant.
Signature Seasoning Blend
Now let’s chat about spices. your basic cinnamon is a must, but don't be shy about getting creative! maybe throw in a pinch of nutmeg or swap out for a mix of dried cranberries.
The essential flavors draw you in, and trust me, it’ll feel like you’re baking with your grandma when those aromas fill your kitchen.
Smart Substitutions
What if you're missing something? No worries! Here are some smart substitutions :
- Apples : Pears or peaches can bring a fresh twist.
- Egg Wash : If you're egg-free, a splash of milk or vegan alternative can still provide that shiny coat.
- Sugar : Coconut sugar offers a deeper sweetness if you're looking to switch it up.
And hey, if you’re in a pinch, just use whatever you have on hand. Baking's about improvisation as much as following the rules!
Kitchen Equipment Essentials
Now, let’s get to the tools. Here’s a quick rundown of what you’ll need:
- Parchment paper : This is your best ally for preventing sticking!
- Baking sheet : Keep it nearby for easy assembly.
- Mixing bowl : You gotta have one! I always go for glass they hold heat well.
- Rolling pin : A must for flattening that pastry.
- Brush : Look for a pastry brush to gently apply your egg wash.
Preparation Tips : Always have your tools ready before diving in. You’d be surprised how much stress that saves!
Final Thoughts
There’s something so satisfying about biting into a flaky pastry filled with warm, spiced apples. honestly, every time i bake these, i feel like i've brought a bit of joy to my family.
Nothing says love like a 30-minute dessert that looks (and tastes) like it took hours!
Combine all these details, and you’re almost there! So, if you’re ready to whip up some scrumptious delights in no time, let’s dive into the step-by-step instructions for our Bake Flaky Apple Pastries in 30 Minutes !
Trust me, your friends and family won't even know you whipped these up in under half an hour! Let's get cooking!
Discover Professional Cooking Methods for Flaky Apple Pastries
Let’s dive into the wonderful world of baking, shall we? if you’re like me, there’s something magical about pulling fluffy pastries out of the oven, especially when they’re warm and filled with sweet and tart goodness.
Today, i’ll share my secrets on how to bake flaky apple pastries in 30 minutes that’ll impress your friends, family, or even just yourself!
Essential Preparation Steps
First off, let’s talk about mise en place. this fancy french term simply means “everything in its place.” measure out your ingredients before you start cooking.
Grab your 1 sheet of puff pastry , 2 medium apples , sugar, cinnamon, and a cup for your glaze.
This organized approach keeps you from scrambling when it’s time to create those delicious pastries.
Now, time management is critical in this quick 30-minute dessert . trust me, i’ve burnt more cookies than i care to mention because i got distracted! set your timer and stay focused.
To make things easier, you can prepare your apple filling while your oven preheats to 400° f ( 200° c) .
Also, keep safety in mind as you work. Be careful while handling knives or hot trays. Seriously, no one wants to visit the ER for a pastry related injury.
Step-by-step Process
Okay, let’s create those flaky pastries step-by-step:
Preheat Oven: Start by preheating your oven to 400° F ( 200° C) .
Prepare filling: in a mixing bowl, toss 2 diced apples with 2 tbsp of granulated sugar , 1 tsp of ground cinnamon , and 1 tbsp of lemon juice .
Set this aside for a bit while we work on the pastry.
Roll Out Dough: On a floured countertop, gently roll out your puff pastry.
Cut Pastry Sheets: Slice it into 4 squares (about 5x5 inches).
Fill Pastry: Place a spoonful of your apple mixture in the center of each square.
Seal Pastry: Fold over the corners and press firmly. If it’s not sealing, a dab of water works wonders.
Apply Egg Wash: Brush the tops with a beaten egg for that golden brown finish.
Bake: Hit that baking sheet with your pastries and bake for 10- 12 minutes or until they’re beautifully golden.
Prepare Glaze: While they’re baking, mix your 1/2 cup of powdered sugar , 1 tbsp of milk , and 1/2 tsp of vanilla until smooth.
Drizzle Glaze: Once your pastries are out of the oven and cooled a bit, drizzle with that dreamy glaze.
Expert Techniques
Here’s where it gets fun! for a super flaky dough , remember two things: the colder your ingredients, the better.
And, don’t overwork that pastry! you want those layers to stay intact. quality checkpoints? look for that golden brown color and wonderful aroma wafting through your kitchen.
Oh, and if your pastries seem a bit too thick, just roll them out a bit more. This isn’t just about looks —flakiness is key!
Success Strategies
Avoid common mistakes! don’t rush through sealing those pastries. if they’re not sealed well, the delicious apple filling might ooze out all over the tray yikes! trust me, it's a mess you won’t want to clean up.
Quality assurance tips? Give them a poke with a toothpick when they come out if it comes out clean, they’re good to go!
Do you want to make-ahead? you can assemble the pastries and store them in the fridge for up to a day before baking.
Just remember to let them sit at room temperature for about 15 minutes before popping them into the oven.
Wrapping Up
There you have it! you’re now equipped to whip up some scrumptious apple snacks in 30 minutes . whether you're serving them up at brunch or enjoying them late night with a cup of tea, these pastries are bound to become a family favorite.
In the next section, we’ll take a closer look at some additional information that will help you elevate your pastry game, including flavor variations and more about baking with apples.
So, stick around, friends! you won’t want to miss it.
Secrets to Making Perfectly Flaky Apple Pastries
Oh my gosh, if you’re looking for a delicious and speedy dessert, you’ve hit the jackpot with these quick and flaky apple pastries ! seriously, you can bake flaky apple pastries in 30 minutes and wow everyone at brunch or on a cozy night in.
Here are some pro tips, presentation ideas, and creative variations that'll knock your socks off!
Pro Tips & Secrets
Let’s dive into my chef's personal insights for making these little gems. first off, don’t over handle that flaky dough ! keep it chilled to help those layers pop in the oven.
You want it flaky, not gloopy.
For time saving techniques , keep your apples prepped ahead of time, or use pre-diced apples! also, don’t be shy with the cinnamon; it really elevates that apple flavor! a hint of lemon juice in your filling not only enhances the taste but gives your apples a fresh zing.
Now, for a little presentation flair, sprinkle some powdered sugar on top just before serving. it makes those pastries look chef worthy without breaking a sweat.
Believe me, your friends will be like, “wow, you’re a baking genius!”
Perfect Presentation
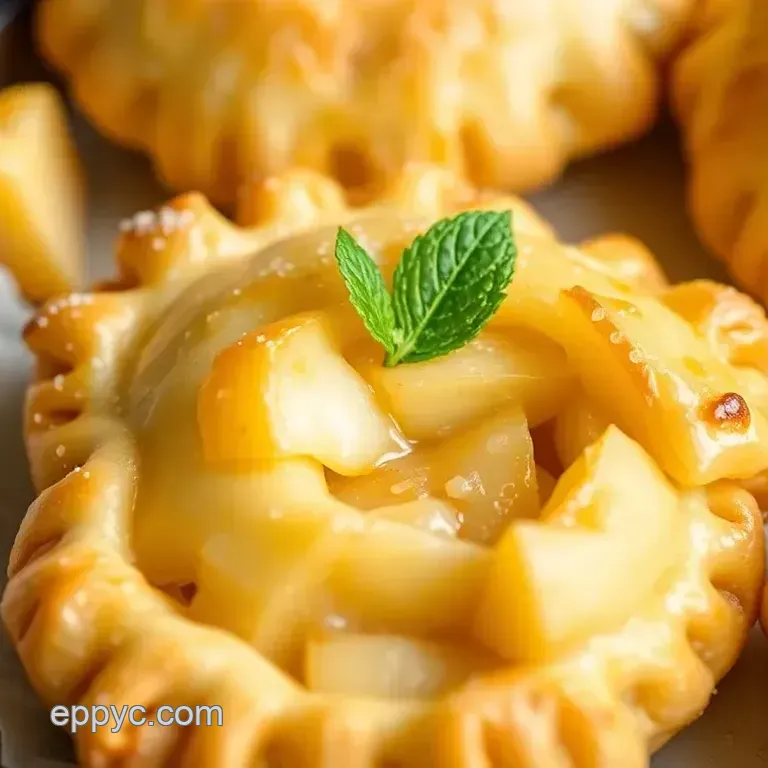
Alright, we gotta talk about how to plate these pastries so they look instagram ready. my go-to plating technique ? arrange them on a colorful plate with a cute garnish of mint leaves or a scoop of vanilla ice cream.
That contrast of vibrant greens or creamy whites against those warm, golden pastries? total knockout!
When it comes to garnish ideas , try drizzling some of that buttery glaze over the warm pastries. the shine will add gloss and make them look extra scrumptious.
Best of all, the mere sight will get everyone ready to dig in!
Storage & make-ahead
So, maybe you made a bunch and need to store some of those yummy pastries? no worries! just pop them in an airtight container and they’ll keep for about 1-2 days at room temp.
If you want to make them ahead, here’s the scoop: you can prepare the filling and pastry, then assemble and bake right before serving.
For longer storage, freeze those delightful little pastries! Just wrap ’em individually and they’ll be good for a month. When you’re ready to enjoy, just throw them into a preheated oven no need to thaw!
Creative Variations
Now, let’s talk fun! consider this your playground for creative pastry fillings . swap out the apples for pears or even peaches when they’re in season.
Feeling adventurous? add a handful of raisins or nuts for crunch!
Let’s not forget dietary modifications gluten-free puff pastry is out there, and it works like a charm! or, for a twist on the classic, think savory fillings with cheese and spinach.
It’s like delivering a surprise with every bite!
Complete Nutrition Guide
Alright, here’s where we keep things real with a complete nutrition guide . each little pastry has about 190 calories, making them a sweet snack idea without being too heavy on guilt.
I mean, who doesn’t want a dish that’s delicious and slightly better for you?
For any health conscious folks out there, you can cut back on sugar or try coconut sugar instead. it’ll give you a more complex flavor without adding too much guilt.
Portion guidance is simple, too: one pastry per person is perfect for dessert maybe two if you’re feeling generous!
Expert FAQ Solutions
Feeling confused about one step? don't sweat it! often people will ask about that flaky texture; the secret is all in keeping your ingredients cold.
If the dough puffs up too high, just make sure you seal those pastry edges tightly.
If you tried a variation and it didn’t turn out as expected? no shame! it happens to the best of us.
It’s all about trial and error. keep trying different flavors until something feels like a home run!
Wrapping It Up
So there you have it! with these tips, tricks, and variations, you’ll be on your way to mastering baking with puff pastry and making those delicious cinnamon apple pastries in no time! trust me, your friends will think you’re a rockstar in the kitchen.
So why wait? get those pastries in the oven and enjoy the delightful aroma of fresh apples and flaky goodness wafting through your home.
You’ve totally got this happy baking!
Bake Flaky Apple Pastries In 30 Minutes