Decadent Sweet Maple Whoopie Pies
- Look into into the Sweetness of Whoopie Pies
- A Bit of History on Whoopie Pies
- Why You’ll Love These Sweet Treats
- The Easy Peasy Details
- A Sweet Transition to Ingredients
- Essential Ingredients Guide
- Whipping Up Sweet Maple Whoopie Pies: A Pro's Guide
- Pro Tips & Secrets
- Perfect Presentation
- Storage & Make-Ahead
- Creative Variations
- Complete Nutrition Guide
- Frequently Asked Questions
- 📝 Recipe Card
Look into into the Sweetness of Whoopie Pies
Oh my gosh, who doesn’t love a good dessert? i remember the first time i tried a whoopie pie. it was at a cozy little bakery during a family road trip.
I took one bite, and boom! i was in chocolate and cream heaven. the soft cookie exterior and creamy filling were like a hug for my taste buds.
I never imagined i'd someday whip up my own sweet maple whoopie pies in 32 min and let me tell you, it's a game changer!
Baking has always been my therapy, you know? when life gets wild, i toss on an apron, grab some flour, and dive in.
So, imagine my excitement when i stumbled across a recipe that was not only easy to follow but also packed with that nostalgia of childhood baking.
A Bit of History on Whoopie Pies
Now, let’s talk about the roots of these delightful treats. according to legend, whoopie pies were first made in the northeastern united states, where they gained fame for their flavorful combinations and rich textures.
Honestly, it’s no wonder they’re classified as classic american desserts ! today, whoopie pies are popping up everywhere, from fancy bakeries to family kitchens.
And with all the maple dessert ideas floating around, it's clear this recipe fits snugly into today’s baking scene.
Making these whoopie pies is like a delightful dance of flavors and textures, so let’s discuss what goes into them.
The good news? they take about 32 minutes from start to finish ! talk about a tasty time saver! and the best part? they’re super easy! trust me, if i can do it, so can you.
Why You’ll Love These Sweet Treats
Alright, you might be wondering, "what makes these whoopie pies so special?" first off, they’re not just delicious; they’re also a little healthier compared to traditional baked goods.
The recipe uses pure maple syrup , which adds a unique richness and natural sweetness. plus, it’s got that killer combination of nutmeg and cinnamon that feels cozy and celebratory at once.
These sweet maple whoopie pies are perfect for every occasion birthdays, holidays, or just a cozy afternoon with your favorite cup of coffee.
Can you imagine surprising your family with these? trust me, there’ll be smiles all around! and the best part? you can get creative with whoopie pie filling ideas .
Add some cream cheese or even peanut butter for a fun twist!
The Easy Peasy Details
Let’s peel it back a bit. you’ll need about $5-$10 worth of ingredients , and they yield around 12 whoopie pie sandwiches (that’s 24 cookies when you think about it!) not a bad deal for a made from-scratch dessert that leaves you with that warm, fuzzy feeling.
Worried about the difficulty level? don’t be! this is definitely one of those easy dessert recipes that make you feel like a baking pro without the stress.
Whether you’re a weekend baker or trying your luck for the first time, these are family friendly baking projects you can tackle together.
A Sweet Transition to Ingredients
Alright, let’s get crackin’. now that you’re drooling and dreaming about these delightful cookies, i bet you’re wondering what you’ll need to whip up your own homemade whoopie pies .
Grab your mixing bowls and let’s jump to those simple whoopie pie instructions !
By the way, can i just say? there's something so nostalgic about baking. it’s like each recipe has its own story, combining tradition and personal memory.
Alright, let’s get to the ingredients now!
Essential Ingredients Guide
Let’s talk about the heart of baking , shall we? Getting the right ingredients is half the battle. Whether you’re whipping up a batch of Sweet Maple Whoopie Pies in 32 Minutes or just trying to make a classic cookie, knowing what you need and how to use it can make all the difference!
Premium Core Components
First off, measurements are key! for our whoopie pies, you’ll need 2 cups (240g) of all-purpose flour, ½ cup (113g) of unsalted butter, and 1 cup (200g) of brown sugar, among other goodies.
Having both us & metric measurements handy is super helpful, especially if you're using a recipe from overseas.
When you're picking out ingredients, remember quality matters. look for butter that’s creamy because you want to make a nice fluffy filling, right? and when it comes to maple syrup , go for the pure stuff, not the imitation.
You’ll taste the difference!
Now, about storage. unsalted butter can chill in the fridge for a couple of months, but keep it wrapped tight! as for maple syrup, it can last indefinitely if stored in the pantry, but once you open it, pop it in the fridge to keep it fresh.
Want to keep things fresh ? check for those expiration dates and always look for a nice rich color in your spices.
If they’re dull or lack aroma, toss them out. trust me, stale spices lead to ho-hum flavor.
Signature Seasoning Blend
Speaking of flavor, that’s where our signature seasoning blend comes into play. for these whoopie pies, a sprinkle of cinnamon and nutmeg adds that cozy autumn kind of vibe.
You can mix in some ginger or even a dash of pumpkin spice for a seasonal twist.
And let’s not forget the herb selections and pairings ! while you won’t use herbs in these sweet treats, you might want to become besties with thyme or rosemary for other recipes.
But for this one, we stick to sweet, not savory!
Smart Substitutions
Ah, the world of ingredients can be tricky sometimes. let’s talk smart substitutions . maybe you're out of brown sugar? no problem! mix equal parts granulated sugar with a splash of molasses, and you’re golden.
And almond butter or coconut oil can sub in for regular butter if you're looking for a dairy-free option.
Dietary restrictions? It happens! You can tweak our whoopie pie recipe to be gluten-free by using a good gluten-free flour blend.
Kitchen Equipment Essentials
Now, what about tools? you don’t need a fancy kitchen to whip these up, but having the right tools sure helps.
You’ll want mixing bowls, parchment paper, and an electric mixer if you’ve got one.
But if you don't? a simple whisk works just fine, too! got a spoon? that works for scooping the dough onto your baking sheets.
And for storage, an airtight container goes a long way in keeping your whoopie pies fresh when you make those sweet treats in 30 minutes!
Don’t forget to cool your whoopie pies on a rack this helps avoid soggy bottoms!
Bringing It All Together
So, armed with this essential ingredients guide , you’re ready to take on your kitchen. understanding what you cook with makes a world of difference, especially when diving into baking with maple syrup.
Now, if you’re excited to bake sweet maple whoopie pies , gather your ingredients and get ready for some fun! with the right tools, a bit of knowledge about your components, and a sprinkle of love, you're just steps away from creating homemade whoopie pies that will impress your family and friends.
Up next, let’s dive into the mouthwatering instructions for making these delicious little pies! Get ready to whip up some nostalgic dessert recipes that everyone will love! 🎉
Whipping Up Sweet Maple Whoopie Pies: A Pro's Guide
Oh my gosh, folks! let’s dive into the world of professional cooking methods, but wait we're gonna keep it super friendly, as if i'm chatting with my best bud over coffee.
Today, we’re talking about how to bake sweet maple whoopie pies in 32 min . these fluffy, cake like cookies are filled with creamy maple goodness perfect for a fun family bake off or even a casual get-together.
So, let’s get started!
Essential Preparation Steps
First up, we gotta talk about mise en place . that fancy french phrase is just a way of saying, “get your stuff ready.
” gather all your ingredients and tools. for our whoopie pies, you’ll need flour, eggs, maple syrup, and buttery goodness.
It just makes life easier, trust me!
Next, let’s chat about time management . i recommend setting a timer for each step. baking isn’t just a pinch of this and a dash of that.
It’s all about precision! when you’re mixing, aim for that 12-minute baking mark that’s where the magic happens.
Oh, and keep things organized! use bowls for dry and wet ingredients. not only does this help avoid spills, but it also keeps that workspace tidy.
And safety tip: don’t go rushing around the kitchen. heat and clumsiness don’t mix! be aware of that hot oven at 350° f ( 175° c) .
Step-by-step Process
Alrighty, let’s break down the steps like any pro chef would. Here’s how:
Preheat and Prepare : First, we crank up that oven to 350° F and line those baking sheets with parchment. No sticky cookies here!
Dry ingredients : in a bowl, whisk together 2 cups flour , 1 tsp baking soda , 1 tsp baking powder , ½ tsp salt , and spices like ½ tsp cinnamon and nutmeg .
A little spice helps lift those flavors, ya know?
Creaming time : in another bowl, beat ½ cup butter with 1 cup brown sugar . you want it creamy and smooth.
Then add an egg , 1 tsp vanilla , and ½ cup maple syrup . bam!
Mix It Up : Gradually add the dry mixture to the wet ingredients. Make sure to fold it gently no need to beat out all that air.
Scoop and bake : use a cookie scoop to grab that batter and drop it onto the baking sheets, leaving about 2 inches in between.
Bake for 10- 12 minutes until lightly golden.
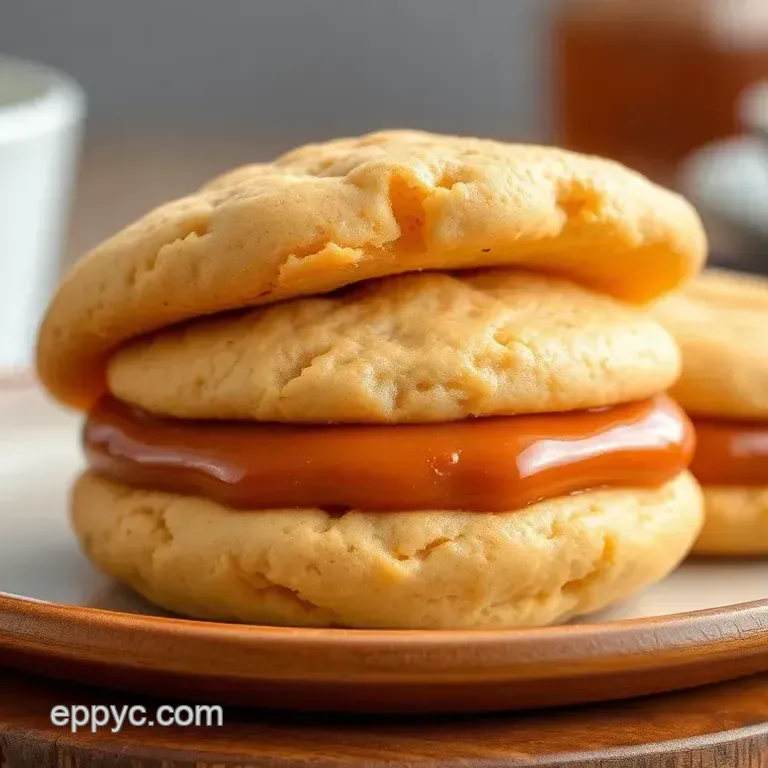
Filling fun : while those cookies are cooling, whip up the filling with ½ cup softened butter , 2 cups powdered sugar , 2 tbsp maple syrup , and a pinch of salt until it’s fluffy.
Assemble : Once those cookies are cool, pair them up and spread that heavenly filling. You could get creative here too. Maybe add some crushed nuts or chocolate chips for a twist!
Expert Techniques
Here’s where we get into the nitty gritty. one critical step is controlling that temperature. baking is all about the science .
If your oven is too hot, your whoopie pies might flop. try to check on them around the 11-minute mark ; you want them just done, not burnt!
Keep an eye on visual cues, too. if they look lightly golden and spring back when you touch ‘em, you’re golden! but if they crumble, ah well, you’ll learn and do better next time.
Success Strategies
Now for some common mistakes folks make. don’t overmix your batter; that helps keep those cookies soft and airy. also, cooling is key.
Let those cookies cool before slathering on the filling no one wants melted frosting!
Quality checkpoints ? Well, always taste your filling before assembling. If it’s too sweet for you, maybe add a dash of salt or a splash more maple to balance it out.
And if you’re like me and often bake for family gatherings, you’ll love the make-ahead options! these cookies can sit in the fridge for a day or two.
They might even taste better after a little chill time!
As we roll into the last bit of this scrumptious journey, remember: baking is not just a chore; it’s bonding, it’s laughter, and it’s creating sweet memories!
Additional Information
Got questions or need more maple dessert ideas? No worries! Check out my next section, where I'll share tips on the best filling combinations and ways to make your Sweet Maple Whoopie Pies even more delightful! You won’t want to miss it!
Pro Tips & Secrets
Alright, let’s dive into some pro tips to make sure your sweet maple whoopie pies come out looking and tasting like a million bucks! first off, cream that butter and brown sugar really well.
You want it fluffy. that’s the secret to those dreamy, soft cookies.
Now, about time saving techniques : prepare your ingredients ahead of time. measure everything out before you start, so you’re not scrambling around for that elusive can of baking powder.
Trust me, i’ve been there! oh, and don’t forget to set a timer. 🚨 ain’t nobody got time for burnt cookies!
For a flavor boost, consider adding a pinch of nutmeg or a splash of maple extract. it elevates the whole thing.
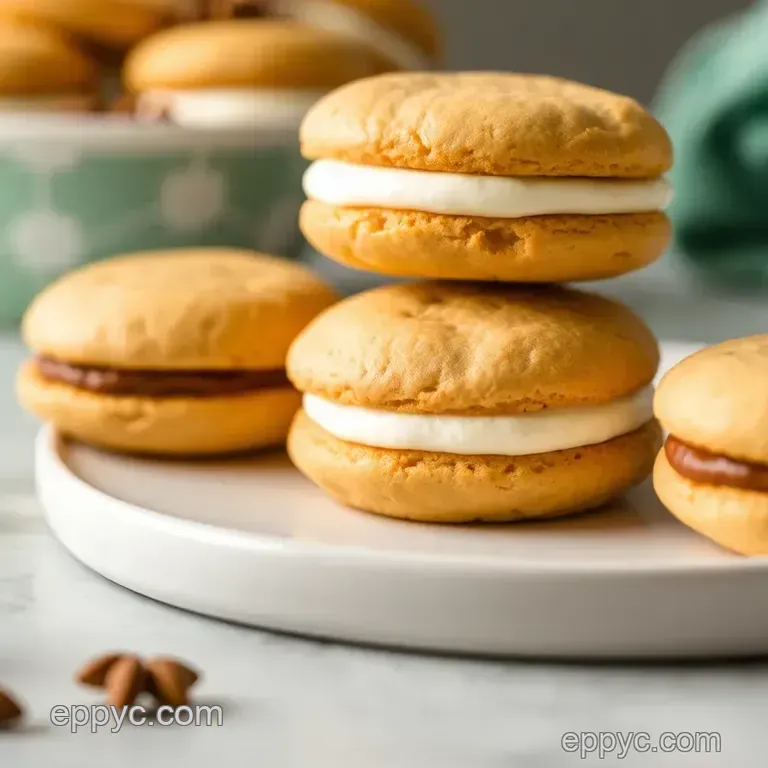
And when it comes to presentation , keep it simple. stack those whoopie pies neatly on a platter and dust with powdered sugar for that fancy touch without the fuss.
Perfect Presentation
Okay, presentation is key if you want to impress your friends, right? a good plating technique is to arrange your whoopie pies on a colorful plate.
Maybe a rustic wooden board if you’re feelin’ extra homey? now, let’s talk garnish . a few sprigs of mint or a sprinkle of crushed nuts can really jazz things up.
Color combos can make your dessert pop. the golden brown of the cookies against that creamy filling is just gorgeous.
For visual appeal tips , think about height! stack a few cookies for a more enticing look.
Storage & make-ahead
You might wonder, “can i make these ahead of time?” heck yes! just whip them up, let them cool, and stash them in an airtight container.
These bad boys can last about 3-4 days at room temperature. if you want to store them longer, freeze ‘em! just make sure to keep those cookies and filling separated with parchment paper so they don’t stick together.
When you're ready to enjoy, simply reheat in the microwave for 10-15 seconds. Boom! They’re like fresh from the oven. That’s how you keep ‘em fresh and delightful!
Creative Variations
Let’s get creative! want something a tad different? how about adding chocolate chips or walnuts in the dough? so delish! or you could mix things up with different whoopie pie filling ideas .
Try a cinnamon cream cheese filling or even a chocolate ganache if you’re feelin’ wild.
For a seasonal twist, add pumpkin spice during the fall. it’s all about seasonal dessert recipes ! and if you’ve got dietary needs, you can swap out regular flour for gluten-free flour without losing that yum factor.
Complete Nutrition Guide
Now, i know it’s not the sexiest topic, but let’s chat nutrition. each of these whoopie pie sandwiches clocks in at about 240 calories .
They’ve got a bit of everything, including some carbs and fats, but hey, they’re a treat! pair them with a mile long brisk walk, and you can enjoy every crumb without the guilt.
These whoopie pies also pack some healthy vibes. Maple syrup has antioxidants, and cinnamon can help lower blood sugar. But remember, don’t go overboard. It’s all about balance, you know?
So there you have it! now you’re all set to bake sweet maple whoopie pies in 32 min . whether it’s a special occasion or a casual weekend bake, these treats are sure to win hearts and satisfy your sweet tooth.
Remember, the experience is just as fun as the outcome. so grab your apron, get your kitchen mess on, and enjoy the journey! happy baking, friend!
Frequently Asked Questions
How can I Bake Sweet Maple Whoopie Pies in 32 Min if I'm a beginner?
This recipe is considered easy, making it accessible even for novice bakers. Just follow the step-by-step instructions carefully, and remember to keep your butter at room temperature for easier mixing. Take your time during each step; baking is all about precision and patience!
Can I make Sweet Maple Whoopie Pies ahead of time?
Yes, you can prepare the cookies ahead of time and store them in an airtight container for up to three days. It’s best to assemble the whoopie pies on the day you plan to serve them to keep the cookies fresh and avoid a soggy filling. If made in advance, refrigerate the assembled pies for a firmer texture.
What are some variations I can try for the filling of my whoopie pies?
For delicious variations, you can experiment with different fillings like cinnamon cream cheese or even maple bacon. Adding mini chocolate chips or crushed walnuts to the filling can also introduce a delightful texture and flavor twist. Get creative and make it your own!
How do I store leftover Sweet Maple Whoopie Pies?
Store leftover whoopie pies in an airtight container at room temperature for up to three days. If you want to extend their freshness, you can refrigerate them. Just be sure to bring them back to room temperature before serving for that perfect texture!
Can I use substitutes in the Sweet Maple Whoopie Pies recipe?
Absolutely! You can use coconut oil instead of butter for a dairy-free option, and granulated sugar mixed with molasses can replace brown sugar if needed. If you don’t have pure maple syrup, maple extract can serve as a substitute; just reduce the quantity slightly as it is more concentrated.
What’s the nutritional information for the Sweet Maple Whoopie Pies?
Each whoopie pie contains approximately 240 calories with 2g of protein and 9g of fat. They have 39g of carbohydrates and 23g of sugar. Keep in mind that these values are estimates and may vary based on the specific brands of ingredients used.
Bake Sweet Maple Whoopie Pies In 32 Min