Hearty Campfire Chili with Ground Beef
- Cozy Up with Campfire Chili: A Dutch Oven Delight
- Your Go-To Essential Ingredients Guide for Campfire Chili
- Mastering the Art of Professional Cooking: Your Guide to Campfire Chili
- Pro Tips & Secrets for Campfire Chili with Ground Beef in Dutch Oven
- Perfect Presentation for Your Chili
- Storage & Make-Ahead
- Creative Variations
- Complete Nutrition Guide
- Expert FAQ Solutions
- 📝 Recipe Card
Cozy Up with Campfire Chili: A Dutch Oven Delight
A Tasty Tale to Kick Things Off
You know those chilly nights when you gather around the campfire, your breath curling in the air while you expect something delicious to fill your belly? well, that was me and my buddies last fall.
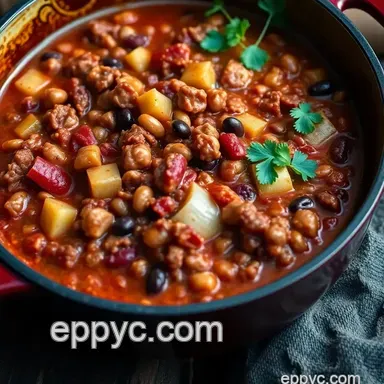
We were out camping, and as soon as the sun dipped below the horizon, i pulled out my secret weapon: campfire chili with ground beef in dutch oven .
Honestly, if you’ve never whipped this up under a starlit sky, are you even camping? it’s got that smoky chili flavor that just wraps around you like a cozy blanket.
Instant comfort food! nothing beats sharing a hearty meal like this after a long day of hiking.
What’s the Story Behind This Chili?
Now, let’s chat about chili for a sec. the campfire chili recipe has a rich history, echoing through the outdoor cooking traditions of american ranchers, cowboys, and even some good 'ol chili cook offs.
Over time, it has evolved from a simple stew into something so much more, with variations to fit any taste.
And oh boy, is it ever popular nowadays! from backyard cookouts to cozy family dinners, this dish has claimed its spot as a go-to meal.
Plus, it’s an uncomplicated recipe that falls right into the category of one-pot meals, making cleanup easier.
If you’re concerned about how long it takes don’t sweat it. you’ll be in and out of the kitchen in a flash! prep only takes about 15 minutes, and with just about an hour of cook time, you’ll have a pot full of hearty goodness that can feed a gang with ease.
Why You’ll Love This Chili
Now, let’s break down what really makes this hearty chili dish so special. first off, it’s packed with protein from the ground beef and power from nutritious bean recipes .
Seriously, you’re looking at a bowl full of energy that’s great for those long hikes or chilly nights. not to mention, it’s incredibly filling it’s the kind of meal that warms your soul.
This chili shines on special occasions too. think tailgating, family gatherings, or cozy bonfire nights. and hey, if you’re inviting over some friends for game day, guess what? you’ve got a winner! it’s got the flavor and heartiness to keep everyone coming back for seconds.
Trust me; it beats those frozen pizzas any day.
Plus, if you’re any bit like me and love to experiment, there are tons of chili variations and substitutions you can try.
Want it spicier? go for it! feel like adding in more veggies or swapping out the beef? absolutely! you’re the chef here, my friend.
Getting Started: The Ingredients You’ll Need
Excited yet? grab your trusty dutch oven because we’re about to dive into the delicious chili ingredients . you’ll need ground beef, onions, peppers, beans, and, of course, the ever important chili spices.
I mean, who could resist a recipe that’s as fun to make as it is to eat? each ingredient brings something to the table, and when it all comes together, you get a flavor explosion that’s nothing short of magic.
Now that I’ve got you hungry, let’s move on to the nitty gritty of crafting this warm comfort food masterpiece. Grab your Dutch oven, and let’s get cooking!
Your Go-To Essential Ingredients Guide for Campfire Chili
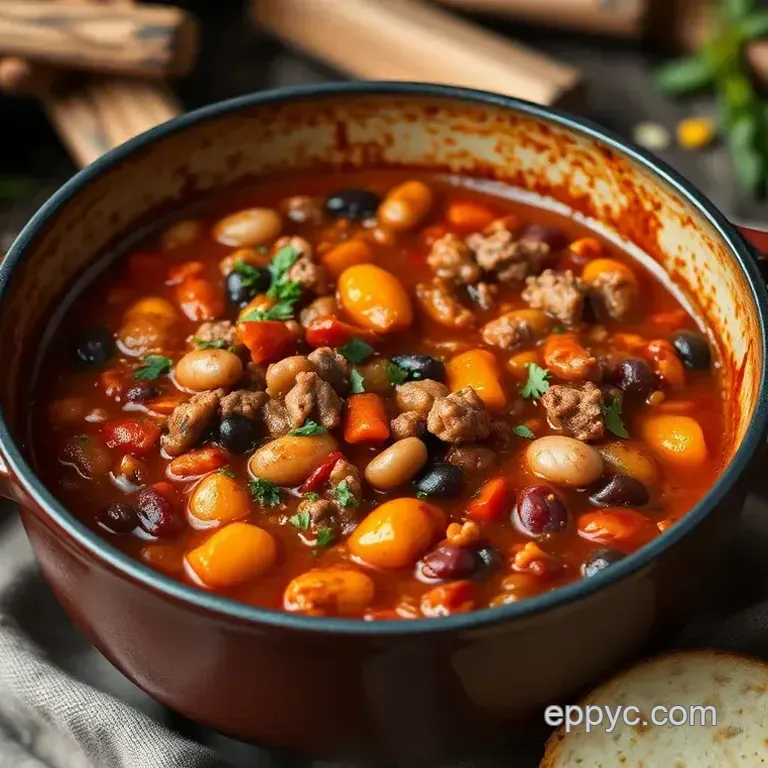
Let’s be real, folks! when you're out there enjoying the great outdoors, nothing hits the spot quite like a bowl of campfire chili with ground beef in dutch oven .
At the heart of this tasty dish are some key ingredients that will take your chili game from bland to grand.
Grab your apron, and let’s dive in!
Premium Core Components
First things first , let's talk about the essentials.
Measurements: for our chili, we’ll need about 1 lb (450 g) of ground beef. use lean if possible. mix in 1 medium onion, chopped, and 2 cloves of minced garlic to get those flavors poppin’.
You'll also want a good 15 oz can of kidney beans and another can of black beans. they’re your protein packed powerhouses!
Quality Indicators: Fresh ingredients are key! Look for lean ground beef that’s bright red. Your veggies should be crisp with no soft spots. And those beans? They should be intact, not mushy.
Storage tips: keep your ground beef in the fridge for about 1-2 days if it's raw. leftover chili? store it in the fridge for up to 4 days or freeze it for later.
Freshness Tips: When picking peppers and onions, give them a little squeeze. They should be firm, not squishy.
Signature Seasoning Blend
On to the magic of flavor!
Essential spice combinations: you can’t forget your chili powder about 2 tbsp (30 ml) will really crank up those smoky chili flavors.
Toss in 1 tsp (5 g) of cumin and 1 tsp (5 g) of smoked paprika for depth.
Herb Selections: Fresh cilantro is your best friend for garnishes. Stick with herbs like oregano for an extra layer of flavor.
Flavor Enhancers: Garlic and onion enhance any dish, but adding a dash of Worcestershire sauce is a game changer! It brings umami and richness.
Regional Variations: Depending on where you hail from, you might like to switch it up with local spices. From adding jalapeños for a spicy kick to opting for a sweeter touch with honey, there’s flexibility!
Smart Substitutions
Now let’s chat about what to do if you’re missing something.
Common Alternatives: Running low on ground beef? Ground turkey or chicken works wonders too.
If you're out of beans, you can use chickpeas or lentils as a nutritious option.
Dietary Modifications: Need a vegan twist? Swap beef for lentils and use vegetable broth instead of beef broth.
Emergency Replacements: Short on chili powder? Mix paprika, cumin, and a splash of cayenne for a quick fix.
Seasonal Options: In summer, fresh veggies like zucchini and corn can take your chili to a whole new level!
Kitchen Equipment Essentials
Now we can’t forget the tools of the trade!
Must Have Tools: A Dutch oven is non-negotiable! Whether it's cast iron or enamel coated, this bad boy is a must for Dutch oven cooking .
Alternative Equipment: Got a camping stove? That’ll work! If you’re in a pinch, a large pot can also get the job done.
Preparation Tips: Always have a sturdy wooden spoon on hand for that perfect stir, and keep your knife sharp for easy chopping.
Storage Solutions: Use airtight containers for your prepped ingredients. They’ll stay fresh until you’re ready to cook.
And there you have it! these essentials will help you whip up a delicious, filling, and incredibly tasty hearty chili dish .
As we gear up for our campfire chili with ground beef in dutch oven , let’s dive into the step-by-step instructions to bring all these tips and tricks to life.
You’re gonna love this hearty bowl of comfort! happy cooking!
Mastering the Art of Professional Cooking: Your Guide to Campfire Chili
When it comes to campfire cooking , nothing warms the spirit quite like a big pot of campfire chili with ground beef in dutch oven .
Seriously, it's like a hug in a bowl! but before you dive into this hearty chili dish, let’s break down a few essential professional cooking methods that will take your outdoor cooking game to the next level.
Essential Preparation Steps
1. mise en place: this fancy french term just means “everything in its place.” chop your veggies, measure your spices, and have your ingredients ready to go.
This way, when you start cooking, it’s all smooth sailing.
2. time management tips: good cooks know when to prep and when to cook. for your chili, you’ll want about 15 minutes of prep time before you fire up the stove.
The better you manage your time, the tastier the results!
3. organization strategies: keep your workspace tidy. utilize small bowls for spices and ingredients. trust me, it makes things way less chaotic.
Plus, you don’t want to be digging through a messy area when you’re trying to catch that perfect smoky chili flavor .
4. Safety Considerations: Always handle your knife and hot cookware with care. If you’re cooking over a campfire, make sure you have proper gear. Burns hurt seriously!
Step-by-step Process
Alright, let’s dive into the nitty gritty of making that delicious campfire chili:
Prepare Ingredients: Dice the onion and bell pepper, mince the garlic, and rinse those chili with beans .
Sauté vegetables: preheat your dutch oven over medium heat. throw in 1 lb of ground beef and brown it for about 5- 7 minutes .
Then, add your onion, bell pepper, and garlic, cooking for an additional 3- 5 minutes until they’re all soft and fragrant.
Combine ingredients: now it’s time for the magic. add in 2 tbsp of chili powder , 1 tsp of cumin , and 1 tsp of smoked paprika .
Stir that up before mixing in the diced tomatoes, 2 cups of beef broth , and your beans.
Simmer the chili: bring everything to a boil and then drop the heat to low. cover it up and let it simmer for 30- 45 minutes , stirring occasionally while dreaming of that perfect bowl of chili.
Adjust Seasoning: Taste it! This is where you can have fun. Need more spice? Toss in some diced jalapeños!
Serve Up: Ladle that glorious concoction into bowls and garnish with fresh cilantro, maybe some sour cream or shredded cheese. You’ve just created a family friendly chili that is sure to please!
Expert Techniques
So how do you ensure your chili is the best? Here are a few expert tips.
Professional Methods: Always start with high-quality ingredients. Fresh produce and quality meat make a real difference!
Critical Steps Explained: Browning the meat well develops deep flavors. Don’t rush this step it’s key.
Quality Checkpoints: Look for a rich color in your chili. You want that gorgeous, inviting hue that says, “Eat me!”
Troubleshooting Tips: If the chili is too thick, simply add a splash more beef broth. If it’s too thin, let it simmer longer without the lid to thicken it up.
Success Strategies
Common Mistakes to Avoid:
- Overcooking the meat . Check its doneness; you want juicy, not dry.
- Not allowing flavors to meld . Chili gets better with time, so let it sit a bit after cooking!
Quality Assurance Tips:
- Always taste as you go. Adjust your seasonings based on your preference!
Perfect Results Guide:
- Use a Dutch oven for even cooking. It makes everything taste better!
Make-ahead Options:
Yeah, you can totally make this chili ahead of time. It keeps beautifully, and flavors only get better as it sits. Plus, it’s perfect for potlucks or family gatherings!
And there you have it! these cooking methods and tips are not just about making a meal; they're about making memories.
Whether you’re camping under the stars or just at your backyard bbq, this campfire chili with ground beef is bound to be a hit.
Stay tuned for the next section on Additional Information where I'll cover some fun chili garnishes and serving suggestions to elevate your chili experience even further!
Pro Tips & Secrets for Campfire Chili with Ground Beef in Dutch Oven
Listen up, chili lovers! making the perfect campfire chili with ground beef in dutch oven is an adventure filled with flavor.
You don’t just want to dump ingredients together and hope for the best. here’s how to elevate your campfire cooking game and leave everyone begging for your chili secrets.
Chef's Personal Insights
First off, let’s chat about the meat. ground beef is a classic choice, but don’t shy away from mixing it up with ground turkey or even some diced bacon for a smoky flavor boost .
I personally love blending meats; it adds a depth that’s just divine. use lean beef to keep it from being too greasy.
Time Saving Techniques
Prepping your ingredients at home makes a world of difference. chop those onions and bell peppers beforehand. store ‘em in zip bags, so when you hit the campsite, you spend less time chopping and more digging into that hearty chili dish .
Flavor Enhancement Tips
Here’s where the magic happens! before you dump your seasonings in, toast them in the dutch oven for a minute.
This little step helps release the aromas and builds a flavor foundation that makes your chili sing. and don’t forget to taste and adjust! more salt, a pinch of sugar, or even a splash of hot sauce can transform your dish.
Presentation Advice
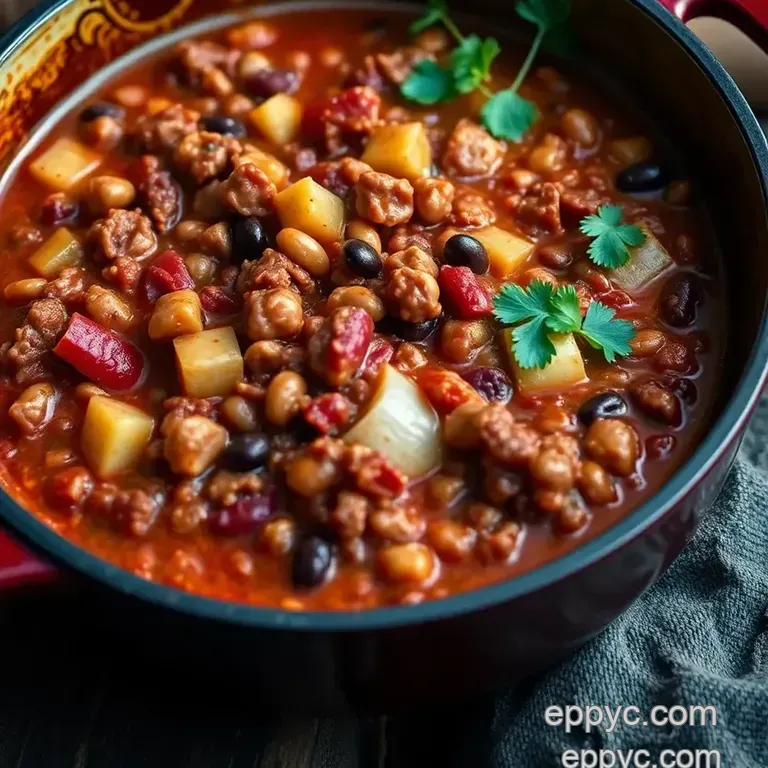
Now, if you want to wow your friends, presentation matters! when serving, ladle the chili into bowls and top with fresh cilantro, a dollop of sour cream, and a sprinkle of cheese.
Oh, and those chili garnishes ? they bring the whole dish together visually and add that extra wow factor .
Perfect Presentation for Your Chili
Even though we’re camping, don’t underestimate the power of a beautiful plate. A little effort here goes a long way!
Plating Techniques
Use deep bowls to prevent spills. Think about adding a good garnish. A splash of color with some diced avocado or sliced jalapeños? Yes, please!
Garnish Ideas
Chopped green onions, avocado slices, or even crispy tortilla strips can turn your simple chili into a meal that looks as good as it tastes.
Plus, they add a nice crunch that pairs perfectly with that warm comfort food.
Color Combinations
Mix those colors up! A bright red chili with green cilantro and creamy white sour cream means you're in for a treat visually. It’s all about catching the eye first.
Visual Appeal Tips
Lighting matters too, so if you’re out in nature, try to serve your chili when the sun is setting for that golden hour glow.
Trust me, your taste buds and instagram following will thank you!
Storage & make-ahead
Let’s talk about leftovers. This easy chili recipe only gets better with time. Here's how to make it last:
Storage Guidelines
Once your campfire dinner wraps up, cool the chili down and store it in an airtight container. keep it in the fridge for up to three to four days or consider freezing it for up to three months.
Just ensure you leave some space at the top of the container for expansion.
Preservation Methods
If you’re outdoors, a cooler filled with ice packs will work wonders. You can also vacuum seal your chili before freezing it for maximum freshness.
Reheating Instructions
To reheat, a campfire is perfect! just toss it back in the dutch oven, add a splash of beef broth (or water), and heat slowly.
If you’re at home, microwaving in short bursts or simmering on the stove works too.
Freshness Duration
Always trust your senses. If it looks off or smells funky, play it safe better to toss it than risk a stomachache!
Creative Variations
Chili is super flexible! Here’s how to get creative:
Flavor Adaptations
Want a different spin? Try adding cocoa powder or a splash of coffee for a richer taste. Trust me; it sounds odd, but it’s delicious!
Dietary Modifications
For a vegetarian take, swap the ground beef with lentils or quinoa. It’ll still be a filling winter meal without skimping on flavors.
Seasonal Twists
In summer, add fresh corn or bell peppers, and in the fall, consider adding butternut squash for a cute seasonal flair.
Regional Variations
In Texas, use just beef and tomatoes for the real deal. If you’re in Cincinnati, add some cinnamon and serve over spaghetti. It’s a chili thing!
Complete Nutrition Guide
Balancing taste and nutrition? I got you!
Detailed Breakdown
This chili packs a punch with about 320 calories and 25g of protein per serving. It’s hearty but won’t leave you feeling sluggish.
Health Benefits
Packed with fiber from the beans, this chili offers great nutrition and satisfaction. Beans are great for your gut health!
Dietary Considerations
Whether you’re gluten-free or watching your sodium, this recipe is easily adjustable. Swap out ingredients to meet your needs!
Portion Guidance
Don’t be stingy! This chili is meant to be shared. Serve it up family style, or in generous bowls to keep that festive atmosphere alive.
Expert FAQ Solutions
Common Questions
My friend always asks, “Can I use different beans?” Absolutely! Kidney beans, pinto beans they all work.
Troubleshooting Guide
If your chili tastes bland, add a squeeze of lime. That acidity can wake it up!
Success Tips
Make it your own! Don’t stress about sticking to the recipe exactly. Be adventurous.
Variations Explained
Experiment with the spice levels if you like it hot. More chili powder brings the heat!
So, there you have it! with these tips, your campfire chili with ground beef in dutch oven will be a hit, whether you’re under the stars or in your cozy kitchen.
Cooking is all about connecting with others, sharing stories, and having fun. gather your friends and family, whip up this chili, and embrace the flavors and warmth it brings! happy cooking, everyone!
Campfire Chili With Ground Beef In Dutch Oven