Grate Expectations: a Guide to Cleaning Your Grill Grates

- Grate Expectations: A Guide to Cleaning Your Grill Grates
- Essential Ingredients Guide
- Grate Expectations: A Guide to Cleaning Your Grill Grates
- Pro Tips & Secrets: Mastering Your Grill Grates
- Perfect Presentation: Grate Style, Grate Flavor
- Storage & Make-Ahead: Grill Clean Today, BBQ Tomorrow
- Creative Variations: Spice Up Your Grilling Game
- Complete Nutrition Guide: Keep It Clean
- The Encouraging Conclusion: Let’s Get Grilling!
- Frequently Asked Questions
- 📝 Recipe Card
Grate Expectations: A Guide to Cleaning Your Grill Grates
A Little Story to Sizzle Your Interest
Oh my gosh, let me tell you about that one time my cousin decided to throw a backyard bbq. we had burgers, dogs, and even some veggies, and everything was going swimmingly until someone pointed out the grill grates.
Yikes ! they looked like a scene out of a horror movie: burnt bits of last week's cookout clinging on for dear life.
I mean, talk about a grilling nightmare! that's when i realized the importance of cleaning grill grates before doing any serious cooking.
You don't want to serve up good food on that kind of canvas.
The Scoop on Grill Grate Cleaning
Cleaning grill grates might seem boring, but it’s actually got a rich history. way back, people were tossing food on hot stones, so keeping your cooking surface clean was essential even then! fast forward to today, and we’re super lucky to have many tools and methods for tackling this task.
It’s become a seasonal ritual for many, kicking off the warm months as we fire up the grills for weekends and gatherings.
Anyone can do it seriously, no advanced skills required. you just need about 30 minutes and some patience. for around a few dollars, you can grab everything you need to make your grill grates shine bright.
Plus, the yield is one perfectly clean set of grill grates that’s ready for that juicy ribeye or fresh veggies.
The Benefits of a Clean Grill Grate
Not only does a clean grate look good, but it also makes a huge difference in the food you grill.
For starters, a clean grill means fewer burnt-on bits messing with your food's flavor. plus, did you know it can actually help with health ? when you're not cooking over old grease and char, you can enjoy a healthier meal.
Essential oils and flavors get more pronounced, which means every bite feels fancy even if you're just flipping burgers!
If you’re throwing a party or having a casual get-together, a clean grill gives off those epic bbq vibes . it’s perfect for tailgating, summer parties, or even a cozy weekend dinner with the family.
And let’s be real; who doesn’t want to be known as the grill master?
Making It Easy: Your Secret Weapon
Now, let’s talk about some bbq grill cleaning hacks . the best part? you don't need a fancy grill cleaner! you can whip up a simple homemade solution with stuff you probably already have in your kitchen.
Mix equal parts vinegar and water, toss in a bit of baking soda, and voilà! you’ve got yourself a cleaning powerhouse!
Here’s a quick tip: before you clean, turn on your grill and let it heat up a bit. it helps loosen the gunk! use a wire brush or a scrubbing pad, and don’t forget those grill gloves.
Your hands will thank you. they say that the best way to clean a grill is to do it regularly, but let’s face it, sometimes life gets in the way.
Just make it a habit post cooking, and you’ll keep that grill shining bright.
So, whether you're tackling a gas grill cleaning or dealing with the good ol' charcoal, following these cleaning BBQ grill hacks makes everything easier and way more enjoyable.
And trust me, your next cookout is gonna rock once you’ve learned how to clean BBQ grill grates like a pro.
Ingredients Needed for Your Grate ification
Now that you’re hyped to clean those grates, let’s move onto what you’ll need to get started:
- ½ cup vinegar
- ½ cup water
- 1 tablespoon baking soda
And of course, don’t forget your trusty grill brush and some scrubbing pads. This simple toolkit is a game changer!
So, grab your supplies and get ready to scrub away those old memories. your upcoming grill session is going to be as clean and fresh as a new pair of sneakers.
Happy grilling, friends!
Essential Ingredients Guide
Grilling is glorious, right? but let me tell you, nothing ruins a sizzling good time faster than a dirty grill.
We’re diving headfirst into the essential ingredients guide , focusing on keeping those grill grates spotless. trust me, you don't want to be battling old, charred bits of last week’s burgers while trying to get that perfect steak.
Let’s get to it!
Premium Core Components
First up, detailed measurements are essential. when mixing your own grill cleaning solution, here’s what you need: ½ cup of vinegar (120 ml) , ½ cup of water (120 ml) , and 1 tablespoon of baking soda (15 g) .
Mix it well! it’s like a science experiment, but without the lab coat.
When it comes to quality indicators for your ingredients, make sure your vinegar is clear and potent. if it smells like a salad dressing, toss it.
Your baking soda should be fresh; the expiration date is your friend!
For storage guidelines, keep your cleaning solution in a spray bottle, and it’ll last ages. just remember to store it out of reach of kids and pets! and seriously, baking soda? a year is its shelf life, but it’s so useful, you’ll use it before then.
And let’s not forget about the freshness tips. use fresh ingredients whenever possible! it makes a difference. other than that, make sure you check the expiration on your supplies every now and then.
Signature Seasoning Blend for Your Clean
Now, cleaning might not seem like it needs a signature blend , but hear me out. use combinations of herbs and spices, like lemon zest or even a little bit of cayenne, in your cleaning solution.
It gives your grill a pleasant smell and can help break down grease. it’s like a spa day for your grill! and don’t forget those flavor enhancers like citrus .
A little fresh lemon juice can cut through grease like a hot knife through butter.
Smart Substitutions
Sometimes things get a little tricky, and you run out of vinegar. no worries! you can swap it with lemon juice .
In a pinch, apple cider vinegar works too. need something quicker? just sprinkle on some table salt while scrubbing. it's just a temporary fix, but hey, desperate times and all that!
If you're on a special diet for whatever reason, check that your “cleaning agents” are safe for your specific needs though food allergens usually aren’t a problem in grill cleaning!
Kitchen Equipment Essentials
Grab your must have tools . a good grill brush and a scrubbing pad are your new bffs. you could even bust out a putty knife for any really tough spots.
And for storage solutions? pop your brushes in a drawer or a utensil holder to keep 'em at arm's reach, so you’re not digging around every time.
If you get into a cleaning frenzy and realize you need to take care of other things, alternate equipment like a toothbrush (yep, i said it!) can be incredibly handy.
Just make sure it’s a retired one!
Tips & Tricks
Here’s a smart hack: preheat your grill just a little before you start scrubbing. it helps loose all that stubborn grime.
Oh, and skip the harsh chemicals! you’re cooking food on that grill. you want to enjoy a spontaneous bbq, not potentially poison the crew with weird residues.
If you want to channel your inner chemist, try adding a bit of baking soda and vinegar together for a fizzy cleaner that can make grease disappear.
Just keep an eye on those bubbles, like a science class experiment gone wild.
Wrapping it Up
So, there you have it! with this guide, you’re armed to keep your grubby grills at bay. cleaning grill grates doesn’t have to be an overwhelming job it’s more like a quick and rewarding pop quiz.
Just remember to keep your essentials in check, and you’ll have the best way to clean a grill down to a science.
Next stop? diving into the step-by-step instructions for a grill that shines like new! happy grilling, folks!
Grate Expectations: A Guide to Cleaning Your Grill Grates
Grilling is an art, right? But nothing can ruin your perfectly cooked steak like a dirty grill. Seriously, no one wants a side of burnt-on burgers with their barbecue! Let’s dive into how to keep those grill grates sparkling clean, so they not only look impressive but make you a grill master in your backyard!
Essential Preparation Steps
First things first, you gotta have your mise en place for this whole cleaning gig. gather your cleaning tools: a wire brush, some gloves, and your homemade cleaning solution.
Trust me on this having everything ready really speeds things up. it’s like that moment when you find all your socks match; life gets easier!
Now onto time management . set aside about 15 to 20 minutes for soaking and then another 10 for scrubbing .
That’s not too bad for some major grill love, right? and don’t forget about organization strategies . for pete’s sake, i’ve been that person searching through the junk drawer for a scrub brush.
Have everything in sight, and be the grill cleaning superhero you know you can be!
Safety is key here. Ensure the grill is completely cool before you start cleaning. Remember that story I told you about the time I burned my hand? Yeah, let’s avoid that!
step-by-step Process
Let’s get into the nitty gritty with clear, numbered instructions. Ready? Here we go:
Prepare your cleaning solution : mix ½ cup of vinegar, ½ cup of water , and 1 tablespoon of baking soda in a bucket or spray bottle.
It fizzes a bit like a science experiment gone right!
Remove the Grill Grates : Make sure you’re not playing with fire. Seriously, let the grill cool down completely.
Soak the Grates : Spray that solution generously and let it chill for 15- 20 minutes . This is where the magic happens!
Scrub Away : Grab your wire brush and scrub like you mean it. Pay close attention to those stubborn spots. If it gets tough, add more of that cleaning elixir.
Rinse and Dry : Rinse those grates under warm water and wipe them down with a cloth. Quick tip: always add a splash of oil afterwards to help with future grilling.
Expert Techniques
Alright, let’s talk tactics. One of my go-to professional methods is soaking the grates overnight if they’re really caked in grime. It’s like giving your grates a spa day!
When checking for quality, look for any missed bits. a little shine means you're on the right track. and for troubleshooting, if a certain area just isn’t budging, don’t sweat it just soak it again, and maybe try some elbow grease.
Success Strategies
We’ve all been there cleaning and cleaning, then realizing we missed a huge spot. common mistakes to avoid include using the wrong tools.
Skip the steel wool! it's a hassle and ends up scratching things up. use a non-abrasive pad instead.
Make sure to double check your work. once you’ve rinsed, look over those grates for anything you missed. for the ultimate clean, regular maintenance is your best friend.
A quick brush after every use does wonders.
Also, feel free to make-ahead options. Clean your grates right after cooking while they’re still warm that’s when the grime is easiest to tackle!
Now, if you’re worried about the best way to clean a grill, this homemade cleaner is not just effective but also super easy.
It’s a combination of things you might already have lurking under your sink. and let’s not forget about cleaning grill grates easy hacks let your solution work its magic first before you scrub like a mad person!
Now that your grill is squeaky clean and ready to go, it's time for some serious barbecuing. Just imagine those perfectly marinated ribs sizzling away yum!
Additional Information
Diving further into grill maintenance, there’s always more to learn about keeping that bbq in top shape. if you're interested in exploring more about grill cleaning, techniques, or even flavor tips, keep your eyes peeled!
remember, cleaning grill grates isn’t just about looks; it’s about the taste, too.
Happy grilling, friends!
Pro Tips & Secrets: Mastering Your Grill Grates
Oh my gosh, let’s talk real for a second about cleaning grill grates. it can feel like the grueling finale of a season finale, right? but trust me, cleaning grill grates doesn’t need to be a pain.
A little elbow grease, some tricks up your sleeve, and you can turn that rusty mess into pure grilling gold!
Chef’s insight: always clean your grill grates while they are still warm. it’s like giving them a mini spa treatment! the heat helps loosen up that stubborn gunk stuck from your last bbq adventure.
Just make sure you’re wearing gloves because, ouch , hot grates!
Time saving technique: i’ve found that if i spray my homemade cleaner (using vinegar, water, and baking soda) and let it sit for 15- 20 minutes, i can kick back with a cold drink while the magic happens.
Skipping the elbow grease, right?
Flavor boost: now, if you want to take it to the next level, try adding a squeeze of lemon juice to your cleaning solution.
Not only does it work like a champ against grease, but it leaves a great fresh scent too! hello, delightful barbecues!
Perfect Presentation: Grate Style, Grate Flavor
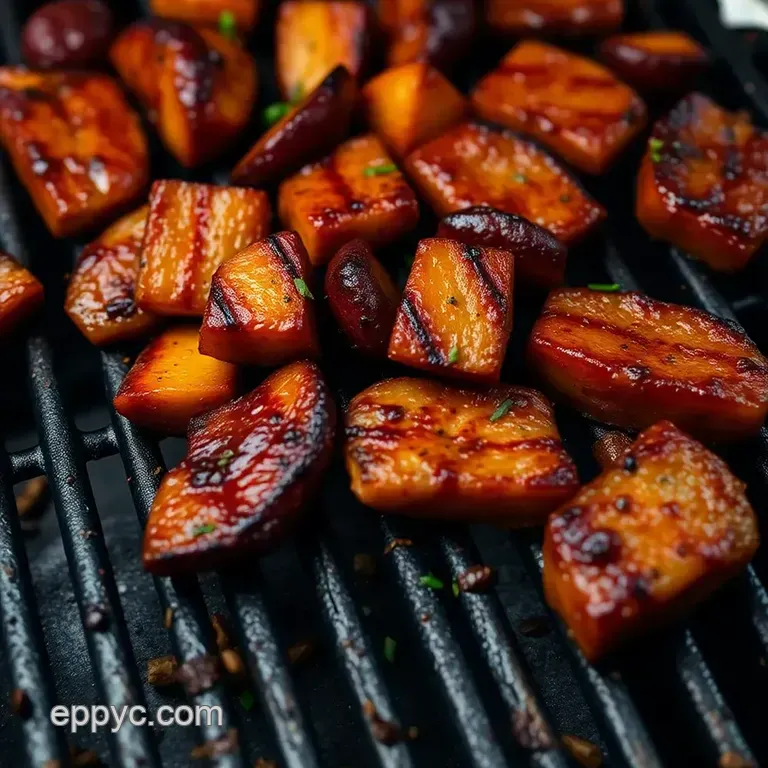
Once those grates are cleaned, how you plate your food is half the fun! Let’s get that grill looking as good as the food you’re serving.
Plating Techniques: Think about the colors on your plate. Bright green peppers, juicy red tomatoes, and golden corn look fantastic once grilled and arranged artfully on a platter.
Garnish Ideas: Fresh herbs are your friends! A sprinkle of chopped parsley or cilantro over your grilled creations can add a pop of color and flavor that’s just to die for.
Visual Appeal Tips: Don’t forget about the contrast! If you’re grilling meats, add colorful sides or a sauce drizzle. For example, bright salsas or a balsamic reduction can really make your dish sing!
Storage & make-ahead: Grill Clean Today, BBQ Tomorrow
A clean grill today makes for a flavorful meal tomorrow! But what do you do with those grates once they’re nice and sparkling?
Storage Guidelines: Once you’ve cleaned your grill grates, ensure they’re completely dry before storing. No one wants rusty grates!
Preservation Methods: If your grill isn’t going to see action for a while, lightly oil the grates with vegetable oil to prevent them from rusting.
Creative Variations: Spice Up Your Grilling Game
Now that we’ve covered the basics, let’s get a little wild!
Flavor Adaptations: Don't just stick to the same old BBQ sauce; try marinating things in soy sauce, garlic, or even a beer for a unique spin on grilling!
Seasonal twists: in summer, throw on some zesty citrus or fresh herbs for a grill pack that’s bursting with summer flavor.
In the fall, go for something warmer, like a hint of maple or apple cider.
Complete Nutrition Guide: Keep It Clean
Okay, so we’re not eating the grill grates, but understanding what goes on them matters!
Health Benefits: Grilling can be a healthier option than frying, as it allows for less oil and fat. Plus, those beautiful charred veggies? They’re packed with nutrients!
Sure, this recipe doesn’t yield consumable food, but it’s essential for making sure the food you do grill is healthy and delicious.
The Encouraging Conclusion: Let’s Get Grilling!
So, whether you’re a weekend warrior or just flipping burgers for the fam, knowing the best way to clean a grill makes a world of difference.
You’ve got the bbq cleaning hacks ! you’ve got the pro tips, and with a few simple steps, you can keep your grill in tip-top shape.
Just remember to enjoy the process! throw on some music, chill with a drink, and turn that chore into time well spent.
Because at the end of the day, grilling isn’t just about the food. it’s about the stories, the laughs, and the good times shared around the grill.
Happy grilling, folks!
Frequently Asked Questions
What are the best methods for cleaning grill grates?
The best methods for cleaning grill grates include using a vinegar and baking soda solution or simply scrubbing with a wire brush. For tough grime, soaking the grates in warm, soapy water can help loosen debris, making it easier to scrub away. It’s all about finding what works best for you!
How often should I be cleaning grill grates?
It’s best to clean your grill grates after every use to maintain their condition and prevent rust or buildup. A quick scrub while the grates are still warm can do wonders. Regular maintenance means less elbow grease when you do the deep clean!
Can I use harsh chemicals for cleaning grill grates?
While it might be tempting, it’s best to avoid harsh chemicals when cleaning grill grates, as they can leave harmful residues. Stick to natural solutions like vinegar or lemon juice for a safe and effective clean. Your future grilled delights will thank you!
What is the key to effective cleaning grill grates?
The key to effective cleaning grill grates is to let your cleaning solution sit for a while to break down the grime. A good soak followed by thorough scrubbing can yield the best results. Additionally, preheating the grill slightly before cleaning can help loosen up stubborn debris!
Are there any tips for preventing food from sticking to my grill after cleaning?
Yes! After cleaning your grill grates, applying a thin layer of cooking oil can help add a non-stick barrier. Additionally, preheating the grill before cooking can create a nice sear, which also helps in preventing sticking. Remember, a little oil goes a long way!
What should I do if my grill grates are still dirty after cleaning?
If your grill grates are still dirty after a first scrub, don’t worry! You can repeat the soaking process with your cleaning solution and scrub again. For particularly stubborn stains, consider using a commercial grill cleaner specifically designed for tough residues.
Grate Expectations A Guide To Cleaning Your Gril

Ingredients:
Instructions:
Nutrition Facts:
| Fat | 0 g |
|---|---|
| Fiber | 0 g |
