Angel Chicken Rice Casserole: Creamy and Comforting
- Time: Active 15 minutes, Passive 45 minutes, Total 60 minutes
- Flavor/Texture Hook: Velvety herb cream meets bubbly cheese
- Perfect for: Stress free Sunday family dinners or potlucks
- Master This Angel Chicken Rice Casserole
- Critical Casserole Specs and Timing
- Why This Technique Actually Works
- Deep Dive into Savory Components
- Necessary Tools for the Bake
- Essential Ingredients and Smart Substitutes
- The Step-By-Step Cooking Guide
- Solving Your Common Casserole Problems
- Smart Swaps and Ingredient Variations
- Scaling for Different Group Sizes
- Casserole Myths to Forget
- Storing and Reheating Your Leftovers
- Perfect Pairings for This Meal
- Recipe FAQs
- 📝 Recipe Card
Master This Angel Chicken Rice Casserole
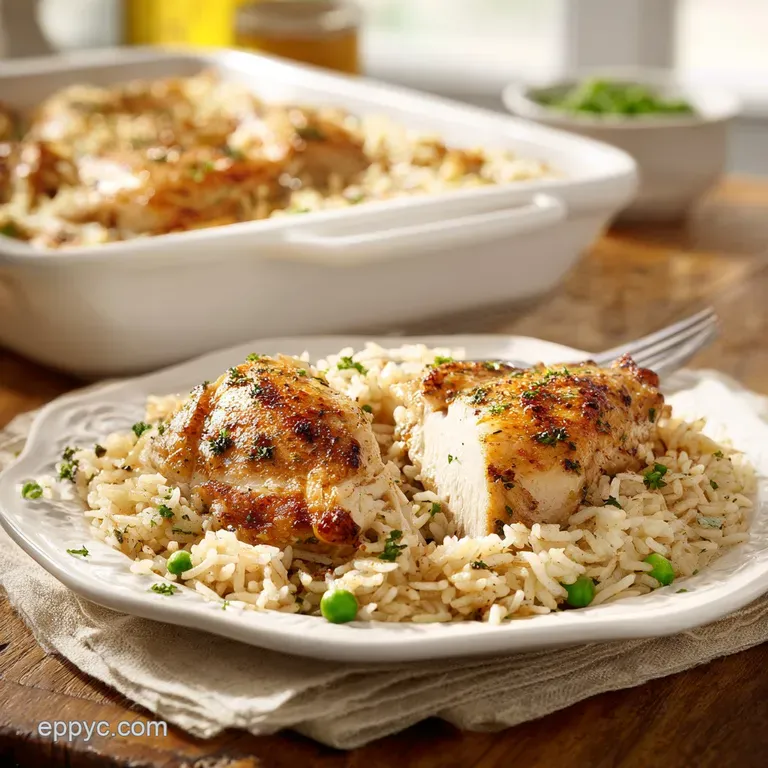
The first time I pulled this dish out of the oven for a Sunday neighborhood gathering, the aroma of zesty Italian herbs hit the air and honestly, it felt like a hug in a pan. I remember watching the steam curl up as I peeled back the foil, revealing that golden, bubbling surface where the cheese had just begun to brown at the edges.
There’s something truly special about the way a simple chicken and rice casserole can turn a hectic weekend into a moment of pure, heartfelt connection.
We’ve all been there where we want a meal that feels expensive and technical but our digital calendars are screaming otherwise. This recipe is my favorite way to empower home cooks to use technology like a simple oven timer and a reliable digital scale to achieve results that taste like they took hours of stovetop stirring.
It’s a budget smart victory that doesn't compromise on that silky, velvety texture we all crave when we think of "comfort food." Trust me, once you see how the rice absorbs every drop of that herb infused gravy, you’ll never look at a box mix again.
I used to worry that using condensed soups or pre packaged mixes was "cheating," but through a bit of kitchen experimentation, I’ve learned it’s actually about how you balance them. By whisking in fresh sour cream and real butter, we transform these basic elements into something far more sophisticated.
This isn't just another dinner; it’s a reliable, heartfelt win for your kitchen rotation that will have your friends texting you for the link before they've even finished their first plate.
Critical Casserole Specs and Timing
Before we jump into the mixing bowl, let's look at how this dish stacks up depending on how you choose to cook it. While I love the traditional oven method for that specific bubbly cheese finish, sometimes your schedule requires a different digital approach.
Having a few options helps you stay flexible without losing that signature flavor profile.
| Cook Method | Total Time | Texture | Best For |
|---|---|---|---|
| Standard Oven | 60 minutes | Fluffy rice, crispy edges | Classic family dinner |
| Slow Cooker | 4 hours (High) | Very tender, stew like | Busy workdays |
| Convection Oven | 50 minutes | Extra browned cheese | Fans of crispy bits |
The beauty of this Angel Chicken Rice Casserole lies in its chemistry. We are essentially using a sealed vessel steaming technique to cook raw rice inside a flavorful fat and water emulsion. It sounds fancy, but it just means your oven does the hard work while you reclaim your evening.
Why This Technique Actually Works
Most people struggle with rice casseroles because the rice ends up either crunchy or like a sad, mushy paste. We avoid that by understanding a few simple principles of heat and moisture.
- Emulsified Foundation: Whisking the cream cheese and butter first creates a stable fat base that prevents the sauce from breaking into an oily mess under high heat.
- Starch Management: Rinsing the long grain rice removes excess surface starch, which ensures the grains stay separate and fluffy rather than clumping together.
- Steam Retention: Using heavy duty foil creates a pressurized environment where the chicken stock and soup moisture are forced into the rice grains.
- Carryover Moisture: The sour cream adds acidity and thickness, which keeps the chicken from drying out even during the final uncovered browning phase.
Deep Dive into Savory Components
Choosing the right components for your Angel Chicken Rice Casserole makes the difference between a "fine" meal and a "request this every week" meal. Even when working with a budget, we can be smart about where we spend our money to get the most flavor impact.
| Component | Role in Dish | Pro Secret |
|---|---|---|
| Cream Cheese | Provides velvety body | Use full fat for better melting |
| Italian Mix | Concentrated herb punch | Zesty versions add needed acid |
| Long Grain Rice | Structural foundation | Always rinse until water is clear |
| Chicken Stock | Flavorful hydration | Use low sodium to control salt |
Between you and me, the cream cheese is the real star here. It bridges the gap between the liquid stock and the heavy soup, creating a sauce that coats the back of a spoon perfectly. If you are interested in how different rice varieties behave in high moisture environments, you might find my guide on Arroz Bomba rice helpful for understanding starch levels.
Necessary Tools for the Bake
You don't need a professional kitchen to make this work, but having a few specific items will make the process much smoother. I'm a big fan of using tools that empower you to be precise without being stressed.
- 9x13-inch Baking Dish: A glass or ceramic dish is best for even heat distribution. Metal pans can sometimes scorch the bottom layer of rice before the middle is cooked.
- Large Whisk: You really want to work that cream cheese and butter together until there are zero lumps. A sturdy silicone coated whisk works wonders.
- Heavy Duty Aluminum Foil: This is non negotiable. Standard foil is too thin and can tear, letting the steam escape and leaving you with crunchy rice.
- Digital Meat Thermometer: While 45 minutes is the standard, checking that the chicken has hit 165°F ensures it’s juicy and safe.
Chef's Tip: If your cream cheese is still a bit cold, microwave it for 15 seconds. It needs to be completely soft to emulsify with the melted butter, or you'll end up with little white specks in your gravy.
Essential Ingredients and Smart Substitutes
Here is everything you need to gather for your Angel Chicken Rice Casserole. I’ve included my favorite budget friendly swaps that still deliver that velvety result we are looking for.
- 0.5 cup (115g) unsalted butter, meltedWhy this? Provides the rich mouthfeel and carries the herb flavors.
- Sub: Salted butter (just reduce the added salt in the rest of the dish).
- 8 oz (225g) cream cheese, softenedWhy this? The key to a thick, stable, and creamy sauce foundation.
- Sub: Neufchatel cheese for a slightly lower fat content with similar texture.
- 0.7 oz (1 packet) zesty Italian dressing mixWhy this? A "shortcut" to 10+ dried herbs and spices in one go.
- Sub: 2 tbsp dried oregano, garlic powder, and onion powder with a pinch of sugar.
- 10.5 oz (1 can) condensed cream of chicken soupWhy this? Acts as a pre thickened binder for the entire casserole.
- Sub: Cream of mushroom or cream of celery for a different flavor profile.
- 1 cup (240ml) chicken stockWhy this? Provides the liquid necessary for the rice to hydrate and cook.
- Sub: Vegetable stock or water with a bouillon base.
- 0.5 cup (120g) sour creamWhy this? Adds a necessary tang that cuts through the heavy fats.
- Sub: Plain Greek yogurt for a protein boost and similar acidity.
- 1.5 lbs (680g) boneless skinless chicken breasts, cubedWhy this? Lean protein that absorbs the savory sauce beautifully.
- Sub: Chicken thighs for a juicier, more forgiving texture.
- 1.5 cups (270g) long grain white rice, rinsedWhy this? The classic choice for a fluffy, non mushy casserole grain.
- Sub: Basmati rice (it cooks slightly faster and adds a nutty aroma).
- 2 cups (225g) Colby Jack or Sharp Cheddar cheese, shreddedWhy this? Provides that essential bubbly, golden brown finish on top.
- Sub: Mozzarella for a better "cheese pull" but less sharp flavor.
The step-by-step Cooking Guide
Ready to get started? Let’s walk through the process. Remember, the goal here is a velvety sauce and perfectly cooked grains. Don't rush the whisking!
Phase 1: Creating the Flavor Foundation
- Whisk the fats. Combine the 0.5 cup melted butter, 8 oz softened cream cheese, and the Italian dressing packet in a large bowl. Note: Keep going until it's a smooth, pale orange paste.
- Incorporate the liquids. Slowly stir in the 10.5 oz cream of chicken soup, 1 cup chicken stock, and 0.5 cup sour cream. Whisk until the mixture is a uniform, thick gravy.
Phase 2: The Layered Assembly
- Prep the rice. Spread the 1.5 cups of rinsed white rice across the bottom of your 9x13-inch dish. Note: Rinsing is vital to prevent the rice from turning into a block of starch.
- Add the chicken. Scatter the 1.5 lbs of cubed chicken pieces evenly over the rice. Avoid stacking the chicken in one spot to ensure even cooking.
- Pour the sauce. Cover the chicken and rice with the creamy mixture. Use a spatula to push the sauce into the corners so every grain of rice is submerged.
Phase 3: The Steaming Bake
- Seal it tight. Cover the dish with heavy duty foil, crimping the edges firmly against the rim.
- First bake. Place in the oven at 350°F (175°C) and bake for 35 minutes until the rice is tender and the sauce is bubbling.
Phase 4: The Cheesy Finishing Touch
- Add the cheese. Remove the foil cautiously (watch for steam!) and sprinkle the 2 cups of shredded cheese over the top.
- Final melt. Bake uncovered for another 10 minutes until the cheese is melted and golden brown.
- Resting time. Let the dish sit for 5 minutes before serving. Note: This allows the sauce to thicken up one last time.
Solving Your Common Casserole Problems
Even the most heartfelt home cooks run into a snag now and then. Casseroles are generally forgiving, but there are a few things that can go sideways if you aren't careful.
Fixing Undercooked Rice Grains
If you pull the foil back and find the rice is still crunchy in the center, it usually means your seal wasn't tight enough and the steam escaped. This is a common issue if you use thin foil or if the dish wasn't completely covered.
To fix this, add another 1/4 cup of hot chicken stock, reseal it very tightly with a new piece of foil, and pop it back in for 10-15 minutes. The extra moisture and heat will finish the hydration process. For more tips on achieving the right bake, check out my Chicken Casserole recipe which focuses on that perfect velvety to crunchy ratio.
Managing Total Sodium Levels
Between the Italian mix, the soup, and the stock, the salt can add up quickly. If you're sensitive to sodium, it can feel a bit overwhelming.
| Problem | Root Cause | Solution |
|---|---|---|
| Too Salty | Stock or seasoning mix | Use low sodium stock and unsalted butter |
| Rice is Mushy | Too much liquid | Measure rice and stock precisely |
| Greasy Surface | Butter separated | Whisk cream cheese more thoroughly at start |
Common Mistakes Checklist
- ✓ Don't skip the rice rinse: Starch is the enemy of fluffy casserole rice.
- ✓ Soften that cream cheese: Lumpy sauce is usually caused by cold cheese.
- ✓ Seal the foil properly: A loose seal leads to "crunchy rice syndrome."
- ✓ Use a 9x13 dish: A smaller, deeper dish will result in unevenly cooked rice.
- ✓ Let it rest: If you scoop it immediately, the sauce will be too runny.
Smart Swaps and Ingredient Variations
One of the things I love about being an enthusiastic innovator in the kitchen is finding ways to make one recipe work for ten different situations. Whether you're trying to save money or just want to use what's in the pantry, these tweaks work beautifully.
If you want a budget friendly version, you can swap the chicken breasts for canned chicken (drained) or even leftover rotisserie chicken. Since the chicken is already cooked, you can reduce the initial bake time to 25 minutes, then add the cheese.
This saves you about $4-5 on the meat and reduces the risk of overcooking.
For a nutrient dense variation, try stirring in 2 cups of frozen peas or chopped broccoli florets before you pour the sauce over the chicken. The vegetables will steam perfectly right along with the rice and chicken, making it a true one pan meal.
You might want to add an extra splash of stock to account for the extra bulk.
Thrifty Meat Substitution Ideas
- Pork Tenderloin: Cubed small, it stays very tender in this sauce.
- Ground Turkey: Brown it in a pan first, then layer it just like the chicken.
- Tofu: Use extra firm tofu, pressed and cubed, for a vegetarian friendly twist.
Making It Your Own
- If you want a kick: Add 1/2 tsp of red pepper flakes to the sauce.
- If you want it richer: Use heavy cream instead of chicken stock (be careful, it's very heavy!).
- If you want it crunchy: Top with crushed butter crackers along with the cheese for that "shatter" texture.
Scaling for Different Group Sizes
Adjusting this recipe is fairly straightforward, but because rice is a "thirsty" ingredient, you have to be careful with the liquid ratios.
Scaling Down (½ Recipe): Use an 8x8-inch pan. Use 0.75 cups of rice and 0.5 cups of stock. Reduce the initial bake time by about 5-8 minutes since there is less thermal mass to heat up. For the egg based components (like if you add a binder), beat one egg and use exactly half.
Scaling Up (2x Recipe): Use two separate 9x13-inch dishes rather than one giant pan. This ensures the rice in the middle of the pan actually gets cooked. When doubling the spices and Italian mix, I recommend using only 1.5x the amount of seasoning first, tasting the sauce, and then adding more.
Spices can become disproportionately strong when doubled.
Baking Adjustments: If you are baking two dishes at once, increase your oven temperature to 375°F (190°C) to compensate for the extra cold mass in the oven, or rotate the pans halfway through the cooking time.
Casserole Myths to Forget
There are so many "rules" floating around the internet about rice and chicken, and honestly, most of them just overcomplicate things. Let's clear the air on a few common ones.
Myth: You must cook the rice before putting it in the casserole. Actually, cooking the rice in the sauce is what makes this dish so flavorful. The rice absorbs the seasoned chicken stock and herb butter instead of plain water.
As long as your liquid to rice ratio is correct and your seal is tight, the rice will be perfect every time.
Myth: Searing the chicken first "locks in the juices." Searing adds flavor through the Maillard reaction (that's the "browning" we love), but it doesn't actually seal in moisture.
In this recipe, the moist heat of the sauce and the foil seal do a much better job of keeping the chicken tender than a quick pan sear would. Plus, skipping the sear saves you a dirty pan and ten minutes of work!
Storing and Reheating Your Leftovers
This Angel Chicken Rice Casserole is a meal prep dream because the flavors actually get a chance to mingle and deepen overnight. The sauce thickens up as it cools, making it even creamier the next day.
Storage Guidelines: Fridge: Place in an airtight container for up to 4 days. Freezer: You can freeze this for up to 3 months. I recommend freezing it in individual portions so they thaw and reheat evenly.
Zero Waste Tip: Don't throw away those leftover bits of cheese or the ends of the onion you didn't use! You can toss the onion scraps into your chicken stock for extra flavor.
If you have a tiny bit of sauce left in the bowl, whisk it with a little hot water and use it as a "gravy" for steamed veggies the next day.
Reheating: To keep the rice from getting gummy, reheat in the oven at 350°F (175°C) covered with foil for 15-20 minutes.
If you're in a hurry and using the microwave, add a teaspoon of water or milk to the dish before heating to create a little extra steam and revive the velvety texture of the sauce.
Perfect Pairings for This Meal
Since this dish is so rich and savory, you really want sides that provide a bit of contrast. I usually lean toward something bright or crunchy to balance out the creamy textures.
A simple green salad with a sharp vinaigrette is my go to. The acidity of the dressing cuts right through the richness of the butter and cream cheese. If you want something warm, roasted green beans or asparagus with a squeeze of lemon juice work beautifully.
The char from the roasting adds a nice smoky depth that complements the Italian herbs.
If you’re hosting a larger crowd and want to lean into the comfort food theme, a basket of warm, crusty bread is never a bad idea. It’s perfect for mopping up any extra golden gravy that’s left on your plate.
However you serve it, this dish is designed to empower you to feel like a master of your kitchen, providing a heartfelt meal that everyone will remember. Enjoy every bubbly, cheesy bite!

Recipe FAQs
How to ensure the rice cooks evenly?
Spread the rinsed rice in an even, flat layer across the bottom of the 9x13-inch dish. Covering the dish tightly with heavy duty foil is critical, as it traps the steam necessary to fully cook the grains through during the 45-minute total bake time.
Why is my sauce lumpy?
Use room temperature softened cream cheese to ensure a smooth texture. If you enjoyed mastering this creamy sauce emulsion, you can apply similar whisking principles when preparing our tangy creamy sauce for other dishes.
Is it true I can use brown rice instead of white?
No, this is a common misconception. This recipe is specifically calibrated for long grain white rice; using brown rice will result in undercooked, crunchy grains because it requires a significantly longer cooking time and more liquid.
How to prevent the rice from getting crunchy?
Seal the aluminum foil tightly around the edges of the baking dish. A loose seal allows moisture to escape, preventing the rice from steaming properly and leading to "crunchy rice syndrome."
How to handle leftovers for the best texture?
Store individual portions in airtight containers in the fridge for up to 4 days. The sauce thickens as it cools, so consider adding a small splash of chicken stock when reheating to restore the original creamy consistency.
Do I really need to rinse the rice?
Yes, always rinse the rice until the water runs clear. Removing excess surface starch is essential to prevent the grains from becoming gummy or clumping together during the bake.
How to fix a runny sauce after baking?
Let the casserole rest for 10 minutes before serving. This allows the sauce to re-absorb and thicken naturally, providing the perfect creamy texture for your meal.
Angel Chicken Rice Casserole

Ingredients:
Instructions:
Nutrition Facts:
| Calories | 645 kcal |
|---|---|
| Protein | 38.5 g |
| Fat | 38.8 g |
| Carbs | 34.3 g |
| Fiber | 0.6 g |
| Sugar | 3.2 g |
| Sodium | 715 mg |
