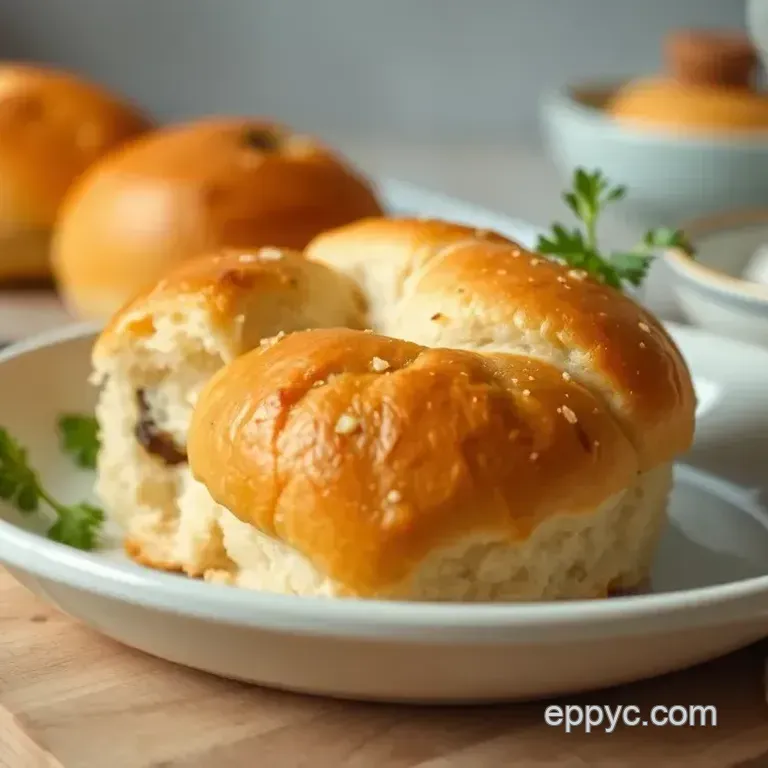
Warm & Joyful Homemade Dinner Rolls
Bake Homemade Rolls for Family Joy
A Magical Kitchen Memory
Oh my gosh, let's talk about those moments when the whole family gathers around the dinner table, and you just know something delicious is about to happen.
One of my fondest memories is from when i was a kid. my mom would whip up her famous homemade dinner rolls every sunday.
The scent of warm, buttery rolls wafting through the house was like a big hug that made everyone smile. so many of us cherish such comfort food recipes they not only fill our bellies but inspire those warm and fuzzy feelings.
Honestly, there's something special about how we gather around food. it’s why i love to bake homemade rolls for family joy it’s all about connection, not just cooking.
Rolling Through History
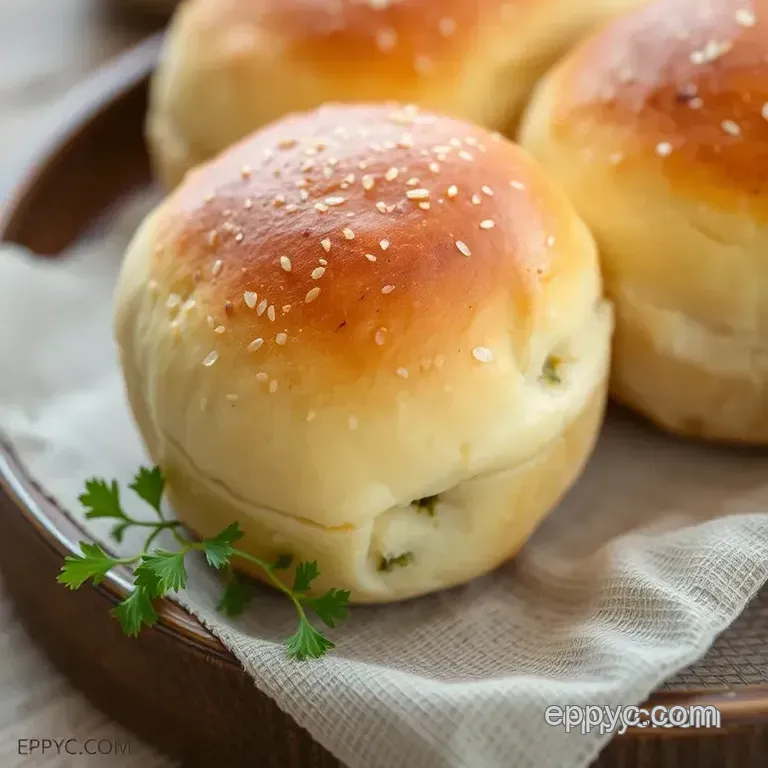
These delightful fluffy bread rolls trace back to traditional bread making practices that have stood the test of time. people have been baking bread for centuries because, well, who doesn’t love bread?! it’s the ultimate way to nourish both body and soul.
Today, these rolls are making a comeback in homes across america, especially during holidays or family gatherings. they bring a sense of nostalgia and comfort that modern dishes just can’t match.
If you're thinking it sounds complicated, don’t fret! this easy bread making recipe takes about 1 hour and 35 minutes from start to finish, counting a good hour for the dough to rise.
Talk about simple! and the best part? you don’t need to be a pro. in fact, it's perfect for beginners wanting to dip their toes into baking with yeast .
With minimal ingredients and just a bit of elbow grease, you'll come out with warm bread rolls that can make any dinner feel festive without breaking the bank.
Unraveling the Benefits
Now let’s chat about the real perks. besides the heavenly taste, these dinner rolls are packed with benefits. they are wholesome, and when made from scratch, you get to control what goes in them.
You can easily tweak the recipe for lower sugar bread recipes or switch out for whole wheat dinner rolls , if you're feeling health conscious.
Not to mention, these rolls are super versatile! they shine bright during family dinners but are equally good as part of a game day spread.
Fill them with delicious, hearty stew or just slather some butter (or honey, if you’re feeling fancy) for a quick snack.
This is kid-friendly baking at its finest my little ones adore rolling the dough into balls, and i end up with adorable little “chef” helpers.
The texture? think soft, buttery rolls that practically melt in your mouth. pairs perfectly with everything from soups to grilled meats.
And if you're throwing a big bash or hosting family dinner, these always earn you a gold star. plus, guess what? you can even freeze homemade rolls for later.
Pop ‘em in the oven, let them warm up, and voilà a treat for anyone who swings by.
Time to Gather Ingredients
So are you feeling inspired? ready to master this recipe? before we dive into the actual baking, let’s take a quick peek at what you’ll need.
Grab your apron and let’s get those step-by-step roll recipe details lined up. you'll want to make sure you've stocked up on some basic pantry staples, which we’ll cover next.
Trust me, when you see the smiles around the table when you set down a basket of freshly baked rolls, you’ll know it was worth it.
Buckle up; let’s bring some joy to your kitchen!
Essential Ingredients Guide
Let’s dive into the delicious world of homemade rolls ! honestly, whether you’re making those soft dinner rolls for a cozy family dinner or prepping some buttery rolls for holiday hosting, there are a few essential ingredients you just can’t skip.
Here’s the lowdown so you can bake homemade rolls for family joy like a pro.
Premium Core Components
First up, let’s talk about those premium core components you need.
Flour: start with 4 cups (500g) of all-purpose flour . if you’re feeling adventurous, swap in whole wheat flour for added nutrition.
When you sift it, look for that fluffy texture. don’t use flour that’s clumpy or old it’s all about freshness!
Yeast: you’ll need 1 packet (2¼ tsp) of instant yeast . make sure to check the expiration date. fresh yeast is crucial because it’s what makes your rolls rise and gives them that airy feel.
Sugar: A little sweetness with 2 tablespoons (25g) of granulated sugar is what brings those rolls to life! Taste your dough before it rises; you want that hint of sweetness.
Salt: Use 1 teaspoon (5g) for flavor. Just don’t skip it. It balances everything out.
Liquid Ingredients: You’ll mix things up with 1 cup (240ml) of warm milk (around 110° F/ 43° C ) and ¼ cup (60g) of melted butter for that rich taste.
Eggs: Don’t forget 2 large eggs, beaten . They help enrich the dough and contribute to that fluffy texture we all crave.
And storage? keep flour in a cool, dry place in an airtight container. yeast should also be stored in the fridge.
Use it within a few months for optimal freshness trust me, you don’t want expired yeast ruining your batch!
Signature Seasoning Blend
Now, let’s jazz up those homemade bread variations with some flavor! Of course, a basic dough is fantastic, but it’s the signature seasonings that elevate your rolls.
Herbs: Consider adding some dried rosemary or thyme for a savory kick. It changes the game when paired with dishes like hearty stews or creamy soups.
Garlic: A sprinkle of garlic powder or fresh minced garlic can make your rolls irresistible! Seriously, who can resist warm bread rolls with garlic?
Spice Combinations: Don’t shy away from experimenting. Try a dash of paprika or cayenne pepper for a subtle heat.
Smart Substitutions
Life happens, and sometimes you don't have exactly what you need. Here’s where smart substitutions come into play.
For gluten-free Options: Use a good gluten-free flour blend, and you’ll still satisfy your gluten-free friends with those warm bread rolls everyone loves.
Non-Dairy Swap: If you’re avoiding dairy, almond milk or oat milk works beautifully. It won’t hurt your rolls at all.
Sugar Alternatives: Want to keep it low-sugar? Try using honey or agave in place of sugar. The result is a slightly different flavor, but totally delicious.
Kitchen Equipment Essentials
Okay, let’s wrap this up with a peek at the must have tools for making your rolls shine.
Large Mixing Bowl: A good size helps prevent flour explosions when you’re mixing. Trust me, I’ve been there!
Baking Sheet: You need a sturdy one; think about investing in a heavy duty pan. It ensures even cooking!
Parchment Paper: Lining your baking sheet with parchment paper is a game changer. No sticking, and easy cleanup!
A Kitchen Towel: This is your secret weapon to keep the dough warm during its rise. It’s like a cozy blanket for your rolls.
Now, let’s jump into the nitty gritty of how to take all these wonderful ingredients and turn them into warm and fluffy rolls. It’s time for some joy in the kitchen let’s get baking!
Professional Cooking Method
Cooking can feel like an art, a science, or sometimes just a necessary task. but with the right method, you can elevate your time in the kitchen.
Let’s break down professional cooking method , perfect for baking those homemade rolls for family joy or whipping up that killer dinner roll recipe.
Ready? let’s dive in!
Essential Preparation Steps
First up, mise en place . it's the fancy french term for “everything in its place.” gather all your ingredients and tools before you start.
This way, you won’t be scrambling at the last minute looking for that one cup of flour (been there, done that!).
Next, time management is key. set your clock! use a timer to keep track of rising and baking times. for our dinner rolls, you’ve got about 1 hour for rising and 20 minutes for baking at 375° f ( 190° c) .
Simple, right?
Organization strategies are also vital. keep your workspace tidy. as you use ingredients, clear them out. not only does this help you stay focused, but it also avoids any kitchen chaos.
Trust me; it’s way easier to whip up those fluffy bread rolls when you’re not fighting against clutter!
Safety considerations? Don't forget to wash your hands and keep your cooking area clean. Bacteria loves to crash parties, and we don't want that in our kitchen!
Step-by-step Process
Now, let’s jump into a step-by-step rollout, no pun intended! Focus on clear, numbered instructions so you can rock this like a pro.
- Mix dry ingredients : Start with your flour, sugar, yeast, and salt.
- Combine wet ingredients : In another bowl, mix warm milk (about 110° F/ 43° C ) and melted butter.
- Form the dough : Combine everything and mix until a shaggy dough forms.
Make sure to knead that dough for 8- 10 minutes until it’s smooth and elastic.
- First rise : Pop that dough into a greased bowl covered with a kitchen towel to rise. Set aside for about 1 hour .
- Shape the rolls : After rising, punch the dough down, divide it into 12 pieces, and shape them into balls.
Remember to let your rolls rise again for about 30 minutes , covered. This second rise is where the magic happens!
Preheat your oven at this point to 375° F ( 190° C) . When it’s time to bake, pop them in and watch those rolls puff up as they turn golden brown.
Expert Techniques
Feeling confident? let's add some expert techniques to your toolkit! for one, always check the quality of your yeast before you bake.
Ensure it's fresh. critical steps like this can uplift your baking game.
You can also use a thermometer to check! if you want that perfect bread texture, you should look for an internal temperature of around 190° f ( 88° c) when your rolls are done.
Got a sticky dough? Don’t panic; add a little more flour, just enough to keep it manageable. Baking is forgiving, but you also don’t want to overdo it.
Success Strategies
Now, let's talk about common mistakes to avoid. the most significant one? rushing the rises! you need that time. no one likes dense, sad rolls.
Quality assurance tip: always check for doneness. give them a light tap; they should sound hollow when baked through.
And hey, here’s a pro tip: you can freeze homemade rolls after you bake them. wrap 'em up, throw 'em in the freezer, and you've got quick dinner rolls ready whenever you want.
Seriously, you can have warm rolls on the table in minutes by just reheating them in the oven.
Additional Information
Baking is all about ease, fun, and connection. cooking with family encourages teamwork and laughter perfect ingredients for any family friendly meal .
Whether you're preparing those soft dinner rolls for a regular family dinner or hosting a holiday feast, the joy it brings is undeniable.
So grab your apron, rally the family, and whip up those buttery rolls that will become everyone's favorite!
Bake Homemade Rolls for Family Joy: Additional Recipe Insights
Ah, the magic of homemade rolls! nothing beats the smell of warm, buttery rolls wafting through the house. i swear it's like a big warm hug.
Trust me, you’re going to want to keep this easy bread making recipe handy. whether you’re hosting family dinner or looking for family friendly meals , these soft dinner rolls tick all the boxes.
Pro Tips & Secrets for Perfect Rolls
Let’s kick things off with some of my favorite baking tips for beginners . first off, make sure your yeast is fresh! if it’s been in the back of your pantry for ages, toss it and buy a new packet.
You want those rolls to rise like they mean it!
When you’re kneading the dough, if it’s stickier than your toddler’s fingers after a candy spree, sprinkle a touch of flour to help it out.
Just remember, too much flour can make your rolls dense, and nobody wants that. trust me; it’s a fine line to walk!
For flavor enhancement , i love to add a sprinkle of garlic powder or some rosemary for that extra oomph.
If you really want to wow your guests, brush them with melted butter right after they come out of the oven.
It gives the rolls a shiny, mouthwatering finish. plus, who doesn’t love butter?
Perfect Presentation
Now let’s talk about how to make these rolls look as good as they taste. when it comes to plating techniques , you can stack them like a little tower or arrange them in a cozy circle on a serving platter.
Garnish ideas? a sprinkle of coarse sea salt or fresh herbs can make a world of difference. color combinations matter too! if your rolls are golden brown, pair them with a vibrant green salad or roasted veggies for a pop.
Presenting food well makes it not just tasty but irresistibly instagram worthy.
Storage & make-ahead Tips
If you're making these in advance or have leftovers (which i doubt because they’ll go fast), here's how to store them.
Place your rolls in an airtight container to keep them fresh. they’ll last about 2-3 days on the counter.
Oh, and if you want to freeze any of those fluffy bread rolls , just wrap them in foil and toss them in the freezer.
They’re good for up to a month. when you’re ready, pop them in the oven at 350° f for about 10- 15 minutes, and you’ll have freshly baked bread ready to enjoy!
Creative Variations
The fun doesn’t stop there! you can jazz up this recipe like crazy. if you have some leftovers, think about making savory rolls filled with cheese or a sweet variation with cinnamon and sugar.
For dietary modifications, try using whole wheat flour for a healthier twist or even a gluten-free roll recipe if you’re catering to dietary restrictions.
Don’t be afraid to experiment! it’s all part of the fun.
Complete Nutrition Guide
Nutrition is always important, especially when we’re talking about comfort food recipes . each roll has about 180 calories packed with a little protein and fat for that comfort boost.
If you’re watching your sugar intake, modify the recipe with low-sugar options.
Always remember to enjoy in moderation, and consider serving these rolls alongside healthy sides, like a garden salad or a broth based stew.
I'll say it again: they’re perfect for pairing with stews !
Expert FAQ Solutions
Got questions? I've been there! If your rolls didn’t rise well, check that yeast freshness. If they turned out too tough, it may have been over kneaded. Don’t worry; every baker faces hiccups.
And if you’re wondering about variations, absolutely go wild! Switch up flavors based on the season, or adjust for gatherings.
Wrapping it Up
So get ready to bake homemade rolls for family joy . this journey of baking with yeast is all about satisfying your cravings and bringing folks together around the table.
Remember, it's not just about the rolls themselves it’s the moments you create while making and sharing them. don’t stress too much, enjoy the process, and happy baking!
Bake Homemade Rolls For Family Joy

