Best Bbq Chicken Recipe: Tender & Glazed
- Time: Active 15 minutes, Passive 55 minutes, Total 1 hour 10 mins
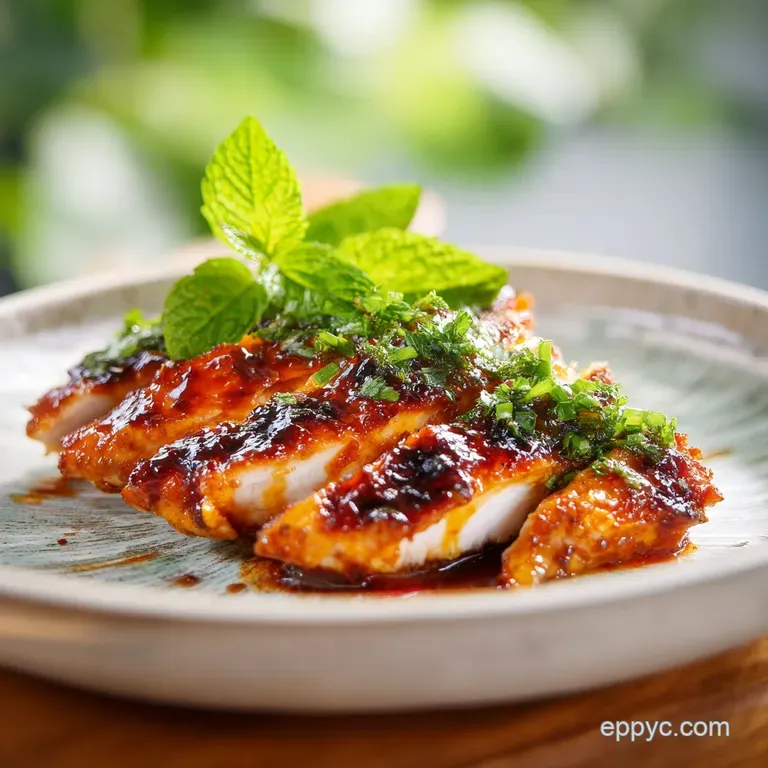
- Flavor/Texture Hook: Smoky sweet glaze with a tender, juicy interior
- Perfect for: Stress free weeknight dinners or meal prep enthusiasts
- Techniques for the Best BBQ Chicken
- Why This Works
- Key Preparation Measurements
- Strategic Ingredient Selection
- Essential Tool Kit
- Cooking Process Stages
- Avoiding Common Cooking Errors
- Flavorful Substitutions
- Storage and Longevity
- Myths About BBQ Chicken
- Suggested Menu Pairings
- Very High in Sodium
- Recipe FAQs
- 📝 Recipe Card
Techniques for the Best BBQ Chicken
The air usually fills with that sharp, vinegary tang of sauce hitting a hot pan, and honestly, it's one of my favorite sounds in the world. I remember the first time I tried to make "the best bbq chicken" for a backyard get together, and it was a total disaster.
I slathered the sauce on way too early, and by the time the middle was cooked, the outside was a charred, bitter mess. It was a heartfelt lesson in chemistry that I never forgot.
We've all been there, hovering over a pan hoping the inside cooks before the outside burns. But once I started using digital tools like a reliable meat thermometer, everything changed. It empowered me to stop guessing and start cooking with precision.
You don't need a fancy smoker or a $1,000 grill to get results that make your friends beg for the recipe. It's all about how you manage the heat and the sugar.
In this guide, we're going to look at how a simple dry rub and a calculated glazing step can transform a standard chicken breast into something spectacular. We'll use technology to our advantage and keep things budget friendly by using pantry staples that pack a punch.
This isn't just about feeding people; it's about that proud moment when you slice into a piece of meat and see those clear juices run across the board.
Why This Works
- Surface Dehydration: Salt in the rub draws moisture out, which then creates a concentrated brine that the meat reabsorbs for deep seasoning.
- Sugar Pyrolysis Control: Adding the honey and brown sugar glaze only in the final minutes prevents the sugars from burning at high temperatures.
- Maillard Reaction: Searing the chicken with the dry rub first creates a savory crust that provides a complex base for the sweet sauce.
- Connective Tissue Breakdown: Maintaining a steady internal temperature ensures the proteins don't tighten up and squeeze out all the moisture.
| Method | Time | Texture | Best For |
|---|---|---|---|
| Stovetop | 12-15 minutes | Crispy, charred edges | Quick weeknight meals |
| Oven Baked | 20-25 minutes | Evenly tender and juicy | Hands off meal prep |
| Hybrid | 18 minutes | Best of both worlds | Maximum flavor depth |
Choosing your method depends on how much you want to hover over the stove. I personally love the hybrid method because it gives you that beautiful sear from the pan but finishes gently in the oven to keep things velvety inside. If you're looking for another poultry winner, my Classic Chicken Piccata Recipe uses a similar pan to finish technique that works wonders.
Key Preparation Measurements
The Dry Brine Method
Most people skip the resting period, but letting the salt and spices sit on the meat for at least 30 minutes (or up to 45 minutes) is the real secret. This allows the seasoning to penetrate past the surface.
When the salt hits the meat, it breaks down the protein structures, meaning they won't contract as much when they hit the heat.
The Heat Source Balance
We are looking for a medium high initial heat to get that sear, then a lower, indirect heat to finish the cooking. If you stay on high heat the whole time, the exterior becomes tough before the center hits 165°F.
It's a balance of thermodynamics that sounds complicated but just means "sear hot, finish low."
The Glazing Timing
The BBQ sauce should only see heat for the last 5 to 8 minutes of the process. Since our sauce contains honey and brown sugar, it will turn into carbon if it's on the heat for 20 minutes. We want it to bubble and thicken into a sticky lacquer, not turn into a black crust.
Strategic Ingredient Selection
| Ingredient | Science Role | Pro Secret |
|---|---|---|
| Smoked Paprika | Flavor Compound | Provides a "grilled" taste without using an actual charcoal grill. |
| Brown Sugar | Caramelization | Lowers the temperature at which the surface browns for a richer color. |
| Apple Cider Vinegar | Protein Tenderizer | The acidity breaks down tough fibers while balancing the heavy sweetness. |
| Dijon Mustard | Emulsification | Helps the glaze cling to the meat rather than sliding off into the pan. |
Right then, let's talk about the shopping list. I’ve kept this budget smart because you likely already have most of this in your cabinet. If you find yourself wanting a different punchy flavor profile later, The Piquant Chicken recipe is another fantastic way to use these pantry staples.
Dry Rub Components
- 1 tbsp smoked paprika: Why this? Essential for that deep, reddish brown color and smoky undertone. (Sub: Regular paprika + 1 drop liquid smoke)
- 1 tbsp brown sugar, tightly packed: Why this? Creates the sticky texture we all crave. (Sub: White sugar + 1 tsp molasses)
- 1 tsp garlic powder: Why this? Provides an even savory base without the risk of burning fresh garlic. (Sub: Onion powder)
- 1 tsp onion powder: Why this? Adds a subtle sweetness and depth. (Sub: Shallot powder)
- 1 tsp kosher salt: Why this? The larger grains are easier to distribute evenly. (Sub: 0.5 tsp table salt)
- 0.5 tsp fresh cracked black pepper: Why this? Offers a sharp bite to cut through the sugar. (Sub: White pepper)
- 0.25 tsp cayenne pepper: Why this? Just enough heat to wake up the palate. (Sub: Chili powder)
The Chicken Breast
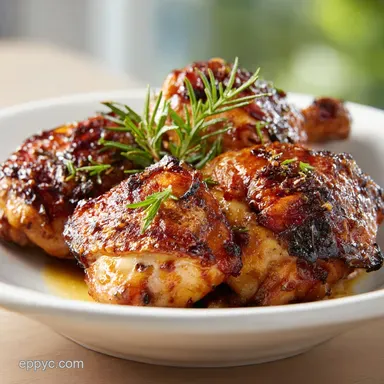
- 1.5 lbs boneless, skinless chicken breasts: Why this? Lean and quick cooking, making it the perfect canvas for big flavors. (Sub: Boneless thighs for more juice)
Glaze Base Ingredients
- 1 cup BBQ sauce: Why this? Use your favorite budget brand; we are going to doctor it up. (Sub: Tomato sauce + vinegar + sugar)
- 1 tbsp apple cider vinegar: Why this? Thins the sauce so it spreads better and adds tang. (Sub: White wine vinegar)
- 1 tsp Dijon mustard: Why this? Adds a sophisticated zing and helps the sauce emulsify. (Sub: Yellow mustard)
- 1 tbsp honey: Why this? Provides a glossy finish that looks professional. (Sub: Maple syrup)
Essential Tool Kit
2 Must Have Tools
You really need a heavy bottomed skillet. A cast iron pan is my go to because it holds heat like a champion and gives you a sear that stainless steel just can't match. If you don't have one, use the heaviest pan you own.
The second tool is a digital meat thermometer. Seriously, stop poking the meat with your finger or cutting it open to check the color. Cutting it lets all the juices out! A quick probe will tell you exactly when you hit 165°F. It's the most empowering tool in a modern kitchen.
Cooking Process Stages

Preparing the Protein
- Pat the chicken completely dry using paper towels. Note: Moisture on the surface creates steam, which prevents a good sear.
- Combine the smoked paprika, brown sugar, garlic powder, onion powder, salt, pepper, and cayenne in a small bowl.
- Coat the chicken breasts evenly with the dry rub, pressing it into the meat with your hands.
- Let the meat rest for 45 minutes at room temperature. Note: This acts as a quick dry brine, ensuring the seasoning reaches the center.
Applying the Heat
- Preheat your oven to 400°F (200°C).
- Whisk together the BBQ sauce, vinegar, mustard, and honey in a small bowl while the oven heats.
- Heat 1 tbsp of oil in a skillet over medium high heat until it shimmers and wisps of smoke appear.
- Sear the chicken for 3 minutes per side until a dark, caramelized crust forms.
The Final Glaze
- Brush a thick layer of the sauce mixture over the top of each breast.
- Transfer the skillet to the oven and bake for 10-15 minutesuntil the internal temperature reaches 160°F. Note: The temp will rise to 165°F as it rests.
- Apply one final layer of glaze and let the chicken rest for 5 minutes before slicing. The sauce should look thick and glassy.
Avoiding Common Cooking Errors
Why Your Chicken Is Dry
If your chicken feels like chewing on a sponge, it's almost certainly overcooked. Chicken breast has very little fat, so once you pass 170°F, the proteins tighten up and push out every drop of moisture. Use your digital thermometer to pull the meat at 160°F.
The carryover heat will do the rest of the work for you while it rests on the board.
| Problem | Root Cause | Solution |
|---|---|---|
| Burnt Coating | Heat too high/Sugar too early | Sear at medium high and add sauce only at the end. |
| Rub Sliding Off | Meat was too wet | Always pat dry with paper towels before seasoning. |
| Bland Interior | No resting time | Let the rub sit for at least 30 mins to penetrate. |
Common Mistakes Checklist
- ✓ Never skip the pat dry step; wet meat won't sear, it will just gray and boil.
- ✓ Don't move the chicken too early in the pan wait for it to release naturally.
- ✓ Avoid using "cold" chicken straight from the fridge; let it sit out for 20 mins first.
- ✓ Always rest the meat after cooking to allow the fibers to relax and retain juice.
- ✓ Check your thermometer calibration in ice water once a year.
Flavorful Substitutions
| Original Ingredient | Substitute | Why It Works |
|---|---|---|
| Honey (1 tbsp) | Maple Syrup (1 tbsp) | Provides a similar sticky texture but adds a woodsy, autumnal flavor profile. |
| ACV (1 tbsp) | Pineapple Juice (1 tbsp) | Adds sweetness and contains bromelain, which helps tenderize the protein. |
| Smoked Paprika | Chipotle Powder | Increases the heat significantly while maintaining the necessary smoky aroma. |
If you are cooking for someone with dietary restrictions, don't worry. You can easily swap the honey for agave if you prefer a lower glycemic index, though it won't be quite as glossy. For a gluten-free version, just double check your store-bought BBQ sauce label, as some use barley based thickeners.
Scaling the Recipe
Scaling Down (1-2 Servings): Use a smaller skillet (8 inch) to prevent the sauce from spreading too thin and burning in the pan. Reduce the baking time by about 5 minutes, as smaller quantities heat through faster.
Scaling Up (8-12 Servings): Do not crowd the pan! Work in batches to sear the meat, then move all the chicken to a large baking sheet for the oven phase. Increase the spices linearly, but only increase the salt to 1.5x the original amount to avoid over salting.
Storage and Longevity
Storage: Store leftovers in an airtight container in the fridge for up to 4 days. The sauce will actually thicken further and permeate the meat even more as it sits.
Freezing: You can freeze the cooked chicken for up to 3 months. I recommend freezing it with a little extra sauce to prevent it from drying out during the thawing process. To reheat, do it slowly in the oven at 300°F covered with foil.
Zero Waste: Don't throw away the leftover sauce in the pan! Add a splash of water or broth to the pan, scrape up the bits (frond), and simmer it down to make a "bonus" gravy for mashed potatoes or rice. If you have leftover chicken scraps, they are perfect for a BBQ chicken salad the next day.
Myths About BBQ Chicken
Myth 1: You must marinate overnight. Actually, long acidic marinations can turn chicken breast mushy. A dry rub with a 45 minute rest is often more effective for texture because it seasons the meat without breaking down the fibers into a mealy mess.
Myth 2: Searing "seals in" the juices. Science tells us this isn't true. Searing creates flavor through the Maillard reaction, but it doesn't create a waterproof barrier. Moisture retention is actually controlled by final internal temperature, not how hard you sear the outside.
Myth 3: Clear juices always mean it's done. Juice color can be misleading based on the age of the bird or the pH level of the meat. The only 100% reliable way to ensure safety and quality is using a digital thermometer to hit that 165°F mark.
Suggested Menu Pairings
This chicken is the star of the show, but it needs some supporting actors. I love serving this with a cold, crunchy slaw to balance the warmth of the spices. A classic cornbread with a bit of honey butter also mirrors the sweetness in the glaze perfectly.
If you want something heartier, a loaded baked potato or some stovetop mac and cheese provides that velvety texture that pairs so well with the smoky chicken. Trust me, once you master this method, you'll never go back to just "grilling" a breast again.
It’s all about the digital precision and the patience to let that rub work its magic. Enjoy the sizzle!

Very High in Sodium
1185 mg mg of sodium per serving (52% % of daily value)
The American Heart Association recommends limiting sodium intake to about 2,300mg per day for most adults. This recipe exceeds half of that daily limit per serving!
Sodium Reduction Tips for BBQ Chicken
-
Low-Sodium BBQ Sauce-20%
The BBQ sauce is a major source of sodium. Use a low-sodium or sodium free BBQ sauce. Many brands offer reduced sodium options with comparable flavor.
-
Reduce Added Salt-25%
Kosher salt contributes a significant amount of sodium. Reduce the amount of kosher salt added. Try using 1/2 tsp instead of 1 tsp.
-
Homemade BBQ Sauce-30%
Consider making your own BBQ sauce using tomato paste (no salt added), apple cider vinegar, honey, Dijon mustard, and spices to control the sodium content. You can find many recipes online that specifically target low-sodium versions.
-
Spice It Up!
Emphasize other flavors like smoked paprika, garlic powder, onion powder, black pepper, and cayenne pepper to compensate for reduced salt. Experiment with adding other herbs and spices that you enjoy.
-
Brine Wisely-15%
If you typically brine your chicken, omit the salt from the brine or significantly reduce the amount. Consider using a sugar and spice focused brine for flavor instead.
Recipe FAQs
What's the best chicken cut to use for barbecue chicken?
Bone-in, skin-on thighs are generally superior for flavor and moisture retention. Thighs have more fat content which insulates the meat from high heat, keeping them juicy even if slightly overcooked.
What are the secrets to great barbecue chicken?
Use a two-stage cooking process: dry rub first, then glaze late. A heavy dry rub seasoned well in advance builds the crust, and adding sugary sauce only in the final minutes prevents scorching and bitterness.
What is the best way to grill barbecue chicken?
Use indirect heat after an initial high heat sear. Sear directly over medium high heat to develop color, then move the chicken to a cooler part of the grill to finish cooking slowly without burning the exterior.
How to make a nice barbecue chicken?
Dry the chicken completely, apply a robust dry rub, and let it rest for at least 30 minutes. This surface dehydration and seasoning penetration is crucial for deep flavor before applying any moisture.
Is it true I must sear chicken before baking to "seal in the juices"?
No, this is a common misconception. Searing creates flavor via the Maillard reaction, but it does not create a moisture barrier; moisture retention is controlled by pulling the meat off the heat at the correct internal temperature.
How long should the BBQ sauce sit on the chicken before it burns?
Sauce should only be exposed to high heat for the final 5 to 8 minutes of cooking. Since most commercial sauces contain sugar, prolonged heat turns them into carbon quickly; they should just be allowed to bubble and glaze.
If my chicken is slightly dry, what can I use as a flavorful addition?
A savory, thickened reduction made from pan drippings works wonders. If you have leftover bones or trim, use the low and slow principle from our Turkey Neck Gravy recipe to create a flavorful base to thin your BBQ sauce.
Best Bbq Chicken Recipe
Ingredients:
Instructions:
Nutrition Facts:
| Calories | 378 kcal |
|---|---|
| Protein | 39.2 g |
| Fat | 5.8 g |
| Carbs | 41.6 g |
| Fiber | 1.1 g |
| Sugar | 35.8 g |
| Sodium | 1185 mg |
