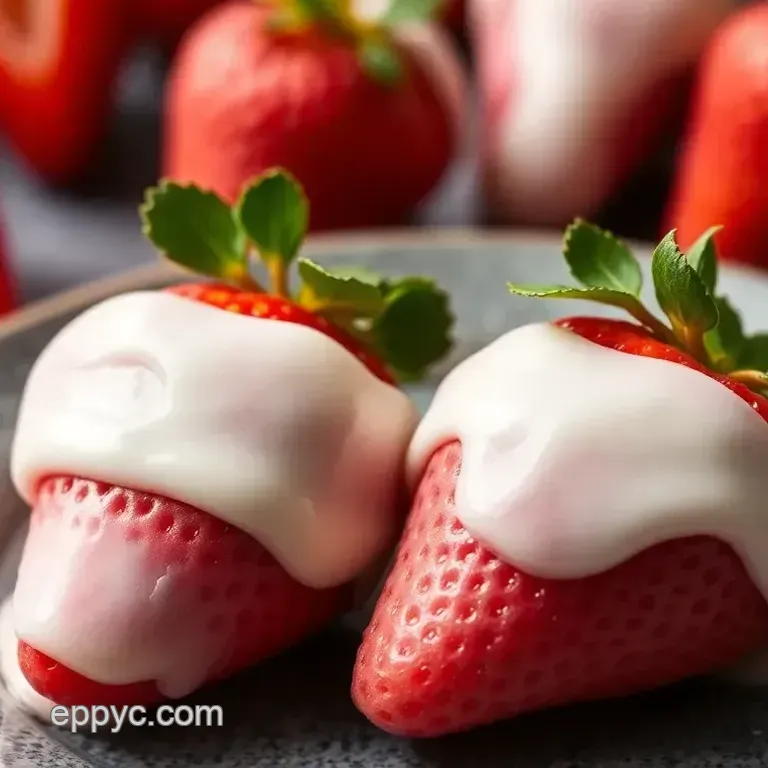
Luxurious Carab Covered Strawberries
- Indulge in Guilt-Free Goodness: Carab Covered Strawberries - 7 Best Tips for a Delectable Delight
- A Sweet History with a Modern Twist
- look into into Deliciousness: Why You’ll Love These
- The Bottom Line: A Healthy Sweet Treat!
- Essential Ingredients Guide to Delicious Treats
- Professional Cooking Method: Carab Covered Strawberries - 7 Best Tips for a Delectable Delight
- Additional Recipe Information: Carab Covered Strawberries - 7 Best Tips for a Delectable Delight
- Frequently Asked Questions
- 📝 Recipe Card
Indulge in Guilt Free Goodness: Carab Covered Strawberries - 7 Best Tips for a Delectable Delight
Ever find yourself craving something sweet, but you also wanna keep it healthy? i totally get it! that was me the other day, scrolling through my phone with a bag of chips in one hand and a guilt trip on the other, when i stumbled upon the idea of carab covered strawberries .
I was like, “wait, why not ditch the chips for something irresistible yet guilt free?” so here we are, diving into these delightful treats that not only taste fantastic but also give you some health cred.
Trust me, you’ll want to whip these up for your next gathering or even just for a movie night!
A Sweet History with a Modern Twist
The beauty of carab covered strawberries lies in their origin. carob has been around for ages but gained traction as a healthier alternative to chocolate in recent health trends.
Unlike cocoa, carob is caffeine free, making it a sweet option for all ages. these treats have become a go-to for those looking to enjoy healthy dessert recipes without sacrificing flavor.
Honestly, they are super easy chocolate covered fruits to make! prep only takes about 15 minutes, and a quick chill in the fridge brings everything together.
No special skills required just some patience as they cool! the cost? very wallet friendly. you can easily make about 12 strawberries for a small investment, which is pretty sweet when you think about it.
look into into Deliciousness: Why You’ll Love These
Let's talk about the advantages. first off, the nutritional benefits of carob are off the charts! it’s loaded with fiber, antioxidants, and a natural sweetness that doesn’t bomb your blood sugar.
When you bite into these strawberries, you might just discover a new world of flavor.
They’re perfect for parties , or as a kid-friendly dessert recipe that gets everyone into the kitchen. and get this: you can serve them on special occasions like valentine’s day or just because it’s tuesday!
oh, and if you’re on the ‘no-cook’ bandwagon, these are your new best friends.
Worried about dietary restrictions? These beauties are naturally gluten-free and can easily be dairy-free . You can swap out traditional chocolate for vegan chocolate alternatives, making them a proper guilt free indulgence that everyone can enjoy without the post dessert regret!
The Bottom Line: A Healthy Sweet Treat!
As we gear up to explore the ingredient lineup, just know that these carab covered strawberries are not just another dessert.
They’re a celebration of flavors and textures that satisfy without all the guilt. need a fun addition to a brunch spread or a refreshing dessert pairing with a hot cup of herbal tea? bingo! these bad boys fit any bill.
So, ready to mix things up in the kitchen? let’s get started. here’s what you’ll need to make these decadent treats come to life! trust me; they’re about to become your new favorite way to indulge without any of the fuss.
Grab those fresh strawberries and let’s dive into the delicious details!
Essential Ingredients Guide to Delicious Treats
Hey there, food lovers! today, we’re diving into the essential ingredients guide like it’s a treasure map for your kitchen.
If you’ve ever wondered what makes a recipe shine, then you’re in the right spot! we’re talking about premium core components for lip-smacking goodness, especially if you’re gearing up for something magical like carab covered strawberries .
Trust me, once you nail these essentials, you’ll be crafting those guilt free indulgences like a pro!
Premium Core Components: What You Need
First off, let’s chat ingredients. knowing detailed measurements is key! for the u.s. folks, think cups and tablespoons. if you’re measuring in metric, we’re talking grams and liters.
Seriously, keep a kitchen scale handy for precision!
Next, let’s focus on quality indicators for each ingredient. fresh strawberries? look for shiny red skins with green tops. if you spot any mold, just walk away, okay? and with carob chips, they should be smooth with a nice aroma.
If they smell off, toss ‘em.
Now, storage! most things are safe in a cool, dry place. but did you know that fresh strawberries can only last a few days in the fridge? eat ‘em quick! for your carob chips, stick ‘em in an airtight container good for a year if stored well.
Signature Seasoning Blend: The Magic Touch
Let’s spice things up! the heart of any dish is its seasoning. when you’re crafting those indulgent desserts, think essential spice combinations.
For our carab covered strawberries, you might want to consider herb selections like mint. fresh mint? oh my gosh, it can totally elevate your dessert game.
We’ve gotta talk about flavor enhancers and aromatics here. a sprinkle of sea salt contrasts beautifully with the sweetness. don’t sleep on it! try different regional variations too.
In the south, pecans are a go-to, while in the west, you might find people tossing in some chili powder for a kick.
Smart Substitutions: Cooking Made Easy
Now, here’s where the fun really kicks in. smart substitutions can save you from a last minute panic. no carob chips? no problem! unsweetened chocolate works too.
Just know they have a different vibe bittersweet instead of sweet.
You’re on a special diet? even easier! for our carab covered strawberries, use vegan chocolate alternatives like coconut milk chocolate.
It’s fantastic and made with wholesome ingredients. looking for low-calorie snacks ? swap out regular chocolate with no added sugar recipes your waistline will thank you.
Also, don’t forget about seasonal options. Summer calls for fresh berries, while fall? Apples are the star. Get creative!
Kitchen Equipment Essentials: Gear Up
Let’s talk tools. you don’t need a fancy kitchen to whip up delicious desserts. for carab covered strawberries , a standard microwave safe bowl or a double boiler does the trick.
Just make sure your parchment paper is ready on that baking sheet for easy cleanup.
When it comes to preparing, keep it straightforward. you know, basic knife skills and a little time can get you far! and for storing, stack those successfully made treats in an airtight container for picnic perfect snacks.
Everyone loves showing up to a party with gourmet fruit desserts, am i right?
Transitioning to Dessert Instructions
Alright, now that we’ve covered all the nitty gritty ingredient details, let’s get into the fun part: crafting those luxurious carab covered strawberries ! seriously, it’s super easy and any home cook at any level can pull this off.
With just a few minutes of prep, your kitchen will smell fabulous. plus, who wouldn’t want a refreshing dessert that’s just as nutritious as it is delightful? so stay tuned for the next steps it’s gonna get delicious!
Professional Cooking Method: Carab Covered Strawberries - 7 Best Tips for a Delectable Delight
Oh my gosh, if you've never tried carab covered strawberries , you’re seriously missing out! these babies are a fantastic way to indulge guilt free, and they’re super simple to make.
I’ve whipped these up at parties, and believe me, they always steal the show. let’s dive into the nitty gritty of making these luscious treats while chatting about some essential cooking methods!
Essential Preparation Steps
Mise en place is your best friend. this french term just means getting all your ingredients prepped and in place before you start cooking.
It’s a game changer! for our carab covered strawberries, set out 12 large strawberries and 1 cup of carob chips on your counter.
That way, you're ready to dip away without scrambling.
Now, remember, timing is everything. you’ll need about 15 minutes to prep and an extra 30 minutes to chill those beauties.
While the strawberries are chilling, it’s the perfect time to sip on some tea or café and plan your next culinary feat!
Don’t forget organization! keep that kitchen tidy. when you're making desserts, you want to feel relaxed. and safety? always a big deal.
If you’re melting carob in the microwave or a double boiler, keep an eye on it to avoid burning. that stuff can go from heavenly to tragic in seconds, trust me!
step-by-step Process
Here’s how to get those Carab Covered Strawberries perfect. Grab your notes!
Prepare the Strawberries : Wash and dry those 12 large strawberries . Seriously, moisture is the enemy here. Just a drop of water can mess with your chocolate game.
Melt the carob : using a double boiler (or microwave, if you prefer), combine the carob chips with 1 tablespoon of coconut oil and heat gently.
If using a microwave, heat in 30-second intervals , stirring in between.
Dip the Strawberries : Hold the stems and dip them into that smooth carob goodness. Cover ’em completely.
Set for Chilling : Place the dipped strawberries on a parchment lined baking sheet . Let the excess drip off; we don’t want it too thick, right?
Chill : Pop that baking sheet in the fridge for at least 30 minutes . Perfect time for a quick snack.
Serve : Arrange on a fancy plate. Maybe add some crushed nuts or sprinkle sea salt for a gourmet touch!
Expert Techniques
Now let’s talk about some expert techniques. One huge tip: use high-quality carob chips! They will really make a difference in flavor. Honestly, I remember trying a cheaper brand once total disaster.
As you’re dipping, look for visual cues. you want that shiny coating but not too thick. a slick, smooth coat is the dream! if things seem a bit clumpy, just add a bit more coconut oil to your melted carob for that dreamy consistency.
If something goes wrong maybe the dip isn’t smooth it’s usually due to heat. Just reheat gently. Timing is also key, and it’s always better to under chill than over chill.
Success Strategies
Let me hit you with some common mistakes. first off, make sure your strawberries are entirely dry. water can ruin that beautiful carob coating.
Oh, and don't skip out on the chilling time. it’s crucial for making that coating set properly.
To ensure quality, always taste test! check if the carob is sweet enough for your liking. you can even jazz it up a bit with alternative sweeteners like agave or maple syrup if you want to kick it into high gear.
Thinking ahead? These Carab Covered Strawberries make for fantastic party dessert ideas. You can prep them in advance. Just keep them in the fridge until you’re ready to wow your guests !
Wrap-Up: Additional Information
So there you have it! you’re all set to make carab covered strawberries like a pro. remember, they’re not just a pretty face; they come with nutritional benefits of carob .
They’re low-calorie and perfect for guilt free indulgence . plus, you can enjoy them as part of healthy dessert recipes or switch things up with easy chocolate covered fruits .
Stay tuned for more insights on using carob in your kitchen, including possibilities for homemade carob treats or even exploring vegan chocolate alternatives ! keep whipping up those delicious and natural sweeteners in desserts .
Can't wait to hear how yours turn out!
Additional Recipe Information: Carab Covered Strawberries - 7 Best Tips for a Delectable Delight
You know when you bite into a chocolate covered strawberry? it’s like an explosion of flavor. now, imagine that but with carob chocolate strawberries ! oh my gosh, it's an indulgent experience with a healthy twist.
Here’s how to take your carab covered strawberries to the next level with my favorite tips and secrets .
Pro Tips & Secrets
First off, let’s talk chef's personal insights . always use high-quality carob chips . that premium chocolate alternative makes all the difference! for time saving techniques, melt your carob in the microwave.
Seriously, pop it in for 30 seconds, stir, and repeat until it’s smooth. quick and easy, right?
When it comes to flavor enhancement , consider adding a pinch of sea salt to amp up that sweetness or even a drop of vanilla extract while melting the carob.
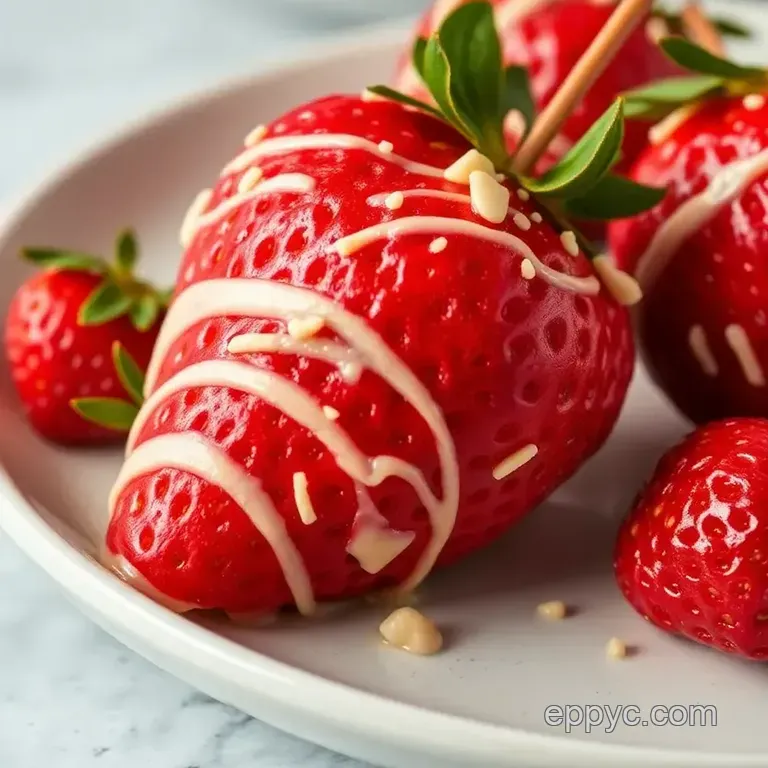
It’s like a party for your taste buds! and don’t forget about presentation; a little sprinkle of crushed nuts on top adds texture and a fantastic look.
Use a piping bag or even a zip-lock bag with a corner cut off to drizzle carob over your strawberries for that gourmet finish.
Perfect Presentation
Plating these beauties is a game changer. you want to make them instagram worthy! simple plating techniques include arranging the strawberries in a circle, with a few scattered around.
Think artful, not an afterthought. for garnish ideas , fresh mint leaves or edible flowers can take these from ordinary to spectacular!
Color combinations matter too. the vibrant red of the strawberries against the rich brown of the carob creates visual appeal.
Plus, consider including a colorful dip on the side, like whipped coconut cream! it adds to the visual banquet and lets folks get a little creative.
Storage & make-ahead
Here’s a good one: you can make these carab covered strawberries ahead of time. just store them in an airtight container in the fridge for about 3 to 5 days .
Need to know how long they last fresh? not too long, honestly. strawberries are best enjoyed fresh, but they’ll be fine for a few days.
For preservation methods , try placing parchment paper between layers of strawberries in the container. it’s a little trick i learned to avoid that sad strawberry mush.
When it comes to reheating, there’s no cooking involved. just enjoy them cold straight from the fridge!
Creative Variations
Now, let’s spice things up with some creative variations . you can swap regular strawberries for seasonal fruits like raspberries or banana slices.
The flavor is limitless! need something special for your kid-friendly dessert recipes ? try drizzling your strawberries with peanut or almond butter for added richness.
Consider different dietary modifications too. You could make these dairy-free by sticking with vegan chocolate alternatives. If you're looking for no added sugar recipes , opt for fresh ripe strawberries they’re naturally sweet, baby!
Complete Nutrition Guide
Let’s break this down. These Carab Covered Strawberries aren't just tasty; they come with some great nutritional benefits. Carob is naturally high in fiber and lower in fat compared to cocoa, making it a superb guilt free indulgence!
Each strawberry packs around 85 calories with some protein, giving you a low-calorie snack option without sacrificing on the fun! plus, they’ll keep you on track if you’re watching your sugar intake.
Always a good idea to be mindful of portions perfect for a refreshing dessert pairing.
Conclusion
Honestly, these carab covered strawberries 7 best tips for a delectable delight are so easy to make and utterly divine.
If you’re looking for healthy dessert recipes that are both satisfying and impressive, then you’ve hit the jackpot with this one.
Gather your friends, make these treats, and watch them disappear in seconds! it’s the perfect way to enjoy fresh fruit while still feeling like you’re indulging.
Get in the kitchen, have fun, and let your creativity shine! you got this!
Frequently Asked Questions
What are Carab Covered Strawberries - 7 Best Tips for a Delectable Delight?
Carab Covered Strawberries are fresh strawberries coated in a sweet, creamy carob chocolate. This twist on the traditional chocolate covered strawberries offers a delicious, caffeine free alternative, perfect for health conscious dessert lovers.
The recipe includes seven best tips to maximize flavor and texture while ensuring an enjoyable experience for both beginners and experienced cooks.
How do I ensure my carob coating is smooth and well adhered?
To achieve a smooth coating, use high-quality carob chips and melt them with a bit of coconut oil. Ensure that your strawberries are completely dry before dipping, as moisture can prevent the carob from adhering properly.
Can I make alternatives for Carab Covered Strawberries?
Absolutely! You can use white carob chips for a unique flavor or mix in dried fruits for extra texture. You might also consider substituting carob with unsweetened chocolate, keeping in mind that this will change the flavor profile and include caffeine.
How should I store my Carab Covered Strawberries?
Store the Carab Covered Strawberries in an airtight container in the refrigerator for up to 3 days. For best results, avoid stacking them to prevent damage to the coating. If you need to store them longer, consider freezing them, but be aware that the texture might change.
What are some health benefits of using carob instead of chocolate?
Carob is naturally sweet, low in fat, and caffeine free, making it a great alternative for those sensitive to caffeine or looking to reduce sugar intake. It also contains beneficial fiber and antioxidants, which may help support digestion and overall health.
What are the best toppings for Carab Covered Strawberries?
Popular toppings include crushed nuts like almonds or walnuts for added crunch and flavor. Sea salt flakes can enhance the sweetness, while a drizzle of melted nut butter adds richness. Feel free to get creative with sprinkles or edible flowers for a decorative touch!
Carab Covered Strawberries 7 Best Tips For A Del

Ingredients:
Instructions:
Nutrition Facts:
| Calories | 85 |
|---|---|
| Fat | 5 g |
| Fiber | 1 g |
