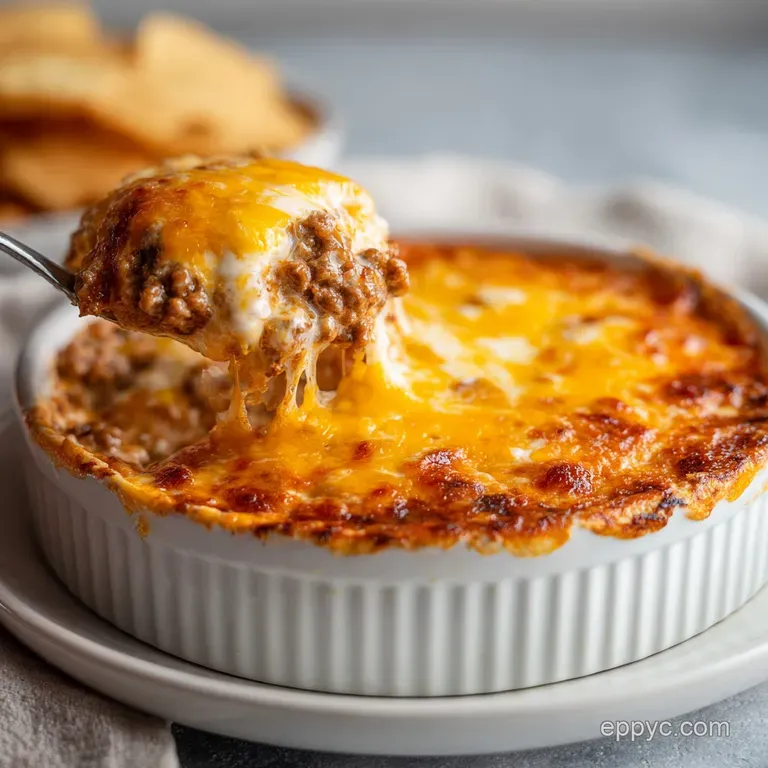
Cheesy Beef Rotel Dip: Creamy and Savory

- Time: Active 10 minutes, Passive 20 minutes, Total 30 minutes
- Flavor/Texture Hook: Silky, molten cheese punctuated by spicy chilies and crispy beef crumbles
- Perfect for: Game day gatherings, quick weeknight snacks, or beginner friendly parties
- Creating the Ultimate Cheesy Beef Rotel Dip
- Secrets Behind the Silky Texture
- Essential Dip Metrics and Timing
- Selecting Your Primary Dip Components
- Minimal Tools for Maximum Results
- Detailed Step by Step Guide
- Fixing Common Dip Texture Issues
- Creative Flavor and Spice Twists
- Smart Storage and Warming Tips
- Pairing Your Dip with Sides
- Kitchen Myths Debunked
- Recipe FAQs
- 📝 Recipe Card
Creating the Ultimate Cheesy Beef Rotel Dip
You've probably been told that the only way to get a truly smooth dip is to let it sit in a slow cooker for four hours until the edges start to crust over. Honestly, forget everything you've heard about that slow burn method.
While it's convenient for a crowd, it often leads to a greasy separation where the oil from the beef pools on top, and the cheese loses its structural integrity. You don't need half a day to make something this iconic, you just need twenty minutes on a stove and a bit of focus on your pan temperature.
I used to think that dumping everything into a bowl and hitting 'start' was the peak of efficiency, but the flavor was always flat. The magic happens when you treat the ground beef like a steak rather than a filler.
By searing the meat until it develops a mahogany crust, you're building a foundation of flavor that no slow cooker can replicate. This is about working smarter with your heat, not longer with your timer.
We are going to use digital precision to make sure every bite is as velvety as the last, without that dreaded grainy texture that ruins a good party snack.
We've all seen those dips that look like a science experiment gone wrong after sitting out for ten minutes. This version stays fluid and glossy because we're going to use a specific emulsion technique that locks the fat into the cheese. It’s heartfelt cooking backed by a little bit of kitchen technology.
Once you see how much better the beef tastes when it's actually browned properly, you'll never go back to the "dump and stir" method again. Let's empower your kitchen skills and get this onto the table while it’s still bubbling and bright.
Secrets Behind the Silky Texture
Most people assume the cheese does all the heavy lifting, but the secret is in how we manage the moisture and the fat. If you just melt cheese into hot meat, the fat often separates, leaving you with a yellow oil slick on top of your bowl.
We avoid this by using a specific order of operations that creates a stable bond between the liquids and the fats.
- The Emulsion Bridge: The processed cheese contains emulsifiers like sodium citrate that act as a glue, holding the fat from the beef and the water from the tomatoes together in a smooth suspension.
- Thermal Stability: Adding softened cream cheese introduces a different type of fat and protein structure that helps prevent the Velveeta from "breaking" or becoming oily when exposed to high heat.
- Acid Balance: The pickled jalapeño juice isn't just for heat; the acetic acid cuts through the heavy dairy fats, making the dip feel lighter on the palate and preventing it from tasting cloying.
- Maillard Depth: Searing the beef undisturbed creates complex flavor compounds that dissolve into the cheese, providing a savory backbone that prevents the dip from being just "salty."
| Thickness | Internal Temp | Rest Time | Visual Cue |
|---|---|---|---|
| 1/4 inch crumble | 165°F (Beef) | 2 minutes | Deep mahogany brown with no pink |
| 1/2 inch cube cheese | N/A | 1 minute | Rounded edges starting to slump |
| Final Dip Slump | 150°F | 5 minutes | Glossy surface with slow moving bubbles |
The consistency of your dip is a direct result of how you handle the initial sear. If you crowd the pan with cold meat, the beef will steam in its own juices rather than fry. This leads to a grey, rubbery texture that gets lost in the cheese.
By using a large skillet and letting the meat sit for a full three minutes without stirring, you're using technology (heat transfer) to your advantage. This creates a texture contrast between the silky cheese and the slightly crispy beef bits that makes the dish addictive.
Essential Dip Metrics and Timing
When you're trying to sync up a snack with the start of a game or a movie, timing is everything. This recipe is designed to be lean on tools and heavy on results. You only need one large skillet and a spatula, which means cleanup is almost non existent.
We are focusing on high-quality steps that don't waste your afternoon but still deliver a professional grade appetizer.
| Component Analysis | Science Role | Pro Secret |
|---|---|---|
| Velveeta Cheese | Emulsifying Agent | Cube into 1 inch pieces for even melting without scorching the bottom. |
| Ground Beef (90/10) | Structural Protein | Don't go leaner than 90/10 or the dip will feel dry and "bready." |
| Ro Tel Tomatoes | Acid/Liquid Balance | Drain exactly half the liquid to control the final viscosity perfectly. |
| Cream Cheese | Texture Stabilizer | Ensure it is completely soft to prevent white flecks in the finished dip. |
Building a great dip is a lot like managing a digital project; you need the right inputs at the right time to get the desired output. If you add the cold milk too early, you'll shock the cheese and cause it to clump. If you skip the jalapeño juice, the flavor profile remains two dimensional. It's these small, heartfelt touches that transform a standard Cheesy Rotel Dip into something your friends will actually ask for the recipe for.
Selecting Your Primary Dip Components
You want ingredients that play well together under heat. I always reach for the 90/10 ground beef because it provides enough fat for flavor without requiring a massive cleanup of grease afterward.
If you use 80/20, you'll spend ten minutes just trying to drain the pan, and you'll likely lose some of those precious browned bits in the process.
- 1 lb lean ground beef (90/10): Provides the meaty texture. Why this? Lean beef prevents an oily film from forming on top of the dip.
- Substitute: Ground turkey (Add 1 tsp olive oil to help it brown).
- 0.5 cup yellow onion, finely diced: Adds aromatic sweetness. Why this? Onions soften into the cheese, adding depth without being crunchy.
- Substitute: Shallots for a milder, more sophisticated flavor.
- 2 cloves garlic, minced: Essential for that savory punch. Why this? Fresh garlic provides a sharp contrast to the creamy dairy.
- Substitute: 1 tsp garlic powder if you're in a rush.
- 1 tbsp low sodium taco seasoning: The primary flavor driver. Why this? Low sodium allows you to control the saltiness of the salty Velveeta.
- Substitute: A mix of cumin, chili powder, and smoked paprika.
- 16 oz Velveeta cheese: The gold standard for melting. Why this? Its unique chemical makeup ensures a perfectly smooth, clump free melt.
- Substitute: 12 oz sharp cheddar plus 1 tsp cornstarch and 4 oz extra milk.
- 4 oz full fat cream cheese: For richness and stability. Why this? It adds a tangy note and prevents the dip from thinning out too much.
- Substitute: Mascarpone for a decadently creamy, less tangy version.
- 10 oz can Ro Tel Diced Tomatoes and Green Chilies: The classic kick. Why this? The canned green chilies provide consistent heat and acidity.
- Substitute: Fresh pico de gallo with an extra splash of lime juice.
- 0.25 cup whole milk: To adjust the flow. Why this? The fat in whole milk keeps the emulsion stable.
- Substitute: Heavy cream for a much richer, thicker dip.
- 0.25 cup fresh cilantro, chopped: For a bright finish. Why this? It cuts through the heavy fat with a herbal freshness.
- Substitute: Flat leaf parsley if you are one of those "cilantro tastes like soap" people.
- 1 tbsp pickled jalapeño juice: The secret ingredient. Why this? The vinegar and spice "wake up" the heavy cheese flavors.
- Substitute: Fresh lime juice or apple cider vinegar.
Minimal Tools for Maximum Results
I am a big fan of using technology to simplify, but sometimes the best tech is a well seasoned pan. You don't need a kitchen full of gadgets for this. A large, heavy bottomed skillet is your best friend here because it distributes heat evenly, preventing the cheese from burning in the corners.
If you have a cast iron skillet, use it! It holds heat beautifully, which keeps the dip molten for longer once you take it to the table.
You will also want a sturdy silicone spatula. Wood is great, but silicone allows you to scrape the bottom of the pan completely, ensuring that every bit of melted cheese is incorporated and nothing gets left behind to scorch.
If you want to be truly precise, a digital instant read thermometer can help you check that your beef has reached 165°F before you move on to the cheese stage, ensuring food safety without overcooking the meat into pebbles.
Finally,, make sure you have a colander or a slotted spoon ready for draining the beef. One mistake I made early on was trying to drain the fat by holding the lid over the pan I ended up losing half my onions down the sink.
Use the right tools for the job, even if they are simple, to empower your cooking process and keep things stress free.
Detailed step-by-step Guide
- Prep the skillet. Place a large skillet over medium high heat. Add the ground beef and diced onion together. Note: Adding them at the same time allows the onion to soften in the rendering beef fat.
- Sear the beef. Break the meat into small crumbles with your spatula and let it sear undisturbed for 2-3 minutes until a dark brown crust forms on the bottom.
- Aromatize the base. Once the beef is mahogany colored and onions are translucent, drain all visible fat from the pan. Stir in the minced garlic and taco seasoning, cooking for 60 seconds until the air smells intensely savory and spicy.
- Introduce the dairy. Lower the heat to medium low. Add the cubed Velveeta and softened cream cheese. Note: Cubing the cheese ensures it melts at the same rate, preventing hot spots.
- Add the tomatoes. Pour in the can of Ro Tel, ensuring you have drained exactly half the liquid.
- Emulsify the sauce. Stir continuously with a silicone spatula until the cheeses are fully melted and a uniform, glossy orange sauce forms.
- Adjust the viscosity. If the dip is too thick to flow off a chip, gradually stir in the whole milk one tablespoon at a time until it reaches a heavy cream consistency.
- Brighten the profile. Stir in the pickled jalapeño juice. Note: This adds a necessary hit of acid to balance the richness of the cream cheese.
- Final heat check. Allow the dip to sit on the low heat for 1-2 minutes until tiny bubbles just begin to break the surface.
- Garnish and serve. Remove from heat and sprinkle with fresh chopped cilantro. Serve immediately in the skillet or a warmed bowl while the cheese is still molten and stretching.
Fixing Common Dip Texture Issues
Even with the best intentions, cheese can be finicky. The most common disaster is the "grease pool," where the fat separates from the solids. This usually happens if the heat is too high or if the beef wasn't drained properly. If you see oil floating on top, don't panic.
You can often fix it by adding a splash of warm milk and whisking vigorously to pull the emulsion back together.
Why Your Dip Separates
If your dip looks like it has a layer of yellow oil on top, the emulsion has broken. This is often caused by the cheese getting too hot, which causes the proteins to tighten and squeeze out the fat. To fix this, remove the pan from the heat immediately and stir in a tablespoon of room temperature milk.
The moisture and the cooling effect help the proteins relax and re absorb the fat.
Why Your Dip is Gritty
A gritty or grainy texture usually means the cheese was melted too quickly or you used a pre shredded cheese with too much anti clumping powder (cellulose). Since we are using Velveeta, this is rare, but it can happen if the heat is cranked to high. The solution is to keep the heat at medium low and be patient.
If it’s already grainy, adding a little extra cream cheese can sometimes smooth it out by introducing more stable fats.
| Problem | Root Cause | Solution |
|---|---|---|
| Oily Surface | High heat or poorly drained beef | Stir in 1 tbsp milk and remove from heat. |
| Thickens too fast | Evaporation or too much Velveeta | Whisk in more milk or jalapeño juice. |
| Bland Flavor | Not enough salt or acid | Add an extra teaspoon of taco seasoning or lime juice. |
Common Mistakes Checklist
- ✓ Never skip browning the beef; grey meat leads to a bland, mushy dip.
- ✓ Avoid high heat once the cheese is in the pan; low and slow prevents scorching.
- ✓ Don't drain all the Ro Tel juice; that liquid contains the concentrated flavor of the chilies.
- ✓ Always soften the cream cheese before adding; otherwise, you'll have white lumps that never melt.
- ✓ Pat the cilantro dry after washing; excess water will make the garnish look wilted and muddy.
Creative Flavor and Spice Twists
While the classic version is a crowd pleaser, you can easily use technology like a smoker or different regional ingredients to change the profile. Sometimes I’ll swap the beef for spicy chorizo if I want a more aggressive, smoky flavor.
If you do this, you definitely won't need the extra taco seasoning, as chorizo is already packed with paprika and garlic.
Chef's Tip: If you want a deeper, more complex flavor, add a teaspoon of instant espresso powder to the beef while browning. It won't taste like coffee, but it will make the beef taste "meatier" and more savory.
If you are looking for something a bit more substantial, similar to beef dip sandwiches, you can keep the beef crumbles larger and add a splash of beef broth to the cheese. This gives it a more "pot roast" feel while keeping that addictive cheese base. Another great variation is to add a can of black beans (rinsed and dried) for a "Loaded Tex Mex" version that has more texture and fiber.
| Servings | Ingredient Adjustments | Skillet Size | Cook Time |
|---|---|---|---|
| 4-6 People | 0.5 lb beef, 8 oz Velveeta | 8 inch skillet | 20 minutes |
| 10-14 People | 1 lb beef, 16 oz Velveeta | 12 inch skillet | 30 minutes |
| 20-25 People | 2 lb beef, 32 oz Velveeta | Large Dutch Oven | 45 minutes |
Smart Storage and Warming Tips
If you happen to have leftovers (which is rare in my house), this dip stores beautifully. However, you can't just toss it in the microwave for five minutes and expect it to be good. The cheese will become rubbery. Instead, store it in an airtight container in the fridge for up to 4 days.
When you're ready to eat it again, the stove is your best bet.
To reheat, put the dip back in a small saucepan over low heat. Add a splash of milk to help loosen it up, as the starch and protein will have tightened up in the cold. Stir constantly until it’s creamy again.
If you must use a microwave, do it in 30 second bursts, stirring in between each one to ensure even heating.
For a zero waste approach, any leftover dip makes an incredible sauce for "taco pasta." Just toss the cold dip with hot macaroni or shells, add a little pasta water to thin it out, and you have a complete meal in minutes.
You can also use the leftover beef cheese mixture as a filling for quick stuffed peppers or as a topping for baked potatoes. Don't let those savory scraps go to waste!
Pairing Your Dip with Sides
A dip is only as good as what you're dunking into it. While standard corn chips are the traditional choice, I like to offer a variety of textures to keep the experience interesting.
Thick cut kettle chips provide a satisfying "shatter" that holds up well to the heavy beef, while fresh bell pepper strips or cucumber slices offer a refreshing, watery crunch that cleanses the palate between cheesy bites.
If you want to go the extra mile, try serving this alongside some warm, soft pretzel bites. The salt on the pretzels and the chewy dough are a match made in heaven for the molten Velveeta.
For a lower carb option, pork rinds are surprisingly good; they stay crispy even when loaded with dip and add an extra layer of savory pork flavor.
- Classic: Sturdy white corn tortilla chips (avoid the thin "restaurant style" which will break).
- Vegetable: Jicama sticks or celery anything with a high water content to offset the salt.
- Bread: Toasted baguette slices or even cubes of sourdough for a fondue style vibe.
- Unique: Fried pita chips seasoned with a little extra cumin and lime zest.
Kitchen Myths Debunked
One of the biggest myths in the dip world is that you have to use "real" cheese for it to be high-quality. In the world of dips, "real" cheese (like aged cheddar) is actually your enemy because it doesn't have the emulsifying salts needed to stay smooth when melted. It will inevitably turn oily and stringy.
Using Velveeta isn't a shortcut; it's a technical choice for a specific texture.
Another common misconception is that you should "boil" the dip to make sure it's hot. Never let your cheese dip reach a rolling boil. Boiling causes the proteins to denature and clump together, leading to a grainy texture that is impossible to fix.
You want a gentle simmer at most just enough to see a few lazy bubbles.
Finally, people often think that adding the tomatoes with all their juice is the best way to thin out the dip. While it does thin it, it also dilutes the cheese flavor significantly.
It is much better to drain half the juice and use milk or cream for thinning, as the dairy fat actually enhances the flavor of the cheese rather than washing it out. Trust the process, use your digital timer, and you'll have a dip that is the star of the show.

Recipe FAQs
How to avoid a grainy texture in the cheese?
Use medium low heat and stir continuously with a silicone spatula. Keeping the heat gentle ensures the cheeses melt and emulsify into a smooth, stable state without breaking down.
Is it true I need to slow cook this for four hours?
No, this is a common misconception. A quick twenty minute stovetop method prevents the dip from becoming greasy or losing its structural integrity.
How to get the best flavor from the ground beef?
Sear the meat undisturbed for 2-3 minutes. This builds a mahogany crust, creating a savory foundation similar to how we develop flavor in our cracking meat sauce.
How to thin the dip if it becomes too thick?
Stir in whole milk gradually. Add just enough to reach your desired consistency while maintaining the emulsified, creamy texture.
Can I prep parts of this recipe in advance?
Yes, brown the beef and onions up to two days ahead. Store the mixture in the refrigerator, then proceed with melting the cheeses on the stove when ready to serve.
How to ensure the dip stays fluid?
Drain all visible fat after browning the beef. Removing excess oil before adding the cheese prevents the dip from separating or forming an oily layer on top.
How to brighten the overall flavor of the dip?
Stir in the pickled jalapeño juice at the end. This addition cuts through the richness of the Velveeta and cream cheese for a balanced, tangy finish.
Cheesy Beef Rotel Dip

Ingredients:
Instructions:
Nutrition Facts:
| Calories | 177 kcal |
|---|---|
| Protein | 12.5 g |
| Fat | 10.6 g |
| Carbs | 5.6 g |
| Fiber | 0.4 g |
| Sugar | 3.1 g |
| Sodium | 371 mg |
