Corned Beef Hash: Shatter Crisp Edges
- Time: Active 15 minutes, Passive 25 minutes, Total 40 minutes
- Flavor/Texture Hook: Shatter crisp edges with savory, salty umami
- Perfect for: Weekend brunch or a high protein breakfast rescue
- Crafting the Ultimate Crispy Corned Beef Hash at Home
- Mastering the Maillard Reaction and Starch Control
- The Physics of Achieving the Perfect Golden Crust
- Selecting Components for Maximum Flavor and Texture
- The Best Tools for a over High heat Sear
- A Foolproof Guide to Searing the Best Hash
- Avoiding Common Pitfalls for a Non Soggy Finish
- Adapting Your Beef Hash for Any Pantry
- Keeping Your Leftovers Crispy and Flavorful
- Completing the Meal with the Perfect Toppings
- Critical High in Sodium
- Recipe FAQs
- 📝 Recipe Card
Crafting the Ultimate Crispy Corned Beef Hash at Home
Picture this: it’s Sunday morning, the sunlight is hitting the kitchen counter just right, and there is a heavy cast iron skillet sitting on the stove. You drop a knob of butter, and it begins to sizzle and dance across the seasoned surface.
Then, the mixture of diced beef and potatoes hits the heat with a sound like a round of applause. That specific aroma salty, buttery, and slightly peppery is exactly why we’re here today.
I used to be the person who just threw everything in a pan and hoped for the best. The result? A soggy, grey pile of mush that looked more like cat food than a proper breakfast. I realized I was making a classic mistake: I was treating it like a stir fry instead of a steak.
After months of testing, I’ve learned that the secret isn't just in the ingredients, but in the patience to let the heat do its job without interference.
We are going to take that leftover brisket (or even a high-quality canned version) and turn it into something truly special. This isn't just about feeding yourself; it’s about that satisfying "crunch" you hear when your fork hits the crust. If you’ve ever enjoyed a Melt in-Your Mouth Beef Tenderloin recipe, you know that temperature control is everything when it comes to beef. Let's get into the mechanics of how to make this work every single time.
Mastering the Maillard Reaction and Starch Control
Starch Gelatinization: Par cooking the potatoes hydrates the starch granules, ensuring they are creamy inside before the outside hits the searing heat.
Maillard Reaction: Keeping the pan at a steady medium high heat allows the proteins in the beef to bond with sugars, creating that signature brown crust.
Evaporative Cooling: Removing excess moisture from the peppers and onions before adding the beef prevents the mixture from steaming instead of frying.
Surface Tension: Pressing the hash firmly into the pan maximizes the contact points between the food and the hot metal for even browning.
Optimal Searing Decision Guide
| Dice Size | Internal Temp | Rest Time | Visual Cue |
|---|---|---|---|
| 1/4 inch Cubes | 165°F (for eggs) | 2 minutes | Deep mahogany edges |
| 1/2 inch Cubes | 165°F (for eggs) | 4 minutes | Golden brown crust |
| Shredded Style | 160°F | 1 minute | Lacey, crispy fringes |
Using the right cut of meat makes a huge difference in how the fat renders out during the sear. If you’re looking for other ways to use up beef, you might find the same comfort in a Mississippi Pot Roast recipe, which relies on that low and slow breakdown of collagen. For our hash, however, we want the fat to act as a frying agent right there in the skillet.
The Physics of Achieving the Perfect Golden Crust
The "why" behind this dish comes down to moisture management. If your potatoes are too wet, the energy from your stove goes into boiling off water rather than browning the food. This is why we dice them small and ensure they are dry before they ever touch the butter.
Think of it like a laboratory experiment where the skillet is your reactor too much steam kills the reaction.
The Secret to this Corned Beef Hash
The magic happens through "Interfacial Heat Transfer." By pressing the mixture down, you eliminate air pockets, allowing the butter to fry the bottom layer into a unified, crispy sheet.
Chef's Tip: Freeze your butter for 10 minutes before grating it into the pan; the tiny frozen shards melt slowly, creating micro pockets of steam that puff up the potato edges before they crisp.
Another trick I swear by is adding a tiny splash of Worcestershire sauce directly onto the beef while it's still on the cutting board. The vinegar and molasses in the sauce help speed up the browning process while adding a deep, fermented funk that cuts through the richness of the fat.
Selecting Components for Maximum Flavor and Texture
Choosing your elements isn't just about grabbing what's in the fridge. I prefer Yukon Gold potatoes because they have a naturally buttery flavor and a medium starch content that holds its shape better than a Russet.
For the beef, if you aren't using leftovers, look for a flat cut brisket that has been brined properly it has the best ratio of lean meat to fat for dicing.
Component Analysis Table
| Ingredient | Science Role | Pro Secret |
|---|---|---|
| Yukon Gold Potatoes | Texture Foundation | Rinse in cold water twice to remove excess surface starch |
| Corned Beef Brisket | Fat & Protein Source | Dice while cold to keep the fat from smearing |
| Yellow Onion | Sugar for Browning | Dice smaller than the beef so they melt into the crust |
| Worcestershire Sauce | Acidity & Umami | Adds a "dark" flavor profile that balances the salt |
When you’re prepping your vegetables, try to keep the red bell pepper and onion at a similar size to the beef. This ensures that every forkful has a bit of everything. Consistency in dicing isn't just for looks; it ensures that the cooking time is uniform across the entire pan.
If you enjoy recipes that build deep flavor through simple aromatics like onion and garlic, you should definitely check out this Recipe with Ground beef and rice for a quick weeknight alternative. But for now, let's focus on getting that skillet screaming hot for the main event.
The Best Tools for a over High heat Sear
To get that restaurant quality finish, you really need a heavy bottomed pan. A cast iron skillet is the gold standard here because it retains heat like a battery. Once it gets hot, it stays hot, even when you dump a pound of cold potatoes into it.
A thin non stick pan will lose its temperature immediately, leading to a grey, steamed mess.
For the Hash Base
- 12 inch Cast Iron Skillet: Provides the thermal mass needed for a deep sear.
- Fish Spatula: The thin, flexible metal is perfect for getting under the crust without breaking it.
- Large Mixing Bowl: For tossing the ingredients together before they hit the pan.
For Serving (Optional)
- Small Lidded Pan: If you prefer to steam your eggs separately rather than nesting them in the hash.
- Sharp Chef's Knife: Crucial for those 1/4 inch cubes that make the texture so consistent.
Don't worry if you don't have a cast iron. A heavy stainless steel pan will work, but you'll need to be more generous with the butter to prevent sticking. The goal is to create a surface that allows the meat and potatoes to release naturally once that crust has formed.
Trust the process if it’s sticking, it usually means it’s not done browning yet.
A Foolproof Guide to Searing the Best Hash
Before we start, make sure all your ingredients are prepped. This moves fast once the heat is on. We’re using 1.5 lbs of Yukon Gold potatoes and 1 lb of diced corned beef. Have your 3 tbsp of butter standing by.
- Par cook the potatoes. Boil the 1/4 inch diced Yukon Golds in salted water for 5 minutes until just barely tender. Note: This ensures the insides are soft while the outsides get crispy.
- Dry the potatoes. Drain and spread the potatoes on a paper towel to remove every drop of moisture.
- Sauté the aromatics. Melt 1 tbsp of butter in the skillet and add the diced onion and red bell pepper. Cook until softened and slightly translucent.
- Incorporate the beef. Add the 1 lb of diced corned beef to the skillet with the veggies. Cook for 3 minutes until the beef fat begins to render and sizzle.
- Combine the base. Clear the skillet, add the remaining 2 tbsp of butter, and toss in the dried potatoes.
- Season the mix. Stir in 1 tbsp Worcestershire sauce, 1/2 tsp black pepper, 1/4 tsp kosher salt, and a pinch of cayenne.
- The Great Press. Use a flat spatula to press the entire mixture down firmly into the skillet.
- Wait for the crust. Leave it alone for 6-8 minutes over medium high heat until the bottom is deep golden and crackling. Note: Resist the urge to stir!
- The Flip. Carefully turn the hash over in sections. Press down again and cook for another 5 minutes.
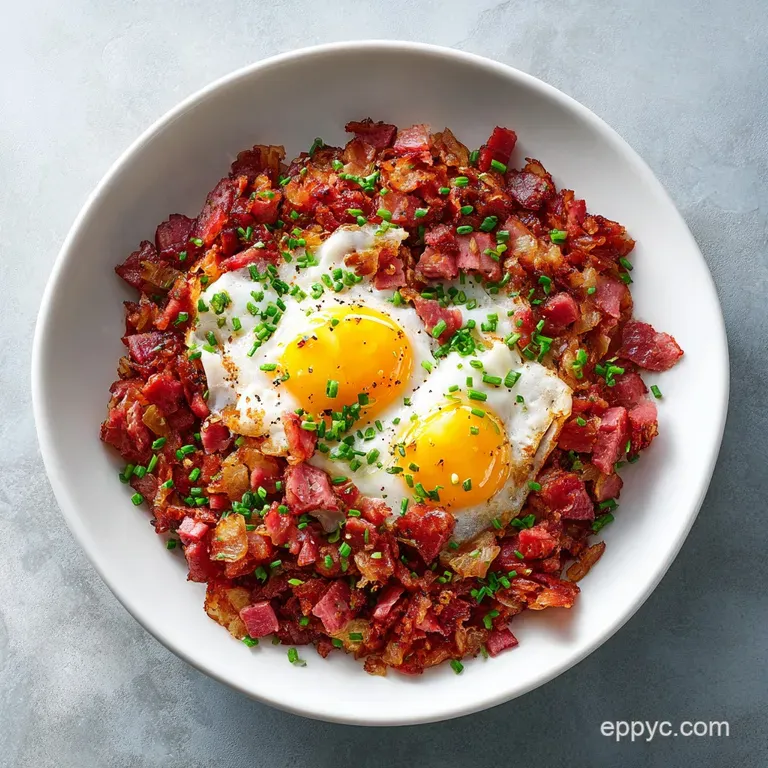
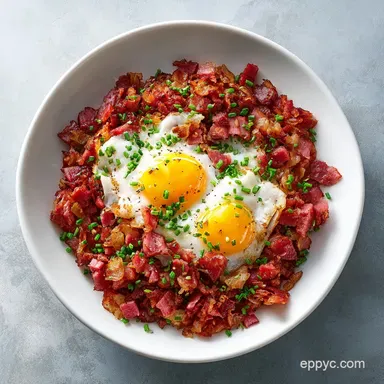
- Add the eggs. Create 4 small wells in the hash, crack an egg into each, cover the pan, and cook for 3-4 minutes until whites are set but yolks are runny.
Chef's Tip: For an even deeper flavor, add 1/2 teaspoon of smoked paprika when you add the black pepper. It mimics the flavor of a wood fired grill and adds a beautiful red hue to the potatoes.
Avoiding Common Pitfalls for a Non Soggy Finish
The most common heartbreak in the world of Corned Beef Hash is the "mush factor." This usually happens because of trapped steam. If you notice your hash is looking wet, it's likely because you crowded the pan or didn't dry the potatoes well enough.
Managing Moisture Levels
If you find that the onions and peppers are releasing too much liquid, push them to the side of the pan and let that liquid evaporate before mixing them back into the potatoes. You want fat to be the only liquid in that skillet.
Fixing a Stuck Crust
If the hash is sticking to your cast iron, don't panic. This often happens if the pan wasn't preheated long enough. Add a tiny drizzle of oil around the edges of the pan and let it seep under. Wait another minute the food will usually release itself once the proteins have fully caramelized.
Troubleshooting Quick Fixes
| Problem | Root Cause | Solution |
|---|---|---|
| Hash is falling apart | Potatoes overcooked during boiling | Add a tablespoon of flour to act as a binder |
| Crust is burnt but inside cold | Heat was too high | Lower heat and cover with a lid for 2 minutes |
| Tastes too salty | Corned beef brine was heavy | Add a squeeze of lemon juice or extra unsalted butter |
Common Mistakes Checklist
- ✓ Forgot to dry the potatoes (results in steaming instead of frying).
- ✓ Stirred too often (prevents the crust from forming).
- ✓ Diced the beef too large (won't crisp up at the same rate as potatoes).
- ✓ Used a cold skillet (everything will stick immediately).
- ✓ Skipped the Worcestershire (loses that essential hit of acidity).
Adapting Your Beef Hash for Any Pantry
Sometimes you don't have a leftover brisket sitting in the fridge, and that's okay. You can still make an incredible meal using pantry staples. The key is adjusting your salt and fat levels based on what you’re substituting.
| Original Ingredient | Substitute | Why It Works |
|---|---|---|
| Cooked Brisket | Canned Corned Beef | High fat content; sears very quickly. Note: Reduce added salt. |
| Yukon Gold Potatoes | Sweet Potatoes | Adds a sugary caramelization. Note: Cook 2 mins less. |
| Unsalted Butter | Beef Tallow | Provides an intense, meaty flavor profile. |
If you're using canned corned beef, be aware that it has a much higher fat to protein ratio. You might not need all 3 tablespoons of butter. I usually start with just one and let the canned beef provide the rest of the frying oil.
It will produce a much "finer" texture, almost like a crispy spread, which is delicious in its own way.
For those who love a hearty meat forward sauce but want a different vibe, my Proper Blokes Bolognese recipe is another great way to use those heavy bottomed pans to build complex flavors.
Utilizing Canned Corned Beef Hash Recipes
When working with the canned version, I recommend chilling the can in the fridge for an hour before opening. This firms up the fat, allowing you to dice the contents into cubes rather than having it crumble into a paste. It makes a world of difference in the final texture.
Keeping Your Leftovers Crispy and Flavorful
If you somehow end up with leftovers, you’ve got to store them correctly. Putting hot hash into a plastic container and sealing it will turn that beautiful crust into a soggy sponge within minutes.
Storage: Let the hash cool completely at room temperature. Place it in a glass container with a piece of paper towel on top to absorb any rising moisture. It will stay fresh in the fridge for up to 3 days. I don't recommend freezing it, as the potatoes tend to get grainy and mealy when thawed.
Reheating: Never use the microwave! It’s the enemy of the crust. Instead, toss the leftovers back into a hot, dry skillet over medium heat. Let it sit undisturbed for 4 minutes until it sizzles, then flip. It’ll be nearly as good as the first time.
Zero Waste Tip: Don't throw away those potato peels or onion ends! You can toss them with a little oil and salt and roast them into "kitchen snacks," or keep them in a bag in the freezer to make a quick vegetable stock later.
Even the leftover fat in the pan can be wiped up with a piece of toast don't let that flavor go to waste!
Completing the Meal with the Perfect Toppings
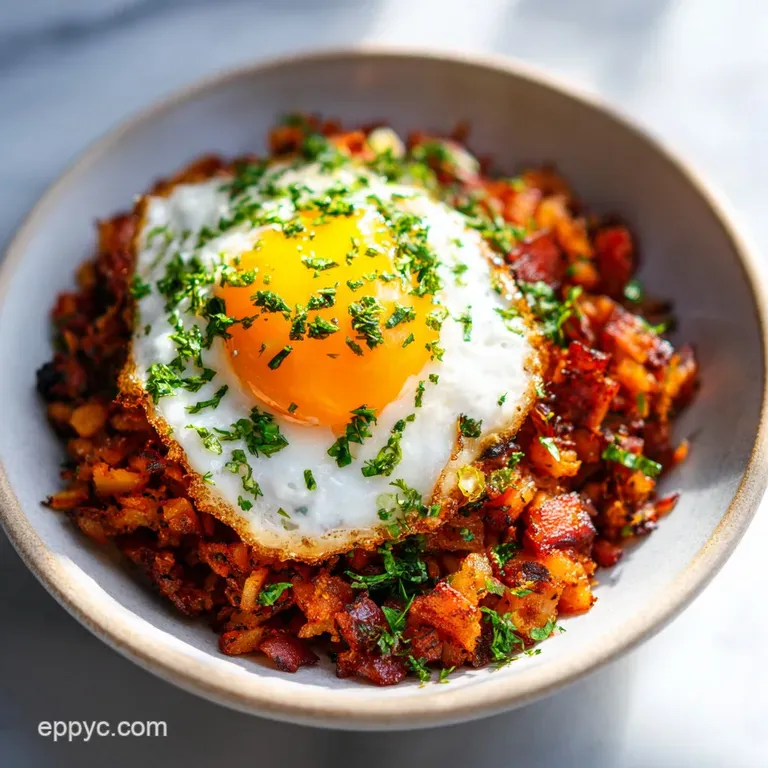
A great hash is only half the battle; how you dress it up at the table is what makes it a "masterclass" meal. Personally, I think a heavy hand with the fresh Italian parsley is non negotiable. The brightness of the herbs cuts right through the heavy, savory notes of the beef.
- Hot Sauce: A vinegar based sauce like Tabasco or Cholula provides the necessary acid to balance the fat.
- Pickled Onions: Adding a few pink pickled onions on top adds a crunch and a pop of color.
- Horseradish Cream: If you want to get fancy, mix some prepared horseradish with Greek yogurt or sour cream for a sharp, cooling dollop.
Decision Shortcut
- If you want maximum crunch, use a larger skillet to spread the mixture thinner.
- If you want maximum richness, use leftover brisket fat instead of butter.
- If you want a quick cleanup, skip the eggs in the pan and serve it as a side to a simple omelet.
Whether you're making this for a crowd or just a quiet morning for yourself, remember that the pan is your friend. Don't rush it. Let that sizzle talk to you, and wait for the aroma of browning beef to tell you it's time to flip. This is soulful, heartfelt cooking that turns simple ingredients into something you'll want to make every single weekend. If you ever want to transition this vibe into a dinner setting, look into The Hearty Stuffed recipe for a similar beef and veg comfort experience. Happy cooking!

Critical High in Sodium
1211 mg mg of sodium per serving (53% % of daily value)
American Heart Association recommends limiting sodium intake to about 2,300mg per day.
Tips to Reduce Sodium in Corned Beef Hash
-
Reduce Corned Beef-25%
Corned beef is very high in sodium. Try using half the amount of corned beef or substituting with a lower sodium cooked roast beef. Rinse corned beef well before dicing.
-
Omit Added Salt-15%
Eliminate the added kosher salt entirely. The corned beef and Worcestershire sauce already contribute a significant amount of sodium. Taste the dish before adding any additional salt.
-
Low-Sodium Worcestershire-10%
Use a low-sodium Worcestershire sauce or reduce the amount used by half. Standard Worcestershire sauce can be surprisingly high in sodium.
-
Increase Potatoes & Veggies-10%
Increase the amount of potatoes and vegetables, like bell pepper and onion, to reduce the ratio of corned beef in the dish. This will naturally lower the sodium per serving.
-
Skip the Eggs-5%
While eggs are a good source of protein, they also contribute to the total sodium. Consider serving the hash without the fried egg on top or using fewer eggs.
-
Flavor with Herbs & Spices
Use plenty of fresh herbs and spices, like the parsley, black pepper, and cayenne pepper already in the recipe, to boost the flavor without adding sodium.
Recipe FAQs
What goes in a corned beef hash?
Diced corned beef, potatoes, and aromatics like onion and pepper. Traditionally, the diced components are cooked in rendered fat until a crisp crust forms, usually seasoned simply with salt, pepper, and sometimes Worcestershire sauce.
What's the secret to good corned beef hash?
Patience and moisture control are the secrets. You must par-cook the potatoes so they are tender inside, then dry them thoroughly before searing in a very hot, heavy skillet like cast iron.
Is corned beef hash good or bad for you?
It depends entirely on preparation and portion size. As a high sodium and high fat dish, moderation is key, though it is rich in protein and provides good carbohydrates for energy.
What type of meat is corned beef hash?
It is made from corned beef, which is typically cured brisket or round cut. If you are making a homemade version, the curing process is critical to achieve the signature flavor; applying the same flavor building principle to other meats is useful, such as in our SteakhouseStyle Steak with recipe.
How do I prevent my corned beef hash from becoming soggy?
Do not stir the hash once it hits the pan for the first 6-8 minutes. Sogginess results from trapped steam, so ensure potatoes are dry and use high heat to encourage immediate surface evaporation and browning (the Maillard reaction).
Should I boil or fry the potatoes first for the best texture?
Boil them briefly first until just fork tender, then dry them completely. This par-cooking gelatinizes the starch, ensuring a creamy interior while the subsequent frying creates a shatteringly crisp exterior.
Can I make corned beef hash without using leftover brisket?
Yes, you can substitute canned corned beef or use other leftover cooked meats. If using canned meat, reduce added salt significantly, and consider chilling it first so you can dice it properly rather than crumbling it into a paste.
Crispy Corned Beef Hash
Ingredients:
Instructions:
Nutrition Facts:
| Calories | 589 kcal |
|---|---|
| Protein | 31g |
| Fat | 35g |
| Carbs | 36g |
| Fiber | 4g |
| Sugar | 5g |
| Sodium | 1211mg |
