Easy Chicken Recipe with Garlic and Herbs
- Time: Active 10 minutes, Passive 12 minutes, Total 22 minutes
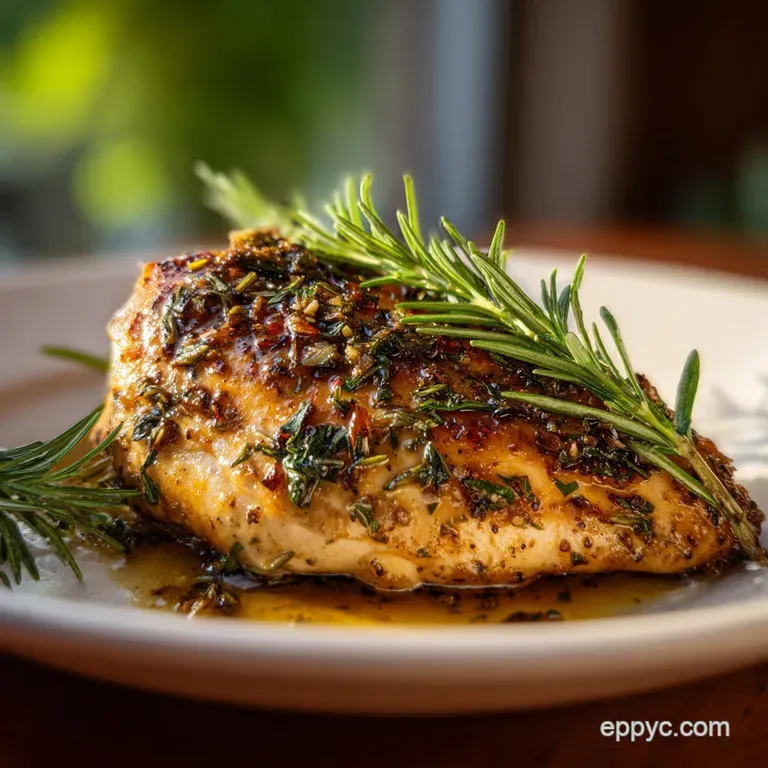
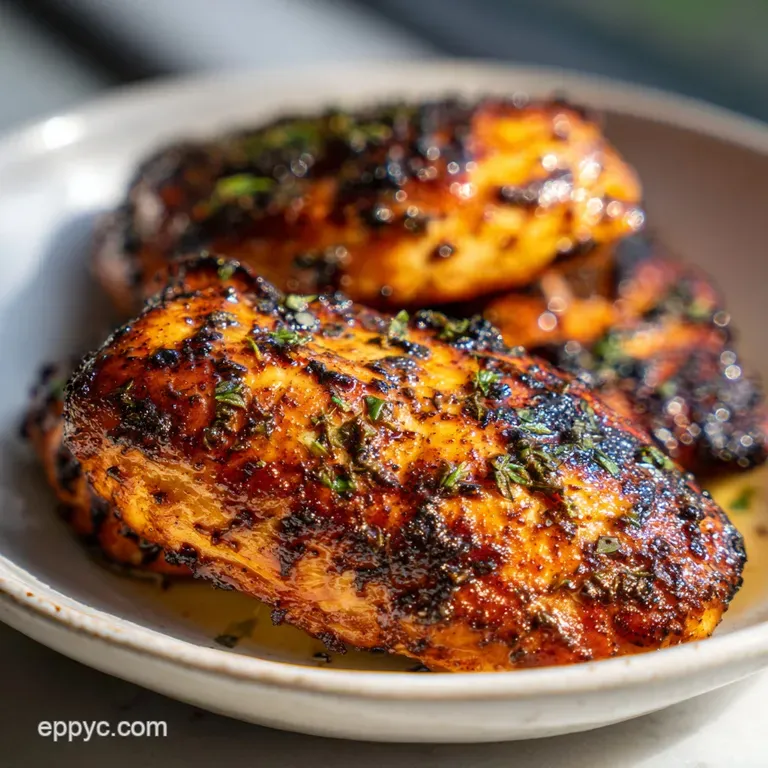
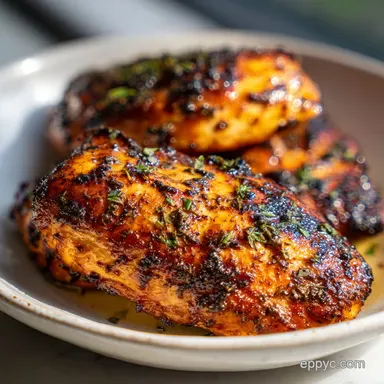
- Flavor/Texture Hook: Golden, crispy exterior with a velvety, garlic infused lemon butter glaze.
- Perfect for: Busy weeknights, budget conscious meal prep, or a quick protein boost.
- Mastering the Golden Sear for this Easy Chicken Recipe with Garlic and Herbs
- The Physics of the Maillard Crust and Butter Mounting
- Component Analysis and Ingredient Deep Dive
- Essential Components and Smarter budget-friendly Alternatives
- The Minimalist Kitchen Kit for Better Searing
- Step by Step Guide to a Flawless Finish
- How to Side Step These Common Searing Mistakes
- Creative Flavor Variations and Smart Ingredient Swaps
- Best Practices for Fresh Storage and Safe Reheating
- What to Serve With Your Garlic and Herb Chicken
- Recipe FAQs
- 📝 Recipe Card
Mastering the Golden Sear for this Easy Chicken Recipe with Garlic and Herbs
Picture this: it is 6:00 PM on a Tuesday, the kitchen light is humming, and you are staring at a pack of chicken breasts like they are a math problem you can't solve. We have all been there, hovering over a lukewarm pan, watching chicken turn that sad, rubbery gray color because the heat wasn't right or the meat was too thick.
This easy chicken recipe with garlic and herbs is a simple weeknight dinner that's packed with flavor, and it’s the exact dish I turn to when I need a "win" without spending forty dollars on groceries.
I remember the first time I actually got the sear right. I’d spent years being afraid of high heat, thinking I’d burn the house down. But when I finally let that avocado oil get shimmering hot and dropped the herb rubbed chicken in, the sizzle was like music. It wasn't just cooking; it was a transformation.
The aroma of rosemary and thyme hitting the fat instantly filled the room, and for a second, I felt like a real chef instead of just someone trying to feed a hungry family.
The beauty of this dish lies in its restraint. We aren't hiding the chicken under a mountain of heavy cream or complicated breading. Instead, we’re using technology well, the technology of a heavy pan and a meat mallet to empower you in the kitchen.
By pounding the meat to a uniform thickness, we ensure every bite is just as juicy as the last. It is a heartfelt way to cook that respects the ingredients and your time.
The Physics of the Maillard Crust and Butter Mounting
Surface Dehydration: Moisture is the enemy of a crisp sear, so patting the chicken bone dry allows the Maillard reaction to begin immediately rather than steaming the meat.
Emulsion Stability: Whisking cold butter into the warm chicken stock at the end creates a "beurre monté," a velvety sauce that clings to the meat instead of breaking into a greasy mess.
| Thickness | Internal Temp | Rest Time | Visual Cue |
|---|---|---|---|
| ½ inch | 160°F | 3 mins | Opaque center with clear juices |
| ¾ inch | 160°F | 5 mins | Golden brown edges, firm to touch |
| 1 inch | 160°F | 7 mins | Deep mahogany crust, bouncy texture |
Choosing the right thickness is the biggest decision you'll make today. If you go too thin, the chicken cooks in a flash but can dry out if you blink. If you leave it thick, you'll burn the outside before the middle even realizes it's in a pan.
Pounding it to a consistent half inch is the "sweet spot" that allows for a shatter crisp exterior and a silky interior.
Component Analysis and Ingredient Deep Dive
Before we get the pans hot, we need to talk about what’s going into them. We are using 1.5 lbs of chicken breasts, which is usually two large ones or three medium ones. The trick to keeping this budget friendly is using fresh herbs that might be growing in a windowsill pot or grabbing the "poultry pack" at the store which usually has exactly what you need.
| Ingredient | Science Role | Pro Secret |
|---|---|---|
| Avocado Oil | High smoke point | Won't smoke out your kitchen at the high temps needed for a crust. |
| Cold Butter | Emulsifier | Must be cold to create that glossy, restaurant style finish in the pan sauce. |
| Fresh Thyme | Volatile oils | Stripping the leaves from the stem releases the oils right as they hit the heat. |
| Chicken Stock | Deglazing agent | Lifts the "fond" (brown bits) off the pan to flavor the entire dish. |
The low sodium chicken stock is a non negotiable for me. It gives you total control over the salt levels. If you use full sodium stock and then add your sea salt, you might end up with something that tastes like a salt lick. We want the herbs and garlic to be the stars here, not the sodium.
Essential Components and Smarter budget friendly Alternatives
You don't need a pantry full of exotic spices to make this happen. Stick to the basics, but make them count. If fresh herbs are too pricey this week, dried ones will work if you know the conversion. Just remember that dried herbs are more concentrated, so you'll use about a third of the amount.
- 1.5 lbs Chicken Breasts: Pounded to ½ inch thickness. Why this? Ensures even cooking and maximum surface area for herbs.
- Substitute: Chicken thighs (boneless/skinless), but increase cook time by 2-3 minutes per side.
- 2 tbsp Extra Virgin Olive Oil: For the herb rub. Why this? Carries the fat soluble flavors of rosemary and thyme into the meat.
- Substitute: Grapeseed oil or any neutral oil you have on hand.
- 1 tbsp Fresh Rosemary: Minced finely. Why this? Provides a piney, earthy backbone to the flavor profile.
- Substitute: 1 tsp dried rosemary (crush it in your palm first).
- 6 cloves Garlic: Smashed and roughly chopped. Why this? Smashed garlic releases juices without burning as fast as minced garlic.
- Substitute: 1.5 tsp garlic powder rubbed directly onto the meat if you're in a rush.
- 1 tbsp Cold unsalted butter: Added at the very end. Why this? Thickens the sauce and adds a rich, velvety mouthfeel.
- Substitute: 1 tbsp heavy cream for a different kind of richness.
Using fresh lemon zest at the end is like turning on a light in a dark room. It brightens everything up and cuts through the richness of the butter and olive oil. If you don't have a fresh lemon, a splash of apple cider vinegar can provide that necessary hit of acidity, though you'll miss those floral citrus notes.
The Minimalist Kitchen Kit for Better Searing
I’m a firm believer that you don’t need a kitchen full of gadgets to cook like a pro, but two things will change your life: a heavy bottomed skillet and a digital meat thermometer. A cast iron skillet (like a Lodge) or a heavy stainless steel pan is essential here.
Non stick pans are great for eggs, but they are terrible for this easy chicken recipe with garlic and herbs because they don't allow the brown bits (the fond) to form on the bottom.
You’ll also need some plastic wrap or a heavy duty gallon bag to pound the chicken. This prevents "chicken spray" from getting all over your counters a mistake I only made once before realizing how much I hate deep cleaning a backsplash.
A simple meat mallet or even a heavy rolling pin works perfectly for this task.
step-by-step Guide to a Flawless Finish
1. Prep the meat. Place the 1.5 lbs chicken breasts between two sheets of plastic wrap. Pound them to a uniform ½ inch thickness. Note: This ensures the edges don't dry out before the center is safe to eat.
2. Season and herb. In a small bowl, mix the 2 tbsp extra virgin olive oil, 1 tsp sea salt, ½ tsp black pepper, 1 tbsp minced rosemary, and 1 tbsp thyme. Rub this mixture all over the chicken.
3. Heat the pan. Place your skillet over medium high heat and add 1 tbsp avocado oil. Wait 2-3 minutes until the oil is shimmering and just starting to faintly smoke.
4. Sear the first side. Carefully lay the chicken in the pan, laying it away from you to avoid oil splashes. Press down slightly with a spatula.
5. Develop the crust. Cook for 5-6 minutes without moving the chicken until a deep golden brown crust has formed. If the meat resists when you try to flip it, it’s not ready yet.
6. Flip and finish. Turn the chicken over. Cook for another 4-5 minutes. Use a digital thermometer to check for 160°F. Once reached, remove the chicken to a plate and tent loosely with foil.
7. Infuse the garlic. Lower the heat to medium. Add the 6 cloves of smashed garlic to the remaining fat in the pan. Sauté for 1 minute until fragrant and pale gold but not brown.
8. Deglaze the pan. Pour in the ¼ cup chicken stock. Use a wooden spoon to scrape up all those delicious brown bits from the bottom of the pan.
9. Mount the sauce. Turn off the heat. Add the 1 tbsp cold butter and 1 tsp lemon zest. Whisk constantly until the butter melts and the sauce looks glossy and slightly thickened.
10. Serve. Slice the chicken against the grain, pour the pan sauce over the top, and garnish with 1 tbsp fresh parsley.
How to Side Step These Common Searing Mistakes
The most common heartbreak with this dish is the "tough chicken" syndrome. It usually happens because people are terrified of undercooked poultry, so they cook it until it has the texture of a shoe. Remember the carry over cooking factor!
If you pull the chicken at 160°F, the internal temperature will continue to rise to the safe 165°F while it rests under the foil.
Why Your Chicken is Dry
If your chicken feels like cardboard, it’s likely because it wasn't pounded evenly. The thin parts overcooked while you were waiting for the thick parts to finish. Also, never skip the rest!
Cutting into the chicken the second it leaves the pan is like popping a water balloon; all the juices will run out onto the cutting board instead of staying in the meat.
| Problem | Root Cause | Solution |
|---|---|---|
| Burnt Garlic | Heat too high or added too early | Add garlic only after chicken is removed and heat is lowered. |
| No Golden Crust | Pan was cold or chicken was wet | Pre heat pan for 3 mins and pat chicken dry before oiling. |
| Thin/Watery Sauce | Stock didn't reduce enough | Simmer stock for 60 seconds before adding the cold butter. |
If you find yourself with a sauce that won't thicken, don't panic. You can always whisk in a tiny "slurry" of half a teaspoon of cornstarch mixed with a teaspoon of water. It's a digital age cheat code for a perfect sauce every time.
Common Mistakes Checklist:
- ✓ Skipping the pounding step (results in uneven cooking and dry edges).
- ✓ Using a cold pan (the chicken will stick and steam rather than sear).
- ✓ Adding garlic at the start (it will burn and turn bitter long before the chicken is done).
- ✓ Overcrowding the skillet (this drops the temperature and prevents a good crust).
- ✓ Forgetting to rest the meat (the juices need time to redistribute).
Creative Flavor Variations and Smart Ingredient Swaps
If you have a little extra room in the budget, you can easily turn this into a "fancy" weekend meal. For another citrusy variation, you might enjoy the technique used in my Classic Chicken Francaise Recipe, which uses a light egg wash for a different kind of velvety texture.
1. The Garlic Herb Chicken Thighs Oven Method
If you prefer the richness of dark meat, use boneless skinless thighs. Since thighs are more forgiving, you can sear them for 3 minutes per side and then pop the whole oven safe skillet into a 400°F (200°C) oven for about 8-10 minutes.
This ensures the connective tissue breaks down without burning the exterior.
2. The Garlic and Herb Chicken Pasta Pivot
Want to stretch this meal to feed more people? Slice the finished chicken and toss it with a pound of fettuccine. Double the pan sauce (use ½ cup stock and 2 tbsp butter) and add a splash of heavy cream. It turns a simple protein into a decadent feast that feels like a restaurant "Garlic and herb chicken pasta."
3. The Mediterranean Twist
If you’re craving something with a bit more punch, try swapping the rosemary and thyme for oregano and dried coriander. Serve it with a dollop of yogurt, much like the flavors found in a Savory Chicken Shawarma recipe. It’s the same basic technique but a completely different flavor destination.
Best Practices for Fresh Storage and Safe Reheating
Leftovers of this garlic and herb chicken are a gift to your future self. Store them in an airtight glass container in the fridge for up to 3 days. To keep the meat juicy when reheating, avoid the microwave if possible.
Instead, put the chicken back in a skillet with a tablespoon of water or stock, cover it with a lid, and heat over low for about 5 minutes. This creates a little steam sauna that revives the meat without drying it out.
For long term storage, you can freeze the cooked chicken for up to 2 months. I recommend freezing the sauce separately in a small bag or ice cube tray. When you're ready to eat, thaw it overnight in the fridge.
Zero Waste Tip: Don't throw away those herb stems! The woody stems of rosemary and thyme are packed with flavor. Throw them into a freezer bag with your onion skins and carrot peels.
When the bag is full, boil it all with water for an hour to make your own "scrap stock" for the next time you make this dish.
What to Serve With Your Garlic and Herb Chicken
Since this dish has a beautiful, built in pan sauce, you want something that can soak up every drop of that garlic butter goodness. Fluffy mashed potatoes are the classic choice, but if you're keeping things light, a bed of sautéed spinach or roasted asparagus works wonders.
The acidity of the lemon in the sauce also pairs beautifully with a crisp green salad tossed in a simple vinaigrette.
If you’re wondering what to drink with this, a buttery Chardonnay or a light Pinot Grigio complements the herbal notes perfectly. For a non alcoholic option, a sparkling water with a heavy squeeze of fresh lime and a sprig of mint keeps the palate refreshed.
If you want X, do Y: If you want a thicker sauce, let the chicken stock reduce by half before adding the butter. If you want a spicier kick, add ½ tsp of red pepper flakes when you sauté the garlic.
If you want a crispier skin on version, use bone in thighs and start them skin side down in a cold pan, then slowly ramp up the heat.
Trust me, once you master this easy chicken recipe with garlic and herbs, it will become your reliable "emergency" dinner. It is fast, it is budget friendly, and it proves that you don't need a complicated grocery list to create something truly heartfelt and delicious. Right then, let's get that pan heating!

Recipe FAQs
What is the most important step for achieving a golden brown sear on the chicken?
Preheat the pan until the oil is shimmering and just beginning to smoke lightly. The chicken must hit high heat immediately to trigger the Maillard reaction before moisture steams the surface.
Why must I pound the chicken breasts to a uniform thickness before cooking?
Pounding ensures even thermal transfer across the entire surface. This prevents the thin edges from drying out while you wait for the thicker center to reach a safe internal temperature.
How can I salvage a pan sauce that looks greasy instead of glossy?
Remove the pan from the heat and vigorously whisk in the final tablespoon of cold butter. This technique, known as mounting with butter, re-emulsifies the fat into the liquid base to create a stable, velvety sauce.
Is it acceptable to use dried herbs instead of the fresh ones specified in this recipe?
Yes, but you must use significantly less amount to prevent overwhelming the dish. Generally, use one-third the quantity of dried herbs compared to fresh, and crush the dried herbs in your hand first to release their oils.
What internal temperature should the chicken reach before I take it out of the skillet?
Pull the chicken from the heat when the internal temperature registers 160°F. The carry over cooking process will safely raise the temperature to the required 165°F while the meat rests under foil.
How do I ensure the garlic infuses flavor without burning during the pan sauce creation?
Lower the heat to medium and add the garlic only after the chicken has been removed and rested. Sauté the garlic for about 60 seconds until fragrant, but never let it turn dark brown, as it will become bitter.
What is a good side dish recommendation that pairs well with the pan sauce?
Mashed potatoes are excellent for soaking up the sauce, but roasted asparagus also works well. If you enjoyed perfecting the simple pan sauce technique here, apply the same principle of deglazing and butter finishing to our Baked Chicken Divan recipe for a richer result.
Easy Garlic Herb Chicken Recipe
Ingredients:
Instructions:
Nutrition Facts:
| Calories | 331 calories |
|---|---|
| Protein | 38.5 g |
| Fat | 17.7 g |
| Carbs | 1.8 g |
| Fiber | 0.3 g |
| Sugar | 0.2 g |
| Sodium | 620 mg |
