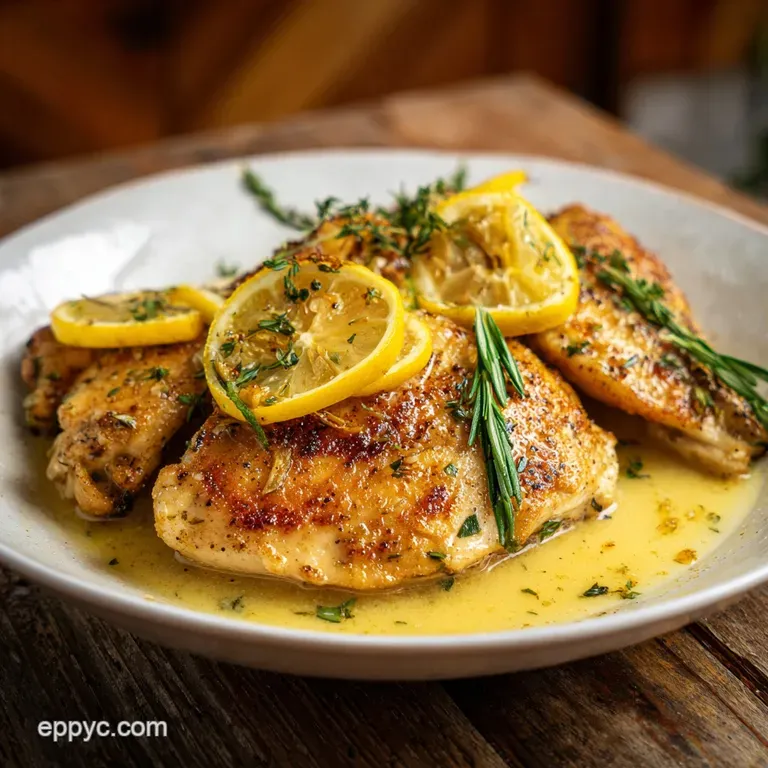
Easy Dinner Idea with Lemon Garlic Chicken
- Time: Active 10 mins, Passive 15 mins, Total 25 mins
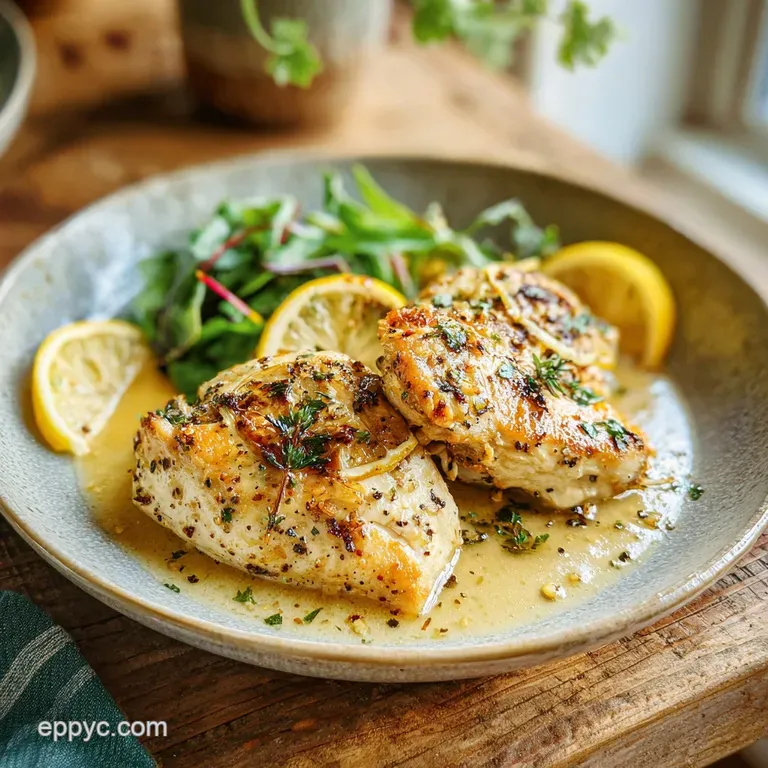
- Flavor/Texture Hook: Velvety lemon butter sauce with a golden crust
- Perfect for: Stress free weeknight dinner or healthy meal prep
- Easy Dinner Idea with Lemon Garlic Chicken
- The Physics of the Golden Crust
- Essential Components for Flavor
- Gear for a Perfect Sear
- Selecting Your Ingredients and Substitutes
- Instructions for the Golden Bird
- Fixing Common Searing Issues
- Smart Swaps for Easy Meals
- Misconceptions About Pan Searing
- Guidelines for Storing Leftovers
- Best Ways to Plate Up
- Recipe FAQs
- 📝 Recipe Card
Easy Dinner Idea with Lemon Garlic Chicken
The kitchen was a disaster zone last Tuesday. Between a dead laptop and a mountain of laundry, the last thing I wanted to do was stand over a stove for an hour. I grabbed four chicken breasts, some garlic, and a single lemon.
The second that chicken hit the hot avocado oil, that characteristic sizzle filled the room, and I knew I was going to be okay.
There is something deeply grounding about the aroma of minced garlic hitting a hot pan. It’s that instant transformation from raw, pungent cloves to a sweet, golden fragrance that tells your brain a real meal is coming.
This easy dinner idea features a standout lemon garlic chicken recipe that's sure to become a new favorite. We've all had dry, boring chicken, but this method ensures the meat stays succulent while the sauce gets thick enough to coat a spoon.
Trust me, I’ve made every mistake in the book from using too much lemon juice and curdling the sauce to not drying the chicken enough and ending up with a sad, gray exterior. I’ve refined this process so you don't have to guess.
We are going to use a little arrowroot starch for a light, gluten-free crust and finish with cold butter for that glossy, professional shine.
The Physics of the Golden Crust
The Maillard Reaction: High heat triggers a chemical reaction between amino acids and sugars, creating that savory brown crust and complex flavor. Without high heat and a dry surface, your chicken will steam instead of sear.
Starch Gelatinization: The arrowroot starch absorbs moisture and swells when heated, creating a thin barrier that keeps the meat juicy while providing a surface for the sauce to cling to.
| Thickness | Internal Temp | Rest Time | Visual Cue |
|---|---|---|---|
| 1/2 inch | 165°F (74°C) | 3 mins | Opaque center, juices run clear |
| 1 inch | 165°F (74°C) | 5 mins | Firm to the touch |
| 1.5 inches | 165°F (74°C) | 7 mins | Deep golden exterior |
This timing ensures you never serve a piece of poultry that feels like chewing on a rubber band. If you want a different flavor profile, you might enjoy my Savory Chicken Shawarma recipe which uses a similar over high heat method.
Essential Components for Flavor
| Ingredient | Science Role | Pro Secret |
|---|---|---|
| Arrowroot Starch | Thickener | Superior to flour for a lighter, silkier sauce texture. |
| Avocado Oil | Fat Source | High smoke point prevents the oil from burning during the sear. |
| Cold Butter | Emulsifier | Adding it cold at the end creates a stable, velvety sauce. |
| Lemon Juice | Acid | Breaks down tough fibers and brightens the heavy fats. |
Adding the butter at the very end is what chefs call "mounting the sauce." If the butter is warm, it just melts into a greasy puddle. When it's cold, it emulsifies with the broth and lemon juice to create a thick, pourable glaze.
Gear for a Perfect Sear
To get that restaurant style finish, you need a heavy bottomed skillet. A cast iron or stainless steel pan is best because they hold heat exceptionally well. If you use a thin non stick pan, the temperature drops the second the cold chicken hits the surface, and you lose that beautiful golden color.
You'll also need a meat mallet or a heavy rolling pin. Pounding the chicken to an even 1/2 inch thickness isn't just about making it look nice; it’s about thermodynamics. When one side of the breast is thick and the other is thin, the thin part turns into sawdust before the thick part is even cooked.
Aim for uniformity so everything finishes at the exact same moment.
Selecting Your Ingredients and Substitutes
- 4 chicken breasts (6oz each): Pounded thin. Why this? Ensures even cooking in under 10 minutes.
- Substitute: Chicken thighs (boneless) for more fat and flavor.
- 1 tsp sea salt: For seasoning and moisture retention. Why this? Fine grains dissolve faster into the meat.
- Substitute: Kosher salt (use 1.5 tsp instead).
- 0.5 tsp cracked black pepper: For a subtle heat. Why this? Freshly cracked provides more aromatic oils.
- Substitute: White pepper for a milder, earthy flavor.
- 1 tbsp arrowroot starch: To create the crust. Why this? Maintains a clear, glossy sauce better than cornstarch.
- Substitute: Tapioca starch or all purpose flour.
- 2 tbsp avocado oil: For the over high heat sear. Why this? Doesn't smoke or oxidize at high temperatures.
- Substitute: Grapeseed oil or light olive oil.
- 4 cloves garlic: Freshly minced. Why this? Pre minced jarred garlic tastes bitter and metallic.
- Substitute: 1 tsp garlic powder in the starch mix (less fresh flavor).
- 0.5 cup chicken bone broth: The base of the sauce. Why this? Provides more collagen and body than standard broth.
- Substitute: Vegetable broth or dry white wine.
- 1 large lemon (zest and 3 tbsp juice): For acidity. Why this? Zest contains the oils that provide the aroma.
- Substitute: Lime juice (changes the profile to tropical).
- 2 tbsp cold unsalted butter: To finish the sauce. Why this? Controls the salt level and creates emulsion.
- Substitute: Ghee or coconut cream (dairy-free).
- 1 tbsp Italian parsley: For freshness. Why this? Adds a grassy note that cuts through the butter.
- Substitute: Fresh chives or cilantro.
Instructions for the Golden Bird
Step 1: Prep the Meat
Place chicken between two sheets of plastic wrap. Pound to an even 1/2 inch thickness. Note: This prevents the edges from drying out while the center cooks.
Step 2: Season and Coat
Sprinkle chicken with sea salt and black pepper. Lightly dust both sides with arrowroot starch. Note: Shake off the excess starch so it doesn't gum up the pan.
Step 3: Sear the Chicken
Heat avocado oil in a large skillet over medium high heat. Add chicken until golden and crackling, about 3-4 minutes per side.
Step 4: Check for Doneness
Remove chicken once it reaches an internal temperature of 165°F (74°C). Note: Transfer to a plate and tent with foil to keep warm.
Step 5: Sauté the Garlic
Lower the heat to medium. Add minced garlic to the residual oil until fragrant and pale gold, about 30 seconds.
Step 6: Deglaze the Pan
Pour in the chicken bone broth and lemon juice. Scrape the bottom of the pan with a wooden spoon until the browned bits dissolve.
Step 7: Reduce the Liquid
Let the sauce simmer for 2-3 minutes until the volume reduces by half. This concentrates the flavor.
Step 8: Mount with Butter
Whisk in the lemon zest and cold butter cubes one at a time. Note: Stir constantly until the sauce looks velvety and thick.
Step 9: Reintroduce the Chicken
Slide the chicken and any juices back into the pan. Spoon the sauce over the meat until glossy and coated.
Step 10: Final Garnish
Turn off the heat. Sprinkle with chopped Italian parsley and serve immediately.
This technique is very similar to what I use in my Classic Chicken Piccata Recipe, which focuses on a slightly more briny finish.
Fixing Common Searing Issues
Why Is My Garlic Bitter?
If you add garlic to a screaming hot pan and leave it for a minute, it will turn dark brown and taste like burnt rubber. Garlic contains high amounts of sugar that carbonizes quickly. Always lower the heat after removing the chicken before adding your garlic.
Why Is My Sauce Too Thin?
A watery sauce usually means the broth didn't reduce enough or you didn't use enough starch on the chicken. The starch on the meat actually helps thicken the sauce when you add it back into the pan. If it's still too thin, simmer it for another 60 seconds before adding the butter.
| Problem | Root Cause | Solution |
|---|---|---|
| Rubbery Chicken | Overcooked | Use a meat thermometer to pull at 165°F (74°C). |
| Soggy Crust | Too much liquid | Ensure chicken is patted dry before starching. |
| Broken Sauce | Butter was too warm | Whisk in cold butter cubes off the heat. |
Common Mistakes Checklist
- ✓ Never crowd the pan; work in batches if the breasts are large.
- ✓ Always use fresh lemon juice; the bottled stuff has a chemical aftertaste.
- ✓ Pat the chicken bone dry with paper towels before seasoning.
- ✓ Don't skip the resting period; it allows fibers to reabsorb juices.
- ✓ Ensure the butter is cold from the fridge before adding it to the sauce.
For a similar pan searing technique with a bit more crunch, you should definitely try my How to Make recipe which uses parmesan for the crust.
Smart Swaps for Easy Meals
If you are cooking for a larger crowd or trying to save a few dollars at the grocery store, there are ways to adapt this without losing the soul of the dish.
| Premium Ingredient | Budget Alternative | Flavor Impact |
|---|---|---|
| Bone Broth | Chicken Bouillon | Less body, but higher saltiness. |
| Fresh Parsley | Dried Oregano | Earthier tone, less visual pop. |
| Arrowroot Starch | All Purpose Flour | Heavier crust, slightly cloudier sauce. |
Downscaling for Two
If you only need two servings, use half the chicken but keep about 75% of the sauce ingredients. Most people find they want extra sauce anyway! Reduce the simmering time by about 20% since there is less liquid in the pan.
Upscaling for a Crowd
When doubling the recipe, work in batches for the searing. Never pile chicken on top of each other in the pan. For the sauce, use 1.5x the spices and liquid rather than a full 2x to prevent it from becoming too salty or overwhelming.
Misconceptions About Pan Searing
A common myth is that searing "seals in the juices." Science shows that moisture loss actually increases at higher temperatures. The reason we sear is for the Maillard reaction the flavor.
The real secret to juicy chicken is pounding it thin so it cooks quickly and letting it rest so the internal pressure equalizes.
Another myth is that you must use wine to deglaze. While wine adds a lovely acidity, chicken bone broth combined with fresh lemon juice provides plenty of complexity. You don't need an open bottle of Chardonnay to make this sauce sing.
Guidelines for Storing Leftovers
Storage: Keep the chicken and sauce in an airtight container in the fridge for up to 4 days. I recommend storing the sauce separately if possible, but it's not a dealbreaker if they are together.
Freezing: This dish freezes reasonably well for up to 3 months. However, the butter emulsion in the sauce may break (separate) when thawed. To fix this, whisk in a splash of warm broth while reheating.
Zero Waste: Don't throw away those squeezed lemon halves! Toss them into a jar of white vinegar for a natural kitchen cleaner, or put them in your garbage disposal to freshen it up. If you have leftover sauce, it's incredible drizzled over roasted broccoli or stirred into a bowl of quinoa.
Best Ways to Plate Up
Presentation matters, even on a Tuesday night. I love serving this over a bed of garlicky sautéed spinach or alongside some crispy roasted potatoes. The sauce is the star here, so anything that can soak up that liquid gold is a win.
Place the chicken breast in the center of the plate and spoon the sauce generously over the top. Add a fresh slice of lemon and an extra pinch of parsley for that "I tried really hard" look. If you want to keep it low carb, try serving it with cauliflower mash.
The creamy texture of the mash against the zesty, velvety sauce is a match made in heaven. Let's crack on and get cooking!

Recipe FAQs
Is it necessary to pound the chicken breasts before cooking?
Yes, pounding is critical for even cooking. Uniform thickness ensures the thin edges don't dry out before the thick center reaches the safe internal temperature of 165°F.
How to create the glossy, thick sauce finish?
Whisk in cold unsalted butter off the heat at the very end. This process, called mounting, creates a stable emulsion with the reduced pan liquids, giving you a professional, velvety texture.
What can I substitute for chicken broth if I don't have any?
You can use vegetable broth or even dry white wine as a base. If using wine, make sure to let it reduce fully to cook off the alcohol before adding the lemon juice.
Why do my garlic cloves burn instantly when I add them to the pan?
False. Garlic burns because the pan temperature is too high. Always reduce the heat to medium after removing the chicken, as minced garlic cooks much faster than the searing crust.
Is it true that searing the chicken "seals in all the juices"?
No, this is a common misconception. Searing is done for the Maillard reaction, which develops deep flavor and color; moisture loss actually increases with high heat.
How should I store leftover lemon garlic chicken for best results later?
Store the chicken and sauce in an airtight container in the refrigerator for up to four days. If you plan on freezing it, note that the emulsion may separate upon thawing, requiring a quick whisk during reheating.
What is the best starch to use for coating the chicken?
Use arrowroot starch for the lightest, silkiest sauce finish. If you’re comfortable mastering texture control here, the same principle of using a refined starch applies when thickening sauces in complex dishes like the Ultimate Baked Chicken Divan with Creamy Sherry Sauce.
Easy Lemon Garlic Chicken

Ingredients:
Instructions:
Nutrition Facts:
| Calories | 336 kcal |
|---|---|
| Protein | 40.4 g |
| Fat | 17.1 g |
| Carbs | 3.8 g |
| Fiber | 0.4 g |
| Sugar | 0.9 g |
| Sodium | 628 mg |
