Gluten-Free Apple Crisp Delight
- Finding Comfort in Apple Crisp: My Delicious Journey
- A Little History on This Delight
- Why This Apple Crisp Stands Out
- More Than Just Deliciousness
- Let’s Gather Our Ingredients
- Your Essential Ingredients Guide for Delicious Cooking
- Mastering the Art of Professional Cooking: What You Need to Know
- Tips & Tricks for an Amazing Gluten-Free Apple Crisp Delight
- Frequently Asked Questions
- 📝 Recipe Card
Finding Comfort in Apple Crisp: My Delicious Journey
Oh my gosh, have you ever had one of those days where nothing seems to go right? a while back, i was having one of those rough days.
You know car troubles, spilled coffee, the works. so, i thought, why not whip up something comforting? that’s how i stumbled upon the apple crisp gluten-free recipe.
Honestly, who doesn’t love a warm, gooey dessert that feels like a big hug? this dish is a classic, and the best part? it fits right into a gluten-free lifestyle!
A Little History on This Delight
Now, let’s talk about where this beauty of a dessert came from. the apple crisp is a modern spin on the british dessert known as “apple crumble,” which has been around since world war ii.
Can you believe that? back then, people needed easy, affordable, and delicious ways to make the most of what they had! nowadays, it's made a comeback, especially in the gluten-free crowd.
It’s become a staple at fall gatherings, holiday dinners, or just a cozy night in.
So, what's the deal with this recipe? it takes about 15 minutes to prep and around 35- 40 minutes to bake.
Super simple, right? plus, it yields about 6 generous servings . you can definitely make it for a small gathering without breaking the bank.
Why This Apple Crisp Stands Out
Alright, let’s get down to the juicy stuff. this gluten-free apple crisp is not just drool worthy; it’s packed with health benefits too! with whole ingredients like apples and oats, you get fiber and vitamins in each bite.
It's a lighter alternative compared to some heavy desserts. and guess what? if you're looking for something a bit more tailored, try it as a dairy-free apple crisp or even a sugar-free apple crisp !
What i love about this recipe is its versatility. you can serve it for casual mid-week dinners or fancy family celebrations.
It shines during thanksgiving dinner, but honestly, who says we can’t have it in july? just picture it warm apple goodness with a scoop of vanilla ice cream or maybe a dollop of whipped cream on top.
Pure bliss!
And for anyone diving into paleo apple dessert territory, you're in luck. this recipe easily transforms into a paleo apple crisp by using plant based butter or coconut oil instead of regular butter.
Trust me; you won’t miss that dairy!
More Than Just Deliciousness
The reality is, whipping up an apple crisp gluten-free is an experience. you gather those fresh apples, peel 'em, and get that cozy aroma wafting through your kitchen.
It’s more than just cooking; it’s like a mini therapy session!
The recipe also opens the door for experimentation. here’s a tip: want to go nutty? toss in some chopped walnuts or pecans into the crisp topping! fancy a little tropical twist? add in some coconut flakes or even a side of coconut tapioca as a pairing.
Who knew a humble apple could wear so many hats?
Let’s Gather Our Ingredients
So, if this has piqued your interest, let’s cut to the chase! it’s time to round up those ingredients. we’re talking juicy apples, oats, almond flour, and a sprinkle of spices to kick it up a notch.
In my experience, the best part about making this recipe is sharing it with someone you love. the laughter, the smells, the yumminess all of it comes together perfectly.
So grab your baking dish and let’s get ready to create something scrumptious that'll warm your heart. trust me; you’ll be making apple crisp on repeat!
Now, let’s dive into the ingredients you’ll need to gather!
Your Essential Ingredients Guide for Delicious Cooking
Cooking is like a big warm hug from your grandma. it’s cozy, comforting, and oh-so-satisfying. but, to keep that kitchen love flowing, you need to know your way around some essential ingredients.
Let’s dive into the must haves that will elevate your dishes and impress your friends (or yourself!).
Premium Core Components
First things first, you’ve got to know your basic ingredients .
- Measurements : Whether you’re pouring in 1 cup of sugar or 250 grams of flour , getting it right matters. Remember, 1 cup is about 240 mL for us tea-loving Americans, and that’s a crucial detail.
- Quality indicators : Look for fresh herbs that smell strong and vibrant. Oregano that’s having an “off day”? Nah, pass on that! A good apple for your gluten-free apple crisp should be firm and a little shiny that’s where the good stuff is!
- Storage : Keep spices in a cool, dark spot. They last longer. Typically, dry spices can chill for a few years, while fresh ones? Use 'em up in a week or two.
- Freshness tips : Always check your garlic. A good head should be firm, not sprouting or mushy. And if you’re grabbing apples, the crisper drawer is your bestie.
Signature Seasoning Blend
Now, let’s talk flavor . Your dishes need some zest, and that’s where the magic of spices comes in.
- Essential spice combos : A classic mix is garlic powder, onion powder, and paprika . Toss that together, and you’re halfway to flavor town!
- Herb selections : Basil and thyme? Perfect pair! Swap ‘em around in your recipes.
- Flavor enhancers : Think about adding a dash of balsamic vinegar or a sprinkle of salt. It’s the cherry on top that makes everything pop.
- Regional variations : Try a dash of cajun seasoning for some Southern flair or cumin for a Middle Eastern twist.
Smart Substitutions
Sometimes, life throws you a curveball. You forgot the butter, but don’t sweat it!
- Common alternatives : If you’re out of sugar, maple syrup can step in like a champ! It’s like the superhero of sweeteners.
- Dietary mods : For a dairy-free apple crisp , swap butter for plant based butter or coconut oil. It works wonders.
- Emergency replacements : Short on eggs? A mashed banana can do the trick in your baking adventures.
- Seasonal options : Use fresh strawberries in spring instead of frozen. They’re sweet, vibrant, and just sing for summer.
Kitchen Equipment Essentials
Let’s not forget about your tools. You need the right gear to pull off your culinary masterpiece.
- Must have tools : A good chef's knife, measuring cups, and a cutting board. Simple, yet essential.
- Alternative options : Don’t have a whisk? Grab a fork. It may not look as fancy, but it gets the job done!
- Preparation tips : Always read through your recipe before you start. Trust me; you don’t want to be halfway through and realize you forgot to preheat the oven.
- Storage solutions : Invest in some airtight containers for your pantry. It keeps everything fresh and ready for your next creation.
As you get into the groove of cooking and experimenting, don’t forget that making a scrumptious apple crisp gluten-free can be a total game changer in your dessert game.
This delightful dish is warm, cozy, and packed with flavor. plus, it fits perfectly into paleo dessert recipes easy who doesn’t love a simple, feel good treat?
Now that you've got the essentials down, it's time to roll up those sleeves and get cooking! Ready for the delicious journey? Let’s go!
Mastering the Art of Professional Cooking: What You Need to Know
Look into into the world of professional cooking! it’s not just for chefs in fancy restaurants. you can bring a bit of that magic into your own kitchen with some straightforward techniques.
Let’s break it down into bite sized chunks that will elevate your home cooking game!
Essential Preparation Steps
First up, let's chat about mise en place . it’s a fancy french term that just means getting all your ingredients ready before you start cooking.
Imagine chopping, measuring, and preparing everything on your countertop. it’s honestly a game changer. you won’t be running around looking for that one spice while your oil is burning.
Next is time management . you gotta keep an eye on the clock. for example, when i whip up my favorite apple crisp gluten-free , i start with the apple filling first while the oven preheats.
It’s all about planning your steps wisely, like a well choreographed dance.
And let’s not forget about organization ! keep your workspace tidy. a messy kitchen can lead to accidents, like spilling that precious coconut sugar while measuring (yeah, been there!).
Plus, a clean area feels so much better to work in.
Safety is key too! always keep your knives away from your fingers trust me, that’s a lesson you don’t want to learn the hard way.
And remember: when handling hot pots and pans, use oven mitts. nobody wants a grilled hand for dinner!
step-by-step Process
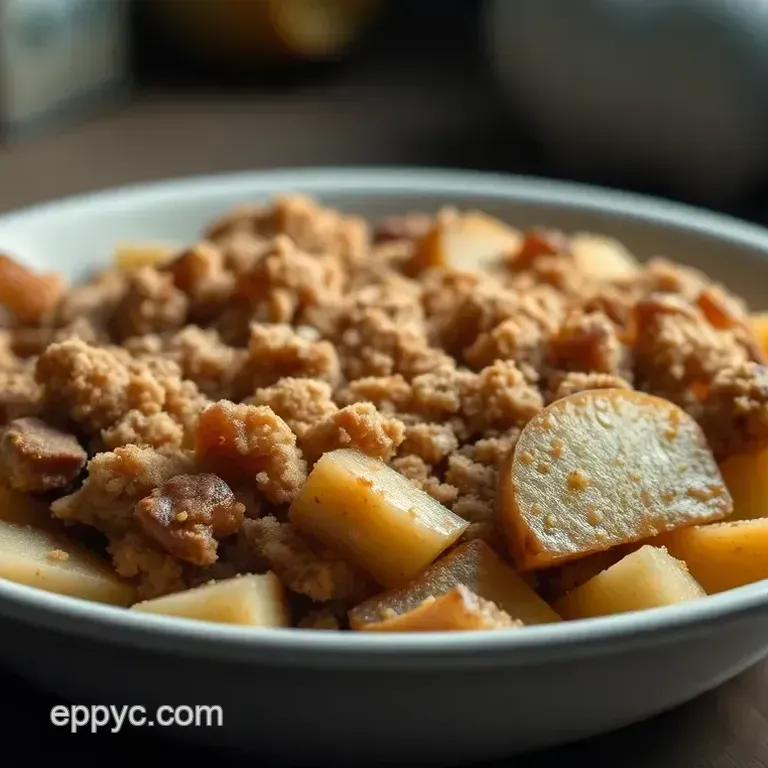
Alright, now for the fun part let’s get cooking! Here’s a simple step-by-step to make your own gluten-free Apple Crisp Delight :
Preheat the Oven to 350° F ( 175° C) . Get that oven working!
Prepare the filling : peel and slice 4 large apples and toss them with ¼ cup (50 g) of brown sugar, 1 tsp of cinnamon, and a dash of lemon juice for zest.
Make the Crisp Topping : In a bowl, mix 1 cup gluten-free rolled oats, ¾ cup of almond flour, and ½ cup of melted Plant Based Butter .
It should look crumbly.
Assembly Time : Spread the apple filling in a baking dish and sprinkle that topping on generously. Trust me, you want every bit of that goodness.
Bake for 35- 40 minutes . You want those apples to be bubbly and your topping to be golden brown think perfect crunchy dessert!
Let it Cool : Allow it to sit for 10 minutes before serving. Hot desserts need a moment before they shine on those plates, especially if you’re adding ice cream!
Expert Techniques
Wanna cook like a pro? Here are some expert techniques. First, use the right temperatures . For fruit desserts like this, always aim for 350° F ( 175° C) when baking.
Also, keep an eye on timing precision. forgetting about your crisp can lead to burnt edges, and nobody wants that.
Use visual cues; the topping should be golden brown and crispy, while the apples should be bubbling softly.
Lastly, if something doesn’t go right like if your crisp isn’t as crunchy as you wanted try adding more oats or a sprinkle of sugar to the topping.
A little tweak, and you’re back on track!
Success Strategies
Let’s talk about success! One common mistake? Not doing a taste test . Taste as you go; it’s crucial to get those flavors just right.
Another tip: don’t skip on choosing the right apples! A mix of sweet and tart varieties, like Granny Smith and Honeycrisp, will give your crisp that lovely, balanced taste.
And for those busy days, you can prep the apple filling a day in advance. just keep it in the fridge until you’re ready to bake.
It’s a lifesaver when you want that warm dessert on a whim!
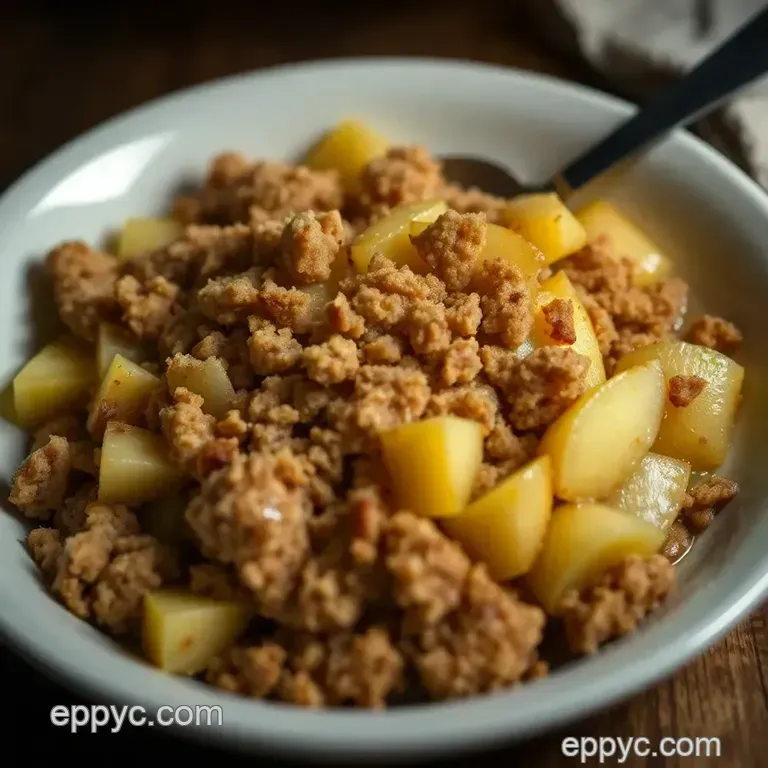
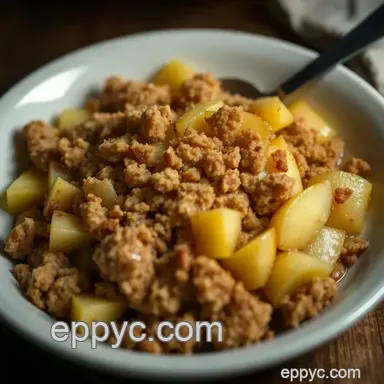
Before you know it, you’ll have the perfect, comforting apple crisp that’ll have everyone asking for seconds. you can serve it warm, paired with vanilla ice cream or whipped coconut cream.
Trust me, this gluten-free treat will be a hit!
Wrapping It Up
So there you have it, friends! with a bit of preparation and the right techniques, you can create a divine dairy-free apple crisp that feels professional and delicious.
Whether you’re a novice or a seasoned home cook, it’s time to step up your game.
Honestly, the joy of having a delicious dessert like this at home? priceless. plus, it’s perfect for gatherings or just enjoying a cozy night in.
Can’t wait to see how your version of this glorious paleo apple dessert turns out!
Stay tuned for more tips and tricks in the last section: Additional Information. Happy cooking!
Tips & Tricks for an Amazing gluten-free Apple Crisp Delight
Alright, friends! let’s dish out some pro tips to take your apple crisp gluten-free game to the next level.
Seriously, once you get these in your back pocket, you'll wonder how you ever made apple crisp without them!
Chef's Secrets
First off, let me tell you about choosing apples. you want a mix of tart granny smith and sweet honeycrisp .
This combo hits all the right notes like karaoke at your favorite dive bar, you know? you get that sweet and tangy vibe, which is key to a killer filling.
Now, for those of you who feel like you’re short on time (don’t we all?), here’s a major time saver: prep the apple filling a day beforehand.
Just cover it and pop it in the fridge. when you’re ready to bake, just layer the oat topping, and voila! less stress, more yum.
Flavor Boosters & Presentation Fun
Wanna amp up those flavors even more? a splash of vanilla in your apple mix can work wonders. and don’t skimp on the spices cinnamon and nutmeg are your best friends here.
They make your kitchen smell like a cozy autumn festival. plus, if you really wanna make it fancy, sprinkle some crunchy walnuts or pecans in the topping for that extra texture.
Speaking of fancy, let’s chat presentation . nobody said you can’t make your dessert look good. toss a scoop of vanilla ice cream on top when you serve it.
Drizzle some caramel sauce, and you’re golden! for realz, nothing says “i put some effort into this” like a well styled plate.
Storage & make-ahead
Now, if you have leftovers (is that even a thing?), here’s how to store your gluten-free crumble : let it cool completely, cover it tightly, and stash it in the fridge.
It'll stay fresh for about 3 days. when you're ready to dive back in, reheat it in the oven at 350° f for about 15- 20 minutes.
That will make the crisp topping extra crunchy again.
Want to make this a meal prep situation? you can totally prep the double batch. bake one fresh and freeze another unbaked.
Just make sure it's wrapped well. when you're ready to bake, pop it in the oven without thawing just adjust the cooking time a bit.
Talk about a game changer!
Creative Variations
Oh boy, do i love swapping up my recipes! you can jazz it up for every season. how about a spiced pear crisp for winter or even throw in some berries during summer? you can also play with the sugars try coconut sugar for a deeper flavor or opt for a sugar-free apple crisp using monk fruit or similar substitutes.
That way, you hold onto all the guilty pleasure without the guilty conscience!
And for anyone going paleo or trying out those dairy-free vibes, coconut oil is your bestie. use that instead of butter trust me, you won’t even notice the difference unless you’re deliberately searching for it.
Nutrition Breakdown
Alright, let’s get real about your nutrition. a serving of our gluten-free apple crisp delight is packed with 250 calories (not bad at all, am i right?).
You’ve got a decent amount of fiber from the apples and oats, which is pretty essential for all of us trying to keep things moving, if you know what i mean.
So, whether you’re keeping it simple with a classic version or getting creative with Paleo dessert recipes easy , there's a way to make this dish your own that suits your lifestyle!
Wrap It Up
There you have it! armed with these tips, you're ready to whip up a gluten-free apple crisp that's gonna wow your friends and family.
Seriously, once you nail this recipe, they’ll be begging for more. so, put on your apron, crank up the tunes, and enjoy the deliciousness of this warm, comforting dessert.
Happy baking, y’all! 🍏
Frequently Asked Questions
Can I make this apple crisp gluten-free with any type of apples?
Absolutely! For the best flavor and texture, I recommend using a mix of sweet and tart apples, such as Granny Smith and Honeycrisp. They create a lovely balance in the crisp. However, feel free to use any apples you have on hand!
What can I use instead of butter in this gluten-free apple crisp recipe?
If you're looking for a dairy-free option, coconut oil works wonderfully as a substitute for butter. It adds a slight tropical flavor and keeps everything nice and moist, just like butter would!
How can I store leftovers of my apple crisp gluten-free?
Once cooled, cover the apple crisp with plastic wrap or transfer it to an airtight container. It should stay fresh in the fridge for about 3-5 days. To reheat, pop it in the oven until warm and it's just as comforting!
I don't have almond flour what can I use instead?
No worries! You can easily substitute almond flour with oat flour or a gluten-free flour blend. Just make sure your chosen flour is indeed gluten-free to keep the entire dessert suitable for those with gluten sensitivity.
Can I prepare the apple filling ahead of time before baking?
Yes, you can! Just prepare the apple filling, toss everything together, and store it in the fridge for up to a day. When you're ready to bake, simply top it with the crisp mixture and pop it in the oven easy peasy!
What are some delicious serving suggestions for my gluten-free apple crisp?
For the ultimate treat, serve your apple crisp warm with a scoop of vanilla ice cream or a dollop of whipped cream. You can also drizzle it with some salted caramel sauce or pair it with a cup of hot chai tea for a delightful evening snack!
gluten-free Apple Crisp Delight
Ingredients:
Instructions:
Nutrition Facts:
| Calories | 250 |
|---|---|
| Fat | 10g |
| Fiber | 4g |
