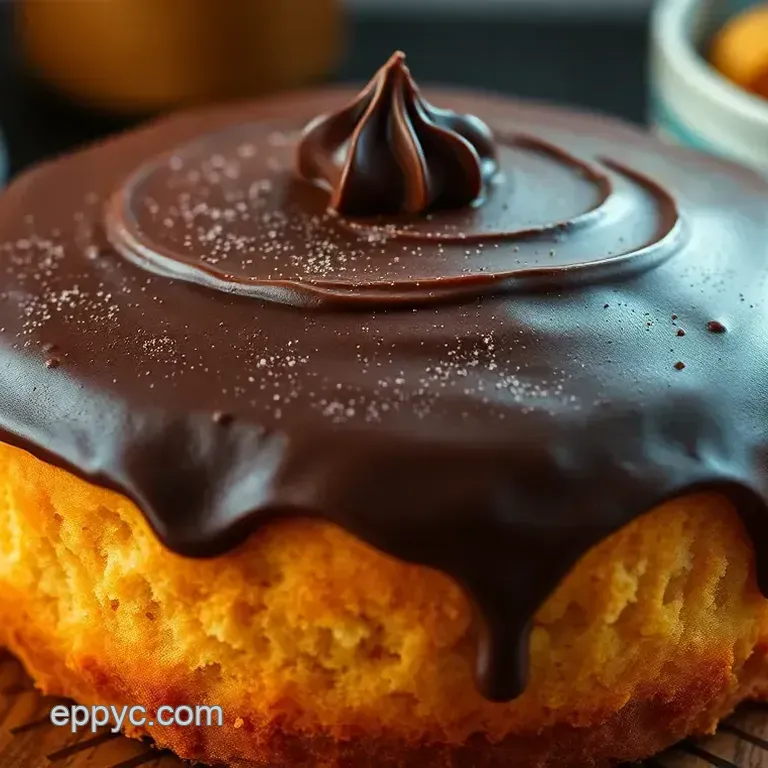
Heavenly Vanilla Cake with Decadent Chocolate Frosting
- look into into Deliciousness: The Perfect Vanilla Cake with Chocolate Frosting
- Essential Ingredients Guide: Your Baking Besties!
- Cooking Like a Pro: Mastering Your Vanilla Cake with Chocolate Frosting
- Pro Tips & Secrets to Perfect Vanilla Cake with Chocolate Frosting
- Frequently Asked Questions
- 📝 Recipe Card
look into into Deliciousness: The Perfect Vanilla Cake with Chocolate Frosting
Let me take you back to that one birthday party where i totally nailed the dessert: a vanilla cake with chocolate frosting that had everyone begging for seconds.
Picture this: kids running around, balloons flying everywhere, and this beautiful cake at the center of it all. honestly, it felt like i was a superstar with each slice that disappeared! if you’ve ever been tasked with bringing dessert and stressed about it, i totally get you.
But trust me, this classic cake is your ticket to dessert glory!
The Sweet History of a Classic Treat
So, where does this beloved cake come from? the concept of yellow cake has been around for ages, often linked to family gatherings and special occasions.
The fluffy texture paired with chocolate frosting is a match made in dessert heaven. this recipe has evolved over time, but the heart of it remains the same: a tender, buttery cake that just melts in your mouth, crowned with rich chocolate goodness.
Today, it's a staple at birthday parties, weddings, and those “just because” moments when you want to treat yourself.
Now, don’t fret about the time. the whole process takes about 1 hour and 10 minutes , including baking. isn’t that wild? you’ll be serving up smiles in no time! and really, don’t think it’s a hassle.
With just medium difficulty, even if you’re not a baking pro, you can totally handle this. plus, who wouldn’t want to whip up the best yellow cake recipe ever?
Why You’ll Love This Cake
First off, let’s talk health. okay, i know cake isn’t exactly a health food , but hey, you’ve got some flour and eggs in there, right? it's about balance, my friends!
plus, this cake is perfect for all ages it's super moist and not overly sweet, making it the moist birthday cake recipe that everyone will adore.
Now, unique selling points? this cake is flexible. you can easily swap out ingredients. who doesn’t love a cake that’s adaptable? trying a gluten-free version or throwing in some fresh berries? go for it!
this vanilla cake with chocolate frosting isn’t just for birthdays; it’s totally suitable for celebrations like anniversaries or even a casual afternoon tea.
One last thing when you take a bite, you’re not just tasting cake; you’re experiencing joy. that’s right, it’s a whole vibe.
Having friends over? nothing says “i care!” like a cake with chocolate frosting that you made yourself.
Ready to get Baking?
So, are you ready to tackle this dreamy yellow cake with chocolate frosting ? gather your ingredients, roll up your sleeves, and get ready for some fun.
Baking can sometimes feel overwhelming, but remember cooking is about enjoying the process. i swear by that! plus, once you see your cake rise and smell that heavenly aroma fill your kitchen, you’ll be hooked.
Now that we’re all fired up, let’s talk about what you need. Here’s what’s on our shopping list for this dessert darling...
Essential Ingredients Guide: Your Baking Besties!
Ah, the beauty of baking. you can whip up a vanilla cake with chocolate frosting and make everyone’s day a little brighter.
But before you get that mixer whirring, let’s talk about the essentials. having the right ingredients makes the difference between a delicious masterpiece and a “what is this?” situation.
Premium Core Components
Let’s kick things off with those premium core components you absolutely need. first up, measurements. if you're like me and still a little lost in the metric world, don't worry! here are some important conversions that will help.
- 2 cups (250g) all-purpose flour
- 1 ½ cups (300g) granulated sugar
- ½ cup (115g) unsalted butter
- And, if you’re feeling fancy, don't forget 1 teaspoon vanilla extract for that dreamy flavor.
When shopping, always look for quality indicators . freshness is key! check expiration dates on baking powder; no one wants a flat cake.
Lastly, keep your essentials stored right. a cool, dry place is best, and most ingredients have a decent shelf life, especially if sealed properly.
Butter? stick it in the fridge, and it’ll be good for a month or so!
Signature Seasoning Blend
Now onto my favorite part, the signature seasoning blend . Spices don’t just kick it up a notch; they can completely transform your baking.
Essential spice combos include cinnamon with vanilla or nutmeg with cake mix. herbs? you can’t go wrong with thyme paired with a lemon vanilla cake for a twist.
Just thinking about it makes my taste buds tingle! and don't forget to explore those regional variations . for instance, if you’re whipping up a yellow cake, try adding a pinch of cardamom for a little extra flair.
Smart Substitutions
Life is unpredictable, and sometimes, that means you might not have every ingredient on hand. That’s where smart substitutions come into play.
Need to swap out some sugar? brown sugar can work wonders and add richness! don’t have eggs? try a mixture of 1 tablespoon of ground flaxseed with 2.
5 tablespoons of water per egg . it’s my go-to hack when i run low on supplies!
With seasonal options, you could use pumpkin puree instead of butter for a fall inspired cake! and speaking of which, if you're in a bind and don't have cocoa powder for that chocolate frosting, a great emergency trick is to use a bit of unsweetened drink mix .
Trust me; it works surprisingly well!
Kitchen Equipment Essentials
Alright, let’s talk kitchen equipment essentials . You don’t need the fanciest stuff, but here’s my list of must have tools that’ll make your life so much easier.
First, a good set of mixing bowls. i swear, you can’t have too many! a spatula is your best friend, especially when frosting that mocha delight.
A cooling rack is critical; letting your cake cool properly can be the difference between moist and a soggy mess.
And don’t forget those handy alternatives! Just about anything can work in a pinch like a whisk if you don’t have an electric mixer.
Wrapping it Up
So there you have it! your essential ingredients guide to getting started with that moist birthday cake recipe or any cake with chocolate frosting your heart desires.
With the right components, creativity, and a few hacks up your sleeve, you’ll be baking like a pro.
We’ve got all the groundwork laid down, and now you’re ready to dive into the fun part. Ready to bake that heavenly dessert? Let’s move on to the step-by-step instructions! Happy baking, friends!
Cooking Like a Pro: Mastering Your Vanilla Cake with Chocolate Frosting
Let’s talk about cooking methods that make you feel like a chef in a fancy restaurant. today, we're diving into the realm of vanilla cake with chocolate frosting .
It seems simple, but there’s a method behind the magic. that perfect balance between fluffy cake and rich frosting? it starts with the basics.
Essential Preparation Steps
First things first, mise en place is your kitchen's best friend. yeah, it literally means "everything in its place." before you even think about preheating your oven, gather all your ingredients and tools.
It’s like laying the groundwork for a skyscraper. if you don't have your flour, sugar, and those gorgeous eggs ready, you're setting yourself up for a chaotic disaster.
Time management is key, too! don't be that person who’s still looking for the sugar while the oven is blaring at 350° f ( 175° c) .
Set a timer while prepping and tackling each part of the cake separately. it keeps everything flowing smoothly.
And oh, let’s not forget about organization strategies. have a clean workspace. it’s way easier to bake in a tidy environment.
Plus, nobody has time to clean up sticky flour spills at the last minute, trust me. safety considerations are equally important; keep your workspace free from clutter.
You don’t want to trip over a rogue spatula mid-bake!
step-by-step Process
Once you’ve got your ducks in a row, it’s time to dive into the actual baking. Here’s how we get there, step-by-step:
- Preheat that oven to 350° F ( 175° C) and get those cake pans lined with parchment paper.
- In a mixing bowl, cream together ½ cup (115g) of softened unsalted butter with 1 ½ cups (300g) of granulated sugar until it's light and fluffy. Seriously, go for that airy texture!
- Add in 3 large eggs one-by-one and don't forget a splash of 1 teaspoon vanilla extract for that heavenly flavor.
- In another bowl, combine 2 cups (250g) of all-purpose flour, 2 ½ teaspoons baking powder , and ½ teaspoon salt .
- Gradually mix this dry combo into your butter mixture, alternating with 1 cup (240ml) of room temperature whole milk until it’s all just combined. You don't want to overmix; that’s a rookie mistake that makes for a dense cake.
- Pour the batter into your prepared pans and pop it in the oven. Bake for 25- 30 minutes . Check for doneness by sticking in a toothpick it should come out clean.
- Let it cool for about 10 minutes in the pans before transferring to a rack.
While you’re hanging tight for the cakes to cool, it’s time to whip up that frosting.
Expert Techniques
Moving on to the frosting, here’s where the magic happens. cream together 1 cup (230g) of softened unsalted butter with 3 ½ cups (440g) of powdered sugar and ½ cup (50g) cocoa powder until it’s silky smooth.
For that creamy richness, add in ¼ cup (60ml) of heavy cream and adjust it until it’s a spreadable dream.
Quality checkpoints: make sure your butter is truly at room temperature. you don't want it to be too hard or too melty.
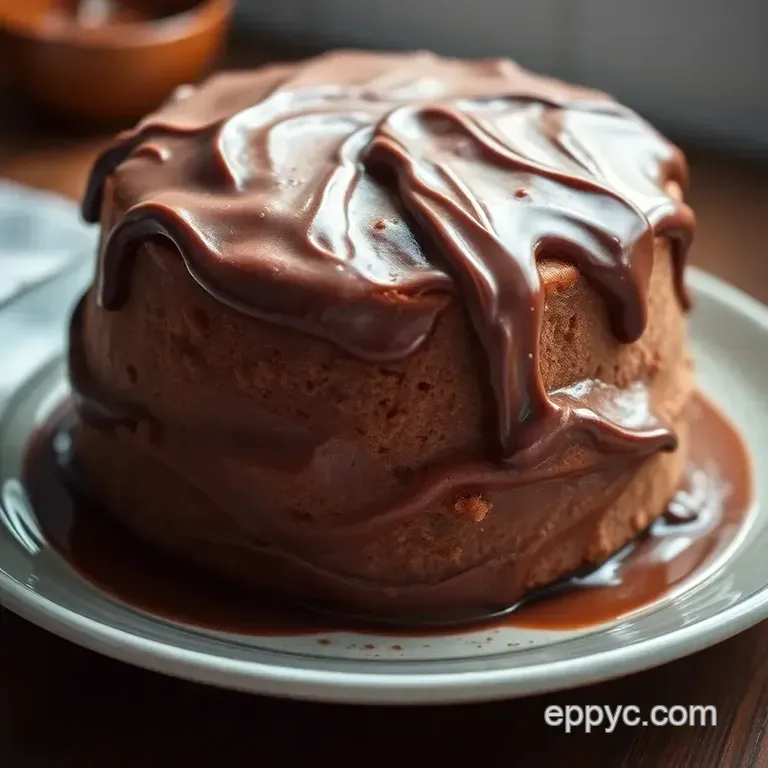
Everything should blend effortlessly without lumps. when frosting, a good tip is to spread the top of one cooled layer, stack the other layer on, and finish by frosting the top and sides evenly.
Success Strategies
Now let’s tackle common hiccups! one easy mistake is not letting your cake cool long enough before frosting sticky mess alert! be patient, let it cool completely.
Also, taste the frosting before slathering it on. adjust the sweetness or cocoa richness as needed.
For make-ahead options, you can bake the cake days in advance, keep it wrapped, and frost it the day you need it.
Super handy if you’re prepping for a birthday bash or simply craving that chocolate frosting cake after a rough week!
Alright, friends, you’re all set to whip up that vanilla cake with chocolate frosting that’ll have your family begging for seconds.
Additional Information
Stay tuned for more tips, tricks, and some delicious variations. Everyone deserves a slice of decadent heaven I know you have it in you to create the best yellow cake recipe that even the folks over at Life Love and Sugar would be jealous of! Happy baking!
Pro Tips & Secrets to Perfect Vanilla Cake with Chocolate Frosting
Alright, listen up! making that heavenly vanilla cake with decadent chocolate frosting isn’t just about tossing ingredients together. oh my gosh, it’s like having a secret map to the treasure of deliciousness! here are some golden nuggets i learned along the way.
Chef's Personal Insights
First off, don’t skip the creaming ! creaming the butter and sugar is crucial for that fluffy cake texture you’re dreaming of.
And trust me, let those ingredients get to know each other. you want to beat that mix until it’s light and creamy, almost like whipped clouds.
I know, easy to say when you’re not on the other side of the bowl, but it’s where you’ll get a happy cake !
Time Saving Techniques
So, here’s a pro tip: whilst your cake bakes , whip up your chocolate frosting! multi tasking is the name of the game.
This way, when you pull your cake from the oven, you’ll be ready to slather on that decadent goodness. and if you’re really in a pinch, you could even use a yellow cake mix as a base and doctor it up! just mix it with chocolate (and maybe add a touch of vanilla for personality).
Flavor Enhancement Tips
Feeling adventurous? try swapping out the vanilla for almond extract . that gives an unexpected twist that'll have everyone asking, “what’s your secret?”.
You can also fold in chocolate chips, which will melt into pockets of deliciousness that take your moist birthday cake recipe to the next level.
Perfect Presentation
Let’s talk presentation because we eat with our eyes first, right? Here are a few tricks I personally love.
Plating Techniques
After frosting your cake, try using an offset spatula to create swirls and peaks. this adds a rustic vibe that screams, “i’m a baking pro!” you could also use a cake leveler to make the layers perfectly flat and easier to stack.
Garnish Ideas
Top it off with some fresh berries, or even better, a handful of colorful sprinkles! And you really want to make your yellow cake with chocolate frosting pop; this is where garnishing comes in handy!
Color Combinations
Mixing colors adds visual appeal. Think about how a rich chocolate frosting pairs with the golden yellow of the cake. It's basically heaven on a plate.
Storage & make-ahead
After the cake party, there are some storage tips I swear by.
Storage Guidelines
Wrap your cake with chocolate frosting tightly in plastic wrap. It’ll keep moisture in and stay fresh. Folks, no one likes a dry cake!
Reheating Instructions
Want to enjoy a slice later? just pop a piece in the microwave for about 10 seconds . seriously, just enough to take the chill off without turning it into a rubbery nightmare.
Creative Variations
Let’s shake things up! Maybe you want to adapt flavors or switch it up according to the seasons.
Flavor Adaptations
Add some lemon zest to the batter in the summer months for a refreshing zing, or toss in some peppermint extract around the holidays.
Seasonal Twists
In the fall, throw in some pumpkin puree for a pumpkin vanilla cake . Can you say yum?
Complete Nutrition Guide
Okay, here’s the not-so-fun part, but it’s important! Let’s break it down a bit.
Nutrition Breakdown: One slice is about 400 calories . It’s a treat, so enjoy it in moderation!
Health Benefits
Hey, there’s cake and then there’s cake, right? Make it cleaner by using less sugar and adding wholesome ingredients like almond flour or coconut sugar .
So, there you have it! whether you’re going for that classic two-layer yellow cake recipe or just whipping up an easy yellow cake recipe, know that it can be a total masterpiece .
Experiment, have fun, and don’t forget to share it with your homies! happy baking everyone! 🍰
Frequently Asked Questions
What should I do if my vanilla cake with chocolate frosting isn't rising properly?
If your cake isn't rising, it could be due to expired baking powder or improper mixing. Make sure to check the freshness of your baking powder and mix the batter until just combined to avoid overworking the gluten. Also, ensure your oven is preheated to the correct temperature!
Can I make the vanilla cake and chocolate frosting ahead of time?
Absolutely! You can bake the vanilla cake a day in advance and store it in an airtight container. For the chocolate frosting, keep it in the fridge until you're ready to use it, and just give it a quick whip to restore its texture before frosting the cake.
What are some variations to try with vanilla cake with chocolate frosting?
There are plenty of fun variations! You can transform it into a lemon vanilla cake by adding lemon zest, or make a strawberry version by folding in some finely chopped strawberries. For a gluten-free option, simply swap out the all-purpose flour for a gluten-free blend!
How do I store leftover vanilla cake with chocolate frosting?
Store the cake in an airtight container at room temperature for up to three days, or in the fridge for about a week. If you want to keep it for longer, consider freezing pieces wrapped tightly in plastic wrap and then foil for up to three months. Just thaw it before enjoying!
Can I use a different type of frosting on my vanilla cake?
Of course! While the chocolate frosting pairs beautifully, you could also try a cream cheese frosting for a tangy twist, or a simple buttercream for a classic touch. Have fun experimenting with different frostings to find your favourite match!
What nutritional information should I know about the vanilla cake with chocolate frosting?
This cake is a delightful treat, but it does pack a caloric punch approximately 400 calories per slice! If you're watching your dietary intake, consider serving smaller portions or enjoying it as an occasional indulgence alongside fresh fruit or tea to balance it out.
Heavenly Vanilla Cake With Decadent Chocolate Fr
Ingredients:
Instructions:
Nutrition Facts:
| Calories | 400 |
|---|---|
| Protein | 3g |
| Fat | 20g |
| Carbs | 54g |
| Fiber | 0g |
| Sugar | 40g |
| Sodium | 250mg |
