Homemade Apple Butter: a Cozy Autumn Treat
- look into into Homemade Apple Butter: A Cozy Autumn Treat
- The Roots of a Comfort Classic
- Why You’ll Love This Recipe
- Transitioning to Ingredients
- Your Go-To Guide for Essential Cooking Ingredients
- Unleashing the Flavor: The Professional Cooking Method for Homemade Apple Butter
- Pro Tips & Secrets for Homemade Apple Butter
- Perfect Presentation: The Art of Plating
- Storage & Make-Ahead Tips
- Creative Variations: Customize Your Apple Butter
- Complete Nutrition Guide
- Conclusion: Get Cooking Your Homemade Apple Butter!
- Frequently Asked Questions
- 📝 Recipe Card
look into into Homemade Apple Butter: A Cozy Autumn Treat
Ever taken a trip down memory lane with just one bite? that’s exactly what homemade apple butter does for me.
The smell of slowly simmering apples in my kitchen brings back memories of autumn days spent with grandma. she had this knack for turning simple ingredients into something magical.
One chilly morning, as i watched her stir a bubbling pot, i thought to myself, “oh my gosh, one day, i want to make this too!” fast forward to now, here i am, ready to share this deliciousness with you.
This recipe isn’t just about food; it’s about those warm, fuzzy feelings of comfort, family, and home. So, grab your apron, folks, ‘cause we’re diving deep!
The Roots of a Comfort Classic
So, what’s the big deal about homemade apple butter ? well, this spread traces its roots back to the american northeast.
Folks used to make it to preserve the harvest. today, it’s a beloved pantry staple! it's modernized and found in many homes across america, bringing a taste of nostalgia with every jar.
Now, let me lay out the nitty gritty. the recipe takes about two to three hours total, including prep. it’s mostly hands off, which is fab if you’ve got other things to tackle.
The best part? it’s an easy apple butter recipe that nearly anyone can whip up. oh, and it’ll give you around four cups to enjoy.
Let’s talk money a batch will run you about $10, depending on where you shop. And trust me, it’s cheaper than buying that fancy jar from the store!
Why You’ll Love This Recipe
The benefits of homemade apple butter are seriously good. first off, it’s packed with nutrients! apples are high in fiber and good for your heart.
Plus, when you make your own, you control the ingredients, which means no funky preservatives or weird additives.
This sweet spread shines during autumn but works on special occasions all year round. pop it on a cheese platter for thanksgiving or toss it on toast for a cozy weekend breakfast.
It’s just the right amount of sweet, and you can customize it however you like add a little ginger or even some vanilla if you’re feeling adventurous.
If you’re comparing this to other spreads, apple butter holds its own. it’s not just another jam; it has a depth of flavor from that slow cooking.
Slow cooker apple butter transforms your basic apples into a rich, spiced delight that store-bought just can’t compete with.
Transitioning to Ingredients
Ready to get started? Gather your slow cooker apples and let’s make some magic happen. Here’s the list of what you’ll need:
- 6 cups of peeled and chopped apples
- 1 cup granulated sugar and 1/2 cup brown sugar
- 1 cup of apple cider
- Ground spices: cinnamon, nutmeg, allspice
- Lemon juice and a pinch of salt
That’s it! Simple, right? Now let’s whip up something delicious that’ll make your taste buds sing. Stay tuned for the next steps, because this homemade apple butter is about to make your kitchen smell like heaven!
Your Go-To Guide for Essential Cooking Ingredients
Let’s face it, cooking can be a bit overwhelming sometimes, especially when it comes to knowing what ingredients to keep on hand.
I’ve been there! that’s why i’m here to give you my essential ingredients guide . buckle up, because we’re diving right into this!
Premium Core Components
Alright, when it comes to quality ingredients , knowing what to look for is key. So, pay attention to your measurements! Here’s a quick rundown:
- Detailed Measurements: In case you’re wondering, here’s something useful: 1 cup measures about 240 ml, and 1 tablespoon is 15 ml. Easy peasy!
- Quality Indicators: Freshness matters. Look for bright colors, good smells, and packaging that isn’t damaged or leaking. Trust me, no one wants to bite into a moldy piece of fruit.
- Storage Guidelines: Most pantry staples tend to live happily in cool, dry places. Spices can lose their punch over time, so keep 'em airtight!
- Freshness Tips: Check for dates on your condiments like mustard and ketchup! These little guys can hide in the back of the fridge and go bad way too soon.
Signature Seasoning Blend
You know that moment when you take a bite and your taste buds do a happy dance? That’s what signature blends are all about!
- Essential Spice Combinations: Think cinnamon, nutmeg, and a sprinkle of ginger for your fall baking. Yup, they totally amp up your homemade apple butter!
- Herb Selections: Fresh herbs like basil or parsley can really bring your dishes to life. They are the rockstars of the herb world, don’t you think?
- Flavor Enhancers: Ever tried a dash of nutmeg in your mac and cheese? Mind blown! Little touches can twist your usual dishes into something fab.
- Regional Variations: Love spicy food? Mix in cayenne for some heat! Want a hint of smoke? That’s right; a touch of smoked paprika works wonders!
Smart Substitutions
Sometimes life throws us curveballs, and we’re out of a key ingredient. No biggie!
- Common Alternatives: If you’re out of baking powder, just mix 1 tsp of vinegar with 1 tsp of baking soda. Bam! You just saved your cake!
- Dietary Modifications: Vegan? Swap butter for coconut oil. You won’t even know the difference.
- Emergency Replacements: No fresh herbs? Dry ones work just as well! Just be mindful of measurements; dried herbs are stronger!
- Seasonal Options: Fruit out of season? Ditch the strawberries in winter and opt for apples or pears when they shine.
Kitchen Equipment Essentials
Let’s be real: having the right tools is half the battle.
- Must Have Tools: A good chef’s knife is your best friend. Invest in one; you won’t regret it!
- Alternative Equipment: If you don’t have a mixing bowl, grab a large pot. Get creative!
- Preparation Tips: Prepping ingredients can cut down cooking time significantly. Slice and dice ahead of time!
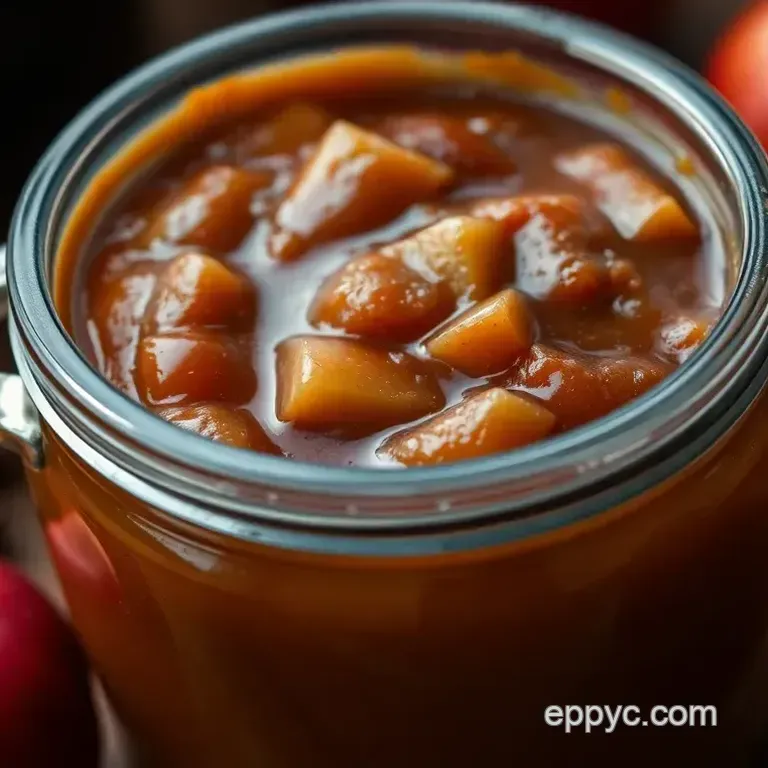
- Storage Solutions: Glass jars are so versatile use them for storage or even to make your homemade apple butter!
Now that we’ve covered essential ingredients, let’s dive into how to whip up that delicious homemade apple butter! you’re going to love it! this cozy autumn treat is perfect for slathering on toast or using in your favorite jams and jellies.
Seriously, it’s no joke when i say, "homemade apple butter" can transform your breakfasts!
Ready? Let’s get cooking!
Unleashing the Flavor: The Professional Cooking Method for Homemade Apple Butter

Getting into the groove of professional cooking might sound a bit intimidating, but trust me, it’s totally doable at home.
Today, we'll dive into making homemade apple butter a dish that’s as cozy as your favorite sweater and perfect for a crisp autumn day.
Essential Preparation Steps
First things first, let’s kick things off with some must know preparation tips. when you’re cooking like a pro, you gotta start with mise en place , which is just a fancy way of saying “everything in its place.
” before you even think about turning on the stove, chop up those apples, measure out your sugars, and have your spices ready to rock.
It’ll save you from scrambling mid-recipe, and who wants that chaos?
Now, let’s talk time management. time can slip away like that last slice of pumpkin pie at thanksgiving, so keep an eye on your clock.
For our slow cooker apple butter , you’ll need about 2- 3 hours of cook time. you wanna set up little reminders to check on your pot, trust me.
And for the safety considerations, don’t leave the kitchen when you’re simmering away. stay close and stir occasionally to keep things from sticking.
step-by-step Process to Deliciousness
Alright, here’s where the magic happens! Follow these simple steps carefully:
Prepare the Apples: Peel, core, and chop 6 cups of apples (I suggest using a tart variety like Granny Smith).
Combine ingredients: toss those apples in your slow cooker with 1 cup of granulated sugar , 1/2 cup of brown sugar , 1 cup of apple cider , and spices: 2 teaspoons of ground cinnamon, 1/2 teaspoon of nutmeg , and a pinch of salt.
Cook the mixture: if you’re using a slow cooker , set it on low for 6- 8 hours . if you're on the stovetop, bring that pot of goodness to a boil, then lower the heat and simmer for 2- 3 hours .
Stir Occasionally: Give it a little love every 30 minutes to prevent sticking.
Blend for Smoothness: Once the apples are soft, grab your immersion blender. Blend it up until it’s as smooth as you like.
Continue Cooking: Let it simmer uncovered until it thickens, about 30- 45 minutes .
Store or Can: Pour your apple butter into sterilized jars. You can refrigerate for about two weeks , or get fancy with canning for long term storage.
Expert Techniques for Apple Butter Success
Here’s where the pros shine! quality checkpoints are crucial, so make sure to taste your sauce throughout the cooking process.
If it’s too tart, add a touch more sugar. if it’s too sweet, squeeze in some lemon juice to balance it.
For instance, adding a little ginger or maple syrup can seriously elevate your flavor game. and hey, remember to adjust your expectations if your apple butter isn’t perfect the first time, you’ll get there, i promise!
Success Strategies for Beginners
We all mess up in the kitchen sometimes, but learning is part of the journey! a common mistake? rushing the cooking time.
Let the apples break down slowly to achieve that dreamy consistency. also, always check for doneness through taste not just appearance.
The best apple butter has a rich, hearty flavor that should tease your taste buds!
If you’re looking to make-ahead, try doubling your batch to stock up for the holidays. you can also give homemade apple butter as sweet gifts.
Trust me, people love receiving jars of your kitchen creations!
So there you have it! with this professional cooking method, you’ll be whipping up easy apple butter and impressing everyone at your next potluck.
The warmth of spices and the sweetness of apples will transform into a cozy spread perfect for any occasion.
Additional Information
If you’re curious about all the ways to use homemade apple butter, it’s a game changer for toast, yogurt, and even charcuterie boards! you can serve it alongside cheese or swirl it into oatmeal for a delicious wake-up call.
Now, who’s ready to hit that kitchen and whip up some slow cooker apple butter magic? 🍏
Pro Tips & Secrets for Homemade Apple Butter
Alright, friends! let’s chat about some pro tips to turn your homemade apple butter into something absolutely magical. honestly, i’ve made my fair share of apple butter, and trust me, a few little secrets go a long way.
Chef's Personal Insights
First off, pick a mix of apples you don't just want all tart or all sweet. get some granny smith for that zing but balance it out with a sweeter apple, like fuji or gala.
It makes all the difference! it’s like having the perfect family recipe: a little bit of this, a little bit of that.
Time Saving Techniques
If you’re short on time, consider using a slow cooker . seriously, it’s a game changer! just toss everything in, set it, and forget it.
You could binge watch your favorite show or catch up on your latest netflix obsession while your slow cooker apple butter is doing its thing.
Flavor Enhancement Tips
Want to elevate those flavors? try adding a splash of vanilla extract or a pinch of ginger. it’s like wearing the perfect pair of shoes with your outfit it just pops! you can also adjust the sugar based on your apple’s natural sweetness.
Always taste as you go!
Presentation Advice
Now, let’s get to presentation. you definitely want your apple butter to look as good as it tastes. when you jar it up, consider tying a cute piece of twine around the top and adding a little cinnamon stick for flair.
Your friends will think you’re a gourmet chef!
Perfect Presentation: The Art of Plating
Speaking of presentation, let’s not underestimate how a well presented dish can make your homemade creations pop.
Plating Techniques
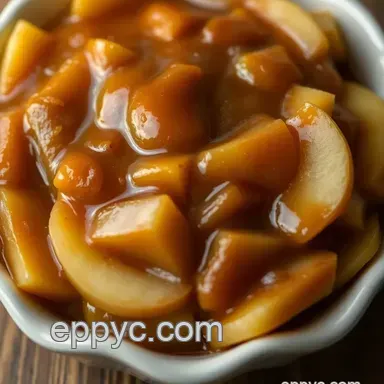
When you serve your chunky apple butter on warm toast , don’t just slap it on! spread it from corner to corner, letting it ooze off the edges like it just can’t contain its joy.
That’s how you want it to look full of love.
Garnish Ideas
Top it off with some chopped pecans or a little drizzle of honey. Not only will it look stunning, but the textures will make your taste buds dance!
Color Combinations
Use colorful bowls for serving. The contrast of rich brown apple butter against a bright colored plate will make it visually appealing. It’s simple, but it takes things up a notch.
Visual Appeal Tips
And remember, to always use clean, fresh jars when you store your apple butter. A squeaky clean jar screams “I’m fancy,” and we want that!
Storage & make-ahead Tips
So, you’ve made a killer batch of that easy apple butter . What do you do now?
Storage Guidelines
Store that goodness in sterilized jars in the fridge. It’ll last about two weeks . But honestly, it won’t last that long because you’ll be spreading it on everything!
Preservation Methods
If you want to make it last longer, consider canning it. Just follow safe canning practices, and you’ll be set for the chilly months ahead.
Reheating Instructions
Need to warm it up? Just pop it in the microwave for a few seconds before spreading or warm it gently on the stovetop.
Freshness Duration
Remember, it all depends on how you store it. Keep it cool, and it’ll be your go-to confection for brunch or that midnight snack sneaky bite.
Creative Variations: Customize Your Apple Butter
Now, let’s get creative! There are so many ways to switch things up with your apple butter.
Flavor Adaptations
Feel like experimenting? Try adding some pumpkin spice if you’re in the fall mood. Or maybe a hint of bourbon for a kick!
Dietary Modifications
For the health conscious folks, swap out regular sugar for coconut sugar or honey. It’s still scrumptious but leaves some guilt behind.
Seasonal Twists
In spring, add a dash of lemon zest for a refreshing vibe. Or if you're feeling extra, blend in fresh strawberries for a unique twist!
Regional Variations
You want to get truly regional? Think about adding a dash of chili powder for a fiery kick. Now, that’s a conversation starter at your next BBQ!
Complete Nutrition Guide
Everyone loves to know what’s in their food, right? Let’s break it down.
Detailed Breakdown
In each serving, you’re looking at about 50 calories for two tablespoons perfect guilt free indulgence!
Health Benefits
Apple butter not only gives you the sweetness you crave, but those apples pack in loads of fiber and vitamins too.
Dietary Considerations
If you’re counting carbs, remember to watch out for the sugars you add, especially if you’re trying out a Crockpot healthy variation.
Portion Guidance
When it comes to serving sizes, a little goes a long way! Start with just a couple of tablespoons. You might find yourself wanting a little more, though.
Conclusion: Get Cooking Your Homemade Apple Butter!
So there you have it: tips, tricks, and tasty tweaks to help you create the best homemade apple butter ever! it's like capturing autumn in a jar.
The flavors, the warmth, the memories. give it a whirl, and i promise, your taste buds will thank you. now, what are you waiting for? roll up those sleeves and get cooking!
Frequently Asked Questions
What apples are best for making homemade apple butter?
Choosing the right apples is crucial for delicious homemade apple butter. Tart varieties like Granny Smith or a mix of sweet and tart apples, such as Honeycrisp or Fuji, work wonderfully. This combination gives a great balance of flavor, making your apple butter rich and tasty!
How long can I store homemade apple butter?
You can store homemade apple butter in the refrigerator for up to 2 weeks. If you want it to last longer, consider canning it. Just make sure to properly seal your jars, and your apple butter can last for a year if stored in a cool, dark place!
Can I adjust the sweetness in my homemade apple butter?
Absolutely! Depending on the sweetness of your apples, you can taste the mixture during preparation and adjust the sugar to your liking. You can also experiment with sugar alternatives or reduce the sugar amount for a healthier version just remember that it may affect the flavor balance!
What are some variations I can try with homemade apple butter?
Get creative with your homemade apple butter! You could add a splash of vanilla extract or some ground ginger for a twist. For an extra autumnal touch, try incorporating a tablespoon of maple syrup it's a delightful addition!
Do I need special equipment to make homemade apple butter?
Not at all! A slow cooker or a heavy bottomed pot works just fine. An immersion blender is great for achieving smoothness, but if you don't have one, a regular blender will do the trick too. Just be cautious when transferring hot mixtures!
What can I serve with homemade apple butter?
Homemade apple butter is incredibly versatile! Spread it on toast or English muffins for breakfast, swirl it into oatmeal or yogurt for a bit of sweetness, or serve it alongside a cheese board. It pairs beautifully with sharp cheeses, making for a delightful contrast!
Homemade Apple Butter A Cozy Autumn Treat
Ingredients:
Instructions:
Nutrition Facts:
| Calories | 50 |
|---|---|
| Fat | 0 g |
| Fiber | 1 g |
