Homemade Pop Tarts Recipe
- look into into Nostalgia: Homemade Pop Tarts
- Your Go-To Essential Ingredients Guide for Homemade Pop Tarts
- The Art of Professional Cooking: Mastering Your Kitchen
- Pro Tips & Secrets
- Perfect Presentation
- Storage & Make-Ahead
- Creative Variations
- Complete Nutrition Guide
- Wrapping Up
- Frequently Asked Questions
- 📝 Recipe Card
look into into Nostalgia: Homemade Pop Tarts
Oh my gosh, i remember the first time i popped one of those sugary delights into the toaster before school.
The aroma wafting through the kitchen was like a warm embrace from my childhood. fast forward to today, and i'm all about that homemade pop tarts recipe that brings back that sweet nostalgia but is way better than the store-bought stuff.
Seriously, nothing beats biting into a flaky, buttery pastry filled with your favorite jam or curd. if you’re thinking "breakfast of champions," look no further.
A Glimpse into the Past
Pop tarts have been beloved since their inception in the 1960s. first marketed to busy moms wanting quick breakfast options, they've now transformed into an iconic snack for kids and adults alike.
They’re crispy, sweet, and utterly customizable. it’s no wonder they keep showing up at my breakfast table. this poptart recipe calls for simple ingredients and a pinch of love perfect for anyone ready to relive their childhood or impress brunch guests!
Time wise, this little adventure is fairly manageable. you'll need about 1 hour and 5 minutes in total: 15 minutes of action, 30 minutes chilling, and a 20-minute bake .
It’s like cooking magic, and you’ll yield 8 beautiful pastries with each batch. and hey, your wallet will thank you; this recipe uses basic pantry staples like flour and butter, so it’s budget friendly too!
Sweet Benefits Galore
Now, let’s be real these aren’t just pretty pastries. there are some serious perks here! when made at home, you control what goes into them.
Using homemade brown sugar or low-sugar jams can help you layout a healthier breakfast option that’s still as tasty. plus, you can avoid all those mysterious preservatives in store-bought varieties.
Nothing screams nostalgia quite like customizations based on childhood favorites.
Thinking of hosting a brunch? these pop tarts are your secret weapon. whether it’s a kid's birthday or a cozy gathering with friends, they’re perfect for serving.
You might even find yourself in sally’s baking after trying a flavor combination of hazelnut spread with fresh strawberries! they stand out from other breakfast options, and believe me, nobody can resist them fresh from the oven with a light glaze drizzled on top.
Find joy in the kitchen as you roll out that dough! it’s a flurry of flour and sugar, and trust me, the mess is part of the fun! just imagine the smell of warm pastries wafting through your home while you reminisce about your own childhood breakfast time rituals.
Getting Ready for Homemade Delights
So, are you eager to gather those ingredients? now that we’ve dunked into the festive vibe of homemade pop tarts , let’s chat about what you need to get started.
The dough is a cinch to whip up, and you’ll be amazed at how easy it is to fill and seal those edges.
Just imagine your favorite fillings: fruity jams, lemon curd, or even a sweet chocolate surprise anything goes!
Stay tuned for the exciting ingredient list that’ll kickstart this cooking journey, because you’re about to create magic right in your own kitchen! Happy cooking, and get ready for your taste buds to thank you!
Your Go-To Essential Ingredients Guide for Homemade Pop Tarts
Hey there, fellow food ensoiasts! have you ever had that moment post breakfast where you think, “man, i just need something sweet and nostalgic”? well, let me tell you you can’t go wrong with a homemade pop tarts recipe !
but first things first, let’s dive a little deeper into the kitchen essentials to elevate your pop tart recipe game to the next level.
Premium Core Components
To kick this off, we need to chat about the core ingredients . Trust me, quality counts! So here’s the scoop:
- Flour: Grab yourself 2 cups (240g) of all-purpose flour. Look for something finely milled; it’ll help create that oh-so-flaky crust.
- Butter: You'll need ½ cup (115g) chilled and cubed unsalted butter. Make sure it’s super cold this makes for a tender pastry that won't flatten out in the oven.
- Sugar and Salt: Simple as can be! It’s just 1 teaspoon of sugar and ¼ teaspoon of salt . These aren't just flavor boosters they're vital for balance.
- Ice Water: Have 6-8 tablespoons ready. This step is all about keeping it cool (literally!). Just a heads-up, use ice water to keep your dough from getting too gooey.
Storage Tips: Store your flour in a cool, dry place should last about 6-8 months.
Freshness Tips: Always check your butter for freshness. If you notice any funky smells, it’s time to toss it. No one wants a rancid pop tart, am I right?
Signature Seasoning Blend
Now, let’s sprinkle a little magic into the mix!
- Essential Spice Combinations: While pop tarts are sweet, a little pinch of cinnamon can take your fillings to another level.
- Herbs and Aromatics: Got some vanilla on hand? A splash can enhance your glaze perfectly.
- Regional Variations: Whether it’s strawberry from the Midwest or lemon from the South, feel free to mix it up based on your cravings!
Smart Substitutions
Life happens, and so do snack emergencies!
- Common Alternatives: No fruit jam? Try Nutella or even peanut butter with banana slices. Heaven!
- Dietary Modifications: Vegan? Swap the butter for coconut oil and use almond milk in the glaze. Easy peasy!
- Seasonal Options: In the summer? Use fresh berries or whatever’s in the farmer’s market.
Kitchen Equipment Essentials
Alright, time to gather your tools! Honestly, I love a good excuse to get my hands on some fun kitchen gadgets.
- Must Have Tools: Think rolling pin, baking sheet, and a pastry brush. Seriously, these are your best friends.
- Alternative Equipment: No rolling pin? Just grab a wine bottle. Ha!
- Storage Solutions: Invest in airtight containers for your finished pop tarts. Keeps ‘em fresh longer.
Serve It Up!
As you’re whipping up your homemade pop tarts , think about what you’ll pair them with maybe a warm cup of coffee or tea? oh my gosh, that combo is unreal! and don’t forget to invite your friends over for a “breakfast of champions” gathering.
Everyone loves a good breakfast time!
When you’re ready, hit up the step-by-step instructions for making these delightful pastries. Whether you fill them with luscious fruits or creamy Nutella, make sure to savor every bite.
Now that we’ve covered the essential ingredients, let’s get into how to craft your pop tarts masterpiece. Trust me, your taste buds will thank you later!
The Art of Professional Cooking: Mastering Your Kitchen
Cooking should be a blast, right? but let’s face it going from novice to a pro cook can feel a bit overwhelming.
I remember when i tried to whip up a homemade pop tarts recipe for the first time. total chaos! flour everywhere, and i forgot to chill the dough.
Nope, not my finest hour. but hey, the more we learn, the better we get. let’s dive into some essential professional cooking methods to help you shine in the kitchen!
Essential Preparation Steps: Get It Together
First things first: mise en place . it sounds fancy, but it just means "everything in its place." before you start, measure out your ingredients trust me, this will save you a lot of headache later.
This is like setting the scene for a great movie, but in your kitchen!
Now, onto time management . prepping your ingredients in advance lets you focus on the fun part cooking! keep a timer handy, especially during crucial steps.
If your cookies bake for 10 minutes and you lose track of that, well, let’s just say charred cookies are not a good look!
Being organized is key. Designate areas for your ingredients, tools, and finished dishes. I love using small bowls for spices and prepped items; it feels kinda chef like, you know?
And don’t forget about safety! Always use a cutting board and a sharp knife. Safety first, folks! Who wants to end up with a band aid instead of a delicious meal?
step-by-step Process: No Room for Mistakes
Now, let’s break this down into easy-to-follow steps.
Preheat your oven to 375° F ( 190° C) . This is non-negotiable. Starting at the right temperature is half the battle.
Prepare your dough . combine the flour, sugar, and salt in a bowl, then work in the chilled butter. the mix should look like coarse crumbs.
Add the ice water, a few tablespoons at a time, until it holds together. chill this baby for 30 minutes .
Seriously, don’t skip this step!
Roll out the dough . once chilled, roll it out to about 1/8 inch thick. i can't stress enough how crucial this thickness is too thick, and it won’t bake right; too thin, and you’ve got soggy pop tarts! aim for rectangles about 3"x5" .
Assemble . Place the filling in the center and seal those edges with a fork. It’s like giving them a little hug. This keeps the yumminess inside!
Bake for about 20 minutes or until golden brown. You’ll know they’re ready when they smell heavenly like not-so-patiently waiting for them to cool down so you can glaze.
Expert Techniques: Take It Up a Notch
Now that you’ve got the basics, let’s talk about some expert techniques.
Always use high-quality ingredients, like homemade brown sugar . It makes a world of difference.
Keep an eye out for quality checkpoints. Is the dough crumbly? Is everything blended? These are signals that you’re still on the right track.
Having troubles? Maybe your dough is too sticky or crumbling too much? Chill it more! Trust me, patience is key.
Success Strategies: Avoiding Pitfalls
We’ve all faced those kitchen fails who hasn’t burned something or let a pie crust get way too soggy? Here are some tips to avoid common mistakes.
Go easy on fillings. A spoonful is plenty. Overstuffing equals spilled toppings, and nobody wants to clean that up!
Remember timing precision! Baking is all about timing. If it says 20 minutes , stay close to the oven.
If you can, try to make these pop tarts ahead of time. They keep well in an airtight container. Meal prep for breakfast time , anyone?
Wrapping It Up
So there you have it tips and tricks from prepping to glazing your paw-tastic homemade pop tarts with sprinkles. honestly, nothing beats a breakfast of champions like a warm, gooey pop tart straight from your own oven.
If i can learn this, so can you!
Now, before you hop off to recreate this delicious recipe, remember to embrace the journey. cooking is all about trial and error.
You’ll improve with practice. in the end, it’s all about the fun and love you put into your poptart recipe .
Ready to dive deeper? Let's move on to some Additional Information to make your kitchen adventures even more exciting! Happy baking!
Pro Tips & Secrets
Alright, let’s dive into some pro tips ! first things first, if you want a flaky, delicious crust, you’ve gotta keep your butter super cold while making this home-made pop tarts recipe .
Seriously, like putting them in the freezer for a few minutes cold! when i first tried this recipe, i didn’t think much of the butter temp, and let’s just say it didn’t end well.
So, keep that butter chilled, folks!
Now, about chilling the dough. i learned the hard way that letting the dough rest in the fridge for at least 30 minutes does wonders.
It helps improve the texture and makes the rolling way easier. plus, think of it as a moment to prep for that breakfast of champions .
For flavor enhancement, consider adding a hint of cinnamon or vanilla to your filling. just a pinch can elevate your tart to a whole new level.
And when it comes to presentation, don’t shy away from fun! a sprinkle of colorful jimmies makes everything better, am i right?
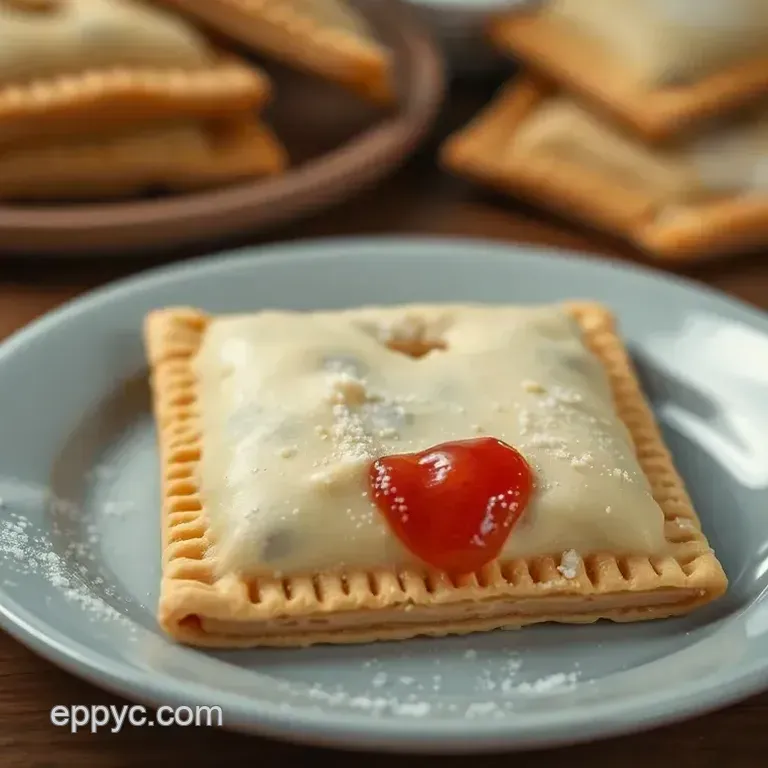
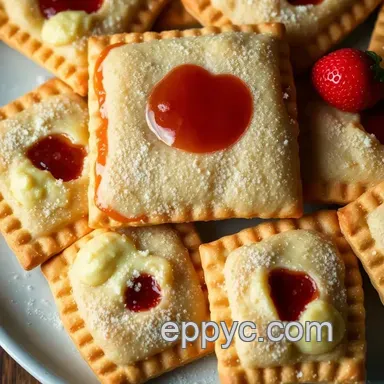
Perfect Presentation

Speaking of presentation , this is where your inner artist can shine! when it comes to plating these pop tarts, i usually cut them into perfect rectangles with my pizza cutter it’s fast and way less messy.
How about a little fun? you can stack two on a plate, drizzle with extra glaze, and toss some fresh berries around for that “instagram worthy” shot.
As for garnish ideas , a mint leaf on the side never hurt anyone! and hey, have you ever thought of adding a dash of edible glitter? you’d be surprised at how much a pop of color can make a difference on your table.
Storage & make-ahead
Okay, so let’s talk storage . i promise you, these homemade beauties won’t last long, but if you need to stash some away for later, just pop them in an airtight container.
They should stay fresh for about three days at room temp. if you wanna keep them longer, freeze unglazed pop tarts before baking.
Just wrap them tight! when you’re ready to bake, no need to thaw just pop them in the oven and add a couple of extra minutes to the baking time.
If you find yourself in the situation where you’ve made tons, i mean, like “meal of the day” worthy amounts, reheating is simple too.
Just toss them in a toaster or oven for a couple of minutes to get that flaky goodness back.
Creative Variations
Here’s where the fun really kicks in! flavor adaptations are your friend think outside the box! want to jazz things up? try using homemade brown sugar or even some chopped apples and cinnamon for a fall twist.
Each season can bring new flavors to the table!
And for those with special dietary needs, you can easily use a gluten-free flour blend or substitute dairy with almond milk and coconut oil.
Honestly, these variations make it a crowd pleaser. friends with dietary restrictions? you’ve got them covered!
Complete Nutrition Guide
Now, let’s get into the nitty gritty the nutrition part. these pop tarts aren’t just a treat; they can be packed with benefits.
With around 200 calories each, they’re pretty balanced if you enjoy just one (or two…no judgment here!). filled with fruit, they also offer some vitamins.
Just remember, moderation is key.
Make sure you’re playing with portion sizes maybe add a side of fresh fruit or a little yogurt for a more wholesome recipes breakfast option.
That little addition can completely change the meal of the day into a more balanced start!
Wrapping Up
So there you have it! your ultimate guide to making the best homemade pop tarts. this home-made pop tarts recipe will not only bring back those nostalgic vibes but also fill your kitchen with the smell of deliciousness.
You can customize, innovate, and create a breakfast treat that's all your own. don't be afraid to put your spin on it!
Honestly, there's nothing quite like enjoying a freshly baked pop tart with your morning coffee or as an afternoon snack.
So, roll up your sleeves, get messy in the kitchen, and have some fun! these treats are sure to be a hit with everyone.
Happy baking!
Frequently Asked Questions
Can I use store-bought pastry for this home-made pop tarts recipe?
Absolutely! If you're short on time or just not up for making the dough from scratch, using store-bought pastry like puff pastry or pie crust can save you some effort. Just remember to adjust baking times according to the instructions on the packaged pastry.
What are some good filling options for home-made pop tarts?
The beauty of this home-made pop tarts recipe is that you can customize it to your heart's content! Popular choices include classic fruit jams like strawberry or raspberry, lemon curd, and even chocolate hazelnut spread. Don’t hesitate to get creative with fillings like peanut butter and banana jam for a twist!
How should I store my homemade pop tarts?
To maintain their flaky texture and freshness, store your pop tarts in an airtight container at room temperature for up to 3 days. If you want to keep them longer, consider freezing them; just make sure to wrap them well to avoid freezer burn, and they can last up to a month!
Can I make adjustments to suit dietary restrictions?
Yes, you can easily adapt this home-made pop tarts recipe! For a vegan version, substitute butter with vegan butter and use almond milk instead of regular milk in the glaze. If you're gluten-free, you can experiment with gluten-free flour blends, keeping in mind the texture might differ slightly!
What can I do to make my pop tarts extra special?
To jazz up your homemade pop tarts, consider adding a dash of cinnamon or nutmeg to the dough for added flavor. You could also top them with fun sprinkles or drizzle some melted chocolate over the glaze - it’s an easy way to impress the guests!
What is the best way to serve homemade pop tarts?
Enjoy your pop tarts warm or at room temperature with a cup of tea or coffee for a delightful afternoon treat. For a more rounded meal, pair them with fresh fruit or even a dollop of whipped cream on the side perfect for a weekend brunch!
Homemade Pop Tarts Recipe
Ingredients:
Instructions:
Nutrition Facts:
| Calories | 200 |
|---|---|
| Fat | 8g |
| Fiber | 1g |
