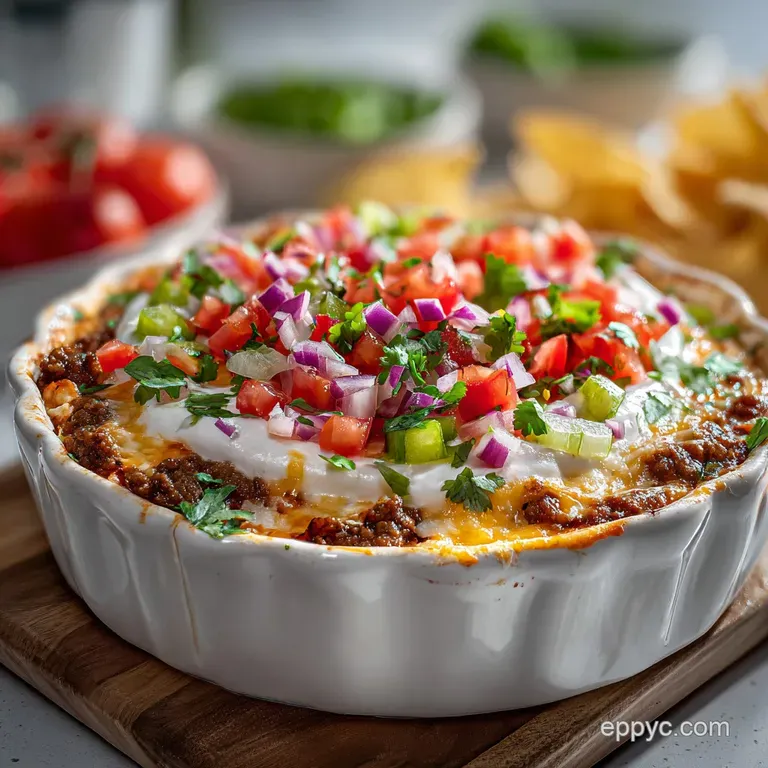
Mexican 7 Layer Dip: Velvety Cream Finish
- Time: Active 15 minutes, Passive 0 minutes, Total 15 minutes
- Flavor/Texture Hook: Velvety cream and crunchy toppings
- Perfect for: Game day crowds or potluck gatherings
- The Best Creamy Mexican 7 Layer Dip
- Speedy Prep for Busy Parties
- Reasons You Need This
- Component Analysis Deep Dive
- Essential Pantry Ingredients
- Kitchen Gear and Tools
- Mastering the Layering Steps
- Solved Dipping Problems
- Tasty Creative Variations
- Best Storage Tips
- Perfect Presentation Guide
- Recipe FAQs
- 📝 Recipe Card
The Best Creamy Mexican 7 Layer Dip
I remember the exact moment I realized my old dip technique was flawed. It was at a summer barbecue where the humidity was high and the chips were thin. Within twenty minutes, the beautiful layers had slumped into a beige puddle, and the bottom of the glass dish looked like a science experiment gone wrong.
My friends were literally using spoons because the chips would shatter the second they hit a hidden pocket of watery salsa.
That disaster sent me on a mission to engineer a better scoop. This article shares my recipe for Easy Creamy Mexican 7 Layer Dip, a guaranteed party favorite. We aren't just slopping beans into a bowl here. We are building a structured, flavor dense appetizer that respects the integrity of the tortilla chip.
By focusing on the viscosity of each layer and the order of operations, you'll create something that looks professional and tastes vibrant.
You've probably seen a dozen versions of this dish, but most of them forget that the "cream" in the middle needs to act as a dam, not a slip and slide. We're using a mix of cream cheese and sour cream to provide a thick, luscious foundation that holds the weight of the heavier salsa and tomatoes.
It's a small change that makes a massive difference in how the dish performs under the pressure of a crowded snack table.
Speedy Prep for Busy Parties
Efficiency is the heartbeat of a successful host. When you're juggling three different dishes for a crowd, you don't want to be stuck dicing tomatoes for an hour. This recipe is designed with a specific workflow that minimizes mess and maximizes speed.
By using pre prepared foundations like canned beans and jarred salsa, we focus our energy on the structural assembly and the fresh finishes that make it pop.
The Physics of the Scoop
Structural Viscosity: Adding softened cream cheese to the sour cream increases the mixture's "yield stress," preventing heavier top layers from sinking into the base. This creates a distinct visual separation and prevents the layers from bleeding into one another over time.
- Prep the Base: Mix the beans and brine first so the flavors meld while you whip the cream.
- Whip the Mid Section: Using a hand mixer for the cream layer ensures a velvety, spreadable consistency that won't break your chips.
- Drain the Salsa: This is the most important step for longevity; a sieve is your best friend here.
| Method | Total Time | Texture | Best For |
|---|---|---|---|
| Traditional Cold | 15 minutes | Thick and sturdy | Outdoor parties/Picnics |
| Warm Bean Base | 25 minutes | Soft and melty | Cozy winter gatherings |
| Individual Cups | 40 minutes | Neat and portable | Kid parties or COVID safe events |
Choosing the right method depends entirely on your environment. For most of us, the classic cold assembly is the gold standard because it allows those fresh flavors of cilantro and lime to really sing.
If you're using a warm base, just remember that the sour cream layer will soften quickly, so it’s best served immediately.
Reasons You Need This
Most party dips are one note, but this one hits the entire sensory spectrum. You get the earthy, salty base of the beans, the tangy zip of the lime infused cream, the buttery richness of guacamole, and the sharp, fresh bite of green onions and tomatoes.
It is a complete meal disguised as an appetizer, which is probably why it's always the first dish to be scraped clean.
- Moisture Barrier: The fat content in the cheese and cream layers acts as a sealant, keeping the bean moisture down and the salsa juices up.
- Acid Balance: Fresh lime juice and jalapeño brine provide the necessary "high notes" to cut through the heavy fats of the beans and cheese.
- Texture Contrast: We move from the smooth, silky base to the firm pop of olives and the watery crunch of fresh Roma tomatoes.
Component Analysis Deep Dive
Understanding why we use specific ingredients helps you become a more intuitive cook. We aren't just choosing these for flavor; they each have a job to do in the overall architecture of the dip.
| Ingredient | Science Role | Pro Secret |
|---|---|---|
| Refried Beans | Foundation Anchor | Use jalapeño juice to loosen the starches for better dipping. |
| Cream Cheese | Emulsion Stabilizer | High fat content prevents the sour cream from weeping liquid. |
| Lime Juice | Enzymatic Brightener | Prevents the guacamole from oxidizing (browning) too quickly. |
Essential Pantry Ingredients
For this recipe, we are using specific quantities to ensure the 9x13 inch dish is perfectly filled without overflowing. I've found that these proportions offer the best chip to dip ratio in every single bite.
- 30 oz refried beans: This provides the heavy base needed to anchor the lighter toppings.
- 1 tbsp jarred pickled jalapeño juice: Don't toss that brine! It adds a pickled, spicy depth that plain water can't touch.
- 16 oz full fat sour cream: low-fat versions are too watery for a structured dip.
- 1 cup softened cream cheese: This is the secret to a "no slump" dip.
- 1 packet taco seasoning: If you want to customize the heat, try my Homemade Enchilada Seasoning recipe for a deeper, smokier profile. Why this? It provides consistent, concentrated spice without adding extra moisture.
- 1 tbsp freshly squeezed lime juice: Always use fresh; the bottled stuff has a metallic aftertaste.
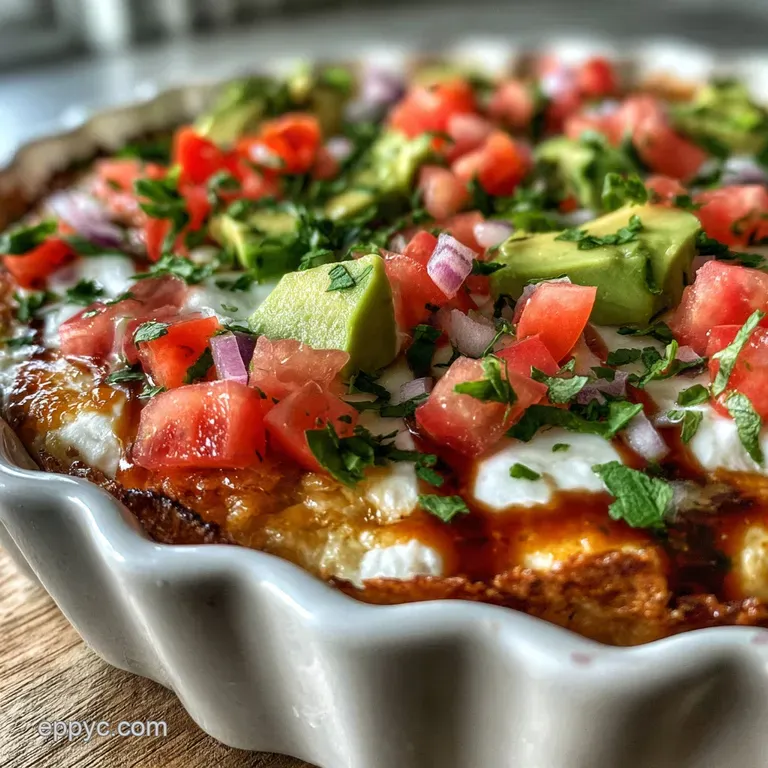
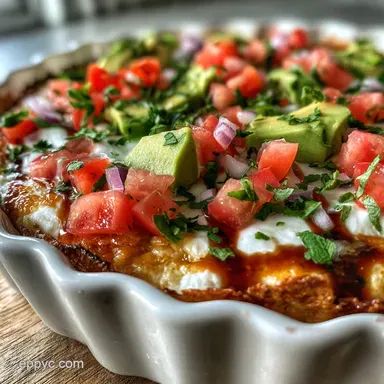
- 2 cups prepared guacamole: Make sure it’s chunky enough to provide texture.
- 1.5 cups chunky salsa: Choose a "thick and chunky" variety and drain it well.
- 2 cups shredded Mexican blend cheese: Grate it yourself if you have time for a fluffier finish.
- 1 cup Roma tomatoes: These have less water than beefsteak tomatoes, keeping the top layer crisp.
- 0.5 cup sliced black olives: Drained and patted dry.
- 0.25 cup fresh cilantro: Chopped finely for aromatic garnish.
- 3 green onions: Use both the white and green parts for a mix of sharp and mild onion flavor.
| Original Ingredient | Substitute | Why It Works |
|---|---|---|
| Full fat Sour Cream | Plain Greek Yogurt | Similar tang and thickness. Note: Adds more protein but slightly less richness. |
| Mexican Cheese Blend | Sharp White Cheddar | Provides a more assertive flavor. Note: Doesn't melt quite as smoothly if served warm. |
| Roma Tomatoes | Red Bell Peppers | Provides a similar crunch without the liquid. Note: Changes the flavor profile significantly. |
Finding the right balance of ingredients is a bit like a puzzle. If you change one thing, you might need to adjust another to keep the dip from becoming too soft or too firm. For a great side pairing, this dip goes beautifully with my Mexican Macaroni Salad recipe.
Kitchen Gear and Tools
You don't need a professional kitchen to pull this off, but a few specific tools will make the process much smoother. Using a glass dish is non negotiable for me because the visual impact of those distinct layers is half the fun of the dish.
- 9x13 inch Glass Baking Dish: This provides the surface area needed for a thin, even spread of layers.
- Hand Mixer: Essential for incorporating the cream cheese into the sour cream without leaving lumps.
- Fine Mesh Sieve: For draining the salsa this is the single most important tool for preventing a soggy dip.
- Offset Spatula: This makes spreading the thick bean and cream layers much easier without disturbing the layer beneath.
- Small Mixing Bowls: For prepping the individual components before assembly.
Mastering the Layering Steps
The secret to a great Layer Dip Party Favorite is in the sequence. We want to place the most moisture heavy ingredients (like salsa) toward the top, where they can drain slightly without ruining the structural integrity of the base.
- Mix the foundation. Combine 30 oz refried beans with 1 tbsp jalapeño juice in a small bowl until smooth. Note: The juice thins the beans just enough to make them spreadable without making them runny.
- Spread the base. Use an offset spatula to spread the bean mixture evenly across the bottom of your 9x13 dish. Look for a flat, level surface.
- Prepare the cream. In a separate bowl, use a hand mixer to beat 16 oz sour cream, 1 cup softened cream cheese, 1 packet taco seasoning, and 1 tbsp lime juice. Note: Whipping adds air, making the layer lighter and easier to scoop.
- Layer the cream. Carefully dollop the cream mixture over the beans and spread it to the edges. Ensure the beans are completely covered.
- Add the guacamole. Spread 2 cups of guacamole over the cream layer. Press down gently to remove air pockets that could cause browning.
- Drain the salsa. Pour 1.5 cups salsa into a mesh sieve and let it sit for 2 minutes. Wait until it stops dripping.
- Apply the salsa. Spread the drained salsa over the guacamole. Note: Draining prevents a red puddle from forming at the bottom of the dish later.
- Add the cheese. Sprinkle 2 cups of shredded Mexican blend cheese over the salsa. Cover the surface completely to act as a bed for the toppings.
- Garnish the top. Layer on 1 cup diced Roma tomatoes, 0.5 cup olives, 3 sliced green onions, and 0.25 cup cilantro.
- Chill and set. Let the dish sit in the fridge for at least 30 minutes until the flavors meld and the layers firm up.
Solved Dipping Problems
Even a simple dish can go sideways if you don't account for the nature of the ingredients. Tomatoes weep, beans can be stiff, and guacamole is notoriously temperamental.
Softening Cold Stiff Layers
If you've ever had a chip snap off in a dip, the bean layer was likely too cold and dense. When refried beans sit in the fridge, the starches undergo retrogradation, making them firm up like a brick.
The fix is that small splash of jalapeño brine; the acidity and liquid keep the starches "open" and pliable even when chilled.
Stop the Bottom Puddles
Water at the bottom of the dish is usually the result of "weeping" tomatoes or undrained salsa. To prevent this, always seed your Roma tomatoes before dicing. The "guts" of the tomato contain most of the water. By removing them, you keep that fresh crunch without the liquid runoff.
| Problem | Root Cause | Solution |
|---|---|---|
| Soggy Base | Salsa or tomato liquid | Drain salsa in a sieve and seed tomatoes before dicing. |
| Broken Chips | Layers are too cold/hard | Mix beans with jalapeño juice; let dip sit 10 mins before serving. |
| Brown Guacamole | Air exposure/oxidation | Seal the guac layer with the salsa and cheese immediately. |
Common Mistakes Checklist
- ✓ Never skip draining the salsa even "thick" salsa has hidden liquid.
- ✓ Use full fat dairy products to ensure the dip stays thick and stable.
- ✓ Soften the cream cheese completely before mixing to avoid white lumps.
- ✓ Pat the sliced olives dry with a paper towel before adding them to the top.
- ✓ Layer the ingredients all the way to the edges of the dish to "seal" the lower levels.
Tasty Creative Variations
While the classic Mexican 7 Layer Dip is a crowd pleaser, there are plenty of ways to pivot the flavor profile depending on what you have in the fridge or the specific dietary needs of your guests.
- Hearty Meat Version: Add a layer of seasoned ground beef or turkey between the beans and the cream layer for a more filling dish.
- Mediterranean Twist: Swap refried beans for hummus, sour cream for tzatziki, and salsa for a cucumber feta relish.
- The Spice King: Add diced fresh habaneros to the tomato layer and use a spicy pepper jack cheese instead of the Mexican blend.
| Servings | Dish Size | Bean Quantity | Sour Cream Amount |
|---|---|---|---|
| 8 People | 8x8 inch square | 15 oz | 8 oz |
| 15 People | 9x13 inch glass | 30 oz | 16 oz |
| 30 People | Two 9x13 dishes | 60 oz | 32 oz |
If you want a lighter version, you can substitute the sour cream for Greek yogurt, but I suggest keeping the cream cheese. It’s the "glue" that keeps the yogurt from running. If you want a smoky kick, try mixing a teaspoon of chipotle in adobo into your bean layer.
Trust me, that smoky heat against the cool cream is brilliant.
Best Storage Tips
Because of the fresh produce and dairy, this dip has a relatively short shelf life once it's fully assembled. However, with the right technique, you can make it last through the weekend.
- Fridge Life: This dip will stay fresh for about 3 days in the refrigerator. After that, the tomatoes start to lose their texture and the guacamole may begin to grey.
- The Tight Seal: Use plastic wrap and press it directly onto the surface of the dip. This minimizes air contact, which is the enemy of fresh guacamole and sour cream.
- Zero Waste: If you have leftover dip that’s looking a bit messy, stir it all together and use it as a filling for quesadillas or a topping for baked potatoes the next day. It’s oddly delicious when melted.
Perfect Presentation Guide
Presentation matters, especially when you've put in the effort to create those perfect, distinct layers. A clear glass dish is your best asset here, but the way you arrange the final toppings can turn it into a centerpiece.
Perfect Chip Pairing Ideas
Don't just grab any bag of chips. You want "scoop" style chips or thick cut corn tortillas that can handle the weight of all seven layers. I personally love the blue corn varieties because the dark color provides a stunning contrast to the bright reds and greens of the dip.
Individual Mini Dip Cups
For parties where people are mingling, you can build this recipe in clear plastic 9 oz cups. Put about two tablespoons of each layer in the cup. This prevents the "double dipping" drama and makes it much easier for guests to walk around with their own personal snack station.
Myths About Layer Dips
A common misconception is that you should "seal" the beans with the guacamole first. In reality, the cream layer is much better at protecting the beans. If you put guac directly on beans, the color can become muddy and unappealing. Another myth is that you can't make this ahead of time.
You absolutely can just wait to add the fresh tomatoes and cilantro until about an hour before serving to keep them from wilting.

Recipe FAQs
Is it necessary to drain the salsa before layering?
Yes, draining the salsa is crucial. Excess liquid pools at the bottom, creating a watery mess that breaks the chip structure.
How to prevent the layers from bleeding into each other?
Use softened cream cheese mixed with sour cream. The fat content creates a thick, stable emulsion that acts as a moisture barrier between the bean base and the salsa top layer.
How to keep the guacamole layer from turning brown overnight?
Seal the guacamole layer completely with the drained salsa and cheese. Oxygen exposure causes browning; the layers above act as a protective seal.
How to make the dip sturdy enough for sturdy chip dipping?
Ensure the refried bean base is mixed with a small amount of acid, like jalapeño juice. This keeps the starches pliable, preventing the base from becoming overly hard and brittle when chilled, which causes chips to snap. If you enjoyed controlling texture here, see how the same principle of managing starch hydration applies in our Classic Seven Layer recipe.
How to make this recipe ahead of time for a party?
Assemble all layers except the fresh tomatoes and cilantro one day ahead. Cover tightly with plastic wrap pressed directly onto the surface and refrigerate. Add the fresh garnishes no more than one hour before serving.
What is the best substitute for full fat sour cream?
Use plain, full fat Greek yogurt as a direct substitute. It maintains similar tang and thickness, though it contributes slightly less richness than the cream cheese/sour cream combination.
What type of tortilla chips work best with this layered dip?
Use sturdy scoop style chips or thick cut corn tortillas. Thin or flimsy chips will inevitably break under the weight of the denser layers, especially the bean and cream sections.
Mexican 7 Layer Dip
Ingredients:
Instructions:
Nutrition Facts:
| Calories | 285 kcal |
|---|---|
| Protein | 8.8 g |
| Fat | 20.6 g |
| Carbs | 14.7 g |
| Fiber | 5.1 g |
| Sugar | 3.8 g |
| Sodium | 782 mg |
