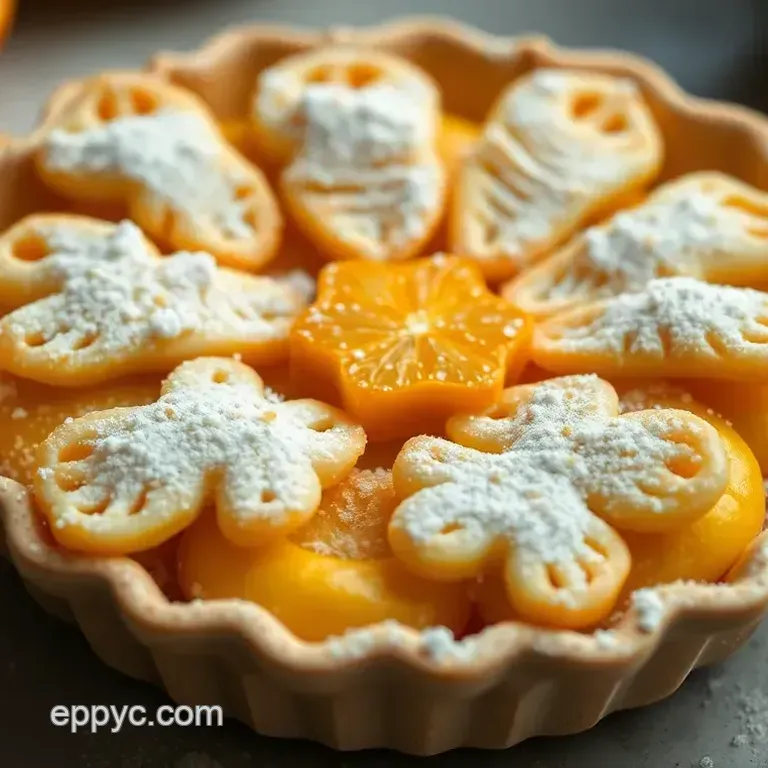
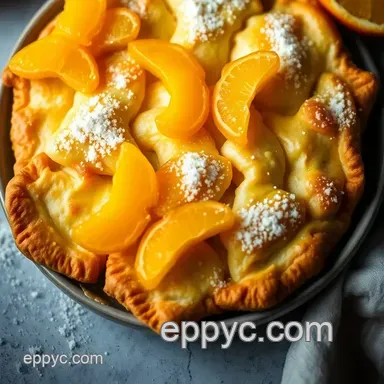
Orange Butterflies: Citrus Delight Pastry Treats
Catching Some Flavorful Butterflies: My Orange Adventure
So, picture this: i’ve always been a sucker for anything that reminds me of sunny days. and one day, as i was daydreaming in my kitchen, a thought fluttered in like an orange butterfly “what if i could capture that sunshine in a pastry?” that’s how i stumbled upon the idea of orange butterflies .
Honestly, who wouldn’t want a flaky, buttery treat filled with bright citrus goodness? it’s like summer took a vacation in your mouth!
These delicate pastries have a history with roots in charming little french patisseries. over the years, they’ve made their way to many households, not just mine.
You know? they’re the kind of treat good enough for afternoon teas or special occasions. and trust me, whipping these up will impress anyone who comes by.
But don't worry, they’re not rocket science! you're looking at about an hour from start to finish, plus they’ll yield 12 adorable butterfly pastries .
Baking and Butterflies: What’s the Deal?
Okay, let’s break it down. the recipe isn't just a quick grab from the store nope! it takes a bit of care.
We’re talking about a medium difficulty level here. you’ll have to work that pastry dough to get it perfectly flaky, like layers of tiny fairy wings aesthetic just waiting for a dash of that sweet orange filling.
You’d think, “ugh, why all the fuss?” but honestly, it’s all about that fresh flavor.
Here's where it gets interesting: the cost. it won’t break your wallet! most of the ingredients are pantry staples, like flour and sugar, and for real? you probably have a few oranges lying around.
Talk about a value pastry!
Why You’ll Love Orange Butterflies
Listen, let’s chat about the good stuff. these orange butterflies aren’t just pretty they’re packed full of goodness! oranges are not only delicious but also bring vitamin c to the party, which we could all use, right?
when you bite into one of these, you’re greeted with that sweet yet tangy flavor that dances on your tongue.
It's like orange aesthetics come to life. plus, they’re perfect for any occasion; whether it’s a casual brunch or a fancy dinner, these pastries fit right in.
And let’s be real for a sec. these butter filled, zesty delights have a unique edge over those other common pastries.
There’s nothing like the light glaze atop that slightly warm butterfly shape to bring everything together. seriously, your guests will be munching away and asking for more!
Time to Gather Ingredients!
Alright, friends, enough chit chatting about these citrus delights . the stage is set, and the ingredients need gathering! picture the color vibe brightening your kitchen as you chop up those fresh oranges and combine them with sugar.
You’ve got this, my friend. it’s time to spread some cheer and let those orange icons cheer you on.
Now, let’s get into the nitty gritty of whipping up these tasty treats! The fun's about to begin, and I can’t wait to see you all flutter away with your orange butterflies ! 🍊🦋
Essential Ingredients Guide: The Heart of Your Kitchen

So, let’s talk about the core ingredients that make your kitchen hum like a well oiled machine! we’re diving into this with style, much like those widget orange aesthetic vibes bright, warm, and oh-so-inviting.
If you're thinking about whipping up something fresh, let's break it down into bite sized nuggets of wisdom (see what i did there?).
Premium Core Components: Stocking Your Kitchen
First off, let’s chat about the basics you NEED. Getting the right measurements can either make or break a recipe. Here’s a simple breakdown:
- For Dry Ingredients : 1 cup like a standard US size equals about 120 grams of flour.
- For Wet Ingredients : That same cup is about 237 ml for liquids. Easy peasy!
Now, you also want to pay attention to the quality of what you're grabbing. look for robust colors and pleasing scents fresh herbs should smell like they just came from the garden, while spices should be vibrant.
Storage is key. keep those spices locked away in a cool, dark place. most dried ones last about 6 months on the shelf, but fresh? well, they can wilt pretty fast usually about 3 to 5 days .
And don’t get me started on freshness! when picking produce, seek out color and firmness. think about the vibrant orange aesthetics of ripe apricots or tomatoes.
You know you want that zing in your dish!
Signature Seasoning Blend: Spice It Up!
Next up let’s spice things up! The right seasoning blend can turn a meal from drab to fab in no time. So, what's essential?
First, essential spices might include paprika, cumin, and oregano. you can create killer combos like garlic and rosemary or go bold with a little chili powder and black pepper.
Add some herbs like thyme and basil for that flavor enhancer vibe.
Don’t forget about regional variations! For instance, if you're feeling like a Mexican fiesta, grab some cumin and cilantro . Feeling Italian? Basil and oregano are your go-tos!
Smart Substitutions: Making It Work
We all face those moments you're in the middle of cooking and realize you’re missing something. enter smart substitutions ! got no buttermilk? no problem just mix regular milk with a splash of vinegar and voilà, you have a quick stand-in.
If you're needing to tweak for health, check out alternatives like using applesauce instead of oil in baking. It’s a game changer, trust me!
And what if it's summer, and those fresh ingredients are out of season? Look for frozen options which can work surprisingly well.
Kitchen Equipment Essentials: Tools of the Trade
Here’s a good one— kitchen equipment essentials ! Start with the must haves:
- A reliable chef's knife is key; don’t skimp here.
- Rolling pin great for everything from cookies to pasta!
- Mixing bowls grab a few in different sizes (you'll thank me later!).
Now, don’t stress if you’re missing a fancy gadget. A sturdy cutting board will do wonders!
Oh, and storage solutions are important too. Use mason jars for your spices, and you'll feel like a true kitchen wizard!
Transition to Delicious Recipes
Honestly, making the best out of your kitchen means having the essentials, dressing it up in fairy wings aesthetic , and being flexible when challenges arise.
With your ingredients lined up and the right tools at hand, you're primed to create mouth watering dishes like orange butterflies , a zestful delight that captures the sweetness and tang of fresh oranges.
Let’s head to the fun part the instructions! you ready?
Mastering the Orange Butterflies : A Professional Cooking Method
So, you’re ready to dive into the world of orange butterflies ? let me tell ya, these delightful pastries are like little bursts of sunshine on your plate.
Flaky pastry, zesty filling, and a sweet glaze just scream happiness, don’t you think? let’s explore how to navigate the kitchen like a pro with some essential prep steps and expert techniques.
Essential Preparation Steps
First thing's first: let’s chat about mise en place . this fancy term just means “everything in its place.” seriously, it’s like the kitchen version of “first things first.
” measure out your ingredients before diving in. it’ll keep you from scrambling for that cup of sugar halfway through trust me, it’ll save ya some stress!
Next up is time management. if you’re anything like me, you might forget about those orange icons while you're caught up in the fun.
Prep time for these treats is about 20 minutes active . plus, you gotta chill that dough for 30 minutes .
Set a timer, so you’re not that person who forgets dinner in the oven while binge watching netflix. total time is about 1 hour and 5- 10 minutes that’s not too shabby!
Organization is key, darling. keep your workspace tidy. i’ve learned that a clean kitchen is a happy kitchen. don’t forget safety! sharp knives can ruin a good day faster than a lemon falling off your counter.
Always use a cutting board and keep your knives sharp.
step-by-step Process
Alright, let’s break it down. Here’s a simple step-by-step that’ll (hopefully) keep you on track.
Prepare the dough : first, mix your flour, salt, and sugar in a big bowl. cut in the chilled butter , then slowly add that cold water .
Mix until it comes together. form it into a disk and chill for 30 minutes .
Make the filling : combine your sugar, orange zest, juice, melted butter, and cornstarch into a bowl. let it thicken while your dough chills.
The color vibe of that filling is just divine!
Roll Out the Dough : Roll it out to 1/4 inch thick , then fold it like a letter this is how you get that amazing flaky texture.
Assemble the Pastries : Cut your dough into squares, fill ‘em up with that zesty goodness, and fold 'em into butterfly shapes.
Bake the pastries : preheat your oven to 375° f ( 190° c) and pop those beauties in for 15- 20 minutes until they’re golden brown.
That’s when the magic happens!
Glaze It Up : Mix your powdered sugar with orange juice and brush it over the warm pastries. You’ll want to dive right in!
Expert Techniques
Now let’s sprinkle in some pro tips. here’s the real tea keeping your ingredients cold while working with puff pastry is crucial.
It’s all about achieving that perfect flakiness. trust me, it makes a world of difference!
Always check your oven’s temperature. if it’s running hot (as mine sometimes does), you might need to adjust baking times.
Look for those visual cues like a golden crust. and if at any point it feels like your dough is fighting back, just take a breath.
You’re in control of the situation!
Success Strategies
We’ve all been there: a recipe doesn’t go as planned. let’s avoid those common mistakes. don’t overstuff your pastries; a tablespoon of filling should suffice.
Also, allow your goodies to cool before glazing; otherwise, you'll have a runaway glaze situation.
Keep in mind, making these orange butterflies is a fun process! if you want to prep ahead, you can chill the filled pastries for a few hours before baking.
This can be a lifesaver during busy weekends or gatherings.
If you're feeling adventurous, think about swapping out the oranges for lemons or even limes for a bit of a twist.
It’s always good to mix things up like an orange widget in a sea of boring gray!
Wrapping It All Up
With a bit of practice and patience, those orange butterflies will soon be a delightful fixture in your kitchen. the whole family will be buzzing with excitement! remember that cooking is a journey, filled with flavors, smells, and oh gosh little messes.
Embrace the process, and let your inner chef shine.
Ready to dive into this pastry adventure? don’t forget, the world of baking is wide open, and you’re the one holding the whisk! keep on experimenting, and soon you'll have all your friends buzzing about your fairy wings aesthetic pastries.
Check out our next section for more tips and tricks!
Whipping Up Your Best Orange Butterflies: A Citrus Delight
Pro Tips & Secrets
Alright, my friends, let’s delve into the nitty gritty of making Orange Butterflies . These cheerful pastries don’t just taste great; they’ll bring a burst of sunshine right into your kitchen!
Chill, chill, chill! keep everything cold the butter, the water, even your flour if you can swing it. this keeps the dough flaky like a perfect spring morning.
Honestly, chilling is the secret sauce here.
Timing is Key. To save time, make your filling while the dough chills. Multitasking is a chef's best friend. You’ll be amazed at how efficient you can be when you’re not just staring at the dough, waiting for it to chill!
Flavor Explosion! For an extra pop, toss some grated ginger into your filling. It’s a game changer! Seriously, it adds a zing that’ll have folks saying, "What’s your secret?"
Presentation is everything. brush the finished pastries with glaze while they’re hot. it adds that glossy finish that just screams, "look at me, i’m fabulous!" plus, the warm pastries soak it up just right.
Perfect Presentation
Now that you’ve mastered the mechanics, let’s talk style! Because what’s more fun than presenting your Orange Butterflies like a chef on a baking show?
Plating Techniques: Lay them on a bright plate. Seriously, a colorful dish just makes everything pop think vibrant orange alongside fresh greens or even a zesty salad.
Garnish Ideas: Sprinkle some crushed pistachios on top! They’re not just pretty; the crunch adds a fantastic texture.
Color Combinations: Pair these beauties with a blueberry or raspberry sauce. The deep blues and reds against the orange will be a feast for the eyes.
Visual appeal tips: use fairy wings aesthetic for a playful touch maybe even scatter some edible flowers for that instagrammable vibe.
You want your dish to have that aesthetic orange tone to reflect those cheerful orange butterflies !
Storage & make-ahead
Did you know you can prep these ahead? Here’s a breakdown on how to store them properly:
Storage Guidelines: Keep any unbaked pastries in the fridge for up to 24 hours. Just cover them tightly with plastic wrap to lock in that goodness.
Preservation Methods: If you’ve baked extras, store them in an airtight container. They’re best eaten fresh, but you can keep them for about 3 days.
Reheating Instructions: Pop them in a preheated oven for 5- 10 minutes at 350° F to warm them up. This also helps revive that crispy texture.
Freshness Duration: Make sure not to go longer than 3 days they’ll start to lose that delightful fluffiness!
Creative Variations
Get wild with these pastries! Here’s where you can really put your own spin on it:
Flavor Adaptations: How about adding some almond extract for a sweet twist? Or switch up the citrus with lemons or limes for a different vibe.
Dietary Modifications: gluten-free? Use a good gluten-free flour mix just keep an eye on the moisture and adjust accordingly!
Seasonal Twists: Infuse the filling with spices like cinnamon or cardamom in the fall for a cozy touch.
Regional Variations: Let’s talk about regional flair. Inspired by Southern charm? Add a touch of sweet tea in the glaze. Or for a New Orleans kick, sprinkle in some cayenne!
Complete Nutrition Guide
Now that we’ve talked style, let’s hit that health info. Here’s the lowdown:
Calories: About 180 per pastry. Not bad for a little slice of heaven!
Health benefits: Oranges are a powerhouse of Vitamin C. So hey, you're getting some nutrients here pat yourself on the back!
Dietary Considerations: Keep portions in check. One or two with a cup of tea? Perfect!
Portion Guidance: Serving size of around 2 is ideal full but not stuffed!
So there you have it! bring sunshine into your kitchen and delight your friends with orange butterflies . they’re a treat that can make even a rainy day feel like summer.
Whip these up, and you’ll be the star of every brunch! happy baking, and let those orange icons of deliciousness take flight! you got this!
Frequently Asked Questions
What are orange butterflies and how are they made?
Orange butterflies are delightful pastry treats filled with a zesty orange filling, encased in a flaky, buttery dough. To make them, you'll need to prepare your dough, chill it, then roll it out and cut it into squares to fill with the orange mixture before folding into a butterfly shape and baking.
They’re perfect for tea time!
Can I substitute orange juice with something else?
Absolutely! If you don’t have orange juice on hand, lemon or lime juice can be used for a different tangy flavor. You could also use store-bought orange marmalade as a filling for a quick alternative, just keep the sweetness in mind!
How should I store leftover orange butterflies?
Store any leftover orange butterflies in an airtight container at room temperature for up to 2 days. If you want them to last longer, refrigerate them for up to a week. Just reheat them lightly in the oven to revitalize that flaky texture before serving!
What tips do you have for perfecting the flaky texture?
For the best flaky texture, ensure your butter is cold when making the dough, and chill the dough after mixing. Also, be sure to roll it out and fold it several times to create layers, which will contribute to that light flakiness we all love!
Are orange butterflies a healthy dessert option?
While orange butterflies are a delightful treat, they're not the healthiest dessert option due to the sugar and butter content. However, you can lighten them by using less sugar and opting for a whole grain flour if you want a bit more nutrition. Enjoy them in moderation as part of a balanced diet!
Can I freeze orange butterflies?
Yes, you can absolutely freeze orange butterflies! To do so, bake them first, and once cooled, place them in a freezer safe container. They’ll keep well for up to 3 months. Just reheat them in the oven when you’re ready to enjoy another treat!
Orange Butterflies Citrus Delight Pastry Treats
Ingredients:
Instructions:
Nutrition Facts:
| Calories | 180 |
|---|---|
| Fat | 8g |
| Fiber | 0.5g |
