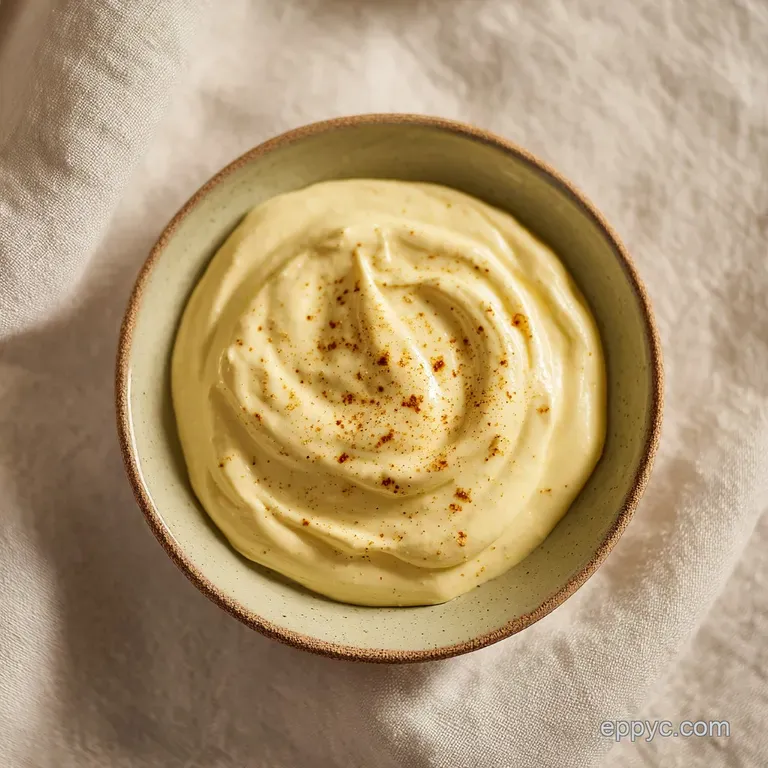
Mayonnaise: Silky and Thick
- Time: Active 2 minutes, Passive 0 minutes, Total 2 minutes
- Flavor/Texture Hook: Silky, buttery, and incredibly thick
- Perfect for: Keto meal prep, gourmet sandwiches, and quick dressings
- Why Making This Homemade Mayonnaise Will Change Your Kitchen Routine
- Breaking Down the Essential Recipe Specs for Success
- Gathering Your Essentials for the Perfect Creamy Base
- Choosing the Right Equipment for a Fail Proof Emulsion
- From Prep to Plate: The Two Minute Mixing Method
- Common Mistakes & Troubleshooting for a Silky Finish
- Variations & Substitutions for Your Custom Flavor Profile
- Scaling Guidelines for Large Batches
- Myths Regarding the Perfect Emulsion
- Storage Guidelines for Maintaining Peak Freshness
- Perfect Pairings for Your Creamy Homemade Creation
- Recipe FAQs
- 📝 Recipe Card
Why Making This Homemade Mayonnaise Will Change Your Kitchen Routine
I still remember the first time I heard that distinct, high pitched "whirr" of the immersion blender hitting the bottom of a mason jar. For years, I was terrified of making my own condiments.
I’d watched my grandmother whisk oil into egg yolks for what felt like hours, her arm shaking, only for the whole thing to "break" and turn into a greasy soup at the very last second. It felt like a high stakes gambling game I wasn't ready to play.
But then, I discovered the "stick blender" method, and my digital loving, efficiency obsessed brain finally clicked with the culinary side of things.
The first time it worked, I actually gasped. One second, you have a layer of clear yellow oil sitting on top of a lonely egg. The next, a thick, white cloud of velvety cream erupts from the bottom of the jar. It’s pure kitchen technology at its finest.
This isn't just about saving a trip to the store, it's about the flavor. When you use high-quality avocado oil and fresh lemon juice, the taste is clean, bright, and deeply satisfying. It’s heart felt cooking powered by a bit of modern physics.
Once you realize that you can whip up a batch of fresh, preservative free spread in less time than it takes to toast a piece of bread, you'll never go back. I've used this base for everything from my favorite Egg Salad Recipe to a quick dip for roasted potatoes. It's a fundamental skill that empowers you to control exactly what goes into your body, ditching the seed oils and weird stabilizers found in the commercial stuff. Plus, there is something deeply rewarding about watching those layers transform in an instant.
Breaking Down the Essential Recipe Specs for Success
The Molecular Glue of the Egg Yolk
The secret to why this recipe doesn't just stay a puddle of oil lies in a tiny molecule called lecithin. Found in the egg yolk, lecithin acts as a bridge between water based ingredients (the lemon juice and egg whites) and the fat (the oil).
Normally, oil and water hate each other, but lecithin has one end that loves water and another that loves fat. When we use the immersion blender, we are mechanically forcing the oil into millions of microscopic droplets. The lecithin then wraps around each droplet, preventing them from grouping back together.
This creates a stable structure that we perceive as thick and creamy.
| Method Type | Speed | Stability | Best Use Case |
|---|---|---|---|
| Immersion Blender | Ultra Fast | High | Small batches in a jar |
| Food Processor | Medium | Medium | Large batches for crowds |
| Hand Whisking | Slow | Low | Developing forearm strength |
When choosing your approach, the immersion blender is the most reliable because it starts the emulsion at the bottom with the heaviest ingredients first. If you are preparing a massive amount for a summer party, a food processor might seem tempting, but it often struggles with the small volume of a single egg.
Stick to the jar and the stick blender for the most consistent results. This setup ensures that the oil is pulled into the blades at the perfect rate, which is the golden rule of condiment technology.
Gathering Your Essentials for the Perfect Creamy Base
The beauty of this recipe is its simplicity, but because there are so few components, the quality of each one matters immensely. We aren't hiding behind sugar or artificial flavorings here. We are using 1 large Egg (50g), which must be at room temperature to ensure the proteins can stretch and bond properly.
If the egg is too cold, the emulsion might struggle to form, leaving you with a runny mess.
Next, we need 1 cup Avocado oil (218g). I prefer avocado oil because it has a neutral flavor and a high smoke point, but most importantly, it’s packed with healthy fats. For the zing, we use 1 tbsp Lemon juice (15g).
Freshly squeezed is non negotiable here, as the bottled stuff often has a metallic aftertaste that will ruin the delicate balance. We also add 1 tsp Dijon mustard (5g), which isn't just for flavor mustard contains its own natural emulsifiers that help keep the mixture stable.
Finally, a pinch of 1/4 tsp Fine sea salt (1.5g) and 1/8 tsp White pepper (0.3g) provide the seasoning. White pepper is a professional secret because it adds a subtle earthy heat without leaving black specks in your beautiful white cream.
| Original Ingredient | Substitute | Why It Works |
|---|---|---|
| Avocado Oil (1 cup) | Light Olive Oil (1 cup) | Neutral flavor profile. Note: Avoid Extra Virgin as it becomes bitter when blended. |
| Lemon Juice (1 tbsp) | Apple Cider Vinegar (1 tbsp) | Provides the necessary acidity. Note: Adds a slightly fruity, sharp tang. |
| Dijon Mustard (1 tsp) | Mustard Powder (1/2 tsp) | Provides the emulsifying power. Note: Flavor is more pungent and less vinegary. |
Using the right oil is the biggest decision you'll make in this process. I've tried using Extra Virgin Olive Oil in a high speed blender before, and let me tell you, it was a disaster. The high speed blades actually break open the polyphenols in the olive oil, making it taste incredibly bitter almost like medicine. If you want that olive oil flavor, use a "light" or "refined" version, or better yet, stick to avocado oil for that buttery, clean finish that pairs so well with a Classic Macaroni Salad recipe.
Choosing the Right Equipment for a Fail Proof Emulsion
You don't need a kitchen full of gadgets, but the one tool you do need is specific. An immersion blender (also known as a stick blender) is the heart of this operation. The diameter of the blending head should ideally fit snugly into the bottom of the vessel you are using.
This is why a wide mouth pint mason jar is the gold standard for homemade condiments. If the jar is too wide, the oil will bypass the blades, and the emulsion won't catch.
| Method | Total Time | Texture | Cleanup Difficulty |
|---|---|---|---|
| Stovetop Infusion | 15 minutes | Thinner/Flavored | Moderate (pots/strainers) |
| Oven Roasting (Garlic) | 45 minutes | Extra Creamy/Paste | Easy (foil/tray) |
Chef Tip: Before you start, make sure your blending jar is bone dry. Even a single drop of water can interfere with the way the oil droplets form, potentially leading to a "broken" sauce that refuses to thicken.
While we aren't "cooking" the mayonnaise on a stove, many people enjoy adding roasted elements. If you want to make a roasted garlic version, you would use the oven method to soften the cloves before blending. However, for the standard base, we are purely in the digital speed realm of cold emulsion.
The technology of the blades spinning at thousands of rotations per minute does all the heavy lifting for us.
From Prep to Plate: The Two Minute Mixing Method
The workflow for this is incredibly fast, so I like to have everything measured out before I even plug in the blender. This is a "set it and forget it" kind of prep, where the order of operations is everything. If you dump things in randomly, you risk a failed batch.
Follow this timeline to ensure you hit the perfect texture every single time.
The Foundation Layer
Carefully crack the 1 large Egg (50g) into the bottom of your clean, dry mason jar. It is vital that the yolk remains intact at this stage. If it breaks, don't panic, but try to keep it whole so it sits right under the blender head.
Add the 1 tbsp Lemon juice (15g), 1 tsp Dijon mustard (5g), 1/4 tsp Fine sea salt (1.5g), and 1/8 tsp White pepper (0.3g) directly on top of the egg.
The Oil Float
Slowly pour the 1 cup Avocado oil (218g) over the top of the egg mixture. You will see the oil settle into a clear layer on top while the egg and seasonings stay at the bottom. This separation is exactly what we want. Let the jar sit for about 30 seconds to allow the egg to settle completely at the base.
The Magic Vortex
Place the head of the immersion blender all the way to the bottom of the jar, making sure it is resting firmly over the egg yolk. Switch the blender to its highest speed. Do not move the blender for the first 20 seconds.
You will see a white, creamy substance begin to form and creep up the sides of the jar.
The Slow Rise
Once the bottom third of the jar is thick and white, slowly start to tilt and lift the blender head. This allows the remaining oil from the top to be pulled down into the vortex. Continue to move the blender up and down gently for another 30 seconds until the mixture is uniform and thick.
You should hear the motor strain slightly as the mayo becomes dense and velvety.
Common Mistakes & Troubleshooting for a Silky Finish
Even with the best technology, things can go sideways. The most common issue is a "broken" emulsion, where the oil and egg refuse to bond, leaving you with a yellow, greasy liquid. This usually happens if the oil was added too fast or if the ingredients were at drastically different temperatures.
If your mayo looks like curdled milk, don't throw it out! We can fix this.
Why Your Mayo Stayed Liquid
If your mixture is thin and runny, it likely means the emulsion never started. This often happens if you move the blender too soon. The blades need to create a "seed" of emulsion at the bottom before they can handle the rest of the oil.
Another culprit is using an oversized jar; if the blender head isn't "trapping" the egg and oil together, the vortex won't be strong enough to break the oil into those tiny droplets.
| Problem | Root Cause | Solution |
|---|---|---|
| Broken/Separated | Added oil too fast or cold egg | Start with a new egg yolk and slowly whisk the broken mix into it. |
| Bitter Aftertaste | High speed oxidation of olive oil | Switch to avocado or sunflower oil for future batches. |
| Too Thin | Not enough oil or moving too fast | Add another 1/4 cup of oil slowly while blending to thicken. |
To save a broken batch, simply take a clean jar, add one fresh room temperature egg yolk, and very slowly we’re talking drop by drop whisk or blend your broken mixture into the new yolk. The fresh lecithin will act as a rescue team, pulling the old mixture back into a stable state.
Common Mistakes Checklist: ✓ Always use room temperature eggs to ensure proper protein bonding. ✓ Never use a jar that is significantly wider than your blender head. ✓ Avoid moving the blender until you see the white "cloud" reach the halfway mark.
✓ Ensure the blender is on the highest speed setting for maximum shear force. ✓ Pat the lemon dry before cutting to avoid extra water entering the jar.
Variations & Substitutions for Your Custom Flavor Profile
Once you have the basic tech down, you can start hacking the recipe to suit your mood. This base is incredibly forgiving when it comes to flavor add ins. I love to experiment with different acids and fats to create unique profiles that empower my meals with more depth.
For a Garlic Aioli Twist
Add 2 cloves of finely minced garlic (or roasted garlic paste) to the jar before blending. The garlic provides an incredible pungent kick that makes this perfect for dipping fries or spreading on a toasted baguette. If you want a more subtle flavor, use garlic infused oil as part of your oil measurement.
For a Spicy Chipotle Kick
Fold in 1 tablespoon of adobo sauce and one chopped chipotle pepper after the mayo has finished thickening. This creates a smoky, spicy spread that is lightyears better than anything you can buy in a squeeze bottle. It’s perfect for tacos or grilled chicken sandwiches.
Decision Shortcut for Customizing
- If you want a Tangy French Style: Use white wine vinegar instead of lemon and double the Dijon mustard.
- If you want a Herby Green Mayo: Pulse in a handful of fresh basil and chives at the very end.
- If you want a low-fat Alternative: Honestly, don't even bother; the fat is what creates the structure. If you need less fat, simply use a smaller portion.
Scaling Guidelines for Large Batches
Scaling a mayonnaise recipe isn't as simple as just doubling everything. Because the emulsion relies on the ratio of emulsifier (yolk) to fat (oil), you have to be careful not to overwhelm the eggs.
If you are making a double batch (2 cups of oil), I recommend using 3 egg yolks instead of 2 whole eggs to ensure there is enough lecithin to hold the extra volume.
When scaling down to a half batch, it gets tricky because the immersion blender needs a certain amount of depth to function. If you only use half a cup of oil, the blades might not be fully submerged, which will lead to a lot of splattering and a failed emulsion.
For small amounts, you are better off using a small bowl and a handheld whisk, though it will take significantly more physical effort.
Myths Regarding the Perfect Emulsion
One of the biggest myths in the kitchen is that you must only use the yolk. While the yolk contains the most lecithin, the egg white actually adds a lovely lightness and extra volume to the finished product.
Using the whole egg (as we do here) makes for a more stable, "foolproof" mayo that is less likely to break during the high speed blending process.
Another common misconception is that you have to whisk in one direction only. The science says otherwise! Whether you whisk clockwise, counter clockwise, or use a high speed digital blender, the goal is simply "shear force" breaking the oil into tiny pieces.
The direction of the blades or your hand doesn't change the molecular structure of the emulsion.
Storage Guidelines for Maintaining Peak Freshness
Because this recipe uses a raw egg and no commercial preservatives, storage is something you need to take seriously. Always store your homemade creation in the coldest part of your refrigerator, usually the back of the bottom shelf.
A glass jar with a tight fitting lid is the best vessel, as plastic can sometimes absorb odors from the fridge that will taint the delicate flavor of the oil.
- Fridge Life: This will stay fresh and safe for up to 7 days. If you see any liquid separating at the top, just give it a quick stir with a spoon.
- Freezer Warning: Do not freeze! Freezing will break the emulsion completely. When the water in the egg freezes and expands, it destroys the delicate bond with the oil, leaving you with a cottage cheese like mess when it thaws.
- Zero Waste Tip: Don't toss the eggshell! Crushed eggshells can be added to your compost or even used as a natural abrasive for cleaning tough stains off your cast iron pans. If you have a tablespoon of mayo left at the bottom of the jar that you can't scrape out, toss in some cold pasta, a bit of tuna, and some celery for a "jar salad" that uses every last bit of that velvety goodness.
Perfect Pairings for Your Creamy Homemade Creation
Now that you've mastered the ultimate spread, what do you do with it? Beyond the obvious sandwich application, this mayo is a fantastic base for a variety of sauces. Mix it with some sriracha for a spicy sushi topping, or blend it with some blue cheese and buttermilk for a restaurant quality salad dressing.
It's also the secret ingredient to the most tender grilled chicken; coat the meat in a thin layer of mayo before seasoning and grilling. The fat protects the protein from drying out, and the egg helps the spices stick.
I personally love using this as a foundation for a rich dip. Try mixing in some caramelized onions and serving it alongside some thick cut potato chips. It’s also the key to making a truly decadent coleslaw.
Since you've controlled the ingredients, you can feel good about serving this to your family, knowing it’s full of healthy fats and real food components. It’s a small change in your kitchen routine that yields a massive upgrade in flavor and quality. Ready to get blending?
Trust me, once you see that first emulsion catch, you'll be hooked on the magic of homemade condiments forever.

Recipe FAQs
How do you make your own mayonnaise?
Place the egg, lemon juice, mustard, salt, and pepper in a jar, then pour the oil on top. Submerge the immersion blender head fully to the bottom, turn to high speed, and hold still for 20 seconds until the bottom third emulsifies; then slowly lift the blender to incorporate the remaining oil.
What are the main ingredients of mayonnaise?
Oil, egg yolk, and acid are essential. The oil provides the body, the egg yolk (lecithin) acts as the critical emulsifier, and the acid (like lemon juice or vinegar) provides the necessary zing.
How to safely make mayonnaise at home?
Use fresh, high-quality eggs and keep all ingredients refrigerated until just before use. Since the recipe relies on raw eggs, ensure your eggs are well within their expiration date, and store the finished product immediately in the refrigerator for consumption within one week.
Is it true that homemade mayonnaise must use only the egg yolk?
No, using the whole egg is often more reliable for stability. While the yolk holds the most lecithin, incorporating the whole egg adds helpful volume and results in a foolproof emulsion that is less likely to break, especially when using high speed blending techniques.
Why is homemade mayonnaise not advisable for long term storage?
No, it is only safe for short term storage due to the raw egg content. Commercial brands contain preservatives and stabilizers that extend shelf life significantly, whereas homemade mayonnaise should be consumed within seven days for optimal safety and texture.
What happens if my homemade mayonnaise breaks and turns runny?
Rescue it by starting a new emulsion with a fresh egg yolk. Place one new, room temperature egg yolk in a clean jar, and then very slowly begin blending your broken mixture into the new yolk drop by drop until the stable emulsion reforms.
Can I use extra virgin olive oil instead of a neutral oil like avocado?
No, using extra virgin olive oil usually results in a bitter product. The high shear force required to create the emulsion can oxidize the delicate compounds in EVOO, releasing bitter flavors; for a good result, use a light or refined olive oil, or stick to avocado oil, which pairs beautifully with dishes like our Simple Macaroni Salad Recipe.
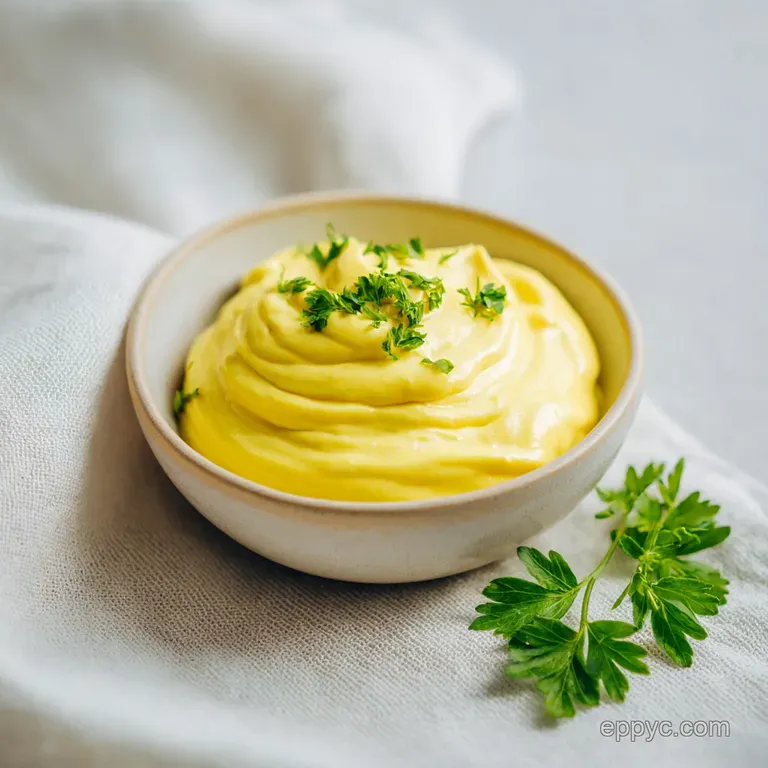
Velvety Homemade Mayonnaise
Ingredients:
Instructions:
Nutrition Facts:
| Calories | 125 kcal |
|---|---|
| Protein | 0.4 g |
| Fat | 13.9 g |
| Carbs | 0.1 g |
| Fiber | 0 g |
| Sugar | 0.1 g |
| Sodium | 41 mg |
