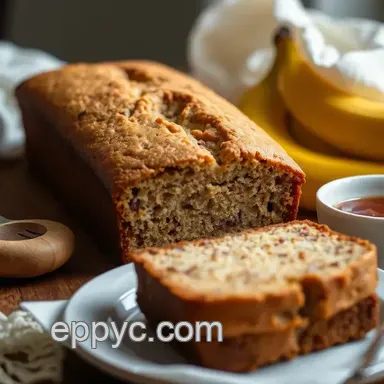
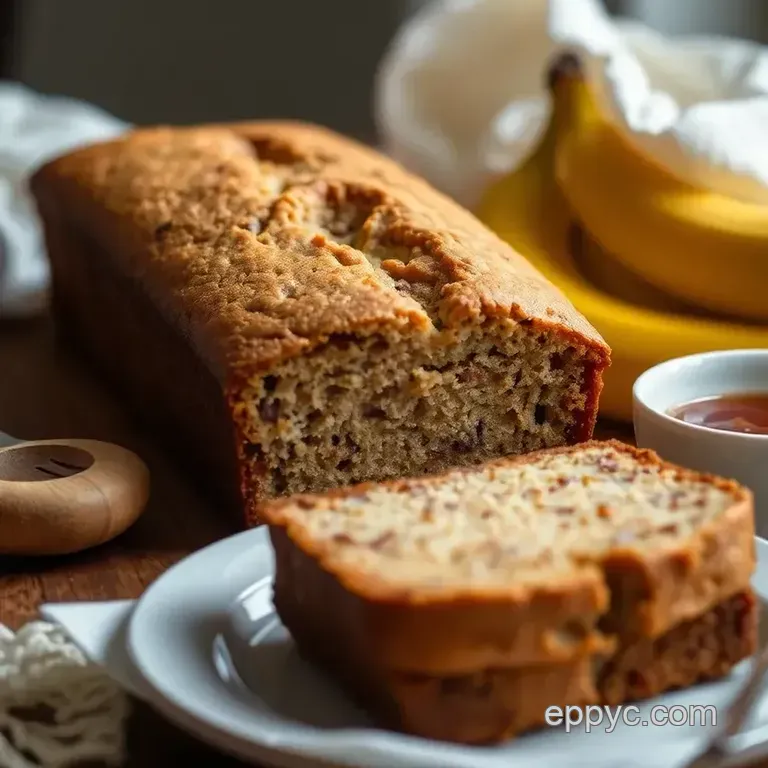
Moist & Flavorful Banana Bread

- Opening Hook
- Recipe Overview
- Key Benefits
- Essential Ingredients Guide
- The Art of Professional Cooking: A Guide for Every Home Chef
- Pro Tips & Secrets for the Perfect Banana Bread
- Perfect Presentation Techniques
- Storage & Make-Ahead Tips
- Explore Creative Variations
- Your Complete Nutrition Guide
- Expert FAQ Solutions
- 📝 Recipe Card
Opening Hook
So, here's a little secret i used to loathe bananas! seriously. but then, one day, i found a bunch of ripe bananas flirting with the edge of rotting on my kitchen counter.
Curious, i decided to give them a chance, and that’s when i discovered the magic of baking. i quickly learned how to bake banana bread for a moist delight that changed my whole perspective! the sweet aroma wafted through my kitchen, wrapping me up in pure comfort.
It was a game changer, my friends! and just like that, i went from a banana hater to a banana bread lover.
As it turns out, banana bread isn’t just a way to rescue those overripe bananas from tragedy; it’s a delicious hug in loaf form.
Each slice bursts with flavor and buttery goodness. seriously, there’s nothing like a warm piece with a cup of coffee or tea.
Let’s dive into this beloved banana bread recipe and explore how to whip up a batch that you can’t resist!
Recipe Overview
Did you know that banana bread has a bit of history? it's thought to have gained popularity during the great depression as a clever way to use overripe bananas that would otherwise go to waste.
I love that it started as a waste not, want not kind of dish! fast forward to today, and it's practically a breakfast staple or a go-to snack idea in american kitchens.
You can even whip up a loaf in about 1 hour and 15 minutes, and honestly, if i can do it, so can you!
This recipe is super easy i can’t stress that enough. no fancy techniques here; just good ol’ mixing. plus, it makes enough to feed the family (or yourself, no judgment!).
We're talking 8 glorious servings of fluffy banana goodness awaiting you!
Key Benefits
Now let's get into the fun stuff! banana bread ingredients are simple and tend to be healthy hello, ripe bananas! those caramelized beauties are not just sweet; they pack a punch of potassium, help keep your heart healthy, and give you a natural energy boost perfect for breakfast.
Want to get a bit healthier? there are healthy banana bread options like using whole wheat flour or swapping in dairy-free replacements! trust me; i tried a dairy-free banana bread once, and it was a revelation.
Banana bread shines brightest during special occasions: it's perfect for brunch, a cozy afternoon snack, or even as a gift to friends needing a little pick-me-up.
Honestly, who wouldn't appreciate a warm loaf on their doorstep? you can jazz it up with toppings, dive into chocolate chip banana bread , or keep it classic whatever suits your vibe!
You won’t just love it for its taste; you'll fall for how forgiving it is to make. have a few brown bananas lying around? great! they’ve found their purpose.
Don't worry about getting a dense banana bread; the secret lies in moist banana bread tips like not overmixing the batter.
Just think about how fluffy and delicious homemade banana bread can be when you treat those ripe bananas right!
With all that said, it's time to gather the banana bread ingredients and get crackin'!
Essential Ingredients Guide
When it comes to whipping up your favorite banana bread recipe , knowing your essential ingredients can make all the difference! whether you’re diving into the classic or want to spice things up with a chocolate chip banana bread , having the right components means success.
So let’s break it down, shall we?
Premium Core Components
First things first, let's talk measurements . if you're like me, you probably grab those big ol' ripe bananas and think, “how much do i really need?” here’s a pro tip: 3 large ripe bananas count for about 1 ½ cups mashed .
It’s vital to get those bananas nice and mushy the riper, the better !
Now, quality matters too. when selecting your ingredients, look for fresh produce and high-quality butter . the butter should have a creamy texture, and when you’re picking your bananas skip the green ones.
They’ll just ruin the party. and storage? store those leftover ingredients in a cool, dry place. this way, your banana bread ingredients stay fresh for weeks!
Signature Seasoning Blend
Now, let’s jazz it up with a bit of seasoning! your herb selections and pairings depend on your taste. for a classic, sprinkle in a little cinnamon or nutmeg .
Trust me, these spice combinations can elevate your moist banana bread like nobody's business!
If you’re looking for regional variations , try adding pecans or walnuts, or keep it simple with a nut-free banana bread recipe ! those sweet banana flavors pair beautifully with warm spices, making your bread irresistibly cozy.
Smart Substitutions
But lucky for us, if you're missing something, it doesn’t mean you can’t bake! with common alternatives , a bit of creativity can save the day.
If you’re out of some sugar, brown sugar gives a richer flavor ! or if there’s a nut allergy in the family, just skip those nuts altogether it still comes out yummy!
Don’t sweat it if your bananas are on the greener side. You can use unsweetened applesauce instead! Seriously, it works wonders for those moist banana bread secrets .
Kitchen Equipment Essentials
Okay, let me keep it real; your cooking tools matter. for our banana bread recipe , you’ll need a 9x5 inch loaf pan and mixing bowls.
Seriously, nothing fancy here! if you don't have a rubber spatula, a sturdy spoon will do just fine.
Clean-up can be a pain, right? So, opting for non-stick pans or even greasing your pans well can save you the headache later on.
Honestly, every time I bake, I remember those little disasters like the time I forgot to grab the baking soda (oops!), but that’s how we learn!
So, with your ingredients in place and the basics locked down, you're ready to bake. Up next, I’ll share some fun, simple instructions to bake banana bread for a moist delight that’ll make your home smell like heaven! Just you wait!
The Art of Professional Cooking: A Guide for Every Home Chef
Cooking is like an art form, isn’t it? it’s all about creativity and patience. but seriously, if you want to whip up something that’ll impress your folks (or yourself) every time, you gotta nail down the professional cooking methods .
Trust me, it’s worth diving into, especially when you're thinking about that heavenly loaf of banana bread!
Essential Preparation Steps
First off, let’s chat about mise en place . this fancy french term simply means "everything in its place." before you dive into cooking, gather all your ingredients.
It puts you in the zone! like, you wouldn’t want to be knee deep in batter and realize you forgot to snag those ripe bananas, right?
Now, about time management . you’ve got a million things going on, i get it! plan your cooking sessions. for example, with a banana bread recipe, set aside about 15 minutes to prep your ingredients and then 60 minutes for baking.
It’s like clockwork, and it makes everything smoother!
Organization strategies can be your secret weapon. keep your workspace clean. use trays to group similar ingredients. and let’s not forget safety considerations .
If you’re using knives, be cautious! it’s easy to slice and dice when you’re pumped about your cooking, but a nasty cut can ruin your vibe.
Step-by-step Process
Alright, let's get to the fun part the step-by-step process . Need a game plan? Here’s how to bake banana bread for a moist delight:
Preheat the oven to 350° F ( 175° C) . Seriously, don’t skip this. A hot oven means your bread will rise and bake just right.
Mash 3 large ripe bananas in a mixing bowl. Use a fork or a potato masher until it’s totally smooth.
Now stir in ½ cup melted unsalted butter until it’s all combined. That buttery goodness is where the magic starts!
Time to throw in ¾ cup sugar, 2 eggs , and 1 teaspoon vanilla extract . Mix it like your life depends on it. You want everything incorporated!
In another bowl, whisk together 1 teaspoon baking soda, ½ teaspoon salt, and 1 ½ cups flour . This is the dry crew.
Gently fold the dry into the wet ingredients. Don’t overmix it’ll lead to dense banana bread. We want fluffy banana bread, people!
Optional: Toss in ½ cup of chocolate chips or walnuts for that extra flair.
Pour it into a greased loaf pan and level it out. Easy peasy!
Pop it into the oven for 60 minutes . And here’s a pro tip check for doneness by sticking a toothpick in the center. If it comes out clean, you’re golden.
Let it cool for a bit in the pan, then transfer it to a rack.
Expert Techniques
Want to level up? Try these expert techniques !
Always check your oven temperature before baking. Ovens can be tricky; you don’t want to end up with overly dense banana bread. A temperature mishap can ruin your bake.
Remember those quality checkpoints . The smell should be heavenly after baking for an hour. Go with your gut trust your senses!
And if you face any issues, don’t panic! Overbaked bread? Just slather on some butter and call it “artisan.” It's all about the attitude.
Success Strategies
Okay, let’s wrap it up with some success strategies .
Avoid common mistakes, like using unripe bananas. We want those ripe beauties for a moist banana bread !
For quality assurance , taste your batter before baking (if it's safe to do so). trust me, a little raw egg won’t hurt with the right ingredients, but raw flour could mess you up.
Think about make-ahead options . You can prep your banana bread batter, then pop it in the fridge overnight. Bake it fresh in the morning talk about a breakfast win!
So, there you have it! with these tips, you can master the art of cooking while making your morning brews a whole lot sweeter.
Now, let’s delve into some additional information on banana bread variations and storage tips to keep your loved ones enjoying this classic treat!
Pro Tips & Secrets for the Perfect Banana Bread
Let’s chat about how to truly bake banana bread for a moist delight ! we’ve all been there standing in the kitchen with overripe bananas, wondering how the heck to use them up.
This banana bread recipe will not only help with that, but it’ll also have your kitchen smelling like heaven. here are some pro tips and secrets to nail it every time.
First off, make sure those bananas are ripe like, the more speckles, the better! those sweet, mushy beauties are what will give you that moist banana bread everyone raves about.
Another tip? don’t overmix your batter! a few lumps won’t hurt and will lead to a fluffier loaf.
Time saving techniques ? Pre-melt that butter in the microwave while your bananas mash. With just 15 minutes of prep time, you can grab a snack to munch on while you wait for your bread to bake!
Lastly, if you want to elevate your banana bread game, sprinkle in cinnamon or nutmeg. seriously, it’s a game changer! those spices will round out the flavor and make your bread feel extra comforting.
Perfect Presentation Techniques
Now let’s talk presentation . because who doesn’t want to impress the fam or guests? a gorgeous loaf of homemade banana bread is worth showing off! after baking, let your banana bread cool completely on a wire rack.
This helps keep the bottom from getting soggy a total bummer if you’re aiming for that fluffy banana bread vibe.
For a nice plating trick, slice your banana bread diagonally. you’ll get larger, eye-catching slices that have a beautiful texture.
And let’s be honest, no one wants a sad, ordinary slab of bread, right?
When it comes to garnish ideas , a sprinkle of powdered sugar or a drizzle of caramel sauce can take it to the next level.
Plus, consider layering your slices with fresh fruit or yogurt this adds pops of color that look fab and taste great too!
Storage & make-ahead Tips
You can totally make this banana bread ahead of time ! once your banana bread cools completely, wrap it tightly in plastic wrap and store it in the fridge for up to a week.
Want to keep it longer? pop that loaf in the freezer and it’ll stay fresh for up to three months.
That’s right, homemade treats that keep!
When you’re ready to enjoy your banana bread, just let it thaw in the fridge overnight, or you can warm it up in the microwave for a few seconds.
Reheated banana bread is pure comfort food! speaking of duration, if you want the freshest slices, try to finish your loaf within the first few days.
Explore Creative Variations
Now for the fun part variations ! the classic banana bread recipe is great, but don’t be afraid to switch things up.
How about adding chocolate chips for a sweeter take? they're perfect for kids (and let's be honest, adults too)! you could also try a dairy-free banana bread using almond milk or coconut oil if you want to keep things light.
Seasonal twists are awesome too. in the fall, toss in some pumpkin for a spiced banana bread that screams cozy.
This is especially great for those chilly mornings. or, if you want something a little different, go for spiced banana bread by adding ginger or cardamom.
So many possibilities!
Your Complete Nutrition Guide
Alright, let’s dive a bit into the nutrition side of things. one slice of this sweet banana bread packs roughly 210 calories .
It holds some good stuff too like potassium from those ripe bananas. if you're looking for health benefits, using whole wheat flour can up your fiber game.
Considering portion guidance? Each slice doesn’t have to be huge. Trust me, a smaller piece enjoyed with a side of yogurt or a fresh fruit salad is super satisfying.
Expert FAQ Solutions
Finally, let’s tackle a few frequently asked questions. a common hiccup is “why did my banana bread turn out dense?” typically, it’s from overmixing! you want just enough mixing to combine the ingredients.
Another hot question: “Can I make this banana bread without nuts ?” Absolutely! Leave ‘em out, or switch ’em for chocolate chips.
So, what are you waiting for? this is your sign to bake some banana bread today! you won’t just enjoy the delicious results; you’ll also savor the journey of baking.
Keep experimenting and find your favorite twist. honestly, baking can be such a rewarding hobby and a fantastic way to share comfort food with loved ones.
Happy baking!
Bake Banana Bread For A Moist Delight