Baked Sweet and Sour Chicken: Ultra Crispy
- Time: Active 20 minutes, Passive 45 minutes, Total 65 minutes
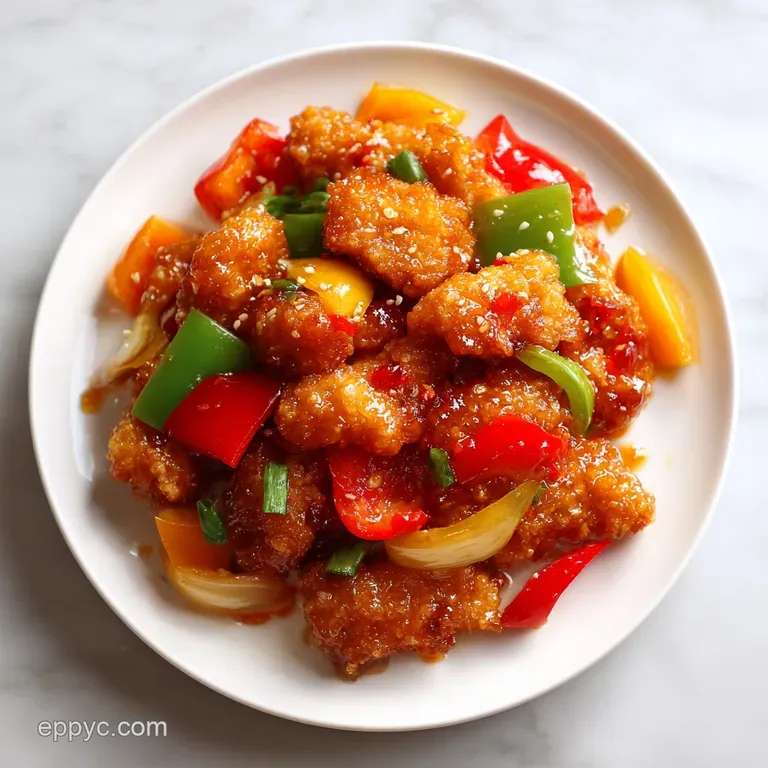
- Flavor/Texture Hook: A high contrast shatter crisp exterior giving way to a juicy, velvety center, all bathed in a glassy, piquant glaze.
- Perfect for: Stress free weeknight dinners or meal prep where you want takeout quality without leaving the house.
- The Secret to Crispy Baked Sweet and Sour Chicken
- Why the Starch Coating Always Shatters
- Component Analysis and Ingredient Roles
- Essential Components for the Signature Glaze
- Minimal Tools for Maximum Crunch Results
- Step-by-Step Guide for a Golden Glaze
- Solving Texture Issues for Professional Results
- Creative Adaptations to Suit Your Preferences
- Myths About Oven Baking Starch
- Smart Ways to Handle Your Leftovers
- Visual Finishing Touches for Stunning Plates
- High in Sodium
- Recipe FAQs
- 📝 Recipe Card
The Secret to Crispy Baked Sweet and Sour Chicken
Right then, let's talk about that specific sound. You know the one the high pitched scritch scritch of a fork dragging across a piece of chicken that has been properly fried.
For the longest time, I thought that sound was exclusive to heavy cast iron vats of bubbling oil and the inevitable cleanup that follows. I’ve tried the soggy "healthy" versions where the chicken just sits in a pool of its own juice, and honestly, they were a disappointment.
But then I discovered the power of the starch oil interface on a preheated sheet pan, and it changed the way I look at weeknight cooking forever.
The hero of this entire operation is the cornstarch. While flour creates a bready, often soft crust, cornstarch is pure amylose. When it hits the hot oil on your baking sheet, it undergoes a rapid transition, creating a micro thin, glass like shell that stays rigid even after the sauce is poured over.
It’s the difference between a meal that feels like a compromise and a meal that feels like a victory. This is the dish I make when I want that heartfelt, soul warming comfort of my favorite Chinese spot but need to keep things practical and digital nomad friendly.
We are going to empower your kitchen today by ditching the deep fryer and embracing technology specifically, the convective heat of your oven. By the time we’re done, you’ll have a tray of chicken that is so vibrant and glossy it looks like it belongs in a professional food shoot.
The aroma of the apple cider vinegar hitting the hot sugar will fill your house, and I promise you, nobody will believe this came out of a standard baking sheet. Let’s get stuck into why this method actually works.
Why the Starch Coating Always Shatters
Understanding the physics of your tray is what separates the soggy from the spectacular. We aren't just putting food in a hot box; we are using a specific sequence of events to manage moisture.
- Thermal Shock Initiation: By preheating the vegetable oil on the rimmed baking sheet for 2 minutes, we ensure that as soon as the chicken touches the metal, the starch begins to dehydrate and harden, preventing it from sticking or turning into a paste.
- Amylose Crystallization: Cornstarch lacks the protein (gluten) found in flour, meaning it doesn't get "chewy." Instead, it forms a brittle network that provides that signature "shatter" when you bite down.
- Evaporative Cooling Control: Leaving space between the 1 inch chunks allows steam to escape quickly; if the pieces are too close, they steam each other, resulting in a soft, flabby coating.
- The Sugar Glaze Bond: The high sugar content in the sauce reacts with the residual heat on the chicken’s surface to create a sticky, cohesive film that clings to the starch rather than soaking into it.
| Method | Total Time | Texture Profile | Best For |
|---|---|---|---|
| Baking Sheet Sear | 65 minutes | Shatter crisp and glassy | Hands off weeknight wins |
| Traditional Deep Fry | 50 minutes | Thick, airy, and crunchy | Weekend projects/Authenticity |
| Air Fryer Batches | 40 minutes | Very dry and ultra crunchy | Small portions (1-2 people) |
It is worth noting that while the air fryer is fast, it often struggles with the volume of 2 lbs of chicken. If you overcrowd an air fryer, you lose the very airflow that makes it work. The baking sheet method is the "innovator's choice" because it handles the full yield without breaking a sweat, ensuring every piece gets the same level of heat exposure. If you find yourself craving other textures, you might enjoy how this compares to a Parmesan Chicken recipe which uses a protein based crust instead of a starch based one.
Component Analysis and Ingredient Roles
The synergy between the sharp vinegar and the savory soy sauce is what builds the "piquant" profile we are looking for. It isn't just about being sweet; it's about that tug of-war between the sugar and the acid.
| Ingredient | Science Role | Pro Secret |
|---|---|---|
| Cornstarch | Moisture Barrier | Ensure the chicken looks "chalky" and dry before hitting the pan to prevent clumping. |
| Apple Cider Vinegar | Protein Softener | The acid helps keep the chicken thighs "velvety" while cutting through the heavy sugar. |
| Chicken Thighs | Fat to Lean Ratio | Thighs contain more connective tissue than breasts, allowing them to stay juicy during the long 45 minute bake. |
| Granulated Sugar | Caramelization Agent | Beyond sweetness, sugar provides the viscosity needed for the sauce to "cling" to the meat. |
Using the right cut of meat is the most practical decision you can make here. Chicken breasts are lean and tend to dry out after 45 minutes in a 200°C oven. Thighs, however, are resilient.
They have enough intramuscular fat to baste themselves from the inside out, which is exactly why they stay so succulent while the exterior becomes a fortress of crunch.
Essential Components for the Signature Glaze
Before you start, make sure your peppers are chopped into uniform 1 inch squares. This isn't just for aesthetics; it's about ensuring the vegetables soften at the same rate the sauce thickens.
- 2 lbs boneless, skinless chicken thighs: Why this? Stays juicy through double baking phases unlike lean breast meat. (Substitute: Chicken breasts, but reduce second bake by 5 mins)
- 1 cup cornstarch: Why this? Creates the crispest possible shell through pure starch dehydration. (Substitute: Potato starch)
- 2 large eggs, beaten: Why this? Acts as the "glue" to bind the starch to the protein. (Substitute: 1/4 cup aquafaba)
- 0.5 tsp salt & 0.5 tsp black pepper: Why this? Essential base seasoning for the meat itself.
- 0.25 cup vegetable oil: Why this? High smoke point allows for the necessary "tray sear." (Substitute: Grapeseed or Avocado oil)
- 0.75 cup granulated sugar: Why this? Provides the "sweet" and creates a glossy, thick syrup. (Substitute: Honey, but will be stickier)
- 0.5 cup apple cider vinegar: Why this? Brings a fruity acidity that balances the ketchup. (Substitute: Rice vinegar)
- 4 tbsp ketchup: Why this? Adds color, lycopene for body, and a familiar tang. (Substitute: Tomato paste + 1 tsp sugar)
- 1 tbsp soy sauce: Why this? The "umami" backbone that rounds out the flavors. (Substitute: Tamari for gluten-free)
- 1 tsp garlic powder & 0.5 tsp onion powder: Why this? Distributes flavor evenly without the risk of burning fresh bits.
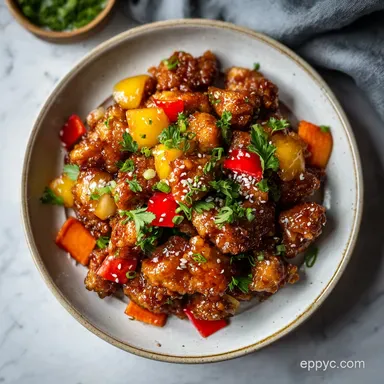
- 1 cup pineapple chunks (canned/drained): Why this? Classic tropical contrast and enzyme rich sweetness.
- 1 green & 1 red bell pepper (1 inch squares): Why this? Provides crunch and essential color contrast.
- 0.5 white onion (cubed): Why this? Adds a savory, aromatic bite to the vegetable mix.
Many people wonder if they can use fresh pineapple. You absolutely can, but I find the canned chunks are more consistent in their sugar content, which is helpful when you're trying to calibrate the sauce. If you’re a fan of these types of one pan wonders, you should definitely see how the sauce profile differs in a Piquant Chicken Sauce for sandwiches.
Minimal Tools for Maximum Crunch Results
We are keeping this heartfelt and simple. You don't need a wok or a deep fryer. In fact, if you have a digital kitchen scale and a standard oven, you are 90% of the way there.
- Large Rimmed Baking Sheet: Essential for containing the oil and the sauce during the stirring phases.
- Large Mixing Bowls: One for the egg wash, one for the starch, and a small one for whisking the sauce.
- Whisk: To ensure the sugar and spices are fully emulsified into the vinegar.
- Tongs: For flipping the chicken individually this ensures you don't tear the coating.
- Measuring Cups/Spoons: Accuracy in the sweet to sour ratio is the digital key to success.
I prefer a heavy duty aluminum baking sheet (like a Nordic Ware half sheet). The thinner, cheaper pans tend to warp at 200°C, which can cause the oil to pool in one corner. A flat, level surface is your best friend when you’re looking for an even "fry" on that chicken.
step-by-step Guide for a Golden Glaze

- Preheat your oven to 400°F (200°C). Season the 2 lbs of chicken pieces with salt and pepper. Note: Seasoning the meat directly ensures flavor is built from the core outward.
- Dip each chicken piece into the beaten egg, then toss in the 1 cup of cornstarch until fully coated and chalky in appearance. until no wet spots remain.
- Pour the 0.25 cup vegetable oil onto a large rimmed baking sheet and place it in the oven for 2 minutes until the oil is shimmering and fragrant.
- Carefully arrange the starch coated chicken in a single layer on the hot baking sheet. Bake for 15–20 minutes, turning once until the edges are golden and firm.
- While the chicken bakes, whisk together the sugar, apple cider vinegar, ketchup, soy sauce, garlic powder, and onion powder in a small bowl until the sugar is mostly dissolved.
- Remove the baking sheet from the oven. Add the pineapple chunks, bell peppers, and onion cubes to the chicken. until the tray looks crowded and colorful.
- Pour the sauce over the mixture and toss to coat every piece. Note: Use a spatula to scrape up any browned bits from the pan that's pure flavor.
- Return to the oven and bake for an additional 25 minutes. until the sauce is bubbling and thick.
- Stir every 10 minutes during the final bake. Note: This prevents the sugar from burning on the edges of the pan and ensures an even glaze.
- Remove from the oven once the chicken is glazed and the peppers are tender crisp until the sauce has reduced to a syrupy consistency.
Solving Texture Issues for Professional Results
The most common hurdle in "baked sweet and sour chicken" is the dreaded sogginess. This usually happens because of moisture trapped under the chicken or a sauce that didn't reduce enough.
Why Your Coating Is Soggy
If your chicken comes out soft rather than crispy, it’s likely a temperature issue. If the oil isn't shimmering hot when the chicken hits the pan, the starch absorbs the oil instead of searing in it.
Also, if you’ve used chicken breasts that were still slightly frozen, they will release excess water as they thaw in the oven, effectively "steaming" the crust from the inside.
The Sauce Is Too Runny
A thin sauce usually means the oven temperature wasn't consistent or the sugar hadn't fully carmelized. The final 25 minute bake is non negotiable. This is when the water in the vinegar evaporates, leaving behind the concentrated syrup.
If it's still too thin, give it another 5 minutes, but watch it closely sugar goes from "perfectly syrupy" to "burnt" very quickly.
| Problem | Root Cause | Solution |
|---|---|---|
| Sticking to Pan | Oil wasn't preheated | Heat the oiled tray for a full 2 minutes before adding chicken. |
| Dull Sauce | Not enough sugar/reduction | Ensure you use the full 0.75 cup of sugar and stir during the final bake. |
| Tough Chicken | Used breast meat / overcooked | Switch to chicken thighs; they handle the 45 minute total cook time much better. |
Common Mistakes Checklist
- ✓ Don't skip the "chalky" phase; if the cornstarch looks wet before baking, add a bit more.
- ✓ Avoid using a glass 9x13 dish; glass doesn't conduct heat as quickly as metal, leading to a softer crust.
- ✓ Pat the chicken dry with paper towels before the egg wash to ensure the coating sticks properly.
- ✓ Ensure the oven is fully preheated to 200°C; a cold start will ruin the starch transition.
- ✓ Use a "rimmed" sheet pan; the sauce will overflow on a flat cookie sheet and make a mess of your oven.
Creative Adaptations to Suit Your Preferences
One of the best things about this "baked sweet and sour chicken" is how modular it is. Once you have the base technique down, you can swap the flavor profile entirely while keeping that incredible texture.
The Spicy Kick
If you want to move away from the traditional profile, add 1 tablespoon of Sriracha or 1 teaspoon of red pepper flakes to the sauce whisking phase. The heat plays beautifully with the sugar and pineapple, creating a "sweet and spicy" vibe that is very popular in modern fusion cooking.
You could even swap the apple cider vinegar for lime juice for a more Thai inspired finish.
Low Carb / Keto Adjustments
While the cornstarch and sugar are the heart of the "shatter crisp" texture, you can make a modified version. Replace the sugar with a 1:1 monk fruit sweetener and use unflavored whey protein isolate instead of cornstarch.
Note: The texture will be different more "breaded" than "glassy" but it will satisfy the craving without the glycemic load.
Scaling the Recipe
- To Scale Down (½ batch): Use 1 lb of chicken and 1 egg. You can keep the spice levels the same, but reduce the cooking time in the final phase by about 5-8 minutes as a smaller volume of sauce will reduce much faster.
- To Scale Up (2x batch): Use two separate baking sheets. Do NOT try to crowd 4 lbs of chicken onto one tray. The moisture release will be too high, and you'll end up with "Sweet and Sour Soup." Use 1.5x the salt and spices but keep the sugar and vinegar at a full double.
If you are cooking for a crowd, this dish pairs excellently with a side of steamed rice or even a Broccoli Casserole if you want to lean into the comfort food theme.
Myths About Oven Baking Starch
There are a few "old wives' tales" in the kitchen that prevent people from trying this method. Let's clear the air and empower your cooking with some facts.
"You can't get chicken truly crispy in the oven." This is a misconception born from people who bake at low temperatures (like 175°C) or use flour based coatings.
High heat (200°C) combined with a high amylose starch like cornstarch creates a physical structure that is indistinguishable from deep fried coatings once the sauce is applied.
"Vinegar loses its punch if you bake it." While some of the raw "sting" of vinegar evaporates, the acidity remains. In fact, baking the sauce concentrates the flavors, making the "sour" part of the profile more sophisticated and integrated with the sugar and fruit juices.
Smart Ways to Handle Your Leftovers
Leftover "baked sweet and sour chicken" is a bit of a mixed bag. The sauce is actually better the next day as the flavors have melded, but the texture of the chicken will naturally soften as it absorbs moisture from the glaze.
- Storage: Keep in an airtight glass container in the fridge for up to 3 days. I don't recommend plastic as the vinegar and sugar can sometimes "ghost" into the material.
- Freezing: You can freeze this for up to 2 months. However, be aware that bell peppers lose their structure after thawing and can become quite soft.
- Reheating: Avoid the microwave! It will turn the chicken rubbery. Instead, put the leftovers back on a baking sheet at 180°C for 10-12 minutes. This will "re fry" the starch and tighten up the sauce.
- Zero Waste Tip: If you have leftover sauce at the bottom of the pan but no chicken, toss it with some cold noodles and a splash of sesame oil for an instant cold noodle salad the next day. Use the pineapple skins (if using fresh) to infuse water for a refreshing kitchen beverage.
Visual Finishing Touches for Stunning Plates
The presentation is where you really show off the heartfelt nature of home cooking. Since this is a "glossy" dish, you want to contrast that with matte garnishes.
A heavy sprinkle of toasted sesame seeds adds a tiny bit of crunch and an earthy aroma that breaks up the sweetness. Finely sliced green onions (scallions) are also essential; use both the white parts for a sharp bite and the green parts for that bright, fresh visual pop.
If you're serving this for guests, try placing the chicken in a wide, shallow bowl rather than a deep one. This prevents the pieces at the bottom from being crushed under the weight of the rest, keeping the coating as intact as possible until the very last bite.
It’s a simple digital age trick for making your home cooked meals look as empowered as a restaurant tier plate.
Right then, you've got the tech, you've got the science, and you've got the heartfelt motivation. This "baked sweet and sour chicken" is more than just a meal it's proof that you don't need a professional kitchen to make professional grade food. Go get that oven preheating!

High in Sodium
945 mg 945 mg (41% 41% of daily value)
The American Heart Association recommends a limit of about 2,300mg per day, aiming for an ideal limit of 1,500mg for most adults.
Tips to Reduce Sodium
-
Reduce Added Salt-25%
The recipe calls for 0.5 tsp of salt. Try reducing this to 1/4 tsp or omitting it entirely and adjusting flavor with herbs and spices.
-
Choose Low-Sodium Soy Sauce-20%
Soy sauce is a significant sodium contributor. Opt for a low-sodium soy sauce or use only 1/2 tbsp and supplement with other seasonings.
-
Use Fresh Pineapple-10%
Canned pineapple often contains added sodium or is packed in syrup with sodium. Using fresh pineapple chunks will eliminate this source.
-
Boost with Fresh Herbs and Spices
Enhance flavor without salt by adding fresh garlic (instead of powder), fresh ginger, or a pinch of red pepper flakes.
-
Opt for No-Salt Added Ketchup-15%
Ketchup can be surprisingly high in sodium. Look for a no-salt added version to significantly cut down on sodium.
Recipe FAQs
How to cook sweet and sour chicken in the oven?
Preheat your oven to 400°F (200°C) and heat your oiled baking sheet for 2 minutes. Coat your seasoned chicken in beaten egg and cornstarch until chalky, arrange in a single layer on the hot sheet, and bake for 15 20 minutes before adding peppers, onions, pineapple, and sauce for a final
25-minute bake.
How to bake chicken for diabetics?
Focus on portion control and use the standard oven baking method to avoid deep frying. You can adjust the sugar ratio in the sauce or serve smaller portions alongside a fiber rich side dish like our crispy coleslaw to balance the meal.
What is the secret ingredient to the most flavorful baked chicken ever?
Seasoning the chicken directly with salt and pepper before any coating is applied. This simple step builds flavor from the core outward, ensuring the meat itself is seasoned rather than just the crust.
What is the secret to the best sweet and sour sauce?
Whisking the apple cider vinegar, sugar, ketchup, and soy sauce thoroughly to create a perfect emulsion. If you mastered this flavor balancing technique here, you can apply the same principle to our other recipes that require precise acid-to-sweet ratios.
Why is my chicken coating soggy instead of crispy?
You likely skipped the "chalky" phase or used a glass dish. Ensure the cornstarch coating looks completely dry and powdery before hitting the oven, and always use a metal rimmed baking sheet for better heat conduction.
Is it necessary to pat the chicken dry before dipping in egg?
Yes, this is vital for a secure crust. Removing surface moisture from the chicken thighs with paper towels ensures the egg wash and cornstarch adhere properly rather than sliding off during the baking process.
Can I use a flat cookie sheet instead of a rimmed baking sheet?
No, avoid flat sheets to prevent oven messes. The sauce, pineapple juice, and vegetable liquids will cause overflow, so a rimmed baking sheet is essential for containing the glaze while the chicken caramelizes.
Baked Sweet And Sour Chicken
Ingredients:
Instructions:
Nutrition Facts:
| Calories | 772 kcal |
|---|---|
| Protein | 39.6 g |
| Fat | 38.2 g |
| Carbs | 66.8 g |
| Fiber | 2.8 g |
| Sugar | 44.5 g |
| Sodium | 945 mg |
