Chocolate Pudding Pie: Silky Dark Chocolate Filling

- Time: Active 15 minutes, Passive 4 hours, Total 4 hours 15 minutes
- Flavor/Texture Hook: Velvety dark chocolate filling against a buttery, shattering graham cracker crust.
- Perfect for: Elegant dinner parties or a joyful weekend treat that requires zero oven time.
- Create Your Stunning Chocolate Pudding Pie
- The Physics of the Velvet Set
- Essential Specs for Your Masterpiece
- Selecting Your Chocolatey Palette Elements
- Crafting Tools for Pastry Artistry
- Painting the Perfect Pudding Portrait
- Fixing Flaws in Your Creation
- Joyful Variations and Smart Swaps
- Preserving Your Show Stopping Dessert
- Plating Levels for Pure Artistry
- Recipe FAQs
- 📝 Recipe Card
Create Your Stunning Chocolate Pudding Pie
I still remember the first time I pulled this beauty out of the fridge for a mid summer garden party. The sun was dipping low, casting long shadows over the table, and as my knife hit that crust, there was a distinct, audible snap that silenced the chatter.
Everyone expects a pudding pie to be a bit of a messy affair, something you scoop with a spoon and hope for the best, but this version is different. It’s an act of pastry artistry that holds its shape with a joyful, wobbling pride.
We’ve all been there trying to serve a slice that ends up looking more like a chocolate landslide on the plate. I spent years tweaking the ratios of fat to liquid until I found the sweet spot that provides that "polished" restaurant finish without the stress of a traditional custard.
It’s about more than just mixing ingredients; it’s about the way the heavy cream interacts with the Dutch processed cocoa to create a mahogany hue so deep it looks like velvet under the kitchen lights.
This isn't just a quick fix for a sugar craving; it’s the recipe I turn to when I want to bring a bit of theater to the table. Whether you’re a seasoned baker or someone who usually avoids the "from scratch" life, there is a genuine joy in watching these simple components emulsify into something so rich and sophisticated.
Trust me, once you see that first clean slice come out of the pan, you’ll never go back to the boxed version again.
The Physics of the Velvet Set
Molecular Suspension: The cold whole milk and heavy whipping cream create a high fat environment that suspends the pudding starches, preventing them from clumping and ensuring a silky mouthfeel.
Aeration Stability: Folding in the pudding infused Cool Whip introduces tiny air bubbles that are trapped by the fat globules, giving the pie its signature cloud like structure that won't slump at room temperature.
| Method | Prep Time | Texture | Best For |
|---|---|---|---|
| Traditional Scratch | 45 minutes | Dense, Custard like | Formal holidays |
| This Hybrid Method | 15 minutes | Light, Velvety | Show stopping results, fast |
| store-bought Premade | 2 minutes | Soft, Often runny | Last minute emergencies |
Choosing between a cooked custard and this hybrid method often comes down to the texture you desire. While a cooked pudding is nostalgic, it often lacks the structural integrity needed for those clean, sharp slices we’re after. Our method provides the best of both worlds the deep flavor of a "Death by Chocolate" recipe with the stability of a modern mousse. It’s a trick I learned while working on a Death by Chocolate recipe that focused on maximum cocoa impact without the heavy weight of a flour thickened base.
Essential Specs for Your Masterpiece
Before we dive into the artistry of the assembly, let's look at the "how" behind the elements. Using Dutch processed cocoa powder isn't just a suggestion; it's the secret to that dark, professional look.
Unlike natural cocoa, which is acidic, Dutch processed cocoa has been neutralized, resulting in a smoother flavor profile that pairs perfectly with the sweetness of the graham crackers.
Component Analysis
| Ingredient | Science Role | Pro Secret |
|---|---|---|
| Whole Milk | Primary Hydrator | Use it ice cold to snap the pudding starches into action immediately. |
| Heavy Cream | Fat Reinforcement | Provides the "velvety" finish that prevents the pie from feeling watery. |
| Dutch Cocoa | Flavor/Color Depth | Sift it twice to ensure zero lumps in your dark chocolate swirl. |
| Melted Butter | Binding Agent | Use unsalted to control the seasoning; it acts as the "glue" for the shatter effect. |
The interaction between the sugar and the salt in the crust is another small but vital detail. The 0.25 tsp of sea salt isn't there to make it salty; it's there to sharpen the edges of the chocolate's sweetness. It makes the flavor bloom on your tongue rather than just sitting there.
If you’ve ever found a dessert to be "one note," it’s usually because the salt was missing.
Selecting Your Chocolatey Palette Elements
Think of these ingredients as your paints. Quality matters, especially when you only have a few components doing all the heavy lifting. I always reach for a high-quality vanilla extract because those floral notes cut right through the richness of the dairy.
- 1.5 cups Graham cracker crumbs: These provide the structural "shatter" we need. Why this? Offers a toasted, honey like base that offsets the dark cocoa.
- Substitute: Chocolate wafer crumbs for a "Midnight" version.
- 6 tbsp Unsalted butter, melted: The liquid gold that binds our base. Why this? Provides a clean dairy flavor without the harshness of salted butter.
- Substitute: Melted coconut oil for a subtle tropical hint.
- 1/3 cup Granulated sugar: Adds a light crunch to the crust. Why this? It caramelizes slightly during the "press" phase, strengthening the shell.
- Substitute: Brown sugar for a deeper, molasses rich foundation.
- 0.25 tsp Sea salt: The ultimate flavor enhancer. Why this? Balances the sugar and makes the chocolate taste "more like chocolate."
- Substitute: Kosher salt (increase to 0.5 tsp).
- 7.8 oz Instant chocolate pudding mix: The foundation of our filling. Why this? Contains modified cornstarch for a reliable, no cook set.
- Substitute: Cook and-serve mix (requires stovetop cooling first).
- 2 cups Whole milk, very cold: The activator. Why this? The fat content is essential for a creamy, non icy texture.
- Substitute: 2% milk (will be slightly less rich).
- 1 cup Heavy whipping cream: For the "velvet" factor. Why this? Adds air and luxury that milk alone cannot provide.
- Substitute: Half and half (pie will be softer).
- 1 tsp Pure vanilla extract: For aromatic depth. Why this? Rounds out the sharp cocoa notes with a sweet fragrance.
- Substitute: Almond extract for a cherry chocolate vibe.
- 2 tbsp Dutch processed cocoa powder: For that mahogany hue. Why this? Offers a dark, intense chocolate flavor without the acidity.
- Substitute: Regular cocoa powder (lighter color, more tang).
- 2 cups Chocolate pudding pie Cool Whip: Our aeration agent. Why this? Maintains its structure longer than fresh whipped cream once folded.
- Substitute: Stabilized homemade whipped cream.
Crafting Tools for Pastry Artistry

You don't need a professional kitchen to make a show stopping Chocolate Pudding Pie, but the right tools will make the process feel like a breeze. A 9 inch deep dish pie plate (like those from Pyrex or Emile Henry) is ideal here.
If you use a standard shallow plate, you might have leftover filling which isn't a disaster, but we want it all in the pie!
A sturdy stand mixer or a high powered hand mixer is your best friend for getting the heavy cream to those stiff peaks. Don't try to whisk the cream by hand unless you're looking for a serious arm workout. Also, grab a flat bottomed measuring cup.
It sounds odd, but it’s the secret weapon for pressing that graham cracker crust into a perfectly even layer.
Chef's Note: To get a professional finish on your crust, use the bottom of a glass to press the crumbs firmly into the corners of the pie plate. This prevents the edges from crumbling when you try to lift the first slice.
Painting the Perfect Pudding Portrait
1. Constructing the Foundation
In a medium bowl, combine 1.5 cups graham cracker crumbs, 6 tbsp melted butter, 1/3 cup sugar, and 0.25 tsp sea salt. Stir until the mixture looks like wet sand. Press this firmly into the bottom and up the sides of your 9 inch pie plate.
Note: Packing it tight is what creates that satisfying shatter when you bite into it.
2. The Chill Phase
Place the crust in the freezer for 10 minutes. Wait until the butter has fully solidified to create a moisture barrier that keeps the crust from getting soggy once the pudding is added.
3. Emulsifying the Filling
In a large bowl, whisk together the 7.8 oz chocolate pudding mix, 2 cups very cold whole milk, 1 cup heavy whipping cream, 1 tsp vanilla, and 2 tbsp Dutch processed cocoa powder. Whisk vigorously for 2 minutes until the mixture thickens and looks glossy.
4. The Aeration Fold
Gently fold in 1 cup of the Cool Whip into the pudding mixture using a silicone spatula. Move in a circular motion, lifting from the bottom and folding over the top. Note: This keeps the air inside, ensuring the filling stays light and cloud like.
5. Constructing the Layers
Pour the dark chocolate filling into the chilled crust. Use the back of a spoon to smooth it out into an even layer, reaching all the way to the edges.
6. The Final Crown
Spread the remaining 1 cup of Cool Whip over the top of the filling. You can go for a smooth finish or use the tip of your spatula to create artistic "peaks" that catch the light.
7. The Patience Test
Cover the pie loosely with plastic wrap and refrigerate for at least 4 hours. Wait until the center is firm to the touch before attempting to slice. This allows the starches to fully hydrate and bond.
8. The Reveal
When ready to serve, run a thin knife under hot water, wipe it dry, and make your first cut. The heat will glide through the chocolate like butter, giving you a clean, restaurant quality edge.
Fixing Flaws in Your Creation
Sometimes, even with the best intentions, the kitchen throws us a curveball. The most common issue people face is a "weeping" pie where liquid starts to pool at the bottom. This usually happens if the milk wasn't cold enough or if the folding process was too aggressive, breaking down the air bubbles.
Why Your Crust is Crumbly
If your crust falls apart the moment you touch it, it’s usually because the butter wasn't distributed evenly or the crumbs weren't pressed hard enough. The sugar in the crust acts as a secondary binder when chilled, so make sure you aren't skipping that ingredient.
| Problem | Root Cause | Solution |
|---|---|---|
| Runny Filling | Milk was too warm or mixed too briefly. | Chill the milk in the freezer for 10 mins before whisking; whisk for a full 2 mins. |
| Soggy Bottom | Filling added to a warm crust. | Always freeze the crust for 10 minutes to "lock" the butter before filling. |
| Lumpy Pudding | Cocoa powder wasn't sifted. | Sift your dry ingredients through a fine mesh sieve to ensure a velvety texture. |
Common Mistakes Checklist
- ✓ Never use low-fat or skim milk; the fat is what provides the structural "set."
- ✓ Don't over mix once you add the Cool Whip, or you'll lose the airy texture.
- ✓ Ensure your mixing bowl for the cream is grease free, or it won't whip properly.
- ✓ Resist the urge to slice early; 4 hours is the absolute minimum for a clean cut.
- ✓ Use a hot knife for every single slice to maintain those sharp, artistic edges.
Joyful Variations and Smart Swaps
One of the best things about this Chocolate Pudding Pie is how easily it adapts to your mood. If you want something even more decadent, you might want to look at a Chocolate Mousse Pie recipe for a slightly different aeration technique, but this version is the ultimate crowd pleaser for its simplicity.
To Deepen the Mahogany Hue
For an intensely dark look, replace half of the graham cracker crumbs with crushed Oreo cookies (remove the cream first). The dark cocoa in the cookies creates a stunning contrast against the white whipped topping.
You can also add a teaspoon of espresso powder to the pudding mix; it doesn't make it taste like coffee, but it makes the chocolate taste twice as deep.
Scaling Guidelines
- Scaling Down (1/2 recipe): Use a 6 inch mini pie tin. Reduce the chilling time to 2 hours.
- Scaling Up (2x recipe): This is perfect for a large party. Use a 9x13 rectangular dish to create "Pudding Pie Bars." Keep the chilling time at 4-6 hours to ensure the larger surface area sets properly.
- The Individual Artistry: Spoon the components into small mason jars for a "deconstructed" look. It’s a great way to serve dessert at a picnic where slicing a whole pie might be messy.
Preserving Your Show Stopping Dessert
This pie is a fantastic make-ahead option because the flavors actually develop and meld as it sits. However, because it’s a dairy heavy dessert, you need to be careful with how you store it to keep that crust shattering and the filling velvety.
In the Fridge: Keep the pie covered with plastic wrap or a pie dome. It will stay fresh and delicious for up to 3 days. After day 3, the crust may start to soften as it absorbs moisture from the pudding, but it will still taste wonderful.
In the Freezer: You can actually freeze this pie for a frozen treat! Wrap it tightly in a double layer of plastic wrap and then foil. It will keep for 1 month. To serve, let it sit on the counter for 15 minutes to soften just enough to slice.
It will have a texture similar to a premium ice cream cake.
Zero Waste Tip: If you have leftover graham cracker crumbs, don't toss them! Toast them in a pan with a little butter and sprinkle them over your morning yogurt or a scoop of vanilla ice cream. If you have extra pudding filling, pour it into small ramekins for a quick "chef's snack" later.
Plating Levels for Pure Artistry
Presentation is where you can truly let your artistic side shine. Whether you're keeping it casual or going for a full "gallery" look, these levels will help you transform a simple slice into a moment of joy.
| Level | Garnish | Tool | Vibe |
|---|---|---|---|
| Simple | Large dollop of extra whip | Table spoon | Cozy & Nostalgic |
| Polished | A fine dusting of Dutch cocoa | Fine mesh sieve | Sophisticated & Minimalist |
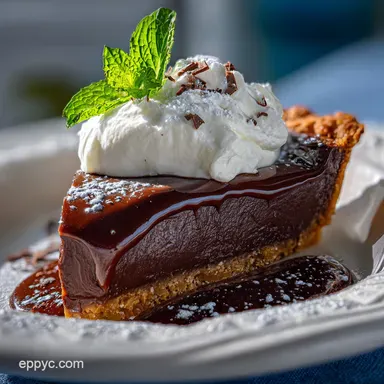
| Restaurant | Chocolate curls and a mint leaf | Vegetable peeler | Show stopping & Luxurious |
To Achieve a "Restaurant" Finish
To get those gorgeous chocolate curls seen in high end bakeries, take a room temperature bar of dark chocolate and run a vegetable peeler along the long edge. Let the curls fall directly onto the pie. The warmth of your hands is usually enough to soften the chocolate just enough to create long, elegant spirals.
If you really want to go all out, serve each slice with a few fresh raspberries. The tartness of the fruit cuts through the heavy cream and chocolate, providing a bright pop of color and flavor that makes the whole dish feel "lifted." It’s these small, artistic touches that turn a recipe into a memory.
Just remember, the most important ingredient is the joy you put into the process. Happy whisking!

Recipe FAQs
Can you use instant chocolate pudding mix for a pie filling?
Yes, this recipe relies on instant pudding mix. Instant mix contains modified starches that set firmly when combined with cold dairy, eliminating the need for stovetop cooking.
How to make pie filling from Jell-O instant pudding?
Whisk the cold milk, heavy cream, and pudding mix together vigorously for two full minutes. The cold temperature and the aggressive whisking activate the starches immediately, resulting in a thickened, glossy filling ready for folding.
What's the difference between a custard pie and a pudding pie?
Custard pies are typically baked until set using eggs as the primary thickener. Pudding pies are generally no-bake, relying on starches (like cornstarch in the pudding mix) combined with cold liquid for structure, resulting in a lighter mouthfeel.
How to prevent skin from forming on the pudding pie surface?
Press plastic wrap directly onto the surface of the filling before chilling. This blocks air exposure, which is what causes the film or "skin" to develop on any exposed cooked starch or dairy surface.
Can I substitute the Cool Whip with homemade whipped cream?
Yes, but you must stabilize the homemade cream first. Homemade whipped cream needs added gelatin or a powdered stabilizer to maintain the structure of this dense pie filling for the full 4-hour chill time.
Is using Dutch processed cocoa essential for this recipe?
No, but it is highly recommended for the color and flavor. Dutch processed cocoa is less acidic than natural cocoa, leading to a darker mahogany color and a smoother, richer chocolate flavor without any sharp tang.
Can this pie be made ahead of time and frozen?
Yes, this pie freezes exceptionally well for up to one month. Double wrap it tightly in plastic and foil, and thaw on the counter for about 15 minutes before slicing for a texture akin to frozen mousse.
Chocolate Pudding Pie Recipe
Ingredients:
Instructions:
Nutrition Facts:
| Calories | 492 calories |
|---|---|
| Protein | 4.3 g |
| Fat | 27.6 g |
| Carbs | 56.8 g |
| Fiber | 1.8 g |
| Sugar | 38.5 g |
| Sodium | 614 mg |
