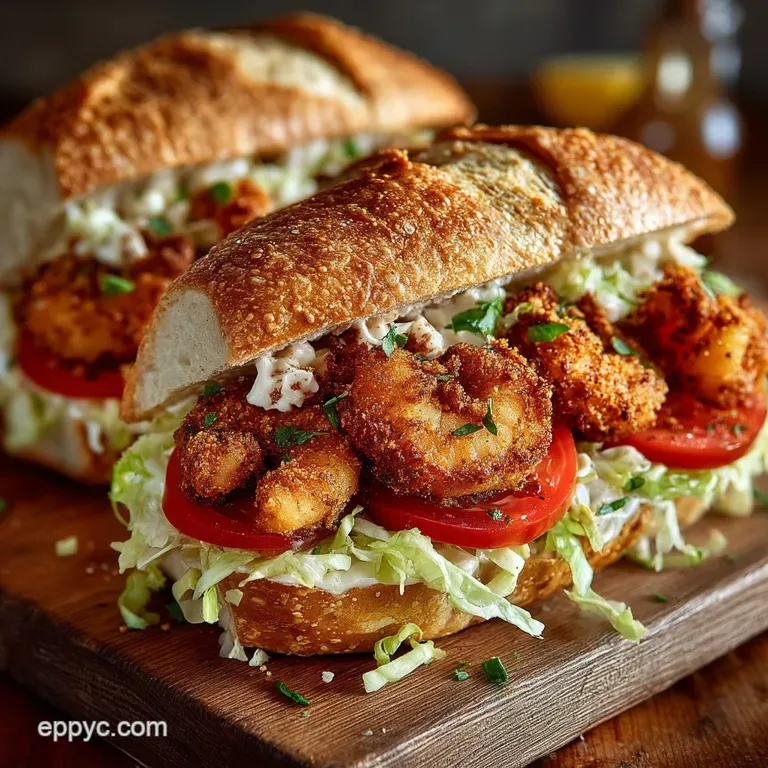
The Classic Chefs Key Lime Pie with Toasted Meringue

- Elevating Dessert: The Meringue Difference
- Why Authentic Key Limes Are Non-Negotiable
- Building the Foundation: The Crumb Crust Secrets
- Mastering the Silky Set: Ingredients for the Best Key Lime Pie Filling
- Precision Steps for Assembling Your Key Lime Pie
- The Final Flourish: Torching the Toasted Meringue
- Troubleshooting Common Key Lime Pie Issues
- Smart Storage and Delicious Variation Ideas
- Recipe FAQs
- 📝 Recipe Card
Elevating Dessert: The Meringue Difference
While some regions prefer a simple crown of fresh, unsweetened whipped cream, the true benchmark of a professional key lime pie recipe is the towering, toasted meringue. This technique transforms a lovely dessert into a true culinary showpiece.
The ethereal, cloud like sweetness of the meringue, made from the four reserved egg whites, provides a glorious, contrasting texture to the dense, silky filling and the crunchy, buttery crust.
On top of that,, applying the meringue and giving it a golden kiss with a kitchen torch introduces a subtle caramelized complexity that perfectly rounds out the intense citrus tartness of this magnificent tropical dessert recipe .
Achieving that perfect, glossy finish on your key lime pie with meringue is the signature of a skilled baker.
Why Authentic Key Limes Are Non-Negotiable
To create the best key lime pie , settling for common Persian limes is simply not an option. The unique character of this dessert hinges entirely on the high acidity and intensely floral aroma provided by the tiny, thin skinned Key limes.
They offer a concentrated punch that sets this confection miles apart from any standard lime pie.
Defining the Perfect Balance of Tart and Sweet
The brilliance of the classic key lime pie recipe lies in its deceptively simple chemical reaction. The goal is a filling that makes your mouth pucker, yet immediately satisfies with rich sweetness.
This essential balance is achieved by combining the razor sharp acidity of the Key lime juice with the thick, cloying richness of sweetened condensed milk. When these two ingredients meet, the acid naturally thickens the milk base, ensuring a custard that sets beautifully during its brief bake, resulting in a smooth, intensely flavored filling.
Essential Gear for Key Lime Pie Mastery
Mastering this recipe, though relatively straightforward, requires a few specific tools to handle the particular nature of Key limes and the optional meringue. A reliable citrus juicer is absolutely critical, as you will need to extract juice from approximately 15 to 20 small limes to reach the necessary half cup volume.
For the zest, a fine microplane is non-negotiable to ensure you capture only the bright green oils without scraping the bitter white pith. Finally, if you are opting for the superior meringue finish, an electric stand mixer will ensure the egg whites achieve the perfect, stiff peak volume, and a kitchen torch is needed for that flawless toasted exterior.
Key Limes Versus Persian Limes: A Flavor Showdown
Common grocery store Persian limes are large, robust, and deep green. While convenient, their flavor is comparatively flat and less acidic. Key limes, conversely, are small, often yellowing when ripe, and boast a deeply concentrated, almost perfumed flavor that is both sweeter and far more intensely tart than their Persian cousins.
Using the authentic fruit is the secret ingredient for ensuring a truly homemade key lime pie experience.
The Critical Role of Freshly Squeezed Juice
The recipe demands a half cup (120 ml) of freshly squeezed juice. Unlike many baking projects where bottled juice might suffice, the delicate volatile oils and high acidity levels of fresh Key lime juice are essential for both the flavor and the structural set of the custard.
To maximize the yield from these tiny fruits, roll them firmly on the countertop for 30 seconds before slicing and juicing; this simple action breaks down the internal membranes, allowing for much easier and greater juice extraction.
Building the Foundation: The Crumb Crust Secrets
A superior Key Lime Pie demands a crust that is sturdy, flavorful, and, most importantly, provides a barrier against moisture. We rely on the traditional graham cracker crust, a foundation that requires a precise ratio of buttery richness to crumb texture.
This base provides a crucial counterpoint to the vibrant filling and ensures the pie can be cleanly sliced without crumbling excessively.
Mastering the Silky Set: Ingredients for the Best Key Lime Pie Filling
The magic of the filling happens when four ingredients egg yolks, zest, sweetened condensed milk, and fresh lime juice are combined to form a custard that sets without lengthy, risky baking. This minimalist ingredient list is the hallmark of every good key lime pie .
Achieving the Ideal Buttery Crumb Ratio
For the crust, 1 ½ cups of finely crushed graham cracker crumbs are combined with 2 tablespoons of sugar and 6 tablespoons of melted unsalted butter. The mixture should resemble wet sand and hold together easily when pressed.
This moisture level is essential for ensuring a compact crust that won't fall apart upon slicing and will adhere firmly up the sides of the pie dish.
Pre-Baking Techniques for a Waterproof Crust
To prevent the dreaded "soggy bottom," the crust must be par-baked. After firmly pressing the mixture into the 9 inch pie dish, bake it at 350°F (175°C) for a brief 8 to 10 minutes.
This short burst of heat crisps the crust, allowing the butter to bind the crumbs and create a protective, waterproof barrier before the moist filling is introduced. Crucially, the crust should be allowed to cool slightly before receiving the custard filling.
Understanding the Role of Condensed Milk in Setting the Pie
Sweetened condensed milk is not merely a sweetener here; it is the structural backbone of the custard. Unlike traditional French custards that rely entirely on egg proteins to set, the proteins in the condensed milk react instantly with the Key lime juice’s acid.
This immediate, chemical thickening starts the setting process, meaning the pie only requires a short time in the oven to fully stabilize the texture, keeping the custard gorgeously smooth and preventing a grainy finish.
Preparing and Stabilizing the Classic Meringue Topping
For a truly stunning finish, the meringue must be stable and voluminous. Begin by ensuring the four egg whites are at room temperature and that the mixing bowl is completely grease free. The addition of ¼ teaspoon of cream of tartar provides the necessary acid to stabilize the whipping egg whites.
Gradually stream in the ½ cup of sugar only after the whites have reached soft peaks, whipping until the meringue is glossy and stiff peaks hold their shape confidently when the whisk is lifted.
Related Recipes Worth Trying
- Easy Chicken Taco Recipe Ultimate Zesty Lime Chipotle — Need simple chicken taco recipes for dinner This easy chicken taco recipe uses marinated thighs for juicy flavourful results topped with cool avocado crema
- FlakyTopped Chicken Pot Pie with Rotisserie Shortcut — The ultimate comfort food made easy This Chicken Pot Pie Recipe uses rotisserie chicken for a quick velvety filling crowned with a golden pastry Your new...
- Deconstructed Chicken Pot Pie Soup with Puff Pastry Crowns — Craving Chicken Pot Pie This Creamy Pot Pie Soup captures all the hearty comforting flavour topped with flaky pastry A sophisticated twist on a classic
Precision Steps for Assembling Your Key Lime Pie
Creating this easy key lime pie is more about timing and technique than complex methodology. The total hands-on preparation is just 25 minutes, followed by a mandatory chill time of at least three hours.
It involves preparing the crust, gently whisking the filling, a quick bake, and the final flourish of meringue, making the process highly rewarding and straightforward.
The Final Flourish: Torching the Toasted Meringue
Execution requires methodical attention to detail, from compacting the graham cracker base to ensuring the baked filling is perfectly set before the final crowning element is applied.
Methodically Pressing the Graham Cracker Base
After combining the crust ingredients, pour the mixture into the prepared pie dish. Use the bottom of a flat measuring cup or glass to press the crumbs firmly and evenly into the base and up the sides. This compaction is essential; it ensures the crust maintains its shape during baking and cooling.
Mixing and Pouring the Custard Filling
In a large bowl, start by whisking the four egg yolks until they lighten slightly, then incorporate the tablespoon of Key lime zest. Next, whisk in the 14-ounce can of sweetened condensed milk until smooth. The final step is introducing the ½ cup of fresh Key lime juice.
Whisk gently; you will observe the mixture immediately thickening slightly. Pour this custard smoothly into the cooled, pre-baked crust.
Baking Time and Visual Cues for a Perfect Set
Reduce the oven temperature to 325°F (160°C). Bake the filled pie for a short period 12 to 15 minutes. The pie is done when the edges look fully set and opaque, but the center still exhibits a slight, gentle wobble when the dish is carefully nudged.
Overbaking is the enemy of a creamy texture, so watch it closely! Remove the pie and cool completely before chilling.
Piping Techniques for a Visually Stunning Meringue Cloud
Once the pie is completely chilled, transfer the stiff meringue mixture to a piping bag fitted with a large star tip for an elegant presentation, or simply spoon it dramatically onto the surface.
It is critical to ensure the meringue fully seals against the edge of the graham cracker crust to anchor the topping and prevent it from shrinking back while toasting.
Safely Achieving That Golden Brown Finish
The final, glamorous step is to toast the meringue. The most precise and safest method is using a handheld kitchen torch, which allows you to caramelize the peaks individually to achieve varied golden brown spots.
If you do not have a torch, place the pie under a hot broiler, but watch meticulously the transition from golden to burnt happens in seconds! Keep the pie on a low rack, leave the oven door ajar, and remove it immediately after the desired golden colour is achieved (usually 30 60 seconds).
Troubleshooting Common Key Lime Pie Issues
Even for the most experienced baker, obstacles can arise. The good news is that most Key Lime Pie problems have straightforward solutions rooted in proper technique and temperature control. Understanding these common pitfalls guarantees success.
Smart Storage and Delicious Variation Ideas
Once mastered, the homemade key lime pie is a versatile foundation. If you love this recipe, consider exploring key lime pie bars for easier serving or even incorporating the flavors into a refreshing key lime pie ice cream .
Preventing a Soggy Bottom: Tips for Humidity Control
The primary culprit for a soggy bottom is usually pouring warm filling into a warm crust, or insufficient par-baking. Ensure the crust is cooled and properly baked until set. Plus,, chilling the finished pie unwrapped for the first hour allows excess moisture to evaporate, rather than condensing on the crust.
Why Did My Filling Crack (And How To Fix It)?
A cracked filling is a clear sign of overbaking, which causes the custard proteins to shrink and pull apart. The fix is simple: avoid overbaking by watching for the gentle wobble. If a crack occurs after baking, the meringue topping or a generous swirl of fresh whipped cream will effortlessly conceal the flaw, preserving the presentation.
Optimal Chilling and Slicing for Presentation
Chilling is arguably the most crucial step. A minimum of three hours is required for the custard to fully solidify, but preferably, chill it overnight. To achieve clean, professional slices, use a thin, sharp knife dipped in hot water and wiped dry between each cut.
This creates an elegant separation line between the creamy filling and the crust.
Nutrition Overview and Ingredient Substitutions
While this dessert is rich, offering an estimated 380 450 calories per slice (excluding the meringue), its intense flavor means a small slice is incredibly satisfying. For substitutions, if Key limes are completely unavailable, use the same volume of Persian lime juice but ensure you add an extra half teaspoon of zest for a needed boost of aroma.
Alternatively, for the crust, vanilla wafers or digestive biscuits can be used in place of graham crackers. If the meringue seems daunting, swapping it out for lightly sweetened whipped cream is a perfectly acceptable variation.
Recipe FAQs
My local shop doesn't have Key Limes. Can I still make this amazing Key Lime Pie with regular Persian limes?
You absolutely can, but Key limes are distinctly floral and possess a higher acidity, giving the pie its authentic lip-smacking tang. If you must use standard Persian limes, use the exact specified volume of juice, but be sure to load up on the zest.
The zest holds most of the fragrant essential oils, which will help boost the aroma and make up for some of the flavour difference.
We’ve all seen the horror of a soggy bottom! How do I ensure my graham cracker crust stays perfectly crisp?
The secret to avoiding that culinary disaster lies in the par-baking step and ensuring the crust is completely cooled before the wet filling goes in. For extra structural integrity, lightly brush the baked crust with a small amount of whisked egg white immediately after it comes out of the oven.
This creates a thin, protein barrier, sealing the crumbs like a champion before you pour the custard.
The recipe uses egg yolks in the filling. Does baking it make the custard safe, or should I be worried?
Not to worry! The acidity of the Key lime juice begins the thickening process (curdling the milk) immediately, and the short time the pie spends in the oven ensures the custard sets safely.
This gentle baking is just enough to coagulate the egg proteins, guaranteeing the pie is stable, creamy, and completely safe to enjoy without needing a fully cooked egg consistency.
How long will this pie keep in the fridge, and can I freeze slices for later?
This pie is best kept chilled and should last safely for 3 to 4 days in the fridge, covered loosely with foil or cling film. While freezing is possible, it tends to work best if you omit the meringue the meringue becomes watery upon thawing.
If freezing, wrap it tightly and eat within a month, allowing it to defrost overnight in the refrigerator.
I’m absolutely knackered after zesting all those tiny limes. Can I skip the meringue and use a different topping instead?
Absolutely, Bob’s your uncle! If meringue seems like too much faff, a generous dollop of sweetened whipped cream is a classic alternative. Simply whip heavy cream with a touch of sugar and vanilla, and top the pie just before serving.
For a richer, less sweet option, a simple fresh berry garnish also works wonderfully against the tartness.
Classic Key Lime Pie With Meringue

