Frothy Steamed Milk Latte: Silky and Vanilla-Kissed
- Time: 5 min active + 5 min cook
- Flavor/Texture Hook: Silky, cloud like foam with a vanilla kissed finish
- Perfect for: Slow mornings, rainy afternoons, or a quick caffeine pick me-up
- Frothy Steamed Milk Latte
- Why the Milk Actually Foams
- Component Analysis
- Gathering the Right Ingredients
- Tools for the Job
- Step by Step Brewing
- Fixing Common Foam Issues
- Troubleshooting Common Issues
- Customizing Your Morning Cup
- Adjusting the Batch Size
- Coffee Myths
- Storage and Zero Waste
- Treats to Serve Beside
- Recipe FAQs
- 📝 Recipe Card
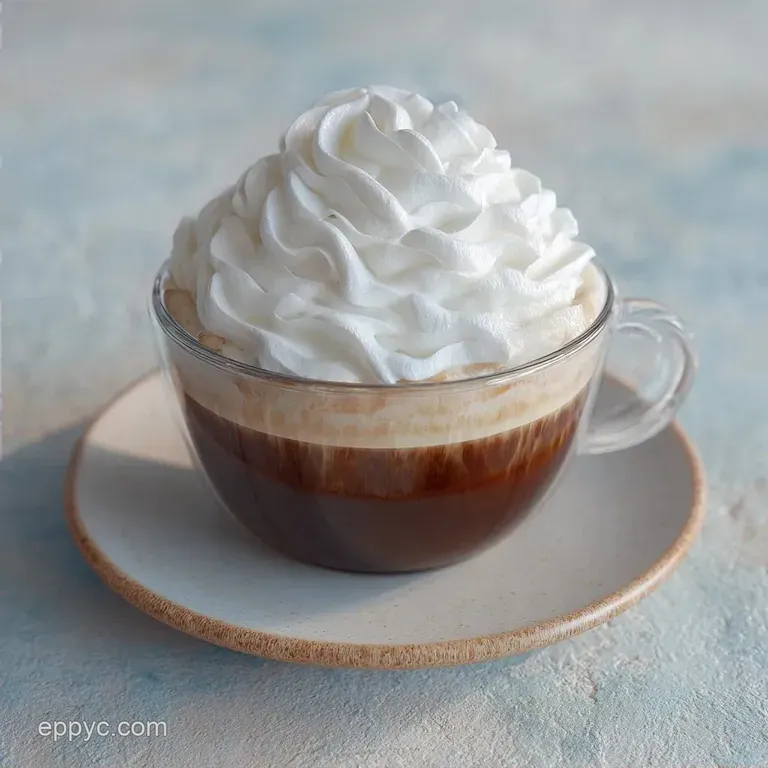
Frothy Steamed Milk Latte
The high pitched whir of a handheld frother is the sound of my morning officially starting. There is something so joyful about watching a few ounces of milk transform from a flat liquid into a thick, glossy cloud.
For a long time, I thought I needed a professional steam wand to get that texture, but I spent way too much time making "bubbly" milk that felt like soap suds rather than actual foam.
Once I figured out the temperature sweet spot, everything changed. Now, I can whip up a drink that looks and feels professional in about 10 minutes. It's not about having the fanciest gear, it's about how you handle the milk.
If you've ever had a latte that felt watery or had a giant bubble on top that just popped immediately, you're in the right place. We are going to make a Frothy Steamed Milk Latte that stays thick and velvety until the last sip.
Why the Milk Actually Foams
Instead of a textbook, let's just look at what's happening in the pitcher.
- Protein Traps: Milk proteins act like tiny balloons. When you introduce air, these proteins wrap around the bubbles to keep them from popping.
- Fat Lubrication: The fats in whole milk give the foam that glossy, reflective look and a velvety mouthfeel.
- Heat Stability: Warming the milk to exactly 60°C-65°C relaxes the proteins just enough to let them stretch without breaking.
- Micro foam Logic: The goal isn't big bubbles, but tiny ones. Smaller bubbles create a denser, creamier texture that blends better with the espresso.
| Method | Time | Texture | Best For |
|---|---|---|---|
| Microwave | 2 mins | Airy/Light | Maximum speed |
| Stovetop | 4 mins | Creamy/Dense | Control over heat |
| Steam Wand | 1 min | Velvety/Glossy | Barista style art |
Component Analysis
Understanding the parts helps you tweak the drink if you run out of something.
| Ingredient | Science Role | Pro Secret |
|---|---|---|
| Whole Milk | Structure | Use full fat for the glossiest foam. |
| Espresso | Base | Brew it strong to prevent the milk from drowning the flavor. |
| Vanilla | Aroma | Stir it into the coffee, not the milk, for a cleaner taste. |
Gathering the Right Ingredients
Stick to these amounts for a balanced 12 oz drink. If you use too much milk, you'll lose that bold coffee punch.
- 2 shots (2 oz) espressoWhy this? Provides the intense, bitter contrast to the sweet milk. (Substitute: 1/4 cup very strong brewed coffee)
- 8 oz whole milkWhy this? Highest protein/fat ratio for stable foam. (Substitute: Oat milk for a similar creaminess)
- 1 tsp vanilla extractWhy this? Adds a floral sweetness without adding sugar. (Substitute: A pinch of cinnamon or almond extract)
Tools for the Job
You don't need a cafe setup, but a few specific things make it easier.
- Wide mouth mug: A 12 oz mug gives you plenty of room to pour without spilling over the edges.
- Handheld frother: These little battery operated wands are the secret to micro foam.
- Microwave safe jar or small saucepan: You need a container that allows the milk to expand as it foams.
- Digital thermometer: This is the only way to be sure you aren't scorching the milk.
Step by step Brewing
Let's put it all together. Follow these steps to get that professional finish.
- Brew 2 shots of strong espresso or concentrated coffee directly into a 12 oz wide mouth mug. Note: Doing this first keeps the coffee hot while you prep the milk.
- Heat 8 oz of whole milk using a microwave safe jar, saucepan, or steam wand. Heat it until it reaches 140°F-150°F (60°C-65°C).
- Froth the heated milk using a handheld frother, French press, or by shaking in a mason jar. Continue until micro foam forms and the milk looks like wet paint.
- Stir 1 tsp of vanilla extract into the hot coffee base. Note: Stirring now ensures the vanilla is evenly distributed.
- Slowly pour the steamed milk into the center of the espresso.
- Hold back the thickest foam using a spoon as you pour.
- Dollop the remaining froth on top of the drink.
Chef's Note: If you're using a microwave to heat your milk, be careful not to let it boil over. For more on specific techniques, you can check out how to froth milk for cappuccinos in the microwave to see how the timing differs.
Fixing Common Foam Issues

Nothing is more frustrating than a latte that looks like a bubble bath. Here is how to handle the hiccups.
Troubleshooting Common Issues
| Issue | Solution |
|---|---|
| Why Your Foam Is Too Stiff | If your foam looks like shaving cream, you've incorporated too much air. This usually happens if you hold the frother too close to the surface for too long. |
| Why Did Your Milk Separate | This happens when the milk is overheated (above 160°F). The proteins break down and the fat separates, leaving you with a watery mess and a skin on top. Always use a thermometer to stop at 150°F. |
| Why Is the Foam Disappearing | If the foam collapses quickly, your milk might be too cold or you're using a low-fat alternative that lacks the necessary proteins. Ensure the milk is steaming hot before you start frothing. |
Common Mistakes Checklist
- ✓ Did you stop heating at 150°F (65°C)?
- ✓ Did you swirl the milk before pouring to remove large bubbles?
- ✓ Did you pour slowly into the center of the mug?
- ✓ Is your espresso strong enough to stand up to 8 oz of milk?
- ✓ Did you use a wide mouth mug to avoid spills?
Customizing Your Morning Cup
Once you have the base down, you can treat this like a canvas. If you want a different flavor profile, try adding a teaspoon of maple syrup or a dash of cardamom to the espresso before pouring the milk.
For those who prefer a different type of caffeine, this frothing technique works perfectly for other drinks. If you're in the mood for something spicy, my Masala Chai recipe uses a similar milk to base ratio. Or, if you want something earthy and green, a Matcha guide can show you how to swap the espresso for whisked tea.
Decision Shortcut: If you want a sweeter drink, swap vanilla extract for 1 tbsp condensed milk. If you want stiffer foam, use skim milk (it foams more, though it's less creamy).
If you want a nutty flavor, use almond milk but heat it 5 degrees higher.
Adjusting the Batch Size
Making one latte is easy, but doing it for a crowd requires a different approach.
Scaling Down (1/2 serving): Use 1 shot of espresso and 4 oz of milk. Reduce the vanilla to 1/2 tsp. You'll need to froth for about 10 seconds less since there is less volume to aerate.
Scaling Up (4 servings): Do not try to froth 32 oz of milk in one small jar; it will overflow. Work in two batches of 16 oz. For the coffee, brew 8 shots into a carafe. Only increase the vanilla to 3 tsp (rather than 4) to keep the flavor from becoming medicinal.
Coffee Myths
"Skim milk makes the best lattes." Not true. While skim milk creates a higher volume of foam, it lacks the fats that create the velvety, silky texture of a true Frothy Steamed Milk Latte. Whole milk or oat milk provide a much more satisfying mouthfeel.
"You need an expensive machine for micro foam." Incorrect. A $10 handheld frother and a thermometer can achieve nearly the same results as a commercial steamer if you control the temperature and the aeration time.
Storage and Zero Waste
Coffee is best served immediately, but there are ways to be efficient.
Storage: If you brew a large pot of espresso or strong coffee, store it in an airtight glass jar in the fridge for up to 24 hours. When you're ready for your latte, just heat a small amount of the coffee in the microwave for 30 seconds.
Zero Waste: Don't toss the leftover foam! If you have a bit of froth left in your pitcher, dollop it onto a bowl of oatmeal or a slice of toast with honey. Also, if you use a French press to froth, use the remaining coffee grounds as a nitrogen rich addition to your indoor potted plants.
Treats to Serve Beside
A rich latte needs something to balance the creaminess. Since this drink is velvety and sweet from the vanilla, I love pairing it with something salty or tart.
A warm, flaky almond croissant is the classic choice, but a slice of lemon loaf cake provides a sharp contrast that cuts through the richness of the whole milk. If you're drinking this as a dessert latte in the evening, a small square of 70% dark chocolate is all you need to complement the bold espresso notes.
Recipe FAQs
What is espresso with steamed milk and a layer of foam called?
A latte. This beverage combines espresso and steamed milk topped with a thin layer of micro foam.
Is it true that milk must reach 160°F to create the best foam?
No, this is a common misconception. Heating milk above 160°F causes proteins to break down and the fat to separate, so aim for 140°F-150°F.
How to froth milk without a professional steam wand?
Shake heated milk in a mason jar or use a French press. Rapidly pumping the plunger or shaking the jar incorporates air to create a stable micro foam.
Why did my milk separate during heating?
The milk was overheated. When temperatures exceed 160°F, the milk becomes watery and develops a skin on top due to protein breakdown.
Why is my foam too stiff or like shaving cream?
Too much air was incorporated. This typically happens if the frother is held too close to the milk surface for an extended period.
Why add vanilla extract to the coffee base?
To enhance the aromatic profile. It adds a subtle sweetness and warmth that balances the intensity of the espresso shots.
What can you make with steamed milk besides coffee drinks?
Hot chocolate or milk steamers. If you enjoy this creamy texture, you will love our bittersweet hot chocolate.
Frothy Steamed Milk Latte

