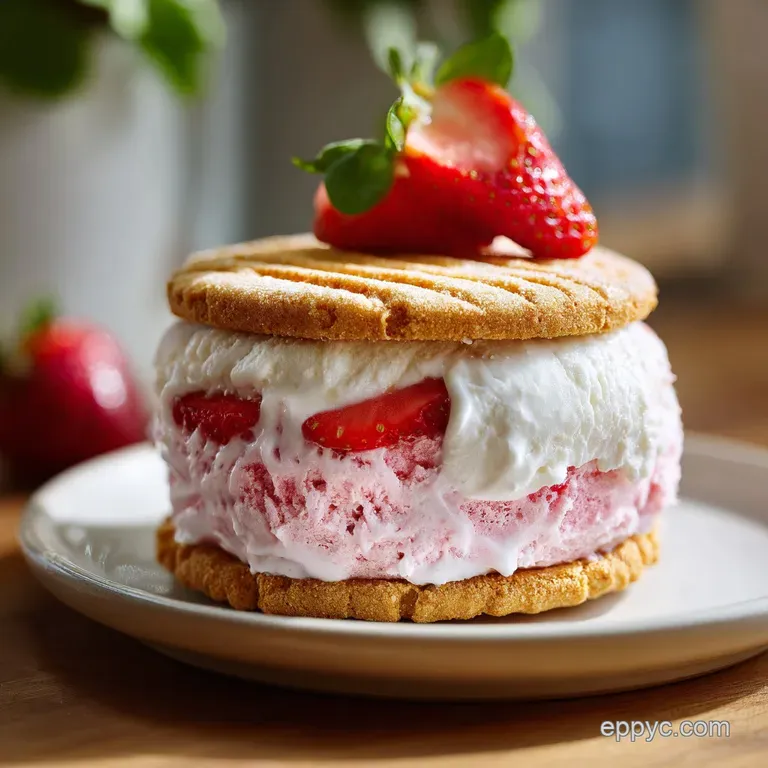
Fudgy Ice Cream Sandwich Recipe
- Time: Active 20 minutes, Passive 4 hours 10 mins, Total 4 hours 30 mins
- Flavor/Texture Hook: Velvety vanilla filling encased in a fudgy, melt in-your mouth cocoa crust
- Perfect for: Summer block parties, budget-friendly meal prep, or a heartfelt weekend project
- The Physics of the Soft Chocolate Wafer
- The Science Behind Perfect Results
- Wait Times and Yield for Your Batch
- Pantry Essentials for an Iconic Ice Cream Sandwich
- Digital Precision and Essential Kitchen Tools
- Mastering the Fudgy Layer Step by Step
- Fixing Common Cookie and Filling Problems
- Adjusting Your Batch Size Digitally
- Smart Swaps for a Budget Friendly Treat
- Freezing and Preserving Your Homemade Sandwiches
- Debunking Frozen Cookie Misconceptions
- The Art of the Perfect Handheld Serve
- Recipe FAQs
- 📝 Recipe Card
The Physics of the Soft Chocolate Wafer
That specific, slightly tacky texture of a classic Ice Cream Sandwich isn't an accident; it's the result of carefully managed hydration. If you use a standard chocolate chip cookie recipe, the fat and flour ratio creates a structure that turns into a tooth shattering brick once it hits the freezer.
We avoid that by leaning on a high ratio of sugar and butter, which act as antifreeze, keeping the baked layer pliable at sub zero temperatures.
I learned this the hard way during a humid July afternoon when I tried using my grandma's famous shortbread for these. One bite and the ice cream squirted out the sides while the cookie remained stubbornly intact. It was a mess, and honestly, a bit of a dental hazard.
Since then, I've used digital tools to track the exact moisture loss during baking, ensuring we hit that sweet spot where the cookie is sturdy enough to hold but soft enough to bite through without effort.
We are aiming for a result that feels intentional and professional. By using Dutch process cocoa, we neutralize the acidity, resulting in a dark, mahogany color and a smoother chocolate profile.
This isn't just a dessert; it's a heartfelt exercise in precision that empowers you to skip the grocery store aisle and create something truly superior in your own kitchen.
The Science Behind Perfect Results
- Hygroscopic Action: The 150g of granulated sugar draws in moisture from the air and the ice cream, ensuring the wafer softens over time rather than drying out in the freezer.
- Starch Gelatinization: Using exactly 125g of all purpose flour provides just enough gluten to hold the "slab" together without creating a tough, bready crumb.
- Fat Emulsification: The 115g of softened butter creates a fat rich barrier that prevents the ice cream moisture from soaking in too quickly, which would otherwise turn the cookie into mush.
- Alkalization Effect: Dutch process cocoa powder has a higher pH than natural cocoa, which helps the cookies stay dark and prevents them from rising too much, keeping the profile slim.
| Wafer Thickness | Freezing Time | Texture Result | Best Used For |
|---|---|---|---|
| 1/8 inch | 2 hours | Crisp & Snappy | Immediate consumption |
| 1/4 inch | 4 hours | Fudgy & Soft | Classic "store-bought" feel |
| 1/2 inch | 6 hours | Cake like | Gourmet brownie style |
Building a great sandwich requires understanding how these components interact once they are unified. If you want a deeper flavor profile, you might even consider adding a splash of something extra to the filling, similar to the flavor balance found in my Silky Smooth Homemade recipe. That little hint of luxury makes the vanilla pop against the bitter cocoa.
Wait Times and Yield for Your Batch
When you are planning your baking session, technology is your best friend. Set a digital timer for the freezing stages because that is where most people fail. You can't rush the firming process. This recipe yields exactly 12 servings, which is the perfect amount for a standard 9x13 inch baking sheet.
| Component | Role in Recipe | Pro Secret |
|---|---|---|
| Dutch Cocoa | Color & Softness | Sift it twice to avoid "cocoa bombs" of dry powder in the dough. |
| Granulated Sugar | Anti freeze | Don't reduce the sugar; it’s what keeps the cookie biteable when frozen. |
| Unsalted Butter | Moisture Barrier | Use high-quality European style butter for a more velvety mouthfeel. |
Pantry Essentials for an Iconic Ice Cream Sandwich
The beauty of this budget smart approach is that you likely have most of this in your cupboard right now. We are focusing on high impact ingredients that don't break the bank but deliver a gourmet result.
- 115g unsalted butter, softened: This provides the tender crumb. Why this? Salted butter varies too much in water content; unsalted gives us total control.
- 150g granulated sugar: Essential for the "soft bite" texture. Why this? Granulated sugar dissolves better into the butter during the creaming process.
- 1 large egg, room temperature: Binds the dough. Why this? A cold egg will curdle the creamed butter, ruining the emulsification.
- 5ml vanilla extract: Adds depth to the chocolate. Why this? Vanilla acts like salt for sweets, making the cocoa taste more "chocolatey."
- 125g all purpose flour: The structural backbone. Why this? It has the perfect protein content to prevent the cookie from being too fragile.
- 45g Dutch process cocoa powder: For that signature dark look. Why this? Natural cocoa is too acidic and will make the cookies too pale.
- 2g salt: Balances the sugar. Why this? Even a tiny amount of salt brightens the entire flavor profile.
- 1.5 Quarts premium vanilla ice cream: The heart of the Ice Cream Sandwich. Why this? Premium brands have less "overrun" (air), making for a denser, more satisfying filling.
Digital Precision and Essential Kitchen Tools
You don't need a professional laboratory, but two specific items will empower your success here. First, a digital scale is non negotiable. Measuring flour by the cup is a recipe for disaster in the world of frozen treats; 125g must be 125g.
Second, an offset spatula is your best friend for spreading that thick, fudge like batter across the pan.
2 Must Have Tools
- A 9x13 inch Jelly Roll Pan: This ensures the dough spreads to the correct thickness. If the pan is too large, the wafers will be too thin and shatter.
- Parchment Paper: Do not try to grease and flour the pan. You need to be able to lift the entire slab out of the tray in one piece.
Mastering the Fudgy Layer step-by-step
- Preheat and Prep: Set your oven to 350°F (180°C). Line a 13x9 inch pan with parchment paper, leaving an inch of overhang on the long sides. Note: This creates a "sling" to lift the baked slab later.
- Cream the Base: Beat 115g softened butter and 150g sugar until pale and fluffy. This usually takes about 3 minutes with a handheld mixer.
- Emulsify: Add 1 large egg and 5ml vanilla extract. Continue beating until the mixture looks like thick buttercream.
- Sift and Fold: Sift 125g flour, 45g cocoa, and 2g salt directly over the bowl. Use a spatula to fold gently until no white streaks remain.
- Spread the Slab: Dollop the dough onto the prepared pan. Use an offset spatula to spread it into a thin, even layer until it reaches every corner.
- The Precision Bake: Bake for 10 to 12 minutes until the edges are set and the top looks matte. Do not overbake, or they will become crackers!
- Cooling and Scoring: Let the slab cool for 5 minutes. While still warm, cut the slab in half crosswise to create two equal rectangles. Let them cool completely.
- The Ice Cream Layer: Soften 1.5 Quarts of ice cream slightly. Spread it evenly over the bottom of one of the cooled chocolate slabs.
- The Assembly Line: Place the second slab on top, chocolate side up. Press down gently until the ice cream reaches the edges.
- The Long Freeze: Wrap the entire pan in plastic wrap and freeze for at least 4 hours until the center is rock solid.
Fixing Common Cookie and Filling Problems
We've all been there the ice cream starts leaking out the sides, or the cookies stick to the paper. It's frustrating, but usually, there's a simple digital or procedural fix.
The "Ice Cream Squish"
If your ice cream is oozing out as you try to cut the sandwiches, your freezer isn't cold enough, or you didn't wait long enough. Most home freezers fluctuate in temperature. Use a digital thermometer to ensure yours is at 0°F (-18°C).
If it's warmer, you'll need to double the freezing time.
Shattering Cookies
If the wafers are breaking when you bite them, they were likely overbaked. Even two extra minutes in the oven can drive out the moisture needed for that fudgy give. Next time, pull them out when they still look slightly underdone in the center; carryover heat will finish the job.
| Problem | Root Cause | Solution |
|---|---|---|
| Soggy Wafers | Ice cream too soft during assembly | Freeze the baked slabs for 30 mins before adding the ice cream. |
| Grainy Texture | Sugar didn't dissolve | Cream the butter and sugar for a full 3-4 minutes until smooth. |
| Hard Ice Cream | low-fat ice cream used | Use "Premium" or "Full fat" versions; the fat prevents ice crystal formation. |
Common Mistakes Checklist:
- ✓ Always use room temperature eggs to maintain a stable emulsion.
- ✓ Never skip the parchment paper sling; you will not be able to get the slab out otherwise.
- ✓ Prick the dough with a fork before baking to prevent unsightly air bubbles.
- ✓ Work quickly during assembly to prevent the ice cream from melting into the cookie pores.
- ✓ Use a hot knife (dipped in warm water and wiped dry) to get those clean, professional edges.
Adjusting Your Batch Size Digitally
Scaling a recipe for a Ice Cream Sandwich requires a bit of math. If you want to double the recipe for a party, don't just double everything blindly.
Scaling UP (2x): When doubling, use two separate 9x13 pans rather than one giant one. This ensures the heat distribution remains consistent. Increase the salt and vanilla by only 1.5x to avoid an overpowering flavor. You will likely need about 3 Quarts of ice cream for a double batch.
Scaling DOWN (1/2): If you only want 6 sandwiches, use an 8x8 inch square pan. Beat one egg in a small bowl, then weigh out exactly half (about 25g-28g) to use in the dough. Reduce your bake time by about 2 minutes, as smaller slabs tend to cook faster around the edges.
This process is much like the logic used in our Classic Bread and Pudding recipe where pan size dictates the final texture. Smaller pans often result in thicker, heartier bites.
Smart Swaps for a Budget Friendly Treat
You don't need the most expensive ingredients to get a heartfelt, high-quality result. Sometimes, the budget options actually perform better in a frozen environment.
| Original Ingredient | Substitute | Why It Works |
|---|---|---|
| Premium Ice Cream | Store Brand + 1 tsp Vanilla | Adds flavor back into cheaper, fluffier ice cream. |
| Dutch Process Cocoa | Natural Cocoa + 1/8 tsp Baking Soda | The soda neutralizes the acid, mimicking the "Dutch" dark color. |
| Unsalted Butter | Margarine or Baking Spread | Higher water content, but makes an even softer cookie. Note: Flavor will be less rich. |
If you are looking for a dairy-free twist, you can swap the butter for a high-quality vegan block and use a coconut based frozen dessert. Just be aware that coconut fats freeze much harder than dairy, so you’ll need to let them sit on the counter for 5 minutes before eating so you don't break a tooth!
Freezing and Preserving Your Homemade Sandwiches
Proper storage is the difference between a fresh treat and a block of freezer burned ice. Once you've cut your sandwiches into those iconic rectangles, wrap each one individually in wax paper, then aluminum foil. This double layer technology prevents air from reaching the surface of the ice cream.
- Fridge: Do not store these in the fridge; they will turn into a puddle in 15 minutes.
- Freezer: Wrapped tightly, these stay fresh for up to 3 months.
- Zero Waste Tip: Don't throw away the "scraps" from the edges when you trim the slab. Crumble them up and store them in a jar in the freezer. They make a fantastic fudgy topping for a sundae or can be folded into a batch of The Piquant Chicken recipe — wait, definitely not that one! Keep the crumbs for a future batch of "cookies and cream" milkshakes instead.
Debunking Frozen Cookie Misconceptions
One common myth is that you need to use corn syrup to keep the cookies soft. While commercial brands use it, our high ratio of granulated sugar and butter achieves the same "soft bite" effect without the extra additives. The sugar interferes with the gluten structure, preventing the cookie from becoming a solid mass.
Another myth is that you should "blind bake" the cookies. In reality, baking them all at once as a slab is the only way to ensure they remain uniform. If you bake individual cookies, they spread unevenly, making it impossible to get that perfect "sandwich" alignment.
Stick to the slab method; it’s the heartfelt secret to professional results.
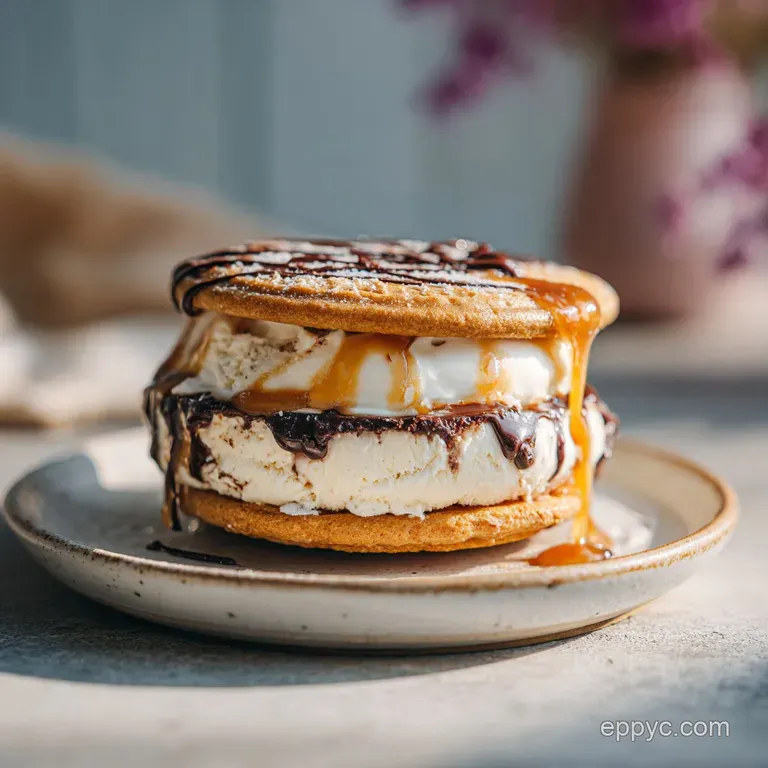
The Art of the Perfect Handheld Serve
When it comes time to enjoy your Ice Cream Sandwich, presentation is everything. If you are serving these at a party, try rolling the exposed ice cream edges in mini chocolate chips, crushed sprinkles, or even toasted coconut. It adds a layer of texture that feels incredibly gourmet.
1. The Classic Handheld
The most authentic way to enjoy these is straight out of the wax paper. The paper catches any drips as the ice cream starts to soften. It’s a nostalgic, heartfelt experience that brings back memories of the ice cream truck, but with a flavor that is infinitely better.
2. The "Sundae" Sandwich
For a more plated approach, place a sandwich in a shallow bowl and drizzle it with a warm chocolate ganache or a salted caramel sauce. The contrast between the freezing cold center and the warm sauce creates a sensory experience that is truly unparalleled.
It’s a simple way to empower a basic dessert into a showstopper.
Whether you're making these for a kids' birthday or just because it's a Tuesday and you need a win, this recipe is a testament to how simple ingredients and a little digital precision can create something magical. Trust the science, mind the freezer times, and get ready for the best sandwich of your life.

Recipe FAQs
What is an ice cream sandwich made of?
Two soft, fudgy chocolate wafers and a layer of firm ice cream. The wafers rely on a high sugar and butter content to remain pliable when frozen, preventing them from shattering when bitten.
Are ice cream sandwiches a thing?
Yes, they are a globally recognized classic dessert. They offer the perfect handheld combination of cold, creamy filling encased in a slightly chewy, moist cookie.
What is an ice cream sandwich called in England?
They are generally called ice cream sandwiches or ice cream wafers. Sometimes, if the wafer is more cake like, it might resemble a specific type of frozen confection, but the direct term is commonly understood.
Who has the best ice cream sandwiches?
The best are generally considered homemade, utilizing high-quality vanilla. While gourmet shops offer excellent versions, creating your own allows you to control the wafer's texture, ensuring it never gets rock hard.
How do I stop my homemade ice cream sandwiches from freezing rock hard?
Use a wafer recipe with a high ratio of sugar and fat relative to flour. Sugar acts as an antifreeze, keeping the wafer soft even at freezer temperatures; this technique is similar to how we control texture in Homemade Dulce de Leche recipe.
How do I get those perfectly clean, straight edges when cutting the sandwiches?
Use a large, sharp knife dipped in hot water and immediately wiped dry. Cut immediately after removing the entire slab from the deep freezer; the heat from the knife melts a clean path through the frozen ice cream and cookie layers.
Is it true that using natural cocoa powder instead of Dutch process makes the sandwich wafer crumble?
No, this is a common misconception; it mainly affects color and flavor profile. Natural cocoa is acidic and results in a lighter, slightly tangier cookie, whereas Dutch process cocoa is neutralized, yielding the darker, smoother flavor preferred in classic recipes.
Fudgy Ice Cream Sandwich

Ingredients:
Instructions:
Nutrition Facts:
| Calories | 442 kcal |
|---|---|
| Protein | 6.8g |
| Fat | 25.2g |
| Carbs | 49.8g |
| Fiber | 2.1g |
| Sugar | 34.6g |
| Sodium | 76mg |
