Garlicky Filipino Sinangag: a Flavorful Garlic Rice Recipe
Oh my gosh, there’s nothing like the smell of golden garlic sizzling away in a hot pan! let me tell you a little story.
The first time i made filipino garlic rice , or sinangag , i was definitely not feeling it. i had just come back from a long day at work, and the thought of whipping up something decent for dinner felt like a chore.
But as soon as i started sautéing that garlic, i felt like i was back in my grandma's kitchen in our hometown, surrounded by family and laughter.
Honestly, that aroma is enough to lift your spirits.
If you’ve ever craved comfort food but want to keep it simple, this just might be your new best friend.
This filipino garlic rice recipe is a homey, satisfying dish that can be ready in about 25 minutes ! you won’t believe how easy, delicious, and adaptable this recipe is perfect for breakfast rice dishes or as a side for lunch or dinner .
Let’s roll up our sleeves and dive into the deliciousness!
Recipe Overview
So, what’s the deal with filipino garlic rice ? this dish hails from the philippines and has been a staple for ages.
Back in the day, it was primarily a way to give day-old rice a second chance at life! traditionalists usually prepare it with leftover rice, tossing in some tasty garlic to jazz things up.
Today, though, it’s gained crazy popularity worldwide.
People love this quick and easy rice recipe because it’s versatile. you can whip it up for brunch, serve it with juicy grilled meats, or even enjoy it with some veggies for a healthy twist.
Plus, when it comes to cost, filipino garlic rice is easy on the wallet. it serves about 4 people and only requires ingredients you likely have lying around.
All you need is basic pantry stuff, and you’re good to go.
Key Benefits
Now, let’s chat about why you should totally add sinangag to your cooking repertoire. first off, garlic is basically a superfood.
It's got tons of vitamins and antioxidants. so, not only is this dish yummy , but it's also a little boost for your health.
Think of it as comfort food with a bonus!
What i love about this garlic fried rice is its adaptability. it’s a fab base for all sorts of dishes pair it with fried eggs, grilled chicken, or even tofu for a meat free option.
You can make it your own by adding cooked vegetables for a colorful, healthy garlic rice experience. this makes it ideal for meal prep too!
Another win? it’s a crowd pleaser! whether you're hosting sunday brunch or a casual get-together, everyone will be all about your garlic flavor rice .
Trust me, it’s the kind of dish that makes you feel at home, no matter where you are. and if you’re looking to bring something special to your next gathering, garlic rice variations can impress even the pickiest of eaters!
Feeling hungry yet? i’m getting excited just writing about it! so now that i've tempted your taste buds, let’s move on to the ingredients you’ll need to create this magic in your kitchen.
Prepare to indulge in the simple yet mouthwatering world of sautéed garlic rice !
Essential Ingredients Guide for Filipino Garlic Rice
Alright, friends! let’s dive into the world of filipino garlic rice , also known as sinangag . this isn’t just any old side dish; it’s the breakfast rice dish that brings all the flavor right to your plate.
Whether you’re planning to whip up a simple garlic rice recipe or go a bit fancy with some garlic rice with vegetables , you need to start with the right ingredients.
Let’s make this guide as easy as possible!
Premium Core Components
First up, when you're cooking with garlic, quality matters. For your Filipino garlic rice, you want to stick with ingredients that pack a punch.
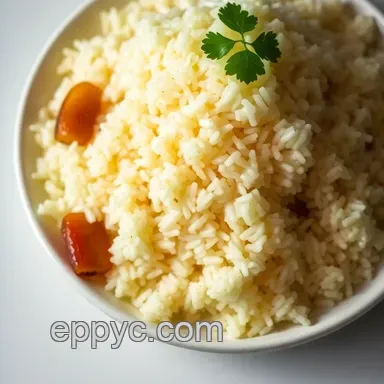
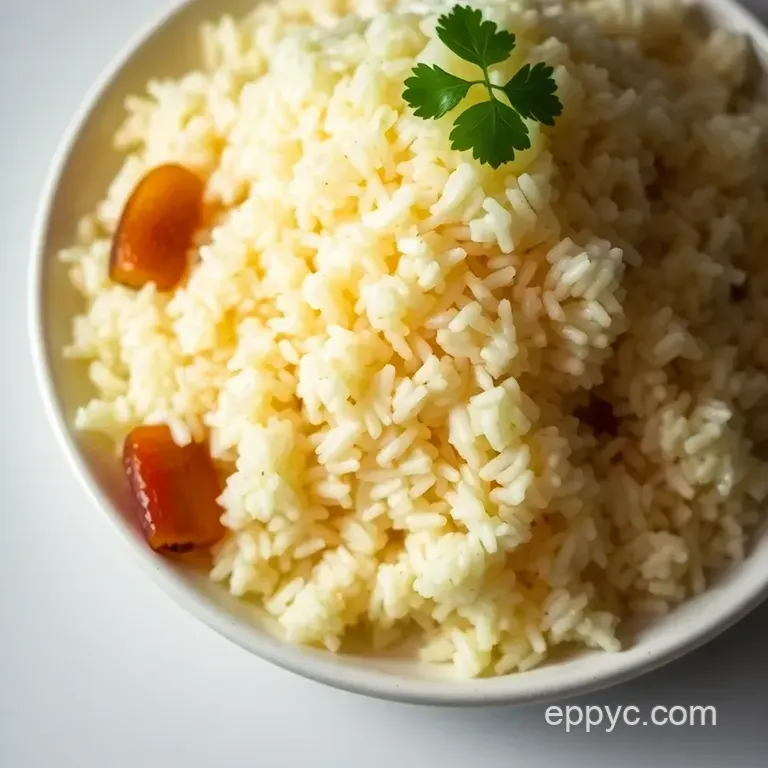
- Rice: Aim for 2 cups of cooked white rice (300g), ideally day-old rice. Fresh rice is just too sticky for our crispy garlic dreams.
- Garlic: You’ll need 6 cloves of garlic , minced (30g) the more, the merrier, right? When garlic is fresh, you’ll notice that vibrant pungency that'll liven up your rice.
- Oil: Grab 2 tablespoons of vegetable oil (30ml). This will help get that garlic nice and golden without burning it believe me, nobody wants bitter garlic in their dish.
- Salt & Pepper: Don't skip out on seasoning! You’ll want 1 teaspoon of salt (5g) and some freshly ground black pepper for that extra kick.
Quality Indicators
You know how some things just don't taste right? fresh garlic and rice make a world of difference. always check that your garlic is firm and free from sprouting, and that your rice is fluffy with no funky smells.
Storage Guidelines and Shelf Life
Store garlic in a cool, dry place, and it’ll be golden for weeks. cooked rice? keep it in an airtight container in the fridge for about 4-6 days.
So, if you're whipping up a batch of garlic fried rice , don’t worry about wasting that leftover rice!
Signature Seasoning Blend
Now, let’s talk about flavor! The beauty of sautéed garlic rice lies in its adaptability. You can elevate this dish with just a few spice combinations.
- Essential Spice Combinations: Consider adding a bit of soy sauce or oyster sauce for an umami kick; it just makes life better!
- Herb Selections: Chopped scallions or cilantro can add a fresh touch.
- Flavor Enhancers: If you’re feeling adventurous, sprinkle in some chili flakes for heat or a dash of sesame oil for that Asian twist.
Smart Substitutions
Running low on any ingredients? No problem!
- Common Alternatives: If you don't have vegetable oil, olive oil is your best bet.
- Emergency Replacements: No garlic? Try shallots or even onion for that aromatic base.
- Seasonal Options: During summertime, toss in fresh basil for a twist!
Kitchen Equipment Essentials
You don’t need fancy gadgets to make this rock star dish. A basic setup will do.
- Must Have Tools: A large skillet or frying pan is vital. You'll want that heat distribution for perfect sautéing.
- Storage Solutions: Keep your cooked rice in the fridge and ensure it’s tightly sealed. You want it ready and waiting for your quick and easy rice recipes !
Bringing It All Together
We’ve covered all the nitty gritty on how to make sinangag, but the real magic happens when you start cooking! a good tip? don't burn that garlic.
Keep stirring until it’s just the right shade of golden.
And, oh my gosh, once you dish it out, serve it with a fried egg or alongside your favorite grilled meats! Your family and friends will think you’re a culinary genius.
Now that you have the essential ingredients guide down, it’s about time we dive into the instructions for this downright delicious filipino garlic rice recipe .
Grab your skillet, take a deep breath, and let’s cook!
Look into Into Professional Cooking: Mastering Garlic Rice
Oh my gosh, let me tell you, there’s something incredibly satisfying about whipping up a delicious filipino garlic rice (aka sinangag).
It’s not just a breakfast staple; it’s comfort food that gives you that warm and fuzzy feeling. but let’s not just talk about the yumminess let’s get into some essential professional cooking methods that’ll have your kitchen buzzing, and your friends begging for seconds!
Essential Preparation Steps
Mise en Place: The Holy Grail
You’ve probably heard the term "mise en place" tossed around, and trust me, it’s more than just culinary jargon. it’s french for “everything in its place.
” before you start cooking, lay out all your ingredients 2 cups of cooked white rice , 6 cloves of minced garlic , and 2 tablespoons of vegetable oil .
It’s like having your ducks in a row before the big game!
Time Management Tips
Timing is everything, especially when you’re working with garlic. that little bulb is fragile and can go from perfect to burnt in mere seconds.
Start with preparing your ingredients before even thinking about turning on that burner. combine that with proper heat settings (medium for oil, medium high for frying), and you’re already ahead of the game.
Organization Strategies
Keep your tools handy. a large skillet, wooden spatula, and knife should be within reach. this not only saves time but also makes the process smoother.
Nothing worse than scrambling to find your spatula mid-sauté, am i right?
Safety Considerations
Cooking can get a bit chaotic, especially when frying. make sure to keep the area around your stove clean and have a towel nearby for any spills.
Oh, and be cautious with that hot oil nobody wants to end up with a grease burn!
Step-by-step Process
- Prepare the Ingredients : Mince your garlic and measure out the rice. It's about 10 minutes of prep.
- Heat the Oil : In your skillet, heat 2 tablespoons of vegetable oil over medium heat .
- Sauté the Garlic : Toss in the minced garlic and sauté until it’s a beautiful golden brown about 2- 3 minutes . Keep stirring, so it doesn’t burn!
- Add the Rice : Crank the heat to medium high , and mix in your 2 cups of cooked rice .
- Mix and Season : Stir it up, season with 1 teaspoon of salt , and add pepper to taste.
- Cook Until Heated : Let it fry for about 5- 7 minutes until everything’s heated and maybe a little crispy.
- Serve : Grab that spatula, dish it out, and maybe sprinkle more garlic on top if you’re feeling sassy!
Expert Techniques
When it comes to sautéing, temperature control is critical. if your skillet is too hot, that garlic will turn bitter, and nobody wants that.
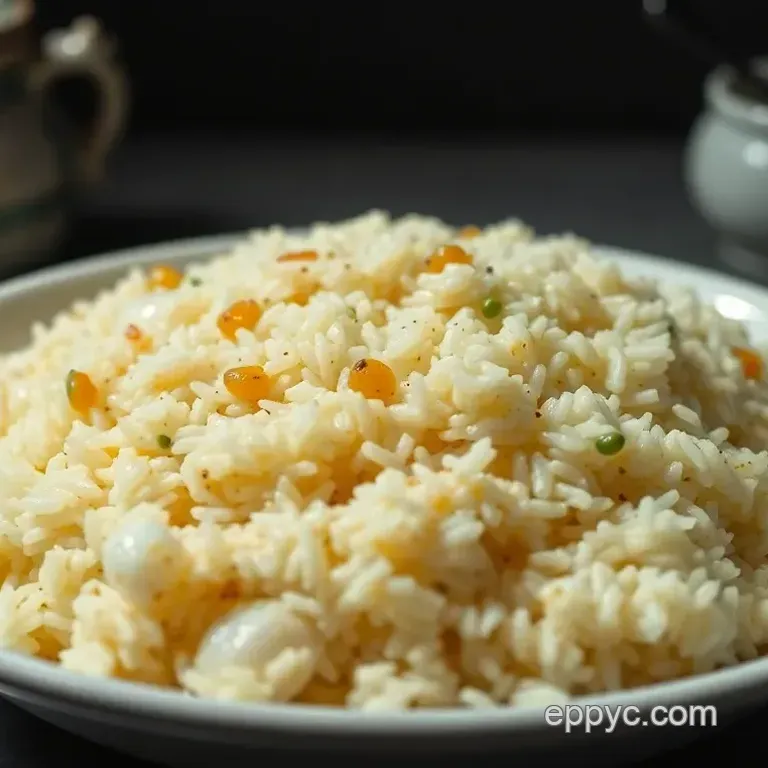
Always keep an eye on it! and here's a pro tip: if you find yourself feeling a little ambitious, toss in some veggies or proteins like a handful of peas or leftover rotisserie chicken for a twist on your classic filipino garlic rice recipe .
Success Strategies
Common Mistakes to Avoid
One common misstep? Using freshly cooked rice it can get clumpy. Instead, opt for day-old rice . It’s the secret to that perfect, fluffy texture.
Quality Assurance Tips
Keep checking on your garlic, and trust your nose. If it smells heavenly, you’re doing it right!
Perfect Results Guide
If you want a real treat, serve your sinangag with a fried egg on top. Talk about a game changer for breakfast!
Wrap-Up and Transition
So, there you have it! garlicky filipino sinangag is not just for breakfast anymore. with the right techniques and a bit of practice, it can be your go-to side dish for everything from barbecues to midnight snacks.
And hey, if you’re looking for more ways to elevate your meals or maybe want some nifty tips to make your kitchen life easier, check out our section on Additional Information next! You’ll be a pro in no time!
Additional Recipe Information for Garlicky Filipino Sinangag
Pro Tips & Secrets
Oh my gosh, let me spill some secrets about making the best filipino garlic rice aka sinangag! first off, i highly suggest using day-old rice .
It's drier and helps achieve that perfect texture. if you try to use fresh rice, it can turn mushy, and nobody wants that.
Trust me!
When it comes to sautéing, keep an eye on that minced garlic. you want it to turn a beautiful golden color not burnt! i learned this the hard way after setting off the smoke alarm the first time i made it.
So stay vigilant!
Want to elevate the flavor? Consider a splash of soy sauce or oyster sauce while cooking. It adds that umami punch that makes you say, “Wow, this is not just your average rice dish!”
Perfect Presentation
Now, let’s talk about presentation. Plating isn’t just for fancy restaurants; it can make your easy garlic rice look like a gourmet meal!
Start with a big scoop of sinangag in the center of your plate. use a round mold if you want to get all fancy about it.
Then, throw some sautéed veggies on top like peas or carrots for color. and don’t forget to sprinkle some chopped green onions or cilantro for a fresh pop.
Trust me, a touch of color makes it way more inviting. And honestly? You eat with your eyes first!
Storage & make-ahead
Life gets busy, right? If you want to make your garlic rice ahead of time, all good! Just follow these storage guidelines.
First, let your rice cool before putting it in an airtight container. it should last in the fridge for about 3-4 days .
If you want to keep it longer, think about freezing it. when reheating, a splash of water in the pan helps rehydrate it.
You'll want to warm it on medium heat until it’s nice and hot about 5- 7 minutes.
Creative Variations
What’s cool about this simple garlic rice recipe is how versatile it is. always feel free to get creative! for a vegetarian twist, toss in some chopped bell peppers or broccoli.
Want protein? cooked shrimp or chicken can transform your plate into a full meal.
How about seasonal? In summer, some cherry tomatoes mixed in give a delightful burst of color and flavor. Seriously, play with what you got!
Complete Nutrition Guide
Nutritionally speaking, garlic rice is not just delicious; it’s got benefits too! each serving packs around 250 calories not too shabby for a base.
Garlic itself is full of antioxidants which can give your immune system a boost.
You can even modify the portion size according to your dietary needs. Just remember, it’s all about balance!
Expert FAQ Solutions
Got questions? no worries! some common concerns include how to prevent mushiness or burning keep the heat medium. also, if your garlic is too strong for your taste, try using less; we all have different spice tolerances.
And if you decide to change up the meat or veggies, just remember that cooking times may vary.
So, if your rice turns out a bit too brown, no biggie! More flavor, right?
Conclusion
In conclusion, making filipino garlic rice can be both super easy and thrilling! you can personalize it however you want.
With these tips and variations, your dining table will become a mouthwatering feast.
So, whether you’re whipping up sinangag for breakfast or serving it alongside some grilled meats, this dish is a winner.
Grab your frying pan, and let’s get cooking! you’ll soon understand why garlic fried rice is considered one of the best rice dishes in the philippines .
Cheers to delicious home cooked comfort food!
Garlicky Filipino Sinangag A Flavorful Garlic Ri