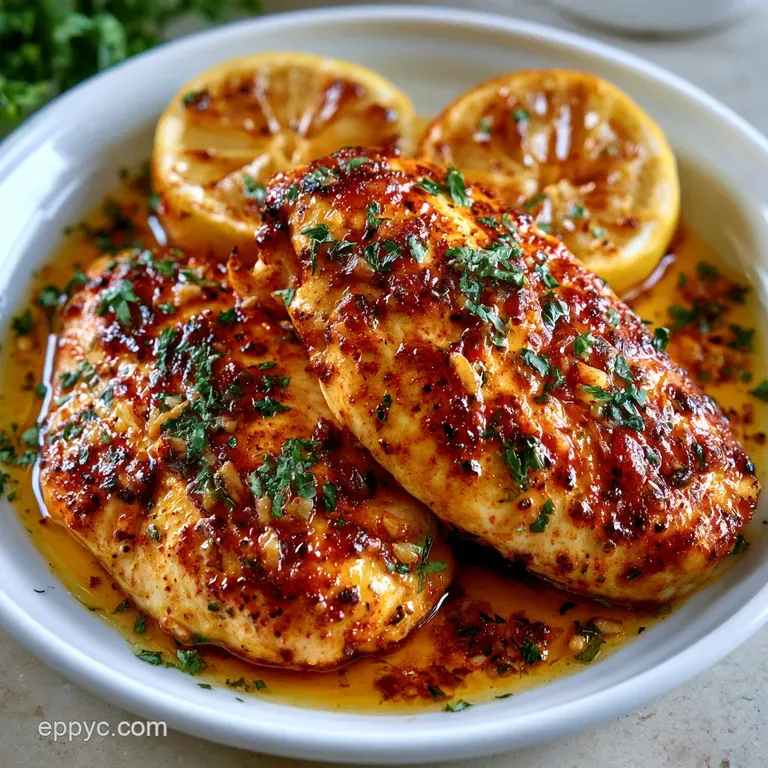
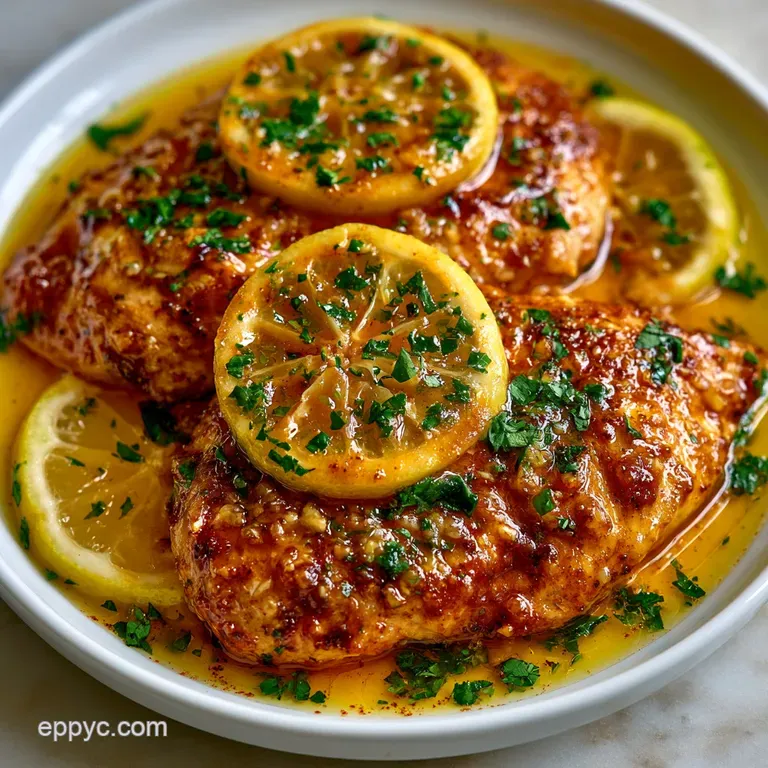
Instant Pot Chicken: Healthy Lemon Garlic
- Time: 10 min active + 25 min cooking = Total 35 minutes
- Flavor/Texture Hook: Zesty lemon aroma with a velvety, tender finish
- Perfect for: Busy weeknight dinners or healthy meal prep
- Savoring the Best Instant Pot Chicken
- The Secret to Juicy Meat
- Component Analysis
- The Grocery List Breakdown
- The Essential Kitchen Tools
- Cooking Steps for Success
- Solving Common Cooking Errors
- Troubleshooting Common Issues
- Flavor Tweaks and Swaps
- Adjusting the Portion Size
- Debunking Kitchen Myths
- Storage Guidelines
- Best Ways to Serve
- Recipe FAQs
- 📝 Recipe Card
Savoring the Best Instant Pot Chicken
That first sound of the pressure valve clicking into place is always a little thrilling, isn't it? But the real magic happens when you open the lid and that cloud of lemon and garlic steam hits your face.
It's the smell of a meal that feels like it took hours, even though you've only been in the kitchen for a few minutes.
I used to be terrified of the "Burn" notice. I once tried to throw everything in at once, and the pot just screamed at me, shutting down mid cycle. It was a total mess. But once I learned the trick of the sauté and the scrape, everything changed.
Now, this is my go to for a Healthy Instant Pot Chicken dinner that doesn't taste like it came from a gym meal prep container.
You can expect meat that actually pulls apart with a fork and a sauce that's bright and punchy. We're not doing the bland, boiled chicken thing here. We're using technology to force flavor into the protein while keeping the moisture locked inside.
The Secret to Juicy Meat
The reason this recipe works isn't just the machine, it's how we handle the heat and the liquids. According to the guides at Serious Eats, pressure cooking can actually toughen lean meats if you aren't careful with the release timing.
- The Fond Factor
- Searing creates browned bits on the bottom that add deep flavor to the sauce.
- Liquid Barrier
- The chicken broth creates a steam environment that prevents the meat from drying out.
- The Slow Vent
- A natural release allows the fibers to relax, preventing the "squeeze" that makes meat rubbery.
- Acid Integration
- Lemon juice breaks down tough proteins without needing a long simmer.
| Method | Total Time | Texture | Best For |
|---|---|---|---|
| Stovetop | 45 minutes | Braised/Tender | Slow evenings |
| Oven | 60 minutes | Roasted/Firm | Sunday dinner |
| Instant Pot | 35 minutes | Velvety/Juicy | Quick weeknights |
And here is a quick decision shortcut for your preferences: - If you want shreddable meat, add 2 minutes to the pressure time. - If you want clean slices, stick to the 10 minutes. - If you're using chicken thighs, increase the time to 12 minutes.
Component Analysis
Before we get into the list, let's look at why these specific items are in the pot. It's not just about taste, it's about how they react under pressure.
| Ingredient | Science Role | Pro Secret |
|---|---|---|
| Olive Oil | Heat Conductor | Use a high smoke point oil for the sear |
| Lemon Juice | pH Balancer | Add zest for the aroma, juice for the tang |
| Chicken Broth | Steam Source | Low sodium allows you to control the salt |
| Smoked Paprika | Flavor Depth | Adds a "grilled" taste without the grill |
This balance is what makes the dish feel complete. The fat from the oil and the acidity from the lemon create a sauce that clings to the meat rather than just sliding off.
The Grocery List Breakdown
Grab these items from your local store. I've suggested some swaps if you're missing something, but keep in mind that changing the fat or acid content can shift the final texture.
- 1.5 lbs boneless, skinless chicken breasts Why this? Lean protein that cooks fast
- Substitute: Chicken Thighs (adds more fat and richness)
- 1 tsp sea salt Why this? Enhances all other flavors
- Substitute: Kosher salt (adjust slightly for grain size)
- 1/2 tsp cracked black pepper
- Substitute: White pepper (milder, more floral)
- 1 tsp smoked paprika
- Substitute: Sweet paprika (less woodsy flavor)
- 1/2 tsp garlic powder
- Substitute: Onion powder (sweeter profile)
- 1 tbsp olive oil
- Substitute: Avocado oil (better for very high heat)
- 4 cloves garlic, minced
- Substitute: 1 tsp garlic paste
- 1/2 cup low sodium chicken broth Why this? Prevents the "Burn" error
- Substitute: Water with a pinch of salt (less flavor)
- 1/4 cup fresh lemon juice Why this? Brightens the heavy pressure taste
- Substitute: Lime juice (more tropical/sharp)
- 1 tbsp lemon zest
- Substitute: Orange zest (sweeter, citrusy)
- 1 tsp dried oregano
- Substitute: Dried thyme (more earthy)
The Essential Kitchen Tools
You don't need a fancy kitchen to make this, but a few tools make the flow much smoother. I use a standard 6 quart Instant Pot, but any electric pressure cooker works.
I highly recommend a sturdy whisk. When you're deglazing the pot, you want something that can get into the edges and scrape every single brown bit of fond. If you leave those bits behind, they can act like little heat magnets and trigger that dreaded burn notice.
A digital meat thermometer is also a lifesaver. While the timing is usually spot on, checking that the center has hit 165°F gives you total peace of mind. Finally, a pair of tongs makes the searing process a breeze so you aren't poking holes in your meat with a fork.
Cooking Steps for Success
Let's crack on with the actual process. Follow these steps closely, especially the deglazing part, to ensure your Instant Pot Chicken turns out perfectly.
- Set the Instant Pot to Sauté mode. Add olive oil and, once shimmering, add the seasoned chicken.
- Brown each side for 2-3 minutes until a golden brown crust forms. Note: Don't overcrowd the pot or the meat will steam instead of sear.
- Remove the chicken and set it aside on a plate.
- Pour in the chicken broth. Use a whisk to scrape every single brown bit (the fond) off the bottom of the pot until the bottom is clean.
- Stir in the lemon juice, zest, oregano, and minced garlic.
- Return the chicken to the pot, nestling it into the liquid.
- Secure the lid, set the valve to Sealing, and cook on High Pressure for 10 minutes.
- Allow the pot to undergo a Natural Release for 10 minutes until the pin drops.
- Flip the valve to Quick Release for the remaining steam.
Solving Common Cooking Errors
Even with a plan, things can go sideways. The most common issue is either the meat being too dry or the machine giving you an error code.
Troubleshooting Common Issues
| Issue | Solution |
|---|---|
| Why Your Meat is Rubbery | This usually happens when you use a Quick Release immediately after the timer goes off. The sudden drop in pressure causes the moisture to be sucked out of the chicken fibers instantly. Always give it |
| Why the "Burn" Notice Appears | If you see "Burn" on the screen, it means there's a layer of food stuck to the bottom that's overheating. This is why we deglaze with the broth. If it happens, you'll need to release the pressure, sti |
| Why the Sauce is Too Thin | Since the liquid doesn't evaporate under pressure, the sauce can be a bit watery. You can fix this by turning the Sauté mode back on for 3-5 minutes after the chicken is done to reduce the liquid. |
Common Mistakes Checklist
- ✓ Deglazed the bottom of the pot completely
- ✓ Used a natural release for at least 10 minutes
- ✓ Seasoned the chicken before the sear
- ✓ Used fresh lemon juice instead of bottled
- ✓ Avoided overcrowding the pot during sautéing
Flavor Tweaks and Swaps
One of the best things about this base recipe is how easily it adapts. If you're tired of lemon, you can swap the zest and juice for lime and add a pinch of cumin. This turns it into a great base for tacos, and you can even mix in some Homemade Taco Seasoning for extra kick.
For those looking for Healthy Instant Pot Chicken Breast Recipes, you can swap the olive oil for a light spray of avocado oil. You can also replace the chicken broth with a low sodium vegetable broth if you want to lighten the flavor profile further.
If you're craving something creamier, stir in two tablespoons of heavy cream or a dollop of Greek yogurt after the cooking process is complete. Just make sure the Sauté mode is off so the dairy doesn't curdle from the residual heat. This makes it feel more like a restaurant style dish.
Adjusting the Portion Size
When you're cooking for a crowd or just for yourself, you can't just double everything blindly. Pressure cooking relies on a specific ratio of liquid to surface area.
Scaling Down (for 2 people): Use 0.75 lbs of chicken. Reduce the broth by 20% and the garlic to 2 cloves. I recommend reducing the pressure time by about 2 minutes to avoid overcooking the smaller pieces.
Scaling Up (for 8 people): Use 3 lbs of chicken. Only increase the salt and spices to 1.5x the original amount to avoid over seasoning. Work in batches for the searing process, otherwise, the chicken will release too much water and you won't get that golden crust.
| Scale | Liquid Change | Time Change | Batching Required? |
|---|---|---|---|
| Half | -20% Liquid | -2 mins | No |
| Double | -10% Liquid | No change | Yes (for searing) |
Remember, if you're doubling the meat, the pot will take longer to reach pressure, but the actual cooking time remains the same.
Debunking Kitchen Myths
There's a lot of noise out there about pressure cooking. Let's clear up a few things.
First, many people believe that searing meat "seals in the juices." This is actually a myth. Searing creates flavor through browning, but it doesn't create a waterproof barrier. The juiciness in this recipe comes from the pressure and the natural release, not the sear.
Another common myth is that the Instant Pot makes everything mushy. This only happens if you overcook your food or use the wrong release method. When handled correctly, the meat stays firm but tender.
Storage Guidelines
To keep your leftovers tasting fresh, store the chicken and the sauce together in an airtight glass container. This prevents the meat from drying out in the fridge.
Fridge: Lasts up to 4 days. Freezer: Lasts up to 3 months. I suggest freezing the chicken in the sauce to maintain the moisture.
For zero waste, don't toss the lemon rinds or the leftover broth in the pot. You can throw the rinds into a freezer bag for future zest or use them to infuse a simple syrup. The remaining liquid is a goldmine of flavor, so I usually pour it over some quinoa or use it as a base for a quick pan sauce.
Best Ways to Serve
This dish is incredibly versatile. For a balanced meal, I love serving it alongside some Fluffy Jasmine Rice, which soaks up that lemony garlic sauce perfectly.
If you're going for a low carb option, steamed asparagus or roasted cauliflower are great pairings. The brightness of the lemon in the chicken cuts through the earthiness of the vegetables.
For a more hearty dinner, try serving the chicken over a bed of mashed potatoes or wide egg noodles. If you have leftover chicken, it makes a killer cold salad the next day just shred it and toss it with a bit of mayo and fresh parsley. This recipe really is a powerhouse for your weekly meal rotation.
Recipe FAQs
Can this Instant Pot recipe be used in a slow cooker?
Yes, you can. Simply combine the ingredients and cook on low for 6-8 hours, though you will miss the quick browning achieved in Sauté mode.
Is this a good option for those seeking light, healthy recipes?
Yes, it is very light. It relies on lean chicken breasts and fresh lemon rather than heavy creams. For another refreshing side, try our Asian salad.
Is an Instant Pot more effective than a crockpot for chicken?
For speed and texture, yes. The pressure cooker delivers tender results in just 10 minutes of high pressure, whereas a crockpot requires several hours.
Why is my chicken rubbery after pressure cooking?
You likely used a Quick Release immediately. The sudden pressure drop sucks moisture out of the fibers; always allow a 10-minute Natural Release first.
Why did my Instant Pot display a "Burn" notice?
Food was stuck to the bottom of the pot. Use a whisk to scrape all brown bits (fond) with the chicken broth before securing the lid.
How to get a golden brown crust on the chicken?
Sauté seasoned chicken in shimmering olive oil. Brown each side for 2-3 minutes before removing the meat to deglaze the pot.
How to store leftovers to prevent drying out?
Store chicken and sauce together in an airtight glass container. This keeps the meat moist for up to 4 days in the fridge.
Healthy Instant Pot Chicken

