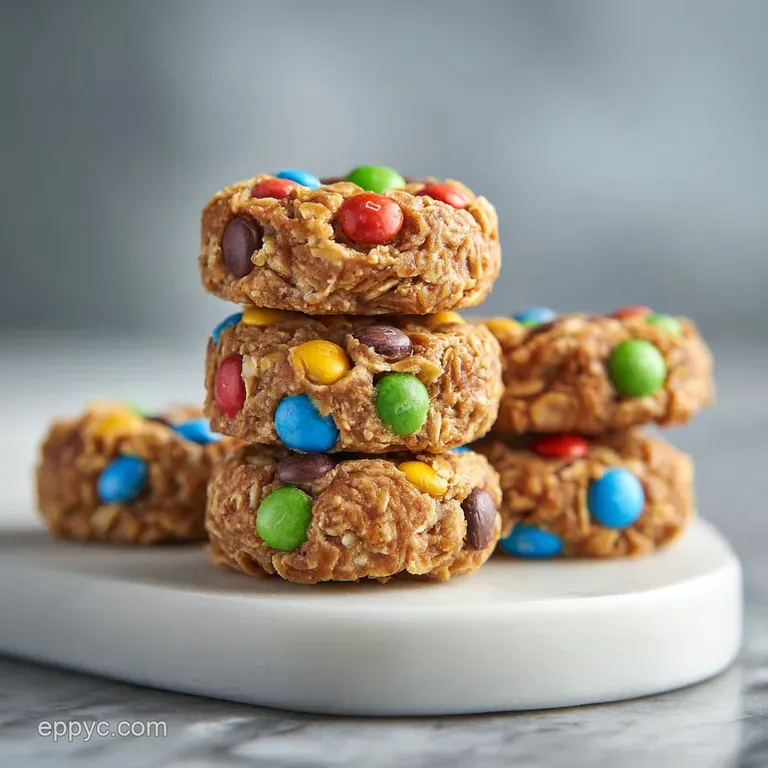
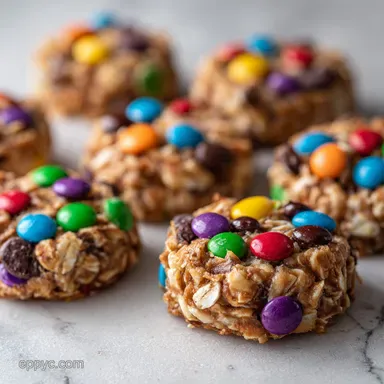
Healthy Monster Cookie Protein Ball Easy No Bake
- Time: Active 10 minutes, Passive 20 minutes, Total 30 minutes
- Flavor/Texture Hook: Velvety peanut butter meets the satisfying snap of mini candies.
- Perfect for: High energy afternoon fuel or organized meal prep for busy digital nomads.
- The Ultimate Healthy Monster Cookie Protein Ball Easy
- The Science of Why it Works
- Optimized Preparation Specification Table
- The Essential Component Hardware List
- Necessary Culinary Assembly Tools
- Sequential Steps for Culinary Success
- Troubleshooting Your Protein Ball Consistency
- Smart Scaling for Large Batches
- Innovative Flavor Variations to Try
- Debunking Common Kitchen Myths
- Storage and Zero Waste Tips
- Recipe FAQs
- 📝 Recipe Card
The Ultimate Healthy Monster Cookie Protein Ball Easy
The sound of a heavy glass jar of peanut butter hitting the counter is my favorite rhythm of the afternoon. You know that feeling when the 3 PM slump hits and your brain feels like a browser with too many tabs open? That is when I reach for these.
This recipe shows you how to make a delicious, healthy monster cookie protein ball that's an easy, no bake energy bite packed with chocolate chips.
I used to struggle with protein snacks that tasted like chalk or crumbled the second you picked them up. It was a digital age problem: I wanted high efficiency and high flavor with zero technical debt.
After a few batches that were either too sticky to handle or too dry to swallow, I finally dialed in the hydration ratios that make these the gold standard of snacks.
Trust me, once you see how the honey and peanut butter tech stack works together to lock in those oats, you will never buy a pre packaged bar again. We are going to empower your pantry today with something that actually tastes like a treat but performs like a fuel source.
Let's get into the mechanics of why this specific combination of ingredients creates such a velvety, cohesive bite every single time.
The Science of Why it Works
Starch Hydration: Rolled oats act as a structural sponge, absorbing the liquid honey and vanilla extract to soften without heat.
Lipid Emulsification: The natural oils in the peanut butter create a hydrophobic barrier around the protein powder, preventing it from becoming gritty or "chalky" when it hits your palate.
| Method | Time | Texture | Best For |
|---|---|---|---|
| No Bake (This Recipe) | 30 minutes | Fudgy and soft | Maximum nutrient density |
| Lightly Toasted Oats | 40 minutes | Nutty and firm | Enhanced aromatic profile |
| Baked Hybrid | 50 minutes | Crispy edges | long term shelf stability |
Working with raw ingredients requires a different mindset than traditional baking. Since we aren't using heat to fuse things together, we rely on the physical "tackiness" of our binders.
I have found that using a digital scale for the honey and peanut butter ensures the balls stay round and don't flatten into sad pancakes on the tray.
Optimized Preparation Specification Table
Understanding the specifications of your ingredients is like checking the system requirements before installing new software. We need the right components to ensure the final product is compatible with your expectations.
I have spent many hours in the kitchen laboratory testing which brands of oats and protein powders play nice together, and the results are consistently better when you stick to these parameters.
| Component | Science Role | Pro Secret |
|---|---|---|
| Rolled Oats | Structural Matrix | Pulse 1/4 of the oats for a smoother, more cohesive dough. |
| Peanut Butter | Lipid Binder | Use "natural" stir style for better moisture distribution. |
| Protein Powder | Nitrogen Source | Sift it first to avoid tiny pockets of dry powder. |
| Raw Honey | Hygroscopic Glue | Warm slightly for 5 seconds to improve blending flow. |
When I first started making these, I used quick oats because I thought they would be easier to chew. Big mistake. They turned into mush almost instantly. You really need the structural integrity of the 1.5 cups Rolled oats to provide that "shatter" and chew that defines a monster cookie. It is similar to how a Classic Oatmeal Cookie recipe relies on the weight of the grain to hold up against the sugar.
The Essential Component Hardware List
You do not need a high tech kitchen to master this. However, using the right "hardware" makes the process seamless. I prefer a heavy duty glass mixing bowl because it doesn't retain smells from previous savory meals, and a silicone spatula is non negotiable for getting every last drop of honey out of the measuring cup.
- 1.5 cups Rolled oats Why this? Provides essential complex carbohydrates and a sturdy, chewy base texture. (Substitute: Quinoa flakes for a different protein profile)
- 0.5 cup Vanilla protein powder Why this? Acts as a dry binder while boosting the nitrogen rich nutritional content. (Substitute: Collagen peptides for a thinner consistency)
- 2 tbsp Ground flaxseed Why this? Adds "grip" to the dough and provides essential Omega-3 fatty acids. (Substitute: Chia seeds for a crunchier texture)
- 0.5 tsp Sea salt Why this? Sharpens the sweetness of the honey and the richness of the nut butter. (Substitute: Kosher salt)
- 0.75 cup Creamy natural peanut butter Why this? The primary fat source that keeps the balls moist and pliable. (Substitute: Almond butter for a milder, woodsy flavor)
- 0.33 cup Raw honey Why this? A natural invert sugar that provides a glossy finish and strong tack. (Substitute: Maple syrup - Note: Results in a softer, slightly stickier ball)
- 1 tsp Pure vanilla extract Why this? Rounds out the flavor profile and bridges the salt and sugar. (Substitute: Almond extract for a cherry like undertone)
- 0.33 cup Mini M&Ms Why this? Provides the iconic "monster" look and a colorful sugar snap. (Substitute: Cacao nibs for a less sweet, more intense bite)
- 0.25 cup Mini semi sweet chocolate chips Why this? Distributes chocolate flavor evenly throughout every single bite. (Substitute: Dark chocolate chunks for a sophisticated finish)
Necessary Culinary Assembly Tools
I like to think of these tools as my peripheral devices. They empower me to work faster and with more precision. If you are serious about meal prepping, investing in a small cookie scoop is the single best digital age upgrade you can make for your kitchen.
- Large mixing bowl: Glass or stainless steel works best for visibility.
- Silicone spatula: Essential for folding in the chocolate without crushing the M&Ms.
- Small cookie scoop: Ensures every ball is exactly 20 grams for consistent nutrition.
- Baking sheet: To hold the balls while they "set" in the fridge.
- Parchment paper: Prevents the sticky dough from adhering to the tray.
Sequential Steps for Culinary Success

- Prep the dry foundation. Combine the 1.5 cups Rolled oats, 0.5 cup Vanilla protein powder, 2 tbsp Ground flaxseed, and 0.5 tsp Sea salt in your bowl. Note: Whisking these dry prevents protein clumps later.
- Activate the binders. Add the 0.75 cup Creamy natural peanut butter, 0.33 cup Raw honey, and 1 tsp Pure vanilla extract.
- Initiate the merge. Stir the mixture until no dry streaks of protein remain. Note: This may require some elbow grease as the dough thickens.
- Integrate the textures. Gently fold in the 0.33 cup Mini M&Ms and 0.25 cup Mini semi sweet chocolate chips.
- Evaluate the consistency. Let the mixture sit for 5 minutes until the oats have absorbed the surface moisture.
- Execute the portioning. Use your scoop to drop 20 equal mounds onto the parchment lined sheet.
- Hand roll the spheres. Roll each mound between your palms until the surface is smooth and glossy. Note: If the dough sticks to your hands, dampen them slightly with water.
- The hydration phase. Place the tray in the fridge for 20 minutes until the balls feel firm to the touch.
- Final Quality Check. Ensure the chocolate hasn't bloomed and the balls hold their shape when pressed.
- Seal for storage. Transfer the set balls into an airtight container for long term enjoyment.
Chef's Tip: If you find the dough too crumbly, add 1 teaspoon of water at a time. The protein powder's absorbency varies wildly by brand, so you have to be the final judge of the moisture levels!
Troubleshooting Your Protein Ball Consistency
Even with the best technology, sometimes the system glitches. I remember a batch I made in the middle of a heatwave; the peanut butter was so runny that my "balls" turned into a giant sheet cake on the tray. It was a mess, but I learned how to recalibrate on the fly.
Usually, the issue is either a hydration imbalance or an ingredient temperature variance.
Managing High Absorbency Protein Powder
If your mixture looks like dry sand and won't stick together even when you squeeze it, your protein powder is likely a "heavy lifter." Some whey isolates or plant based blends soak up liquid like a sponge. Don't panic and dump more honey in that will make them cloying.
Instead, add a tiny bit of almond milk or water.
| Problem | Root Cause | Solution |
|---|---|---|
| Crumbly texture | Too much dry protein powder relative to fats. | Add 1-2 tsp of warm water or extra peanut butter. |
| Sticky surface | Honey hasn't fully integrated or temp is too high. | Chill the dough for 15 minutes before rolling. |
| Flat balls | Peanut butter was too runny or warm. | Use a refrigerated peanut butter to stiffen the base. |
- ✓ Always measure your oats exactly; too many will prevent the ball from binding.
- ✓ Ensure your peanut butter is well stirred; the oil at the top is vital for the smooth finish.
- ✓ Don't skip the 20 minute rest; it is the "invisible cook time" where the texture stabilizes.
- ✓ Use mini candies rather than full sized ones to keep the structural integrity high.
Smart Scaling for Large Batches
If you are prepping for a fitness challenge or a long road trip, scaling this recipe is quite simple. I often double the batch to have 40 servings ready for the week. Since this is a cold process recipe, the math is straightforward, but you do need to be careful with the salt and vanilla as they can become overpowering in large quantities.
Scaling Up for Family Portions
When doubling the ingredients, I suggest keeping the sea salt at 0.75 tsp instead of a full teaspoon. This prevents the "monster" flavor from becoming a "salt monster." Also, use a stand mixer with a paddle attachment if you are making more than 40 balls; your forearms will thank you for the digital assistance.
| Servings | Oats | Peanut Butter | Honey | Pan Size |
|---|---|---|---|---|
| 20 Balls | 1.5 cups | 0.75 cup | 0.33 cup | Small Tray |
| 40 Balls | 3 cups | 1.5 cups | 0.66 cup | Large Sheet |
| 60 Balls | 4.5 cups | 2.25 cups | 1 cup | Two Sheets |
Innovative Flavor Variations to Try
Once you master the base "code" of this recipe, you can start installing "plugins." I love experimenting with different mix ins to keep my snack game fresh. Just remember to keep the dry to wet ratio consistent. If you add something dry like shredded coconut, you might need a touch more honey.
Boosting the Healthy Fats
If you want more crunch and a boost of healthy fats, swap half the chocolate chips for chopped walnuts or pecans. The earthy flavor of the nuts pairs beautifully with the vanilla protein. You could even use the technique from my How to Bake recipe to understand how different sweeteners affect the texture and "tack" of the mixture.
Creating a Chocolate Base
For a double chocolate version, swap the vanilla protein for a rich cocoa based protein powder. It creates a dark, velvety appearance that looks like a truffle but behaves like a powerhouse snack. I like to add a pinch of espresso powder to this version to deepen the chocolate notes without adding extra sugar.
Debunking Common Kitchen Myths
One major myth is that "no bake" means "no waiting." People think they can eat these the second they are rolled. While they are safe to eat, the flavor and texture are 100% better after that 20 minute rest.
The oats need time to undergo a process called "staling" in reverse, where they soften and become one with the binders.
Another misconception is that you need expensive, high end protein powders for a good result. In my experience, a mid range, reliable brand works just as well. The magic isn't in the price tag; it is in the ratio of the ingredients. You are the one who empowers the recipe with your technique, not the label on the jar.
Storage and Zero Waste Tips
Keeping your protein balls fresh is all about humidity control. I store mine in a glass container with a tight lid. They will stay perfect in the fridge for up to 10 days, though they rarely last that long in my house! If you find you have "crumbs" at the bottom of the bowl after rolling, don't throw them away.
I sprinkle them over my morning yogurt for a "monster cookie" granola experience.
For long term storage, these freeze beautifully. Place them on a tray to freeze individually first, then toss them into a silicone bag. They will keep for 3 months. To eat, just let one sit on your desk for 10 minutes it will be perfectly chewy and ready to fuel your next digital project.
This zero waste approach ensures you are getting every bit of value out of your ingredients!

Recipe FAQs
Can I make these protein balls without peanut butter?
Yes, with substitutions. You can use almond butter or cashew butter for a similar binding effect and fat content, much like we do in our Creamy Cashew Alfredo Sauce: A dairy-free Delight in 20 Minutes where nuts are the primary binder.
Why are my protein balls crumbling?
Your protein powder is too absorbent. Some protein powders soak up more liquid than others, leaving the mixture dry and crumbly. Add 1-2 teaspoons of water or extra peanut butter gradually until it binds.
How do I prevent the balls from being too sticky?
Chill the dough before rolling. If the mixture is too sticky to handle, refrigerate it for about 15 minutes. This helps the ingredients firm up, making them much easier to roll into smooth balls.
Do I need to bake these protein balls?
No, they are a no-bake recipe. These protein balls are designed to be made without any oven time, relying on the binding properties of honey and peanut butter to hold their shape.
What's the best way to store these protein balls?
Refrigerate them in an airtight container. They will stay fresh in the fridge for up to 10 days, maintaining their chewy texture and preventing spoilage.
Can I use maple syrup instead of honey?
Yes, but expect a softer texture. Maple syrup is a great substitute for honey, but it tends to create a slightly softer and stickier ball. This is a similar effect we sometimes see when adapting recipes to be vegan, like in our Creamy Vegan Mac n Cheese Recipe: A dairy-free Comfort Classic.
Why are my balls flat on the tray?
Your peanut butter was likely too warm or runny. Using a firmer, chilled peanut butter helps maintain the shape of the balls. The fat in the peanut butter needs to be solidified enough to provide structural support.
Healthy Monster Cookie Protein Balls
Ingredients:
Instructions:
Nutrition Facts:
| Calories | 139 kcal |
|---|---|
| Protein | 5.9 g |
| Fat | 6.9 g |
| Carbs | 15.2 g |
| Fiber | 1.6 g |
| Sugar | 10.8 g |
| Sodium | 70 mg |
