Homemade Artisan Crackers: 4 Flavor Variations
- Time: Active 10 minutes, Passive 15 minutes, Total 25 minutes
- Flavor/Texture Hook: Prismatic, salty crunch with a paper thin, golden shatter
- Perfect for: Upscale charcuterie boards, holiday gifting, or a creative afternoon project
- Achieving the Perfect Crunch with This Homemade Artisan Crackers 4 Flavors Recipe
- How to Fix the Rubbery Texture of Store-Bought Crackers
- Why the Water to Flour Ratio Creates That Shatter
- Planning Your Artistic Flourish with Specific Kitchen Checkpoints
- The Raw Elements Needed for Your Edible Art Canvas
- Tools That Transform Simple Dough into Gourmet Sheets
- Mastering the Rolling and Baking Technique for Golden Crispness
- Solving the Mystery of the Soft or Burnt Cracker
- Exploring New Textures and Creative Flour Flavor Profiles
- Preserving the Crisp and Reducing Kitchen Waste Naturally
- Debunking Baking Myths to Perfect Your Next Platter
- Recipe FAQs
- 📝 Recipe Card
Achieving the Perfect Crunch with This Homemade Artisan Crackers 4 Flavors Recipe
There is nothing more heartbreaking than assembling a gorgeous board of expensive cheeses and artisanal jams only to realize your crackers are a leathery, soggy disappointment. I remember the exact moment I realized I had to stop buying the boxed stuff.
It was a Saturday evening, and the "premium" sea salt crackers I’d bought felt more like damp cardboard than a vessel for my favorite brie. They lacked that musical "snap" that signals a truly well made bake.
That specific failure led me down a rabbit hole of dough hydration and rolling techniques. I realized the secret wasn't some exotic ingredient, it was the rhythm of the roll and the intensity of the heat.
This homemade artisan crackers 4 flavors recipe is the result of those long afternoons spent testing exactly how thin a dough could go before it became a work of art. We aren't just making snacks here, we're crafting a sensory experience that brings a certain joy to the table.
When you pull these out of the oven, the aroma of toasted flour and rosemary fills the room, signaling that something special has happened. The crackers don't just sit there, they gleam with olive oil and catch the light with flakes of Maldon salt.
It's about that first bite where the cracker shatters effortlessly, providing a clean, crisp base that lets your toppings sing. Let's get into how we make this happen with style and precision.
How to Fix the Rubbery Texture of store-bought Crackers
The biggest hurdle most home cooks face with crackers is a lack of structural integrity they either turn out too hard, like a tile, or too soft, like a tortilla. The fix is actually quite poetic. It's all about managing the moisture and ensuring the gluten doesn't get too worked up.
When we use olive oil, we are effectively coating the flour particles, which limits the gluten development and ensures the final result is tender rather than chewy.
Another common struggle is the "puff." If you've ever ended up with crackers that look like little pillows, you've skipped the most vital artistic step: docking. By pricking the dough, we create tiny escape vents for steam. This keeps the crackers flat, focused, and incredibly crunchy.
This specific flavors recipe relies on that flatness to ensure every square millimeter gets evenly toasted by the oven's 400°F (200°C) heat.
Why the Water to Flour Ratio Creates That Shatter
Gluten Limitation: The olive oil coats the flour proteins, preventing them from forming long, stretchy chains, which results in a "short" dough that snaps beautifully.
Steam Release: Pricking the dough (docking) allows internal moisture to escape instantly in the high heat, preventing the layers from separating and puffing.
Starch Gelatinization: The 2/3 cup of water hydrates the flour just enough so that when it hits the 400°F (200°C) oven, the starches set rapidly into a rigid, crispy lattice.
Lipid Heat Transfer: Olive oil acts as a heat conductor within the dough, essentially "frying" the cracker from the inside out to achieve that deep golden hue.
| Thickness | Internal Temp | Rest Time | Visual Cue |
|---|---|---|---|
| 1/16th inch | N/A (Flash Bake) | 5 mins | Golden edges and firm center |
| 1/8th inch | N/A (Flash Bake) | 8 mins | Deep brown, slightly chewy center |
| 1/4th inch | N/A (Flash Bake) | 10 mins | Biscuit like texture, not recommended |
The thickness of your dough is the single most important variable in this recipe. While many recipes give you a range, I’ve found that 1/16th of an inch is the "sweet spot" where the cracker transitions from being a food item to being a masterpiece.
It requires a bit of patience with the rolling pin, but the resulting shatter is worth every second of effort.
Planning Your Artistic Flourish with Specific Kitchen Checkpoints
| Component | Science Role | Pro Secret |
|---|---|---|
| All Purpose Flour | Provides the structural framework | Use a kitchen scale for exactly 250g to ensure the hydration is perfect. |
| Olive Oil | Shortens gluten and adds richness | Use a high-quality extra virgin oil; the flavor carries through the bake. |
| Sea Salt | Enhances flavor and tightens gluten | Fine sea salt dissolves better into the dough than chunky kosher salt. |
| Water | Hydrates the starch | Use room temperature water (around 70°F) to keep the dough relaxed and easy to roll. |
To keep your kitchen workflow as joyful as possible, I recommend setting up your "flavor stations" before you even touch the flour. Since this homemade artisan crackers 4 flavors recipe moves quite quickly once the dough is rolled, having your rosemary, Parmesan, and spices measured out prevents any frantic searching while the oven is preheating.
The Raw Elements Needed for Your Edible Art Canvas
The beauty of this dough lies in its simplicity. We start with 2 cups of all purpose flour (250g) and 1/2 teaspoon of sea salt (3g). A tiny hint of sweetness from 1 teaspoon of granulated sugar or honey (5g) helps with the browning process.
For the fat, we use 3 tablespoons of olive oil (45ml), and for hydration, 2/3 cup of water (160ml).
The Master Base Dough
This is your foundational element. It should be supple and slightly oily to the touch, which makes it incredibly easy to roll out paper thin. If the dough feels too tight, let it rest for five minutes to allow the gluten to relax.
Flavor Variation 1: Everything Bagel
We use 2 tablespoons of everything bagel seasoning for this one. It provides a massive textural contrast with the seeds and a punchy, savory profile that pairs perfectly with cream cheese.
Flavor Variation 2: Rosemary & Sea Salt
Finely mince 1 tablespoon of fresh rosemary and pair it with 1 teaspoon of flaky Maldon salt. This is the most sophisticated of the bunch, ideal for serving alongside a sharp cheddar or a Jalapeno Popper spread.
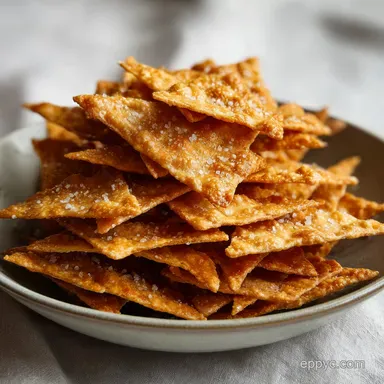
Flavor Variation 3: Smoked Paprika & Onion
Combine 1 teaspoon of smoked paprika with 1/2 teaspoon of onion powder. This variation offers a beautiful rust red color and a depth of flavor that feels warm and inviting.
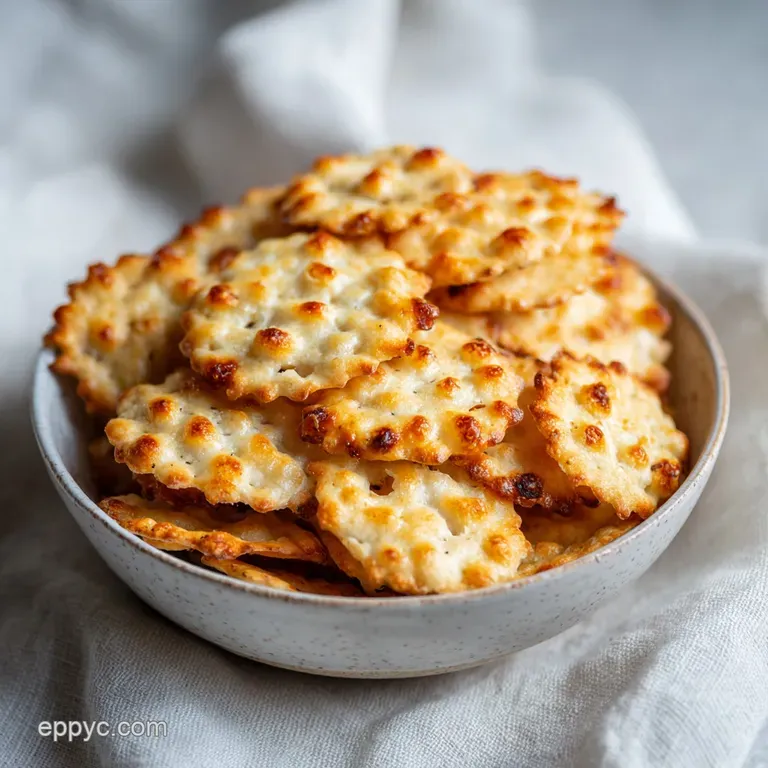
Flavor Variation 4: Parmesan & Thyme
1/4 cup of finely grated Parmesan cheese (25g) and 1 teaspoon of dried thyme create a cracker that tastes almost like a savory biscuit. The cheese crisps up against the hot tray, creating little lacy edges of pure flavor.
Tools That Transform Simple Dough into Gourmet Sheets

You don't need a professional bakery to achieve these results, but a few specific tools make the process much more pleasant. A heavy rolling pin is your best friend here. It does the work for you, applying even pressure across the dough.
I also highly recommend using a pizza cutter for scoring; it glides through the dough much more cleanly than a knife, which can sometimes "drag" and tear the thin sheet.
Parchment paper is non negotiable. Because we are rolling the dough so thin, trying to move it from a counter to a baking sheet is a recipe for disaster. By rolling directly onto the parchment, you can simply slide the whole masterpiece onto the tray. If you have a wire cooling rack, make sure it's nearby.
Cooling the crackers on a flat surface can trap steam underneath, leading to a loss of that precious crunch.
Mastering the Rolling and Baking Technique for Golden Crispness
- Preheat your oven to 400°F (200°C) and prepare a large baking sheet with parchment paper. Note: A hot oven is crucial for that immediate steam blast.
- In a large mixing bowl, whisk together the flour, salt, sugar, and any 'in dough' seasonings like the onion powder or dried herbs.
- Create a well in the center and add the olive oil and water. Stir with a spatula until a shaggy dough forms.
- Lightly knead the dough in the bowl for 30 seconds until smooth and elastic.
- Place the dough directly onto a sheet of parchment paper and roll it using a rolling pin until it is paper thin (about 1/16th of an inch).
- Dock the dough by pricking it all over with a fork to prevent puffing and air bubbles.
- Brush the surface lightly with water and sprinkle your chosen toppings over the top. Note: The water acts as a glue for the seeds and salt.
- Lightly roll over the toppings with the rolling pin to press them firmly into the dough.
- Using a pizza cutter, score the dough into squares or rectangles until you see the parchment through the lines.
- Slide the parchment onto the baking sheet and bake for 12-15 minutes until golden brown and crackling.
Solving the Mystery of the Soft or Burnt Cracker
If your crackers are coming out soft in the middle but dark on the edges, your rolling might be uneven. This is a common hurdle when first trying the flavors recipe. The edges of the dough naturally tend to get thinner than the center.
To fix this, always roll from the center outward, and check the middle thickness with your fingers it should feel as thin as a piece of heavy cardstock.
Why My Crackers Are Chewy
This usually happens if the oven wasn't fully preheated or if the dough was too thick. The water needs to evaporate rapidly to create the crisp structure. If it lingers, the dough "cooks" like bread instead of "drying" like a cracker.
| Problem | Root Cause | Solution |
|---|---|---|
| Toppings fall off | Surface too dry | Brush dough with water or a thin film of oil before sprinkling seeds. |
| Bubbles or "pillows" | Insufficient docking | Use a fork to prick the dough every half inch; don't be shy! |
| Bitter taste | Burnt spices | Reduce oven time by 2 minutes and watch for the "golden" transition. |
It's also worth noting that these crackers continue to crisp up as they cool. Don't be tempted to leave them in the oven until they are dark brown; by then, the delicate oils in the nuts or seeds will have turned bitter. Aim for a sunset gold color and let the residual heat finish the job on the wire rack.
Common Mistakes Checklist
- ✓ Pat the work surface with a damp cloth before laying down parchment (stops it from sliding).
- ✓ Whisk dry ingredients thoroughly to avoid salt pockets in the dough.
- ✓ Use a ruler if you are a perfectionist about the 1/16th inch thickness.
- ✓ Don't skip the 30 second knead; it organizes the flour and oil into a cohesive sheet.
- ✓ Ensure your Parmesan is "powdery" fine so it integrates into the dough's surface.
Exploring New Textures and Creative Flour Flavor Profiles
When you want to scale this recipe down for a quiet solo snack, simply halve all the ingredients. For half an egg, whisk it in a small bowl and use roughly 1.5 tablespoons. If you are scaling up for a large party, the key is to work in batches.
Don't try to double the dough in one bowl; it becomes too difficult to knead effectively. Instead, make two separate batches of the base dough to ensure the texture remains consistent.
| Original Ingredient | Substitute | Why It Works |
|---|---|---|
| All Purpose Flour | Whole Wheat Flour (50/50) | Adds a nutty, rustic flavor. Note: May require 1 extra tbsp of water. |
| Olive Oil | Melted Butter | Creates a richer, more "shortbread" like texture with a dairy finish. |
| Granulated Sugar | Maple Syrup | Provides a deeper, caramel like sweetness that pairs well with sea salt. |
If you're feeling adventurous, you can even experiment with adding a tablespoon of nutritional yeast for a vegan "cheesy" profile without using dairy. The flexibility of this homemade artisan crackers 4 flavors recipe is what makes it a staple in my kitchen. It's an artistic playground where you can match the cracker to whatever mood you're in. If you find yourself with extra rosemary, you might even consider pairing these savory bites with a sweet treat like Homemade Apple Fritters for a truly varied dessert board.
Preserving the Crisp and Reducing Kitchen Waste Naturally
Once your crackers have cooled completely and I mean completely store them in an airtight container at room temperature. They will stay perfectly crisp for up to 5 days.
If you live in a high humidity area and they lose their "snap," you can revive them by popping them back into a 350°F (180°C) oven for 3 to 4 minutes. It’s like magic; the heat drives out any absorbed moisture and restores the original shatter.
For zero waste enthusiasts, don't throw away those jagged edge scraps! The "ugly" pieces that don't fit into your perfect squares are actually the best part. I save them in a jar and pulse them in a food blender to create the most incredible gourmet breadcrumbs you've ever tasted.
Use them to top a mac and cheese or to crust a piece of chicken. Even the flour dust left on the parchment can be swept into a "scrap dough" pile for a rustic, kitchen sink cracker.
Debunking Baking Myths to Perfect Your Next Platter
A common myth is that you need a pasta roller to get crackers thin enough. While a pasta roller is a fun tool, a standard rolling pin and a bit of elbow grease actually give you more "artisan" control over the texture.
You want those slight variations in thickness; they create a more interesting eating experience where some bites are more toasted than others.
Another misconception is that the dough needs to rise. Because we are using no yeast or chemical leaveners like baking powder, there is no "rising" involved. The "lift" comes entirely from steam. This is why we don't need to let the dough sit for hours; ten minutes of prep and you are ready to roll.
It’s a fast, classic method that relies on heat rather than time.
Masterful Plating Levels
- Simple: Pile the crackers into a wide wooden bowl with the different flavors mixed together for a "treasure hunt" experience.
- Polished: Line the crackers up by flavor in straight rows on a slate board, separating them with small bunches of grapes or dried apricots.
- Restaurant: Create "stacks" of three crackers held together with a small dollop of goat cheese, topped with a single micro green or a tiny sprig of fresh thyme.
| Level | Tweak | Effect |
|---|---|---|
| Simple | Toss in sea salt | Highlights the base dough's quality |
| Polished | Garnish with herbs | Signals the specific flavor profile visually |
| Restaurant | Add honey drizzle | Creates a sweet savory bridge for the palate |
Creating these crackers is a true act of artistry. There’s a certain joy in taking such basic ingredients and turning them into something that people can't stop reaching for. Whether you're serving them with a simple hummus or an elaborate Sloppy Joe dip, the effort you put into that paper thin roll will be evident in every single crunch. Trust the process, watch the oven, and most importantly, enjoy the beautiful, crackling result of your hard work.

Recipe FAQs
How to ensure the crackers are uniformly thin?
Roll the dough directly on your parchment paper using a consistent motion. Aim for 1/16th of an inch thickness, and if you are a perfectionist, use a ruler to check the edges before scoring with your pizza cutter.
Is it necessary to let the crackers cool on a wire rack?
Yes, cooling is mandatory for texture. Letting them sit on a wire rack allows steam to escape completely, which is the only way to reach maximum crispness after the 12-15 minute bake time.
How to stop the parchment paper from sliding while rolling?
Pat your work surface with a slightly damp cloth before laying down the parchment. This creates a gentle grip that keeps the paper stationary while you apply pressure to roll the dough paper thin.
Is it true I can substitute butter for the olive oil?
No, this is a common misconception. The recipe specifically relies on 3 tablespoons of olive oil to achieve the correct dough hydration and final crispness; using a solid fat like butter would fundamentally change the texture.
Why is docking the dough important?
Pricking the dough with a fork prevents uneven puffing during the bake. If you enjoyed mastering this even baking technique here, you will notice how similar moisture control principles ensure a consistent crunch in other snack preparations.
How to keep the Parmesan from burning?
Ensure your Parmesan is grated to a powdery consistency. Because the cheese is finely ground, it integrates into the dough's surface rather than sitting on top, preventing the edges from scorching during the 15-minute cook time at 400°F.
How to prevent salty pockets in the dough?
Whisk the sea salt and flour together thoroughly before adding any liquids. Taking these few extra seconds ensures the seasoning is evenly distributed, so every bite has the same balanced flavor profile.
Homemade Artisan 4 Flavor Crackers
Ingredients:
Instructions:
Nutrition Facts:
| Calories | 268 kcal |
|---|---|
| Protein | 6.2 g |
| Fat | 9.8 g |
| Carbs | 38.5 g |
| Fiber | 1.4 g |
| Sugar | 1.1 g |
| Sodium | 315 mg |
