Homemade Condensed Milk: Silky & Creamy
- Time: Active 5 minutes, Passive 20 minutes, Total 25 minutes
- Flavor/Texture Hook: Silky, buttery, and intensely creamy
- Perfect for: Coffee creamer, fudge, or emergency pantry refills
- Why This Recipe Works
- Essential Kitchen Timing Plan
- Component Science Deep Dive
- Selecting High Quality Components
- Required Gear for Success
- Detailed Reduction Step Guide
- Solving Texture and Color Issues
- Adapting for Special Diets
- Scaling for Large Batches
- Kitchen Wisdom and Myths
- Maximizing Freshness and Life
- Creative Serving Ideas
- Recipe FAQs
- 📝 Recipe Card
I’ll never forget the rainy Tuesday I decided to whip up a batch of fudge, only to find my pantry completely devoid of those little blue and white cans. The store was miles away, and I was already in my pajamas.
That’s when I realized that learning how to make condensed milk at home wasn't just a fun project it was a kitchen survival skill. I stood over my stove, watching the steam rise, feeling a bit skeptical that simple milk and sugar could actually transform into that thick, liquid gold we all love.
But then, the magic happened. The thin, watery milk started to take on a warm, ivory hue. The scent shifted from plain dairy to something reminiscent of toasted marshmallows and childhood summers.
By the time I whisked in that final pat of butter, I knew I’d never go back to the store-bought stuff unless I was in a massive hurry. There’s a clean, pure sweetness here that you just don't get from a tin.
If you’ve ever wondered if it’s worth the twenty minutes of stirring, let me tell you: it absolutely is. We’re going to talk about the flow of the reduction and how to get that signature velvety texture every single time.
It's surprisingly therapeutic to watch the bubbles change shape as the mixture thickens. Trust me on this, once you see those first lazy, heavy bubbles popping on the surface, you’ll be hooked on making your own staples from scratch.
Why This Recipe Works
- Thermal Reduction: Simmering at a low heat allows water to escape as steam, concentrating the milk solids and fats without scorching the proteins.
- Sugar Stabilization: The high sugar to milk ratio doesn't just sweeten; it acts as a preservative and prevents the milk from curdling during the long heating process.
- Lipid Emulsification: Adding a small amount of butter at the end introduces extra fat that bonds with the reduced milk, creating a glossy, professional sheen.
- Crystal Inhibition: A tiny pinch of salt breaks the perceived sweetness while helping to keep the sugar crystals from reforming as the mixture cools.
This method is significantly more rewarding than the shortcut versions you might see online. To see how this fresh approach stacks up against the pantry staple, check out this comparison.
| Feature | Homemade Fresh | Canned Shortcut |
|---|---|---|
| Flavor Profile | Clean, milky, toasted | Metallic, overly processed |
| Texture | Silky and pourable | Often gelatinous or stiff |
| Ingredient Control | Total (no preservatives) | High sodium, additives |
Using this fresh method is similar to the technique used in our Coconut In Milk recipe, where slow reduction creates a deep, complex sweetness that store-bought versions simply lack.
Essential Kitchen Timing Plan
Managing your time is the secret to a stress free kitchen. This isn't a "set it and forget it" situation, but it doesn't require your undivided attention for the full duration either.
We've broken it down into three distinct phases so you can multi task effectively while you make condensed milk for your next dessert project.
Phase 1: The Initial Dissolve
Spend the first 5 minutes focused on the pot. You want to ensure the sugar is completely dissolved before the milk reaches a simmer. If you skip this, you might end up with a grainy texture later. Once the sugar is gone, you can relax slightly.
Phase 2: The Reduction Zone
This is the 15 minute window where the real work happens. You’ll want to check the pot every 2 or 3 minutes. The milk will slowly drop in volume. This is a great time to prep other ingredients or wash a few dishes, as long as you stay within earshot of the stove to monitor the simmer.
Phase 3: The Finishing Gloss
The final 5 minutes require your full attention. As the liquid thickens, it becomes more prone to sticking or burning. This is when you'll add the butter and vanilla, whisking vigorously to ensure a perfectly smooth emulsion before removing it from the heat.
Component Science Deep Dive
| Ingredient | Science Role | Pro Secret |
|---|---|---|
| Whole Milk | Provides the protein base | Use fresh, full fat milk for the creamiest mouthfeel |
| White Sugar | Controls water activity | Don't reduce the amount; it's vital for the thickness |
| Unsalted Butter | Adds gloss and fat | Grate it while cold so it melts instantly |
Selecting high-quality Components
Getting the right ingredients is half the battle. You want 2 cups (480ml) of Whole Milk. Don't even think about using skim or 1% here; we need those milk fats to create the body. For the sweetener, we use ¾ cup (150g) of Granulated White Sugar.
This provides the classic, neutral sweetness that works in everything from coffee to cakes.
To finish it off, you'll need 1 tbsp (14g) of Unsalted Butter and a ½ tsp of Pure Vanilla Extract. These are the "polishing" ingredients. The butter adds that luxurious "shatter" of light on the surface, while the vanilla rounds out the sharp edges of the sugar. A pinch of fine sea salt is the final touch that makes the whole thing pop. If you're looking for more ways to use these pantry staples, you might find inspiration in this How to Make recipe for caramel sauce.
The Primary Base
Whole milk is the non negotiable foundation. The proteins in the milk undergo a very mild Maillard reaction during the 20 minute cook, which gives the final product its characteristic off white color. If you use lower fat milk, the reduction will take longer and the texture will be watery.
The Finishing Touches
Vanilla and butter should always be added off the heat. If you boil the vanilla, the alcohol evaporates and takes most of the flavor with it. Adding the butter at the very end creates a fresh emulsion that stays stable as it cools in the fridge.
Required Gear for Success
You don't need fancy gadgets to make condensed milk from scratch, but the right pot makes a world of difference. A heavy bottomed saucepan is your best friend here. Cheap, thin bottomed pans have "hot spots" that will scorch the milk before it has a chance to reduce.
I prefer a stainless steel or enameled cast iron pot.
A silicone spatula is better than a wooden spoon because it can scrape every millimeter of the bottom of the pan. This prevents that thin layer of "milk skin" from burning. Finally,, a fine mesh strainer is a great "insurance policy" if a few bits of milk skin do form, you can pour the finished liquid through the strainer for a perfectly silky result.
Detailed Reduction Step Guide

- Combine ingredients. Pour 2 cups Whole Milk and ¾ cup Granulated Sugar into your heavy saucepan. Note: Using a wide pan speeds up evaporation.
- Dissolve the sugar. Heat over medium low, stirring constantly until no grains are visible on the spatula.
- Bring to simmer. Increase heat slightly until small bubbles break the surface. Do not let it reach a rolling boil.
- Simmer and reduce. Cook for 20 minutes, stirring occasionally to prevent sticking. Watch for the liquid to reduce by half.
- Monitor the color. The milk will shift from bright white to a pale cream. Note: This indicates the sugars are concentrating.
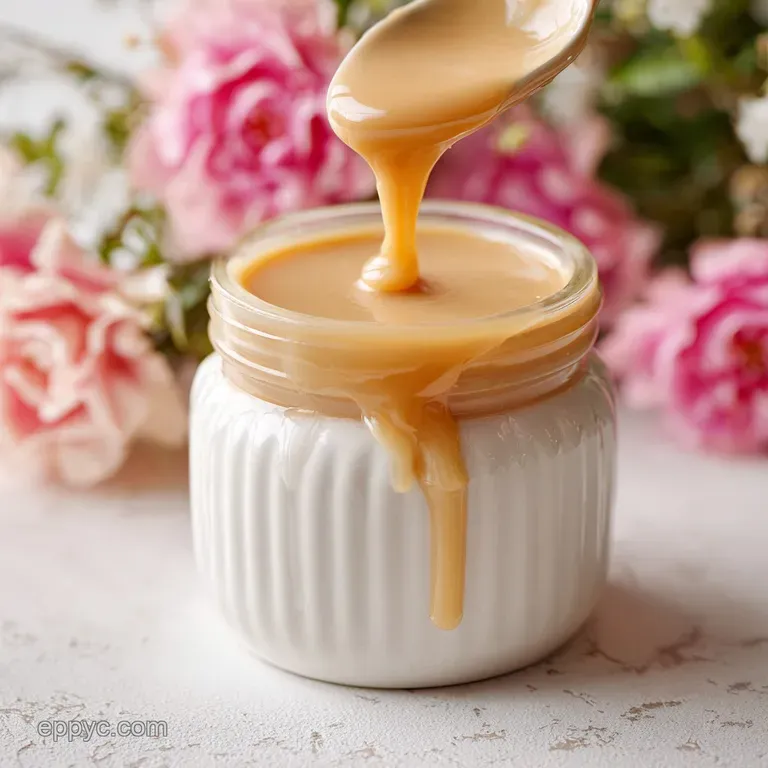
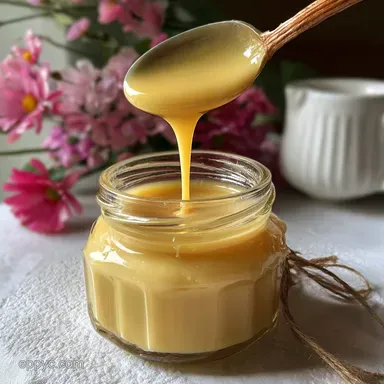
- Test the thickness. Dip a spoon in; the mixture should coat the back without immediately running off.
- Add the enrichment. Remove from heat and stir in 1 tbsp Unsalted Butter and a pinch of salt. Whisk until the butter is fully integrated.
- Flavor and cool. Stir in ½ tsp Pure Vanilla Extract. The aroma should be sweet and floral.
- Strain if needed. Pour the hot liquid through a fine mesh sieve into a glass jar.
- Final chill. Let it sit at room temperature for 1 hour, then refrigerate. It will thicken significantly as it cools.
Chef's Tip: To speed up the process by 5-10 minutes, use a wide frying pan instead of a deep saucepan. The increased surface area allows water to evaporate much faster, though you'll need to stir more frequently!
Solving Texture and Color Issues
Why Your Milk is Too Thin
If your result looks more like coffee creamer than a thick syrup, you likely didn't simmer it long enough. The "20 minutes" is a guideline; atmospheric humidity and your stove's specific "medium low" can change things. Always go by the visual cue: it must be reduced by roughly half its original volume.
Fixing a Grainy Texture
Graininess usually happens because the sugar didn't fully dissolve at the start, or because milk solids dried on the sides of the pan and were stirred back into the mix. If this happens, don't panic.
You can often fix it by reheating the mixture with a tablespoon of water and whisking vigorously, or simply running it through a high speed blender for 30 seconds.
| Problem | Root Cause | Solution |
|---|---|---|
| Burnt brown bits | Heat was too high | Strain immediately and do not scrape the bottom |
| Separation | Added butter while boiling | Whisk in 1 tsp of warm milk to re emulsify |
| Too dark color | Cooked too long | Use it as a dulce de leche substitute instead |
Common Mistakes Checklist
- ✓ Never leave the stove unattended; milk can boil over in seconds.
- ✓ Use a heavy bottomed pan to prevent localized scorching.
- ✓ Don't scrape the "crust" off the sides of the pan back into the liquid.
- ✓ Ensure the sugar is 100% dissolved before the milk starts simmering.
- ✓ Always add the vanilla off the heat to preserve the delicate aroma.
Adapting for Special Diets
If you're looking to make condensed milk recipes but have dietary restrictions, it's actually quite simple to adapt. For a dairy-free version, full fat coconut milk (the canned kind) is the best substitute for whole milk.
It has a similar fat content and reduces beautifully, though it will leave a distinct tropical flavor.
Crafting a dairy-free Alternative
When using coconut milk, skip the butter at the end. Coconut milk is already quite high in fat and will thicken up significantly on its own. It's a fantastic way to create a Silky Smooth Homemade recipe that is vegan friendly.
| Original Ingredient | Substitute | Why It Works |
|---|---|---|
| Whole Milk (2 cups) | Coconut Milk (full fat, 1 can) | Similar fat content. Note: Adds coconut flavor best in tropical/spiced dishes |
| White Sugar (¾ cup) | Honey or Maple Syrup | Natural sweeteners work. Note: Will result in a much darker, thinner sauce |
Scaling for Large Batches
When you need to make condensed milk quickly for a big holiday bake, you can double the recipe. However, be aware that doubling the ingredients does not mean you simply double the time. Because there is more volume, it takes longer for the entire mass to reach the evaporation temperature.
Doubling the Recipe
Use a much larger pot than you think you need. When doubling to 4 cups of milk, use a wide 5 quart pot. Expect the simmering time to increase to about 30-35 minutes.
Don't double the vanilla or salt exactly; start with 1.5x the amount and taste, as these flavors can become overpowering in larger concentrations.
Halving the Recipe
If you only need a small drizzle for a single cup of coffee, halving is easy. Use a small butter melter or a tiny saucepan. The reduction will happen very fast likely in 10-12 minutes so watch it like a hawk. Use a small whisk to keep everything moving.
Kitchen Wisdom and Myths
The "Boiling Water" Myth
Some people think you can just mix boiling water with milk powder and sugar to "make" condensed milk. While this creates a sweet milk liquid, it lacks the depth of flavor and the specific protein structure created by the slow cook reduction. The heat treated version is always superior in fudge and baking.
The "Constant Stirring" Myth
You do not need to stir for 20 minutes straight! As long as your heat is low and your pan is heavy, a stir every few minutes is plenty. Over stirring can actually incorporate too much air, making the mixture foamy rather than silky.
Maximizing Freshness and Life
Storage is straightforward. Once your homemade creation has cooled completely, transfer it to a sterilized glass jar. It will stay fresh in the fridge for up to 2 weeks. Because it doesn't have the commercial stabilizers found in the canned stuff, it may thicken quite a bit.
Simply let it sit on the counter for 15 minutes or give it a quick 10 second zap in the microwave to bring back the pourable consistency.
Zero Waste Tips
If you find yourself with just a tablespoon or two left in the jar, don't wash it out! Pour some hot coffee directly into the jar, screw the lid on tight, and shake it up. You've got an instant, perfectly sweetened cafe au lait with zero waste. You can also freeze leftover condensed milk in ice cube trays.
Once frozen, pop them into a freezer bag. They are perfect for dropping into iced coffee or blending into smoothies for a hit of creamy sweetness.
Creative Serving Ideas
Now that you know how to make condensed milk quickly and easily, the possibilities are endless. It’s the perfect base for a "magic" tray bake or a simple Vietnamese iced coffee. I love to drizzle it over fresh berries for a dessert that feels fancy but takes zero effort.
The Perfect Coffee Swirl
For an impressive morning treat, layer a tablespoon of your homemade milk at the bottom of a glass, top with ice, and pour strong espresso over it. The way the dark coffee marbles into the ivory milk is visually stunning.
Decorative Drizzling
Because this version is slightly thinner than canned when warm, it's ideal for drizzling over pound cake or pancakes. It soaks into the crumbs better than the thick store-bought goop, creating a moist, decadent bite every time. It's the ultimate empowering tool for any home cook looking to level up their dessert game.

Recipe FAQs
How do they make condensed milk?
By slow evaporation of water. They combine whole milk and sugar, then heat the mixture gently until about 60% of the water content evaporates, concentrating the solids and creating the thick, sweet syrup.
How to make condensed milk at home in 5 minutes?
No, five minutes is impossible for true condensation. Creating the signature thickness requires reducing the milk volume over about 20 minutes of simmering; quick methods result in overly sweet, thin milk.
Can I make condensed milk from regular milk?
Yes, this is the standard method. You need whole milk for the necessary fat content, which you reduce slowly with a high ratio of sugar until the volume halves.
What is a good substitute for condensed milk?
Evaporated milk mixed with extra sugar is the closest pantry substitute. For a dairy-free option, use canned full fat coconut milk reduced with sugar, similar to the technique used in our Silky Smooth Homemade recipe.
Is it true that stirring constantly prevents scorching when making condensed milk?
No, this is a common misconception; only occasional stirring is needed. Constant stirring can incorporate too much air, leading to a foamy texture; ensure you use a heavy bottomed pot to distribute the heat evenly instead.
Why is my homemade condensed milk grainy instead of silky smooth?
The sugar was not fully dissolved before simmering began. If you skipped ensuring all sugar crystals disappeared initially, those undissolved bits cause graininess; you can sometimes fix this by blending the final product.
How long does homemade condensed milk last in the refrigerator?
It lasts about two weeks when stored correctly. Seal it tightly in a sterilized jar, and if it thickens too much upon cooling, let it sit at room temperature for 15 minutes before using.
Homemade Condensed Milk Recipe
Ingredients:
Instructions:
Nutrition Facts:
| Calories | 123 kcal |
|---|---|
| Protein | 2.0 g |
| Fat | 3.4 g |
| Carbs | 21.7 g |
| Fiber | 0 g |
| Sugar | 21.6 g |
| Sodium | 36 mg |
