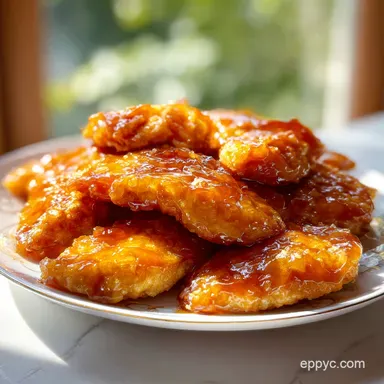
Sticky Honey Garlic Chicken Breasts: Pan-Seared
- Time: 10 min prep + 10 min cooking = Total 20 mins
- Flavor/Texture Hook: Velvety, sweet savory glaze with a deep golden crust
- Perfect for: Fast weeknight dinners and beginner home cooks
- Easy Honey Garlic Chicken Breasts
- The Logic Behind the Stickiness
- Technical Recipe Details
- Pantry and Shopping List
- Required Cooking Gear
- Step by Step Cooking Flow
- Fixing Common Cooking Errors
- Creative Variations and Swaps
- Storing and Reducing Waste
- Plating Your Final Dish
- High in Sodium
- Recipe FAQs
- 📝 Recipe Card
That aggressive sizzle when the chicken hits the hot oil is the best part of my Tuesday nights. There is something about the smell of garlic and honey caramelizing in a pan that just makes a house feel like a home, even if you're just cooking for yourself after a long shift.
I used to struggle with these because I'd just throw whole breasts in the pan, and by the time the outside looked brown, the middle was still raw. Then I started slicing them into thin cutlets. It changed everything. Now, these honey garlic chicken breasts cook in minutes and stay tender every single time.
You can expect a dish that tastes like high end takeout but takes almost no effort. We are going for a glossy, thick sauce that clings to the meat rather than a watery soup at the bottom of the pan. Trust me on this, the slicing step is non negotiable if you want that consistent texture.
Easy Honey Garlic Chicken Breasts
The magic of this recipe is all about the timing and the surface area. By thinning out the chicken, we maximize the amount of meat that touches the pan, creating a gorgeous crust. This is where the flavor lives, and it creates the perfect base for that sticky glaze to hold onto.
Let's crack on with the logic of how we get those results without spending an hour in the kitchen. It's a simple flow: prep the meat, sear for color, and then build the sauce in the same pan to pick up all those brown bits.
The Logic Behind the Stickiness
To get that professional look and feel, we have to manage the sugars and the starch. It's not just about boiling honey, but about creating a stable glaze.
- Sugar Caramelization: Honey and soy sauce contain natural sugars that brown quickly. We sear the chicken first so the sugars in the sauce don't burn before the meat is cooked.
- The Starch Bind: A small amount of cornstarch creates a network that traps water and fat. This transforms the sauce from a liquid into a velvety coating.
- Acid Balance: Rice vinegar cuts through the heavy sweetness of the honey. This prevents the dish from tasting like candy and gives it a bright, sharp finish.
- Surface Area: Slicing the breasts into cutlets increases the area for the glaze to adhere, ensuring every bite is coated.
| Method | Prep Time | Texture | Best For |
|---|---|---|---|
| Fast Sear | 10 mins | Crispy edges, velvety sauce | Weeknight rush |
| Classic Roast | 30 mins | Uniformly tender, thinner glaze | Sunday dinner |
| Slow Cook | 4 hours | Shredded, deeply infused | Meal prep |
Component Analysis
| Ingredient | Science Role | Pro Secret |
|---|---|---|
| Honey | Sweetener & Glaze | Use a runny variety for easier whisking |
| Rice Vinegar | PH Balancer | Adds a subtle tang that wakes up the garlic |
| Cornstarch | Thickening Agent | Always mix with cold water first to avoid lumps |
| Low Sodium Soy | Umami & Salt | Low sodium lets you control the salt level |
Technical Recipe Details
This recipe is built for speed and precision. Because we are using thin cutlets, the window between "cooked" and "overdone" is small. We are aiming for a fast, over high heat sear followed by a quick glaze reduction.
For those who like to track their progress, here are the precision checkpoints. First, your oil should shimmer but not smoke before the chicken goes in. Second, the chicken is done when it hits an internal temperature of 165°F (74°C).
Finally, the sauce is ready when it bubbles and coats the back of a spoon.
Pantry and Shopping List
Grab these items before you start. I've found that using a neutral oil is key here because extra virgin olive oil can smoke too early at the temperatures we need for a good sear.
- 1.5 lb boneless skinless chicken breasts Why this? Lean protein that absorbs glaze well (Sub: Chicken thighs for more fat/juice)
- 1 tsp kosher salt Why this? Coarser grains for better surface distribution (Sub: Sea salt)
- ½ tsp black pepper Why this? Freshly cracked adds a woody heat (Sub: White pepper)
- 2 tbsp neutral oil Why this? High smoke point prevents burning (Sub: Avocado oil)
- ⅓ cup honey Why this? Provides the sticky, floral sweetness (Sub: Maple syrup)
- 2 tbsp soy sauce (low sodium) Why this? Deep umami flavor without oversalting (Sub: Tamari for gluten-free)
- 1 tbsp rice vinegar Why this? Mild acidity to balance the honey (Sub: Apple cider vinegar)
- 4 cloves garlic, minced Why this? Pungent, aromatic base (Sub: Garlic powder - use 1 tsp)
- 1 tsp cornstarch Why this? Thickens the glaze instantly (Sub: Arrowroot powder)
- 1 tbsp cold water Why this? Dissolves starch to prevent clumps (Sub: Chicken broth)
Required Cooking Gear
You don't need a professional kitchen for this, but the right pan makes a difference. I recommend a large stainless steel or cast iron skillet. Non stick is fine, but you won't get as much of that brown crust (fond) on the bottom of the pan, which is where the sauce gets its depth.
I also suggest using a digital meat thermometer. According to Serious Eats, pulling meat slightly before it hits the target temperature and letting it rest allows carryover cooking to finish the job without drying it out. A simple whisk and a small bowl for the slurry will round out your arsenal.
Step by step Cooking Flow

Let's get into the actual work. Follow these steps in order to keep the flow moving and ensure the garlic doesn't burn while you're messing with the chicken.
- Slice each chicken breast horizontally to create two thin cutlets. Pat the meat dry with paper towels and season both sides generously with salt and pepper. Note: Dry meat sears better; moisture creates steam.
- In a small bowl, whisk together the honey, soy sauce, and rice vinegar. Set this aside so it's ready the moment the chicken comes out.
- Heat the oil in a skillet over medium high heat until it shimmers.
- Add the chicken cutlets without crowding the pan. Sear for 3-5 minutes per side until they develop a deep golden brown crust and reach an internal temperature of 165°F (74°C).
- Remove chicken to a plate and let them rest for a moment.
- Reduce heat to medium. Add the minced garlic to the pan and sauté for 30 seconds until fragrant and slightly softened.
- Pour in the honey mixture and let it bubble and reduce for 2 minutes.
- Stir in the cornstarch water slurry and simmer for 1 minute until the sauce is thick and velvety.
- Return the chicken to the pan, tossing to coat every inch in the glaze.
- Serve immediately over rice or steamed greens.
Fixing Common Cooking Errors
Even the best of us mess up. Maybe the sauce is too runny, or the garlic turned bitter because it scorched. Don't panic, it's usually an easy fix.
The Sauce is Too Thin
If your glaze isn't clinging to the meat and is instead pooling at the bottom, you likely didn't simmer the slurry long enough. The starch needs to hit a certain temperature to activate. Just keep it on the heat for another minute, or whisk in a tiny bit more cornstarch mixed with water.
The Garlic is Burning
Garlic has a very low burn point. If it turns dark brown or black, it will taste bitter and ruin the honey garlic chicken breasts. If this happens, wipe the pan clean with a paper towel and start the sauce phase over. Next time, ensure your heat is lowered before the garlic hits the oil.
The Chicken is Dry
This usually happens if you don't slice the breasts into cutlets or if you leave them in the pan too long during the glazing phase. Remember, the chicken is already cooked when it goes back in; you're just warming it through and coating it.
| Problem | Root Cause | Solution |
|---|---|---|
| Sauce is watery | Not enough reduction time | Simmer for 1-2 more mins |
| Bitter taste | Garlic overcooked | Lower heat; wipe pan if burnt |
| Rubberies meat | Overcooked internal temp | Use a thermometer; pull at 160°F |
Common Mistakes Checklist
- ✓ Crowding the pan (leads to steaming, not searing)
- ✓ Adding garlic too early (it burns before chicken is done)
- ✓ Forgetting to pat the chicken dry (prevents the brown crust)
- ✓ Adding cornstarch directly to hot sauce (creates lumps)
- ✓ Overcooking the meat during the final glaze toss
Creative Variations and Swaps
Once you've got the basic honey garlic chicken breasts recipe down, you can start playing with the flavor profiles. I love treating this as a base and swapping out a few ingredients to change the mood of the meal.
The Spicy Kick
If you want some heat, add a teaspoon of Sriracha or red pepper flakes to the honey mixture. For a more complex heat, check out my spicy pan seared chicken for ideas on using bold pepper sauces.
The Citrus Swap
Replace the rice vinegar with fresh lime juice. This gives the dish a tropical, zestier vibe that works great if you're serving it with coconut rice.
The Air Fryer Method
You can sear the seasoned cutlets in an air fryer at 400°F for about 7-9 minutes. However, you'll still need to make the sauce in a pan on the stove and toss the chicken in at the end. The air fryer is great for a "crispy" feel, but the pan is better for the glaze.
The Maple Alternative
Swap the honey for pure maple syrup. It changes the flavor from floral to a deeper, woodsy sweetness. If you're exploring other sweet savory glazes, you'll find that teriyaki chicken tips often use similar principles of balancing salt and sugar.
| If you want... | Do this... |
|---|---|
| More heat | Add 1 tsp red pepper flakes |
| Thicker glaze | Simmer slurry for 30 seconds longer |
| Low sugar | Use a honey substitute or reduce honey by 1/4 |
Storing and Reducing Waste
Leftovers are actually great because the chicken continues to marinate in the glaze. Store the chicken in an airtight container in the fridge for up to 3 days. When reheating, I recommend a splash of water or chicken broth in a pan over medium heat.
This loosens the glaze back into a velvety consistency so it doesn't just burn on the bottom.
You can freeze this dish for up to 2 months, though the texture of the sauce can sometimes break. If it looks separated after thawing, just whisk in a teaspoon of warm water while reheating.
To keep things zero waste, don't throw away the leftover glaze in the pan. Pour it over some steamed broccoli or sautéed spinach. If you have extra chicken trimmings from slicing the breasts, toss them into a soup or a stir fry later in the week.
Plating Your Final Dish
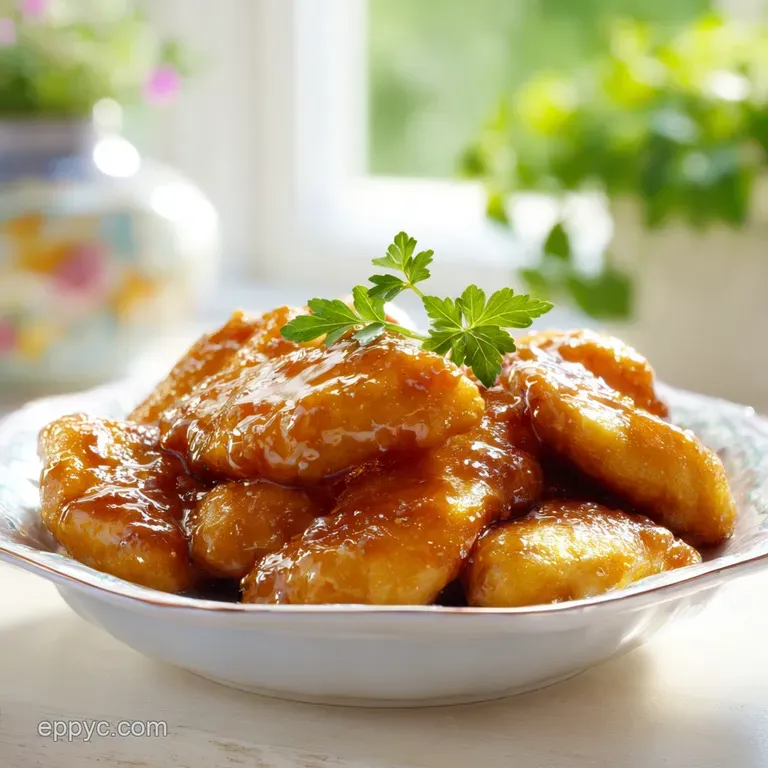
The look of this dish is half the battle. Because the glaze is so glossy, it looks stunning against a matte background like white jasmine rice or brown quinoa. I like to pile the cutlets slightly overlapping in the center of the plate and then drizzle any remaining pan sauce over the top.
Garnish is where you add the final punch. A sprinkle of toasted sesame seeds adds a tiny bit of nuttiness and a great visual contrast. Thinly sliced green onions provide a fresh, sharp bite that cuts through the honey.
If you have a lemon wedge on the side, a final squeeze of juice right before eating wakes up all the flavors.
Right then, you're all set. Whether you're making these honey garlic chicken breasts for a quick dinner or a small gathering, the key is that over high heat sear and the patience to let the sauce reduce. Happy cooking!
High in Sodium
810 mg 810 mg of sodium per serving (35% 35% of daily value)
The American Heart Association recommends a daily limit of 2,300mg of sodium to maintain heart health and reduce the risk of hypertension.
Tips to Reduce Sodium
-
Cut the Kosher Salt-25%
Reduce or completely omit the 1 tsp of kosher salt; the soy sauce already provides a significant amount of salinity for the chicken.
-
Swap Soy Sauce-20%
Replace the low sodium soy sauce with coconut aminos, which provides a similar umami flavor with significantly less sodium.
-
Increase Acidity-10%
Add a squeeze of fresh lime juice or an extra teaspoon of rice vinegar to brighten the flavor profile, reducing the need for added salt.
-
Boost Aromatics
Add freshly grated ginger or double the amount of minced garlic to enhance the depth of flavor without adding sodium.
Recipe FAQs
How do I make honey garlic chicken breast?
Slice breasts into thin cutlets, sear in oil for 3 5 minutes per side, and glaze with a honey soy-vinegar reduction. Finish by thickening the sauce with a cornstarch slurry and tossing the chicken to coat.
Is chicken breast good for diabetics?
Generally yes, but monitor the honey content. Chicken breast is a lean protein, though the honey in the glaze adds concentrated sugars that may impact blood glucose levels.
What gives honey garlic chicken the best flavor?
The balance of sweet honey, salty soy sauce, and acidic rice vinegar. Searing the meat until it develops a deep golden brown crust also adds essential savory depth.
What's the secret to juicy honey garlic chicken?
Slicing the breasts into thin cutlets and cooking them quickly. This prevents the meat from overcooking while ensuring it reaches the safe internal temperature of 165°F.
Can I freeze this dish for later?
Yes, for up to 2 months. Store in an airtight container and serve it alongside a Asian salad for a fresh contrast.
Why is my sauce too thin?
You likely skipped the cornstarch slurry or didn't simmer it long enough. Simmer the cornstarch and water mixture for 1 minute until the glaze becomes thick and velvety.
Is it true I should cook the chicken breasts whole for this recipe?
No, this is a common misconception. Slicing them horizontally into thin cutlets ensures they cook evenly and sear faster without drying out the center.
Honey Garlic Chicken Breasts