The Midnight Velvet Flourless Chocolate Torte Decadently Rich Simply Magnificent
- Unlocking the Magic: Why This Flourless Cake Redefines Decadence
- The Essence of Pure Chocolate Indulgence
- Curating the Core Components for Our Torte
- Essential Equipment for Perfecting This Flourless Cake
- The Crafting Process: Step-by-Step Assembly
- Baking Science: Temperature Control for a Fudgy Finish
- Elevating Your Midnight Velvet Experience
- Expert Troubleshooting for Your Chocolate Creation
- Recipe FAQs
- 📝 Recipe Card
Unlocking the Magic: Why This Flourless Cake Redefines Decadence
When we talk about true indulgence in the baking world, nothing quite compares to the sheer, unadulterated richness of a proper flourless cake . This isn't a compromise; it’s a complete celebration of texture and flavour, achieving a density that rivals the finest European tortes.
Our goal today is to create the "Midnight Velvet Flourless Chocolate Torte," a dessert so profoundly satisfying that the absence of flour becomes utterly irrelevant. It relies on the magic combination of high-quality chocolate and perfectly aerated eggs to deliver a melt-in-your mouth experience that demands admiration.
If you’ve been searching for a showstopper that simplifies the ingredient list while amplifying the sensory impact, look no further.
The Essence of Pure Chocolate Indulgence
The beauty of a flourless chocolate cake lies in its elemental simplicity. By stripping away the flour, we allow the cocoa solids, butter, and sugar to interact purely, creating a profile that is intensely chocolatey.
This particular version, requiring only about 25 minutes of active preparation, proves that even complex tasting desserts can stem from an easy flourless cake recipe .
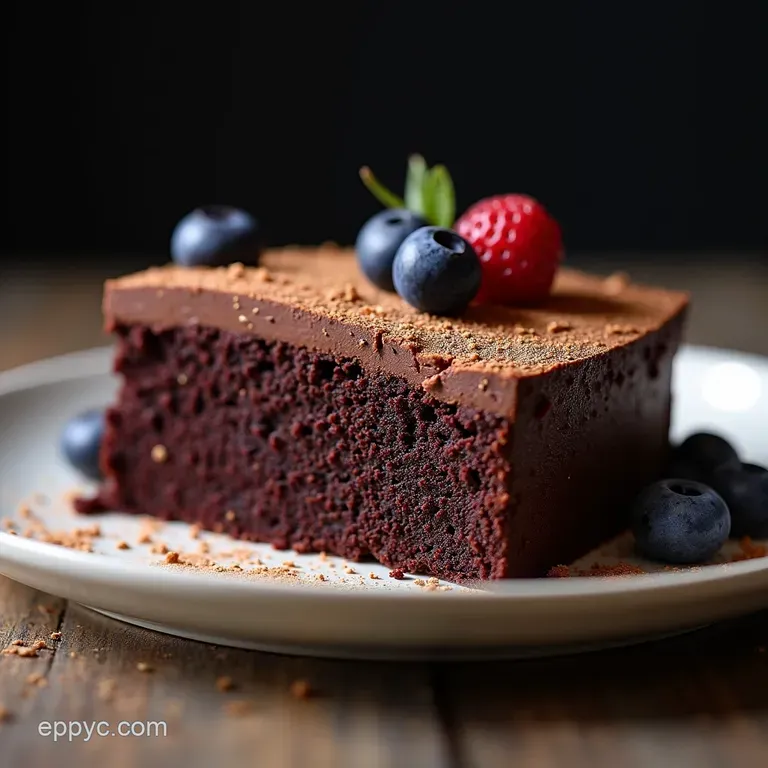
We are aiming for a texture that is somewhere between a dense brownie and a silken mousse deep, dark, and utterly luxurious.
Gluten-free Grandeur: Meeting Every Dietary Need
One of the most significant appeals of this type of dessert is its inherent suitability for gluten sensitivities. Because it contains zero wheat products, this gluten free flourless cake instantly becomes a safe and spectacular option for guests with celiac disease or gluten intolerance.
It’s proof positive that dietary restrictions don't mean restricting flavour or elegance. The richness comes purely from high-quality cocoa fat, ensuring a magnificent experience regardless of dietary needs.
The Secret to That Signature Fudgy Texture
The defining characteristic of a superior flourless cake is its signature fudgy mouthfeel. This is achieved entirely through technique, not ingredients. The structure is built by the emulsion of egg yolks, melted chocolate, and butter, which is then bolstered by the air incorporated into the egg whites.
When baked correctly, the result is a dessert that is dense, moist, and deeply satisfying a far cry from crumbly, dry cakes. Mastering the gentle folding process is key to preserving that coveted velvet texture.
A Centerpiece Dessert Ready in Under an Hour
While the cooling time is essential for setting the final structure, the active time commitment for this recipe is surprisingly brief. With only 25 minutes of active preparation, this dessert punches well above its weight class in terms of impact versus effort.
It’s an ideal candidate for weeknight luxury or last minute entertaining, making this an incredibly simple flourless cake to manage when time is of the essence.
Curating the Core Components for Our Torte
Since this flourless cake recipe relies on so few elements, the quality of each item becomes paramount. We aren't masking any flavours with flour or leavening agents; we are showcasing the core ingredients in their purest form.
For this "Midnight Velvet" torte, the ratio of chocolate to butter to eggs is crucial for achieving the perfect structure. We utilize five large eggs, separated, alongside a full pound (225g) of both chocolate and butter.
Half a cup of sugar is reserved for the yolks, and the other half is used to stabilize the whipped whites. A teaspoon of pure vanilla extract adds aromatic complexity, perfectly balanced by a mandatory touch of salt to sharpen the dark chocolate notes.
Essential Equipment for Perfecting This Flourless Cake
While the ingredients are few, the tools needed ensure the delicate structure of the cake is preserved. You will need a 9 inch springform pan, which is non-negotiable for easy release.
Crucially, you’ll rely on a heatproof bowl and a saucepan to create a gentle double boiler, ensuring we melt the chocolate base without scorching it. Finally, an electric mixer, fitted with a whisk attachment, is essential for achieving the significant volume required from the egg whites.
A flexible rubber spatula will be your best friend during the final, vital folding stage.
Selecting the Ultimate Dark Chocolate Blend
For a truly decadent flourless cake , you must select a dark chocolate that is at least 70% cacao. This high percentage ensures intense flavour and sufficient cocoa butter for richness. Avoid standard baking chips if possible, as they often contain stabilizers that prevent smooth melting.
Finely chopping a high-quality bar ensures it melts evenly alongside the butter, creating a homogenous, glossy base for our mixture.
Butter Quality: The Unsung Hero of Richness
Since butter provides the majority of the fat content alongside the chocolate, using high-quality, unsalted butter is recommended. Cut the butter into cubes before melting it with the chocolate.
This slow, gentle heating process, facilitated by the double boiler method, guarantees that the fats emulsify beautifully, contributing to the creamy, smooth texture we seek.
Whipping Wisdom: Achieving Stiff, Glossy Egg Peaks
The structure of this cake is the air trapped in the egg whites. They must be beaten to stiff, glossy peaks. This means when you lift the whisk, the peak stands straight up without drooping. We incorporate the second half of the sugar slowly during this whipping process.
This technique stabilizes the protein structure, ensuring the meringue holds up against the dense chocolate mixture during the folding stage.
A Pinch of Salt: Balancing the Intensity
Never underestimate the power of salt, especially in intensely rich chocolate desserts. A mere quarter teaspoon of fine sea salt added to the egg whites helps them whip to better volume while simultaneously cutting through the profound sweetness and richness of the dark chocolate, ensuring the flavour profile is balanced rather than overwhelmingly heavy.
Related Recipes Worth Trying
- Seriously Moist Tres Leches Cake Recipe Ultimate Sponge — Learn how to make an authentic Tres Leches Cake from scratch This easy recipe guarantees an impossibly light sponge soaked in three milks Truly a showstopper
- Best Coffee Cake Recipe My Ultimate Cinnamon Streusel — Looking for the best coffee cake recipe This easy Cinnamon Streusel Coffee Cake is buttery tender and topped with a generous streusel Perfect for brunch or...
- JewelTopped Fruit Tart Cake A Showstopping Dessert — Bake a showstopper This JewelTopped Fruit Tart Cake has a buttery crust creamy filling fresh fruit The perfect fruit tart cake recipe for any celebration
The Crafting Process: step-by-step Assembly
The journey to creating this magnificent torte begins with preparation. Preheat your oven to 350° F ( 175° C) and thoroughly grease and line the base of your springform pan with parchment paper. Once prepared, we address the chocolate base first.
Using a double boiler a bowl set over simmering water gently melt the chopped dark chocolate and cubed butter together, stirring until perfectly smooth. Remove this from the heat and allow it to cool slightly; this cooling is vital so it doesn't scramble the yolks when combined later.
Next, in a separate vessel, whisk the five egg yolks with half of your granulated sugar until the mixture lightens in colour and thickens slightly. Gradually whisk the lukewarm chocolate mixture into this yolk base, adding the vanilla extract and, if desired, a teaspoon of espresso powder to deepen the cocoa notes.
This forms the dense, flavourful foundation of your flourless cake .
The critical step follows: whipping the egg whites. In a clean, grease free bowl, beat the five egg whites with the salt until soft peaks form. Slowly stream in the remaining sugar while continuing to beat until you achieve those stiff, glossy peaks.
Now comes the gentle integration. Take one-third of the stiff egg whites and fold them into the chocolate base mixture. This initial addition is meant to lighten the heavy batter. Once partially combined, gently fold in the remaining two-thirds of the whites in two separate additions, using a light cutting and folding motion with your spatula.
Resist the urge to stir vigorously; we must preserve every bubble of air that gives this flourless cake recipe easy preparation its lift.
Baking Science: Temperature Control for a Fudgy Finish
Pour the delicate batter into your prepared pan. The baking time is relatively short, generally 40 to 45 minutes. The key indicator of doneness is visual: the edges should look set, perhaps even slightly puffed, but the centre should still have a noticeable wobble when gently nudged.
This slight under baking ensures the glorious fudgy interior remains moist rather than drying out.
Melting Down the Chocolate Base Without Scorching
The gentle heat provided by the bain marie prevents the chocolate from seizing or burning. If the water boils too aggressively, the bottom of your bowl will become too hot, potentially damaging the delicate fats in the chocolate.
Keep the water simmering lightly never a rolling boil and stir constantly until every piece of chocolate and butter has melted into a uniform, silky liquid before moving it off the heat.
Folding Gently: Preserving the Aeration of the Egg Whites
The act of folding is where the science of this flourless cake truly shines. Think of folding as turning the batter over itself rather than stirring in circles. This preserves the volume created by the whipped egg whites.
If you deflate the whites by aggressive mixing, the cake will bake flat and dense while still tasty, it won't achieve that signature light yet-rich quality. Stop folding when the mixture is uniformly coloured, even if faint white streaks remain.
Springform Pan Preparation: Ensuring a Clean Release
Because this cake sets up dense and is best served chilled, ensuring it releases cleanly is important for presentation. Greasing the pan well, lining the bottom with parchment paper, and then greasing the paper again gives the cake a non-stick base.
For extra security, especially if you are serving it immediately after chilling, consider wrapping the lower exterior of the pan in heavy duty foil in case you opt to use a water bath for baking.
The Cooling Ritual: Patience for Ultimate Density
Do not rush the cooling process. Allow the cake to cool completely on a wire rack; you will observe it sinking slightly as it cools, which is entirely normal for a flourless chocolate cake . This settling process transforms the airy bake into the dense, compact texture you expect.
Once fully cooled to room temperature, transfer it to the refrigerator to chill for a minimum of two hours, though overnight chilling yields the best, most sliceable result.
Elevating Your Midnight Velvet Experience
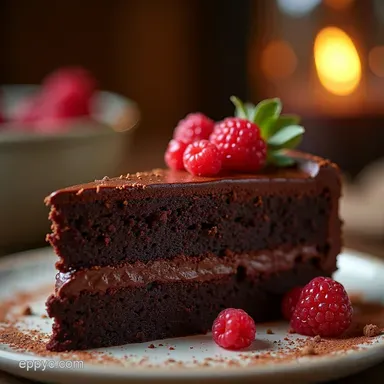
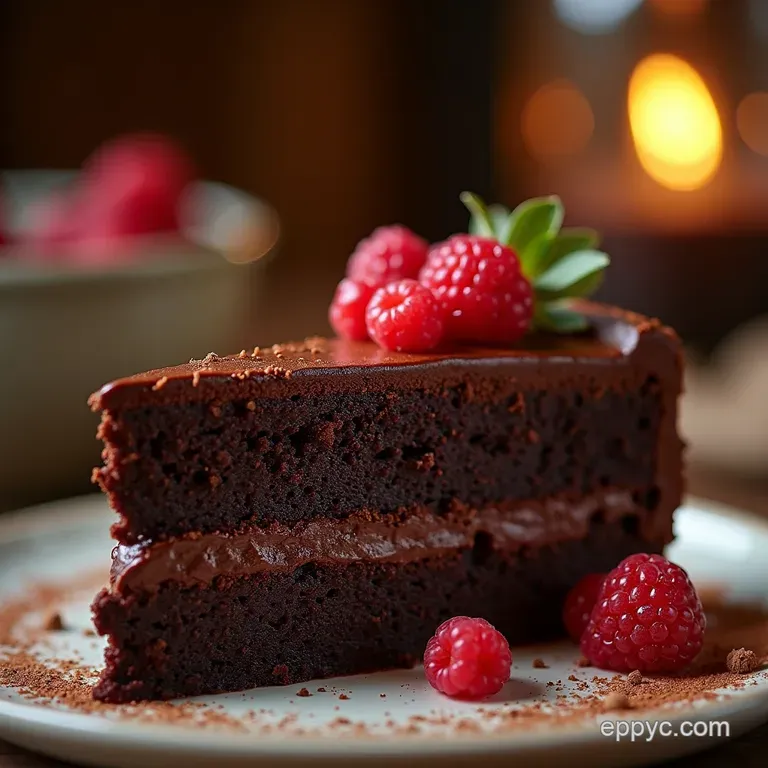
Once chilled and set, your decadent flourless cake is ready for its moment in the spotlight. The classic presentation is wonderfully simple: a light dusting of high-quality unsweetened cocoa powder or icing sugar across the top, providing a visual contrast to the dark interior.
However, the richness of this torte begs for an acidic counterpoint to balance the palate. A sharp raspberry coulis or a side of lightly sweetened crème fraîche performs this role beautifully.
Expert Troubleshooting for Your Chocolate Creation
Even with the simplest recipes, questions arise. Understanding why certain things happen ensures success next time you make this flourless cake recipe .
Suggested Toppings Beyond Powdered Sugar
While simplicity reigns, sometimes you need extra flair. Consider lightly toasted, slivered almonds sprinkled around the base edge for crunch, or perhaps a quick drizzle of high-quality salted caramel sauce just before serving. A dollop of softly whipped cream, flavoured lightly with bourbon, also pairs wonderfully.
Optimal Storage Solutions for Leftover Flourless Cake
Due to its high butter and chocolate content, this cake stores exceptionally well. Keep it tightly covered in the refrigerator for up to five days. It actually tastes better on day two or three as the flavours fully meld.
If you need to store it longer, wrap individual slices tightly in plastic wrap and freeze them for up to one month; thaw in the refrigerator overnight before serving.
Variations: Adding Espresso or Spices
To enhance the chocolate depth without adding extra sweetness, incorporate a teaspoon of instant espresso powder directly into the melted chocolate mixture this trick works wonders in any chocolate bake.
For a more exotic twist, consider adding half a teaspoon of ground cinnamon or a tiny pinch of cayenne pepper to that same melted base for a subtle, warm heat that plays wonderfully against the dark cocoa.
Understanding the Center: Why Cracking Happens (and How to Avoid It)
A slight crack across the surface is common and often embraced as authentic for this style of cake. Cracks usually occur when the outside sets much faster than the centre, causing the surface to tear as the interior sinks during cooling.
While wrapping the pan in foil and using a water bath (as mentioned in the prep section) offers insurance, know that this is generally a sign of a rich, perfectly baked dessert, not a failure. Do not worry about surface imperfections; the flavour will be magnificent regardless.
Recipe FAQs
Why is my Flourless Cake sinking in the middle? Is it ruined?
Not at all! That slight dip is actually a hallmark of a truly magnificent flourless cake, similar to a proper soufflé that's had a moment to settle. It happens because the cake relies entirely on trapped air from the egg whites for lift, and as it cools, that structure relaxes and compacts.
Just be sure to let it cool completely before chilling, as that final chill helps set the dense, fudgy texture.
Can I use milk chocolate instead of the dark chocolate specified for this recipe?
While you certainly can substitute, I strongly advise sticking to the recommended 70% cacao dark chocolate. Milk chocolate has far more sugar and dairy solids, which messes with the delicate balance needed for this dense structure to set properly.
You’ll likely end up with something much sweeter and potentially gooey in the centre rather than satisfyingly fudgy.
How should I store leftovers of this intensely rich cake?
This cake absolutely thrives when chilled, so storage is straightforward. Keep it tightly covered (or in an airtight container) in the refrigerator for up to 4 or 5 days. If you plan to keep it longer, it freezes beautifully; wrap slices tightly in plastic wrap and then foil.
Allow frozen slices to thaw overnight in the fridge for the best texture.
I’m nervous about folding the egg whites; what’s the secret to keeping the air in?
Folding is the make-or-break moment! Treat the egg whites like you’re handling precious china gently! First, lighten the heavy chocolate base by folding in about a third of the whites vigorously.
Then, when you add the remaining two-thirds, use a large, flexible spatula to cut down the middle and sweep up the side, turning the bowl as you go. Stop as soon as you see no more white streaks; a few specks are better than a flat cake!
Can I bake this ahead of time for a dinner party?
Absolutely, this cake is practically designed to be made ahead! In fact, it tastes even better the next day once it has fully set up in the fridge, allowing the chocolate flavours to deepen. You can bake it completely up to 24 hours in advance.
Just remove it from the fridge about 30 minutes before serving to let it warm up ever so slightly from fridge cold.
Midnight Velvet Flourless Cake