Muffin Tin Meat Pies: Savory and Crisp

- Time:15 minutes active + 25 minutes cooking = Total 50 minutes
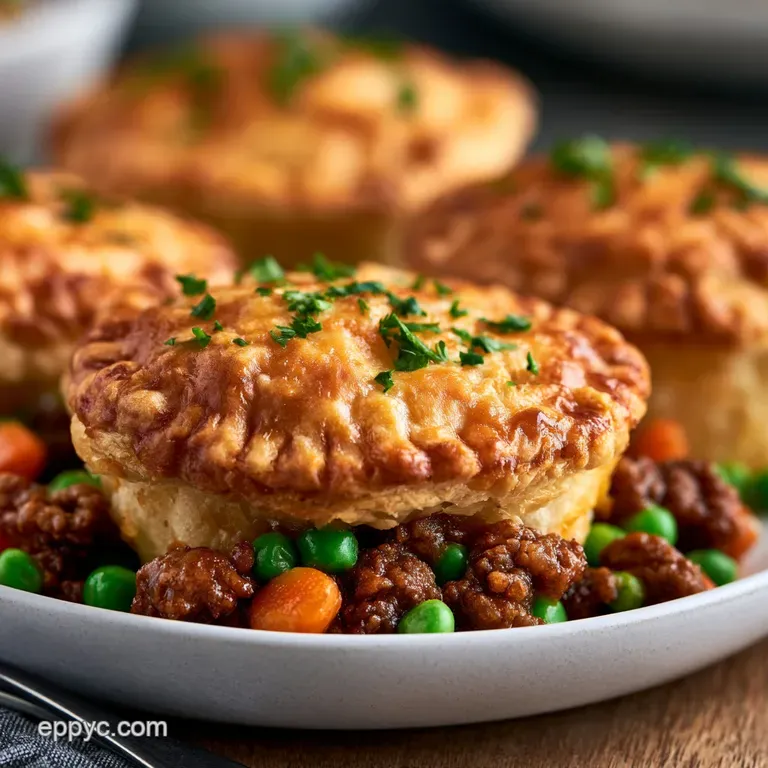
- Flavor/Texture Hook: Shatter crisp golden crust with a velvety, savory center
- Perfect for: Weeknight dinners, meal prep, or kid friendly parties
- Easy Muffin Tin Meat Pies
- Secrets for a Crispy Crust
- Quick Breakdown and Timing
- The Ingredient List
- Basic Tools for the Job
- Step by Step Assembly
- Fixing Common Pie Problems
- Flavor Variations and Swaps
- Scaling the Batch
- Debunking Pie Myths
- Storing and Freezing Tips
- Best Sides and Pairings
- Recipe FAQs
- 📝 Recipe Card
Easy Muffin Tin Meat Pies
The steady sizzle of ground beef hitting a hot pan is the sound of a dinner win. I remember the first time I tried making mini pies, and it was a disaster. I just threw the meat mixture into the crust and popped them in the oven. The result? A "soggy bottom" that felt more like a wet sponge than a pastry.
It was heartbreaking because the filling tasted great, but the texture was all wrong.
I realized the problem was too much moisture in the meat. If the sauce is too runny, it steams the bottom of the crust instead of baking it. This muffin tin meat pies recipe fixes that by treating the filling like a thick ragu, ensuring the liquid is mostly gone before it ever touches the dough.
Now, we've got a reliable system. You get that satisfying crunch on the outside and a rich, hearty center that doesn't leak. It's a simple shift in technique that makes these individual treats feel like they came from a professional bakery, even though we're just using a standard muffin tin and store-bought crust.
Secrets for a Crispy Crust
To get these right, we have to look at how the heat and moisture interact. I'm not a lab tech, but after a few soggy failures, I've figured out what actually happens in the oven.
- The Flour Shield: Stirring flour into the meat creates a thickener. This binds the beef broth and Worcestershire sauce into a glaze, so the liquid doesn't soak into the pastry.
- The Cool Down: Letting the filling sit for 10 minutes is key. If you put boiling meat into cold dough, the fat melts instantly, creating a greasy layer that prevents the crust from crisping.
- Steam Release: That little 'X' we cut in the top isn't just for looks. It lets steam escape so the lid doesn't puff up and separate from the edges.
- Egg Wash Glow: The egg and water mixture acts like a glue and a glaze. It helps the pastry brown evenly and gives it that velvety, professional shine.
| Method | Time | Texture | Best For |
|---|---|---|---|
| Stovetop Filling | 10 mins | Thick & Glazed | Maximum crust crispness |
| Oven only (Raw) | 35 mins | Softer/Steamed | Quick assembly, less flavor |
Quick Breakdown and Timing
Right then, let's look at the components. This is a straightforward build, but timing is everything. You don't want the dough to get too warm while you're filling the tins, or it becomes a sticky mess.
Component Analysis
| Ingredient | Science Role | Pro Secret |
|---|---|---|
| All Purpose Flour | Thickening agent | Cook for 1 min to kill the "raw" flour taste |
| Beaten Egg | Browning agent | Add a pinch of salt to the egg for better color |
| Beef Broth | Flavor base | Use low sodium to control the salt level |
| Pie Crust | Structure | Keep it chilled until the second you need it |
The Ingredient List
Trust me on this: don't skip the Worcestershire sauce. It adds that deep, savory punch that makes the beef taste more complex.
- 1 lb (450g) lean ground beef Why this? Less grease prevents soggy crusts
- 1 small (110g) yellow onion, finely diced Why this? Adds aromatic sweetness
- 2 cloves (6g) garlic, minced
- 1/2 cup (120ml) beef broth Why this? Creates a rich, savory sauce
- 1 tbsp (15ml) Worcestershire sauce Why this? Adds essential umami depth
- 1/2 cup (75g) frozen peas and carrots, thawed
- 1 tsp (5g) salt
- 1/2 tsp (3g) black pepper
- 1 tbsp (15g) all purpose flour Why this? Stabilizes the sauce
- 2 sheets (approx. 450g) refrigerated pie crusts
- 1 large (50g) egg, beaten
- 1 tbsp (15ml) water
Quick Swaps
| Original Ingredient | Substitute | Why It Works |
|---|---|---|
| Lean Ground Beef | Ground Turkey | Leaner option. Note: Needs more salt/pepper for flavor |
| Beef Broth | Chicken Broth | Lighter taste. Note: Less "beefy" depth |
| Pie Crust | Puff Pastry | Much flakier. Note: Rises more, requires larger vents |
| Frozen Peas/Carrots | Diced Celery/Carrot | Fresh crunch. Note: Sauté these with the onion |
Basic Tools for the Job
You don't need a fancy kitchen to pull this off. I've made these using the most basic gear.
- 12 cup standard muffin tin
- Large skillet or frying pan
- Mixing bowl for the egg wash
- Pizza cutter or round cookie cutter (for the crust circles)
- Fork (for sealing the edges)
- Silicone spatula
Step by step Assembly
Let's crack on with the cooking. Follow these steps and pay attention to the cues - they're more important than the timer.
Sautéing the Base
- Brown the ground beef over medium high heat until no pink remains.
- Toss in the diced onions and garlic, stirring frequently until the onions are translucent and the meat smells nutty.
Reducing the Sauce
- Stir in the flour and cook for 1 minute. Note: This removes the raw flour taste.
- Pour in the beef broth and Worcestershire sauce.
- Simmer for 3-5 minutes until the liquid reduces into a thick, velvety glaze that clings to the meat.
- Fold in the peas and carrots, then remove from heat and let cool for 10 minutes.
Fitting the Crust
- Grease a 12 cup standard muffin tin lightly.
- Cut circles from the pie crust and press them gently into each cup, ensuring the dough reaches the bottom and slightly up the sides.
Sealing and Baking
- Spoon the cooled filling into each crust.
- Cut smaller circles for the tops and press the edges with a fork to seal the filling inside.
- Cut a small 'X' in the center of each lid for steam to escape.
- Brush the tops with the beaten egg and water mixture.
- Bake at 400°F (200°C) for 20-25 minutes until the crusts are a deep golden brown.
Fixing Common Pie Problems
Even with a plan, things happen. Maybe your crust didn't brown, or the filling leaked. Don't panic, it's an easy fix.
Stopping Soggy Bottoms
If your bottom crust is soft, it's usually because the filling was too wet or too hot. Make sure the sauce is a glaze, not a soup, before filling.
Preventing Leaky Filling
Leaks happen when the fork seal isn't tight enough. Press firmly around the entire circumference of the pie to create a true weld.
Fixing Pale Crusts
Pale crusts usually mean the oven temperature was too low or you skipped the egg wash. The egg provides the protein and sugar needed for that deep brown color.
| Problem | Root Cause | Solution |
|---|---|---|
| Soggy base | Too much liquid | Simmer sauce longer until thick |
| Crust shrinks | Overworked dough | Press gently, don't stretch the pastry |
| Filling overflows | Overfilling cups | Leave a 1/4 inch gap at the top |
Common Mistakes Checklist:
- ✓ Did you cook the flour for 1 minute?
- ✓ Did you let the filling cool for 10 minutes?
- ✓ Did you cut a vent 'X' in the top?
- ✓ Did you use a fork to seal the edges tightly?
- ✓ Is the oven preheated to exactly 400°F?
Flavor Variations and Swaps
Once you've mastered the basic muffin tin beef pies, you can get creative. I love using these as a base for different proteins. You could swap the beef for shredded chicken or even ground pork.
If you want to change the vibe, try adding some smoked paprika or a dash of cumin for a southwest twist. For something more hearty, try adding a few diced potatoes to the filling. If you're looking for a different way to use ground beef, you might enjoy my Pioneer Womans Spaghetti Sauce for a classic pasta night.
Diet Friendly Swaps
For a lower carb version, you can use a keto friendly almond flour crust. Just be aware that almond flour is more moisture rich but creates a denser crumb than standard pie crust. You'll likely need to increase the bake time by 5 minutes to ensure it's fully set.
Scaling the Batch
If you're feeding a crowd, you can easily double this recipe. Just be careful not to overcrowd your skillet when browning the beef, or it will steam instead of sear.
- Scaling Up (2x): Use two muffin tins. I recommend lowering the oven temp to 375°F (190°C) and extending the time by 5-8 minutes to ensure even heat distribution.
- Scaling Down (½): Use a 6 cup tin. Reduce the beef to 1/2 lb. Since you can't easily halve an egg, beat one egg in a bowl and use about half of the liquid for the wash.
Debunking Pie Myths
I've heard a lot of confusing advice about mini pies. Let's clear some things up.
Myth: You must blind bake the crust first. Truth: For these mini meat pies, blind baking is unnecessary. The filling is thick and the bake time is short enough that the bottom crisps up perfectly without a pre bake.
Myth: Lean beef makes a dry filling. Truth: As long as you use beef broth and Worcestershire sauce, the lean beef stays moist. In fact, using 80/20 beef often results in too much grease, which is the primary cause of soggy crusts.
Storing and Freezing Tips
These are brilliant for meal prep. I usually make a double batch and keep half for the week.
Fridge Storage: Keep them in an airtight container for up to 4 days. To reheat, avoid the microwave if you can. Use a toaster oven or a regular oven at 350°F (175°C) for 10 minutes to bring back that shatter crisp texture.
Freezer Storage: These freeze beautifully. Flash freeze them on a baking sheet for an hour before transferring them to a freezer bag. They'll stay fresh for up to 3 months. Bake them from frozen at 375°F (190°C) for 25-30 minutes.
Zero Waste Tip: If you have leftover pie crust scraps, don't toss them! Roll them into small balls, sprinkle with salt and pepper, and bake them alongside the pies for little savory crackers.
Best Sides and Pairings
To balance the richness of these best muffin tin meat pies, you need something fresh or acidic. A crisp arugula salad with a lemon vinaigrette cuts right through the savory beef.
For a more indulgent meal, I love serving these with a side of buttery French Brioche Bread. The sweetness of the brioche pairs perfectly with the salty, umami flavor of the beef.
The Dipping Station
- - Garlic Aioli
- Mix mayo, minced garlic, and a squeeze of lemon.
- - Spicy Ketchup
- Stir a bit of sriracha or chipotle powder into regular ketchup.
- - Brown Gravy
- A side of thick beef gravy for dipping is a classic move.
Recipe FAQs
Can I make these in advance for meal prep?
Yes, they are perfect for meal prep. Keep them in an airtight container in the fridge for up to 4 days or freeze them for up to 3 months.
How to prevent the bottom crust from getting soggy?
Cool the filling for 10 minutes before spooning it into the crust. Adding hot filling melts the dough's fats prematurely, which leads to a gummy texture.
Is it true that the filling must be piping hot when added to the pastry?
No, this is a common misconception. Hot filling will compromise the structure of the refrigerated crust; the mixture should be cooled slightly first.
How to reheat leftovers without making them mushy?
Heat them in a toaster oven or regular oven at 350°F (175°C) for 10 minutes. This restores the shatter crisp texture that a microwave would destroy.
Can I use a different meat filling instead of ground beef?
Yes, you can swap beef for ground pork or turkey. If you enjoy the savory depth found in our meat sauce recipe, you can use a similar flavor profile for these pies.
How to seal the pie lids so they don't pop open?
Press the edges firmly with a fork to create a tight seal. Cutting a small 'X' in the center of the lid is also essential to let steam escape.
How to bake the pies directly from the freezer?
Bake them at 375°F (190°C) for 25-30 minutes. This lower temperature ensures the frozen center heats through completely without burning the crust.
Muffin Tin Meat Pies

