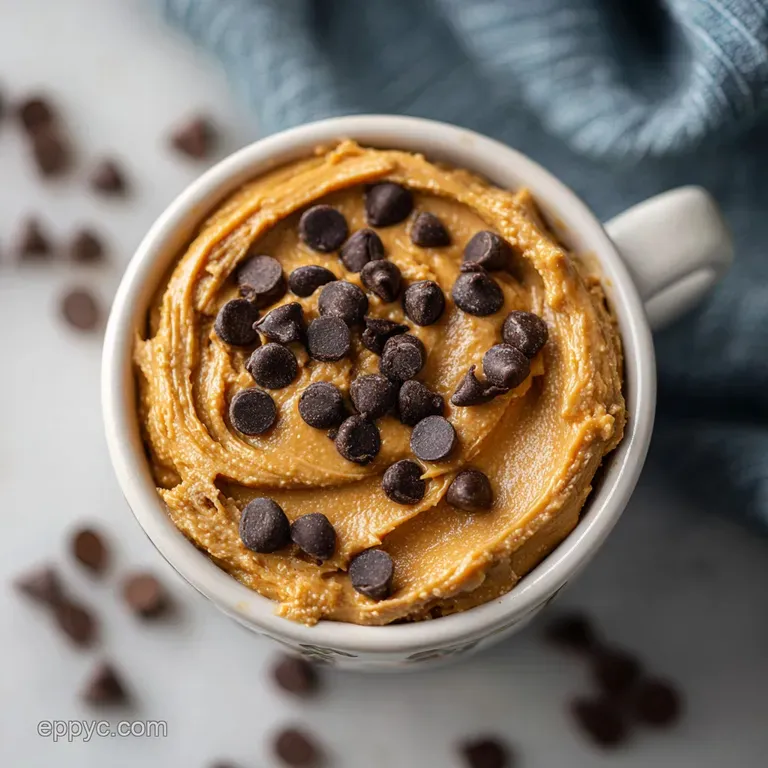
Peanut Butter Dessert with Chocolate Chips
- Time: Active 10 mins, Passive 20 mins, Total 30 mins
- Flavor/Texture Hook: Velvety peanut butter base with a crackling, salty chocolate finish
- Perfect for: Low effort weeknight treats or a quick potluck winner
- Making My Peanut Butter Dessert with Chocolate Chips
- Why This Fudgy Texture Works
- Science Behind Your Favorite Ingredients
- Simple Ingredients and Clever Swaps
- Tools for Efficient Home Baking
- From Raw Dough to Golden Plate
- Fixing Common Texture and Bake Issues
- Scaling Your Recipe Up or Down
- Debunking Common Baking Myths
- Storage Tips and Zero Waste
- Serving Your Dessert with Style
- High in Sodium
- Recipe FAQs
- 📝 Recipe Card
Making My Peanut Butter Dessert with Chocolate Chips
The first time I attempted a version of this, I was chasing the dream of those "3 ingredient" miracles you see online. I wanted that specific aroma the one that fills the kitchen with a warm, toasted nuttiness the second the oven door swings open. But my first try was a disaster.
It was a sandy, crumbly brick that required a gallon of milk just to swallow. It lacked the soul of a truly decadent treat.
I realized that the secret isn't just about mixing things together; it's about the technology of the ingredients. We need that moisture rich coconut sugar and a single egg to act as the glue.
Now, when I pull this out of the oven, the edges are golden and "shatter" slightly under the fork, while the middle remains almost like fudge. It's the kind of thing you make when you need a win after a long day of digital meetings.
Trust me on this: the contrast of the flaky sea salt against the molten dark chocolate is what makes people ask for the recipe. We aren't just making a snack; we're creating a heartfelt moment of pure indulgence. Let's crack on and get these into the oven.
Why This Fudgy Texture Works
- Hygroscopic Binding: Coconut sugar draws in moisture more effectively than refined white sugar, preventing the "sandy" texture common in flourless bakes.
- Protein Netting: As the egg heats, its proteins denature and form a delicate web that traps the natural oils from the creamy peanut butter.
- Maillard Reaction: The combination of amino acids in the peanuts and the sugars creates that signature toasted flavor and golden brown crust.
- Fat Suspension: Dark chocolate chips remain semi solid because the high cacao butter content resists immediate thinning at lower baking temperatures.
| Thickness | Internal Temp | Rest Time | Visual Cue |
|---|---|---|---|
| 1 inch | 175°F (80°C) | 15 mins | Edges pull away from sides |
| 1.5 inches | 180°F (82°C) | 20 mins | Center doesn't jiggle when shaken |
| 0.5 inches | 170°F (77°C) | 10 mins | Deep golden brown perimeter |
Choosing the right pan size changes everything about the final result. If you use a smaller square pan, you'll get a thick, brownie like consistency that pairs beautifully with a scoop of vanilla bean ice cream. If you prefer something more like a traditional cookie, spread it thinner and watch for those crackly edges.
Science Behind Your Favorite Ingredients
| Ingredient | Science Role | Pro Secret |
|---|---|---|
| Natural Peanut Butter | Primary Fat & Protein | Stir the jar thoroughly to incorporate all separated oils before measuring. |
| Coconut Sugar | Moisture & Caramelization | Sift it if it's lumpy; those lumps won't dissolve in this flourless dough. |
| Large Egg | Structural Emulsifier | Use room temperature eggs so the fats in the nut butter don't seize up. |
| Baking Soda | Leavening & Browning | Ensure it's fresh (less than 6 months old) for a proper lift. |
The interaction between the sea salt and the dark chocolate is more than just a flavor choice. Salt actually suppresses our perception of bitterness, which allows the fruity, complex notes of the dark cacao to shine through. It's a simple way to empower your palate without adding extra sugar.
Simple Ingredients and Clever Swaps
You won't need a pantry full of specialized items for this. Most of these are probably sitting in your cupboard right now, waiting to be transformed into this indulgent peanut butter chocolate chips dessert.
- 1 cup (250g) Natural creamy peanut butter: Use the kind where the only ingredients are peanuts and salt.
- Substitute: Almond butter works, though it results in a slightly milder flavor profile. Why this? Provides the foundational fat and structure without needing flour.
- ¾ cup (145g) Coconut sugar: Gives a deep, earthy sweetness.
- Substitute: Brown sugar (packed) will work if you can't find coconut sugar.
- 1 Large egg: Essential for binding.
- Substitute: A "flax egg" (1 tbsp ground flax + 3 tbsp water) for a denser, more crumbly result.
- 1 tsp (5ml) Pure vanilla extract: Rounds out the nutty notes.
- Substitute: Almond extract for a more "marzipan" style aroma.
- ½ tsp Baking soda: Our only leavening agent.
- ¼ tsp Sea salt: To balance the batter.
- ¾ cup (130g) Dark chocolate chips (70% cocoa): The bitter edge is necessary.
- Substitute: Milk chocolate chips if you prefer a much sweeter profile. Why this? High cacao content keeps the dessert from feeling cloying.
- ¼ cup (30g) Chopped roasted peanuts: Adds a necessary "shatter" to the texture.
- 1 tbsp Flaky sea salt: For finishing.
- 2 tbsp (30g) Extra dark chocolate chips: For the top.
If you are looking for more high protein morning options after a late night treat, you might enjoy my How to Make recipe for pancakes. It uses similar pantry staples but keeps things light for the start of the day.
Tools for Efficient Home Baking
I'm a big believer in digital tools in the kitchen. Using a digital scale to measure your peanut butter and sugar ensures that you aren't fighting with sticky measuring cups. It makes the cleanup so much faster, which is a game changer when you're busy.
Beyond the scale, you really only need one large mixing bowl and a sturdy spatula. If you have a stand mixer, you can use it, but honestly, it's not necessary. A hand mixed dough often results in a better texture because you aren't over aerating the egg.
For the baking vessel, a 9x9 inch square metal pan or a 10 inch cast iron skillet provides the best heat distribution.
From Raw Dough to Golden Plate
- Preheat your oven to 350°F (175°C). Line your pan with parchment paper, leaving an overhang on two sides for easy removal later.
- Whisk the room temperature egg in a large bowl. Add the vanilla extract and whisk until light and slightly frothy.
- Incorporate the coconut sugar into the egg. Mix vigorously for 1 minute until the sugar begins to dissolve. Note: This creates a smoother finish on the top of the bars.
- Add the natural creamy peanut butter, baking soda, and sea salt. Stir with a heavy spatula until the dough becomes thick and pulls away from the bowl.
- Fold in the ¾ cup of dark chocolate chips and the chopped roasted peanuts. Distribution should be even but don't overwork the dough.
- Transfer the mixture to your prepared pan. Use the back of a spoon or damp fingers to press it into an even layer.
- Scatter the extra 2 tbsp of chocolate chips over the top. Press them in slightly so they stay put during the bake.
- Bake for 18 to 22 minutes until the edges are dark golden and the center looks set.
- Finish by sprinkling the flaky sea salt over the molten chocolate the moment it comes out of the oven.
- Cool completely in the pan for at least 30 minutes. The internal structure needs this time to solidify, otherwise, it will crumble when sliced.
For those who find themselves constantly reaching for the cocoa powder, you have to try my Death by Chocolate recipe which is a great stovetop alternative when you don't want to turn on the oven. It's just as rich but offers a silky contrast to these chewy bars.
Fixing Common Texture and Bake Issues
Why Your Dessert Is Too Oily
This usually happens if your natural peanut butter wasn't mixed well before measuring. The oil separates in the jar, and if you scoop from the top, you get too much fat. If the bars come out greasy, blot them gently with a paper towel while warm.
Next time, try storing your PB jar upside down to keep the oil better distributed.
What If My Slice Crumbles
Flourless desserts are held together by egg protein and sugar. If you slice it while it's still hot, the structure hasn't "set" yet. Patience is the hardest part of this recipe! Let it cool to room temperature, or even better, pop it in the fridge for 20 minutes before cutting with a sharp, warm knife.
| Problem | Root Cause | Solution |
|---|---|---|
| Burnt Bottom | Dark metal pan or rack too low | Move rack to middle and use parchment paper |
| Raw Center | Oven temperature calibration | Increase bake time by 5 mins or use an oven thermometer |
| Grainy Mouthfeel | Sugar didn't dissolve | Whisk egg and sugar longer before adding the peanut butter |
- - ✓ Forgetting to line the pan
- This dough is very sticky and will bond to the metal without parchment.
- - ✓ Using "No Stir" peanut butter
- These often contain palm oil or added sugars that change the spread and texture.
- - ✓ Overbaking
- If it looks "done" in the middle, it's actually overdone. It should still have a slight "give."
- - ✓ Neglecting the rest time
- Slicing too early destroys the fudgy interior.
- - ✓ Skipping the salt
- Without the sea salt, the richness can feel overwhelming rather than balanced.
Scaling Your Recipe Up or Down
If you want to make a smaller batch (half recipe), use a small loaf pan. Since you can't easily use half an egg, whisk a whole egg in a small cup and then measure out roughly 2 tablespoons of the liquid. Reduce the baking time by about 5 minutes, as the smaller thermal mass will heat through faster.
For a double batch, I recommend using a 9x13 inch pan. Don't simply double the baking time! It usually only takes about 5 to 7 extra minutes because the thickness remains similar, even though the surface area is larger.
Keep the spices and salt at 1.5x rather than a full double to ensure the flavors don't become aggressive.
| Feature | Fast Method | Classic Method |
|---|---|---|
| Preparation | One bowl, 10 mins | Multiple bowls, cream butter |
| Texture | Fudgy and dense | Light and cake like |
| Shelf Life | Best within 3 days | Stays soft for 5 days |
Debunking Common Baking Myths
One massive myth is that you must have flour to create a stable dessert. In reality, the protein in the egg and the solids in the peanut butter are more than enough to provide a "crumb." Another misconception is that "natural" peanut butter is too runny for baking.
While it is more liquid at room temperature, it actually provides a cleaner flavor and a superior chew once the proteins are set by the heat of the oven.
People also think that you need to grease parchment paper. You don't! Parchment is silicone coated and naturally non stick. Greasing it actually causes the bottom of your bars to fry in the extra fat, which can lead to burnt edges and a greasy finish.
Storage Tips and Zero Waste
Storage Guidelines: You can keep these bars in an airtight container at room temperature for up to 3 days. If you want them to last longer, the fridge is your best friend. They actually become even fudgier when chilled! They will stay fresh in the refrigerator for about a week.
For long term storage, wrap individual slices in plastic wrap and freeze them in a zip top bag for up to 3 months. To reheat, just 15 seconds in the microwave brings back that "just baked" molten chocolate feel.
Zero Waste Tips: If you have small crumbs or broken pieces at the bottom of the pan, don't throw them away. They are incredible when folded into vanilla yogurt or sprinkled over a bowl of oatmeal. You can also pulse the leftovers in a food processor to create a "crust" for a chocolate silk pie.
Even the dregs of the peanut butter jar can be used; just add the other ingredients directly into the jar, shake it up, and make a "peanut butter mug cake with chocolate chips" in the microwave for a single serving treat.
Serving Your Dessert with Style
While these are perfect on their own, a little presentation goes a long way. I love serving a warm square of this peanut butter dessert with a drizzle of melted dark chocolate and a few extra crushed peanuts for crunch. If you're feeling fancy, a dollop of unsweetened whipped cream helps cut through the richness.
- - The Sundae
- Serve warm with a scoop of coffee ice cream and caramel sauce.
- - The Breakfast Twist
- Crumble a small piece over greek yogurt with sliced bananas.
- - The Sweet & Salty
- Add a tiny drop of honey on top of each square before serving.
This recipe is designed to empower you to create something sophisticated with minimal effort. It’s a digital age classic reliable, fast, and always a hit. If you enjoyed this process, you might find that my How to Bake recipe for walnut muffins provides a similar nutty satisfaction for your weekend brunch. Happy baking!

High in Sodium
910 mg mg of sodium per serving (40% % of daily value)
The American Heart Association recommends limiting sodium intake to about 2,300mg per day for overall cardiovascular health.
Tips to Reduce Sodium in Your Peanut Butter Cookies
-
Reduce Added Salt-25%
Eliminate the ¼ tsp of sea salt and the 1 tbsp of flaky sea salt entirely. These are significant sources of sodium in the recipe and aren't essential for flavor, reducing sodium by approximately 25%.
-
Choose Unsalted Peanut Butter-20%
Use natural creamy peanut butter that is specifically labeled 'unsalted'. This simple swap will greatly reduce the sodium content of the cookies by approximately 20%.
-
Sodium Free Chocolate Chips-10%
Carefully check the labels of both your dark chocolate chips and extra dark chocolate chips to ensure they are low in sodium or sodium free. Some brands add salt during processing, so choose wisely for an estimated 10% sodium reduction.
-
Baking Soda Reduction-5%
Decrease the amount of baking soda used in the recipe from 1/2 tsp to 1/4 tsp. This will slightly lower the sodium while potentially maintaining the cookie's texture.
-
Enhance with Extracts
Experiment with adding different extracts, such as almond or maple, to boost the flavor profile without adding any sodium. This helps create a more satisfying taste, making you less reliant on salt for flavor.
Recipe FAQs
Can I substitute the peanut butter in this dessert?
Yes, almond butter is a good substitute. It provides a similar texture and healthy fats, though it will yield a slightly milder flavor profile.
What is the best way to store peanut butter chocolate chip desserts?
Store in an airtight container at room temperature for up to 3 days. For longer storage, refrigerate for about a week, or freeze individually wrapped slices for up to 3 months.
Why did my dessert turn out crumbly?
This typically happens if the dessert was sliced while still warm. Flourless bakes need time to set; allow them to cool completely before cutting for a clean slice.
Can I make this dessert without coconut sugar?
Yes, packed brown sugar is a suitable alternative to coconut sugar. It will provide a similar deep sweetness and caramel notes necessary for this recipe.
How do I get a fudgy texture instead of a cakey one?
Ensure you are using natural, unsweetened peanut butter and don't overmix the batter. The high fat content from the nut butter and minimal leavening contribute to a dense, fudgy result.
Is it true that parchment paper doesn't need greasing?
Yes, that's correct. Parchment paper is naturally non-stick due to its silicone coating; greasing it can lead to excess oil and a greasier final product.
How long should I bake this peanut butter dessert?
Bake for 18 to 22 minutes, or until the edges are dark golden and the center appears set. It's better to slightly underbake than overbake for the best fudgy texture.
Peanut Butter Chocolate Dessert
Ingredients:
Instructions:
Nutrition Facts:
| Calories | 391 kcal |
|---|---|
| Protein | 10.6 g |
| Fat | 24.1 g |
| Carbs | 36.0 g |
| Fiber | 4.8 g |
| Sugar | 25.6 g |
| Sodium | 910 mg |
