Oven Bbq Chicken: Sticky, Smoky, and Easy
- The Ultimate Sticky-Glazed Oven BBQ Chicken (No Grill Required!)
- The Science of the Sticky Glaze: Why This Method Wins
- Essential Components for Perfect Oven BBQ
- Step-by-Step Guide: How to Bake the Best Barbecue Dinner
- Troubleshooting and Expert Secrets for Foolproof Results
- Practical Planning: Storing and Reheating Oven Barbecue
- What to Serve Alongside Your Oven BBQ Meal
- Recipe FAQs
- 📝 Recipe Card
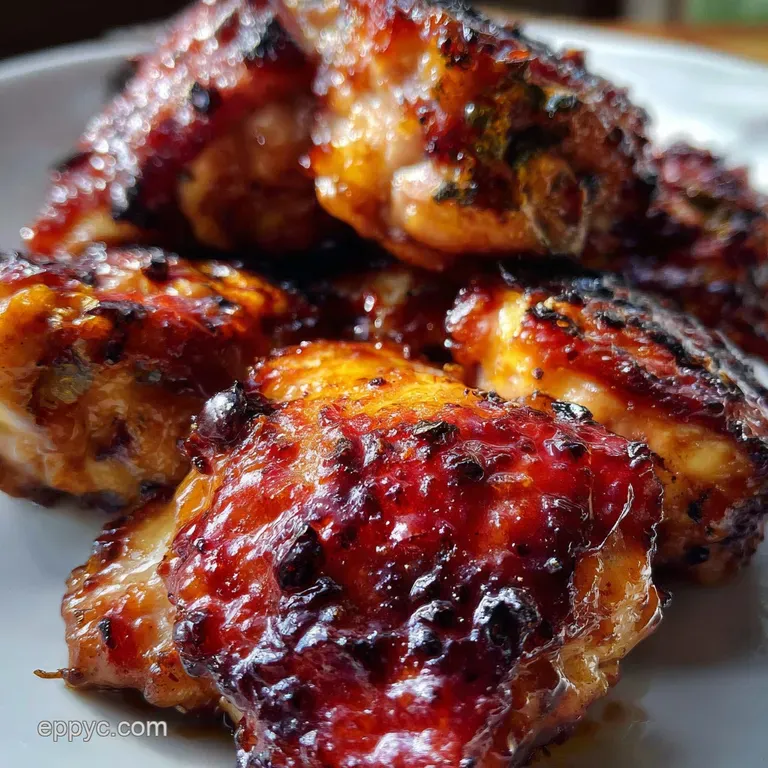
The Ultimate Sticky Glazed Oven BBQ Chicken (No Grill Required!)
There is genuinely nothing like the smell of serious barbecue drifting through your house. That sweet, savory, smoky aroma, sticky and rich, promises total comfort. Forget standing outside in the wind and rain; we are making the absolute best Oven BBQ Chicken right here in your kitchen.
This is the perfect answer when you crave deep, caramelized flavor but your grill is either hibernating or non-existent.
I spent years chasing that elusive "smoke ring" only to realize the best weeknight solution is actually inside a reliable 400°F box. This recipe is fast, uses inexpensive cuts, and eliminates all the guesswork of managing charcoal flare ups.
It’s a total game changer for casual entertaining or just crushing a Tuesday dinner.
We’re going to achieve that classic mahogany crust and fall off-the-bone tenderness using bone-in pieces and a crucial two-stage baking process. Let's crack on and talk about how we get maximum stickiness without burning the whole operation.
This easy oven bbq chicken recipe is about to become your family's favorite.
The Science of the Sticky Glaze: Why This Method Wins
This isn't just about throwing sauce on meat and hoping for the best. The secret to phenomenal Oven BBQ Chicken lies in understanding sugar and heat. We need a dark, sticky, almost crispy glaze, but we absolutely cannot afford to burn the sugar before the meat is cooked through.
Why We Ditch the Grill (And Still Get Char)
Grills are unpredictable; ovens are constant. By baking this slowly, we allow the collagen in the thighs and legs to break down fully, guaranteeing juicy, tender results every single time. Using a high heat initially helps render the fat from the skin, setting us up for that incredible crunch.
We replace the smoke flavor of the grill with a heavy dose of smoked paprika in the dry rub. Trust me, the aroma alone is transformative.
The Two-Stage Cooking Method Explained
We use two different temperatures for a reason. First, a hotter temp (400°F) helps brown the skin and melt the fat layer quickly, ensuring crispiness. Then, we drop the temperature down to 375°F before we apply the glaze. This drop is non-negotiable.
Applying the glaze at the lower temp ensures the high sugar content caramelizes slowly into a rich, dark bark rather than instantly incinerating into bitter charcoal.
Prep Time and Total Cook Time Overview
| Stage | Duration | Notes |
|---|---|---|
| Active Prep: | 15 minutes | Mixing rub, patting dry, coating. |
| Initial Bake: | 30 minutes | High heat, no sauce yet. |
| Glazing & Finish: | 15– 20 minutes | Lower heat, basting every 5– 7 minutes. |
| Resting: | 10 minutes | Mandatory for juicy results. |
| Total Time: | Approx. 70– 80 minutes | Hands off for the majority of the cook time. |
Creating the Flavor Foundation: The Essential Dry Rub
Before any sauce touches the surface, we build flavor deep into the meat. The rub contains dark brown sugar, which, along with the salt, acts as a brine, drawing out moisture and tenderizing the muscle fibers. It’s what gives the final product that dark, rich color even before the sauce goes on.
Pro Tip: Don’t be afraid to gently lift the skin of your thighs and rub the spices directly onto the meat beneath!
When to Apply the Sauce for Maximum Adhesion
Timing is everything when preparing Oven BBQ Chicken . Wait until the last 15– 20 minutes of cooking. At this point, the initial fat has rendered, the skin is set, and the meat is close to done. Glazing too early leads to a burnt sugar mess.
Glazing too late results in wet, pale skin. The final 15 minutes allows just enough time for three layers of basting to caramelize perfectly.
Temperature Control: Ensuring Fall Off-The-Bone Texture
We are aiming for an internal temperature of 165°F (74°C) measured in the thickest part of the meat, avoiding the bone. If you pull the meat right at 165°F and let it rest, the residual heat (carryover cooking) will finish the job perfectly.
Anything over 170°F risks drying out your perfectly seasoned meal.
Essential Components for Perfect Oven BBQ
Choosing the Right Cut: Bone-In vs. Boneless Options
I strongly recommend bone-in, skin-on pieces thighs and drumsticks are the kings of oven bbq chicken thighs and legs. The bone adds flavor, and the skin protects the meat from drying out while providing the necessary fat to render and crisp up.
| Cut | Pros | Substitution/Alternative |
|---|---|---|
| Bone-In Thighs/Legs | Juicy, flavor maximized, forgiving on cooking time. | None better for this specific recipe. |
| Boneless Breasts | Cooks faster, leaner option. | Use smaller pieces and drastically reduce cooking time (20– 25 mins total). Check out my tips for Hot Honey Chicken: Crispy, Sweet Spicy Recipe if you prefer breast meat. |
The Secret Spice Blend: Key Flavor Enhancers
We use sugar for caramelization and balance, salt for seasoning and moisture retention, and paprika for that crucial smokiness. If you can only buy one specialty spice for this, make it smoked paprika.
- Dark Brown Sugar: Essential for the sticky crust and richness. Substitute: Light brown sugar or a dry sweetener like Erythritol, though results will be slightly less sticky.
- Smoked Paprika: The stand-in for the grill smoke. Substitute: Regular paprika, but add a 1/4 tsp of liquid smoke to your glaze for a similar depth.
- Apple Cider Vinegar: Cuts the sweetness of the glaze. Substitute: White wine vinegar or lemon juice.
store-bought vs. Homemade Barbecue Sauce Selection
Life is busy, so don't feel guilty about using your favorite store-bought sauce. The quality of your sauce makes a huge difference! Don't use a thin, vinegary sauce here; you want something thick that coats the back of a spoon. We are merely doctoring it up with honey and Worcestershire for extra depth and shine.
Necessary Kitchen Tools for Easy Prep
You absolutely need a wire rack placed over a lined baking sheet. This isn’t optional. The rack allows air to circulate underneath the meat, resulting in that gorgeous, all-around crust. If you skip the rack, the bottom of your Oven BBQ Chicken will stew in rendered fat, turning soggy.
Also, please, for the love of good food, get an instant read thermometer.
step-by-step Guide: How to Bake the Best Barbecue Dinner
Preparing the Bone-In Segments (The Crucial Rub Application)
- Dry It Out: Pat your bone-in pieces thoroughly dry with kitchen paper. Any surface moisture prevents browning.
- The Rub: Mix the brown sugar, smoked paprika, salt, garlic powder, onion powder, and cayenne (if using) together. Drizzle the pieces with oil, then massage the rub generously over every surface.
- Setup: Place the pieces skin side up on the wire rack over the foil lined pan. Preheat your oven to 400°F (200° C) .
The Initial Bake: Cooking Low and Slow
- Initial Blast: Bake the seasoned pieces for 30 minutes at 400°F. The fat will start sizzling and rendering onto the foil below. Your kitchen should already smell fantastic.
- Make the Glaze: While the meat bakes, combine your store-bought BBQ sauce, honey, apple cider vinegar, and Worcestershire sauce in a small pan. Bring it to a gentle simmer for two minutes to combine the flavors, then remove from the heat. Crucial Safety Note: Pour a portion of the glaze into a separate small bowl for basting. Do not contaminate the main batch with the brush after it has touched raw or partially cooked meat.
Glazing Protocol: Achieving the Signature Sticky Finish
- Reduce Heat: After the first 30 minutes, reduce the oven temperature to 375°F (190° C) .
- First Glaze: Brush the pieces generously with your prepared glaze. It should cover the surface thickly.
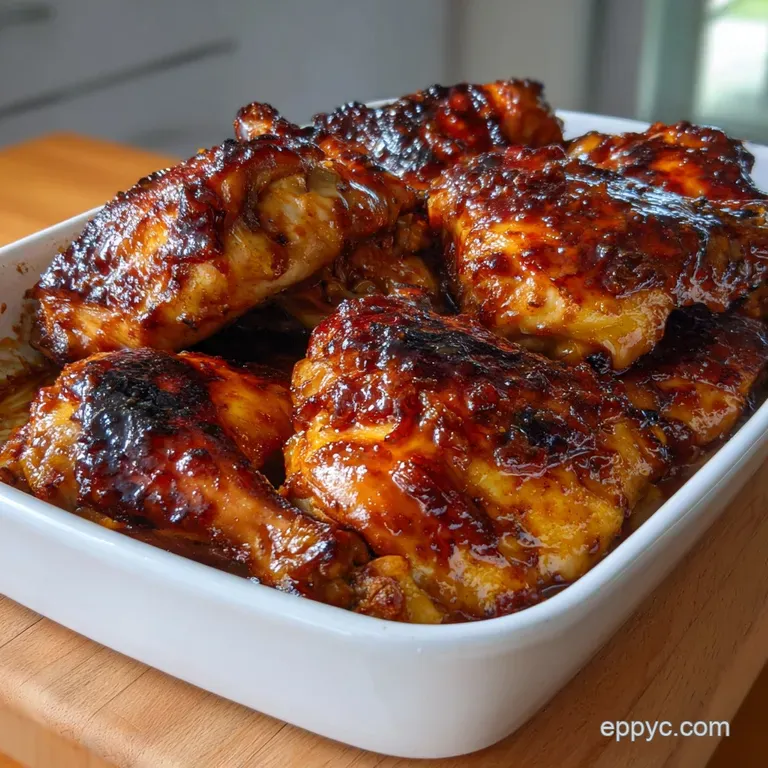
- Baste and Bake: Return the tray to the oven and continue baking for another 15– 20 minutes . Baste again every 5– 7 minutes, building up that thick, sticky coat. Watch the color it should be darkening into a beautiful mahogany.
Resting Time and Serving Safely
- Check Temp: Use your instant read thermometer. When the thickest part reads 165°F (74°C), remove the tray.
- Resting: Transfer the pieces to a clean cutting board and tent them loosely with foil. Let them rest for 10 minutes . This allows the juices to settle back into the muscle fibers, guaranteeing maximum tenderness. Skipping this step means all those lovely juices run out onto the board!
Troubleshooting and Expert Secrets for Foolproof Results
Preventing Dryness: The Importance of Internal Temperature
A thermometer is your safety net against dry, sad pieces. If you are struggling with oven bbq chicken breast recipe results that always come out like sawdust, you are overcooking it. Breasts need to be pulled exactly at 165°F.
Bone-in thighs are more forgiving, but checking the temperature ensures perfectly juicy results every time.
Fixing a Runny Glaze (The Broiler Technique)
If your glaze looks sticky but not quite mahogany enough, or if it feels too wet, don't worry. After the meat hits 165°F, crank the oven to the Broil/Grill setting (high) .
Place the tray under the broiler for 1– 2 minutes, watching constantly . The high direct heat will quickly caramelize the remaining sugars, creating that delicious char.
Chef’s Note: Do not walk away from the broiler! Sugar goes from caramelized perfection to scorched coal in about 45 seconds. Stay put and keep the door cracked.
Handling Cross Contamination Safely
This is serious kitchen business. If you handle raw pieces, wash your hands thoroughly. If you use tongs to turn the raw meat, switch to a clean pair of tongs when handling the finished product. If you accidentally double dip the basting brush into the main glaze reservoir, you need to discard that entire batch.
Why Tenting is Non-Negotiable
After all that effort, you need to preserve the moisture. Tenting the finished Oven BBQ Chicken with foil for 10 minutes creates a miniature sauna, allowing the redistributed juices to remain locked inside.
If you skip this, they will all run out when you cut into the meat.
Practical Planning: Storing and Reheating Oven Barbecue
Refrigerating Leftovers: Maximum Shelf Life
Cool the leftover pieces completely before storing them in an airtight container. Properly sealed, they will last safely in the refrigerator for up to 3 4 days . They make phenomenal leftovers, especially if you shred the meat for sandwiches the next day. This also works great if you are planning on making a dish like Buffalo Chicken Dip Recipe: Ultimate Pub-Style Baked Flavor .
The Quickest Way to Reheat Without Drying Out
Never microwave these unless you want tough rubber. The best way to reheat is low and slow in the oven. Preheat the oven to 300°F (150°C). Wrap the leftovers tightly in aluminum foil (this traps the moisture) and bake for 15– 20 minutes, or until heated through.
The foil keeps the heat even and prevents the glaze from getting excessively crispy or tough.
What to Serve Alongside Your Oven BBQ Meal
Since we’ve made the main event so rich and savory, you want sides that are bright and crunchy.
- A tangy, vinegar based coleslaw is the classic choice; its acidity cuts right through the sweet glaze.
- Crispy, air-fried chips or sweet potato fries are perfect for soaking up any extra sauce.
- I also love serving this with a simple macaroni and cheese or a refreshing dill potato salad.
This Oven BBQ Chicken is truly the ultimate way to get deep, smoky flavor without the fuss of actual fire. Enjoy!

Recipe FAQs
Why is my oven BBQ chicken dry, even though I used bone-in pieces?
Dryness usually results from overcooking or cooking at an overly high temperature initially. Ensure you use a reliable meat thermometer to pull the chicken exactly when it hits 165°F (74°C) internal temperature, allowing the residual heat to complete the cooking.
Basting the chicken with pan drippings before applying the final glaze can also help lock in vital moisture.
My BBQ glaze is burning before the chicken is fully cooked. What should I do?
The glaze burns because of its high sugar content and early application. Only apply the BBQ sauce during the final 10 to 15 minutes of cooking, once the chicken is nearly at temperature. If you notice quick scorching, reduce your oven temperature slightly or consider using the lower rack for the final glazing step.
Can I use boneless, skinless chicken breasts instead of bone-in pieces?
Yes, you can substitute boneless cuts, but the cooking time must be drastically reduced, potentially by half or more. Boneless cuts lack the insulating bone and fat, making them very prone to drying out under the oven's heat. Monitor the internal temperature closely, still aiming for 165°F (74°C).
I don't have liquid smoke. How can I still achieve a smoky flavor?
If liquid smoke is unavailable, you can substitute 1/2 teaspoon of smoked paprika directly into your dry rub mixture for a concentrated, dry smokiness. Alternatively, use a BBQ sauce that already contains deep hickory or mesquite smoke flavouring.
Another excellent substitute is using finely ground chipotle powder for a smoky, spicy profile.
Do I need to marinate the chicken in the dry rub overnight, or is just 30 minutes sufficient?
While 30 minutes will suffice for flavour, allowing the dry rub to rest on the chicken for 4 to 8 hours, or preferably overnight, yields a much deeper, more complex flavour profile. The salt in the rub acts as a brine, drawing moisture in and resulting in a more tender finished product.
Always cover and refrigerate the chicken if resting for more than an hour.
How long can I store leftover Oven BBQ Chicken, and what is the best way to reheat it?
Leftover cooked BBQ chicken can be safely stored in an airtight container in the refrigerator for 3 to 4 days. To reheat without drying it out, place the chicken in a foil covered oven safe dish with a small splash of water or chicken broth.
Bake it at 325°F (160°C) until warmed through, usually about 15-20 minutes.
Can I use aluminum foil instead of parchment paper for lining the baking sheet?
You can use aluminum foil, but because the BBQ glaze is extremely sticky, the chicken may adhere tightly to the foil, making removal difficult and potentially tearing the skin. If using foil, ensure you coat the surface thoroughly with cooking spray or oil, especially before the final glazing stage.
Ultimate Oven Bbq Chicken

Ingredients:
Instructions:
Nutrition Facts:
| Calories | 205 kcal |
|---|---|
| Protein | 11.9 g |
| Fat | 8.8 g |
| Carbs | 20.6 g |
