Valentine Cake Pops Easy Festive Dessert
- Time: Active 1 hour 45 minutes, Passive 30 minutes, Total 2 hours 15 minutes
- Flavor/Texture Hook: A distinct chocolate vanilla snap with a silky, moist interior
- Perfect for: Romantic surprises, Galentine's parties, or show stopping dessert tables
- Creating the Show Stopping Valentine Cake Pops Easy Festive Dessert
- The Secret Behind That Vibrant Red Velvet Glow
- Planning Your Palette: Time and Yield Metrics
- Selecting the Elements for Edible Pastry Art
- Essential Tools for a Clean Finishing Touch
- The Step-By-Step Path to a Velvety Finish
- Fixing Common Cracks and Coating Slips
- Creative Flavor Twists and Dietary Adaptations
- Preserving the Snap: Storage and Freshness Tips
- Presenting Your Masterpiece with Artistic Flourish
- Recipe FAQs
- 📝 Recipe Card
Creating the Show Stopping Valentine Cake Pops Easy Festive Dessert
I remember standing in my kitchen three years ago, surrounded by what looked like a red velvet explosion. My first attempt at cake pops was a mess, with cake balls sliding down their sticks like sad, melting popsicles and white chocolate that looked more like cottage cheese than a smooth glaze.
But when I finally bit into that one survivor, the way the white chocolate shattered against the vibrant red crumb was pure joy. It wasn't just a snack; it was a tiny piece of edible art that made the whole mess worth it.
We're going to skip that messy learning curve today. This version of a Valentine Cake Pops Easy Festive Dessert focuses on the artistry of color and texture, moving away from the "leftover cake" feel and toward something you'd see in a boutique bakery window.
We're talking about a rich, homemade red velvet base that's specifically engineered to hold its shape while staying incredibly moist. Trust me, once you see that deep crimson center peek through the pearl white coating, you'll never go back to store-bought kits.
The Secret Behind That Vibrant Red Velvet Glow
- Structural Integrity: The combination of buttermilk and vinegar reacts with the baking soda to create a lift that stays airy even after crumbling, preventing the pops from becoming leaden.
- Thermal Anchoring: Dipping the stick into melted chocolate before inserting it into the cake ball creates a cold weld effect that locks the weight in place.
- Surface Tension: Adding coconut oil to the white chocolate wafers thins the viscosity, allowing the coating to flow into a glass like finish rather than a lumpy shell.
- Fat to Crumb Ratio: Using full fat cream cheese in the binder ensures the interior doesn't dry out, mimicking the texture of a luxury truffle.
The Physics of the Grip
The secret to the perfect pop is the temperature differential between the chilled cake and the warm chocolate "glue" on the stick. This creates a mechanical bond that prevents gravity from pulling the cake ball down during the final dip.
| Servings | Cake Base Needed | Frosting Binder | Dip Quantity |
|---|---|---|---|
| 13 Pops (Half) | 1/2 Cake Sheet | 60g Frosting | 225g Wafers |
| 26 Pops (Full) | 1 Whole Cake | 120g Frosting | 450g Wafers |
| 52 Pops (Double) | 2 Whole Cakes | 240g Frosting | 900g Wafers |
When you're planning for a party, remember that these are deceptively filling because of their density. I usually calculate two per person, though they disappear so fast you might want to hide a few for yourself. Similar to the logic of a How to Bake recipe where texture is king, the density here is what provides that satisfying bite.
Planning Your Palette: Time and Yield Metrics
| Component | Science Role | Pro Secret |
|---|---|---|
| Buttermilk | Acidic tenderizer | Use room temp to avoid curdling the fat |
| Red Food Gel | Pigment stability | Gel prevents thinning the batter vs liquid |
| Coconut Oil | Viscosity reducer | Adds a silky sheen to the white chocolate |
| Cream Cheese | Binding agent | Provides a tangy counterpoint to the sugar |
This recipe yields 26 pops, which is the sweet spot for a standard baking sheet. You'll spend about 30 minutes on the actual bake, but the real artistry happens during the 1 hour 45 minutes of prep and assembly.
Don't rush the cooling phases, because heat is the enemy of a smooth chocolate finish.
Selecting the Elements for Edible Pastry Art
- 345g All purpose flour Why this? Provides the necessary gluten structure to prevent crumbling.
- 300g Granulated sugar (Sub: Caster sugar for faster dissolving)
- 15g Unsweetened cocoa powder Why this? Adds depth and reacts with acid for color.
- 1 tsp Baking soda (Sub: 3 tsp baking powder if needed)
- 240ml Buttermilk, room temperature (Sub: Milk + 1 tbsp lemon juice)
- 2 Large eggs, room temperature
- 240ml Vegetable oil (Sub: Melted coconut oil for a firmer crumb)
- 1 tbsp Red food coloring gel Why this? Concentrated color without adding excess moisture.
- 1 tsp Distilled white vinegar
- 115g Full fat cream cheese, softened
- 60g Unsalted butter, softened
- 120g Powdered sugar, sifted
- 1 tsp Pure vanilla bean paste Why this? Those tiny flecks add a premium visual touch.
- 450g high-quality white chocolate melting wafers
- 2 tbsp Coconut oil
- 20g Valentine themed nonpareils
Chef's Tip: Freeze your butter for 10 minutes then grate it into the frosting if you're in a rush; it incorporates much faster with the cream cheese without leaving lumps. Also, keep a heating pad under your bowl of melted chocolate to keep it fluid for the entire dipping process.
Essential Tools for a Clean Finishing Touch

You don't need a professional pastry kitchen, but a few items make this so much easier. A stand mixer such as a KitchenAid is great for the cake, but I actually prefer mixing the binder by hand to feel the texture.
You'll definitely want a tall, narrow microwave safe glass for dipping this uses less chocolate to get the depth you need to submerge the pop.
Make sure you have a Styrofoam block or a dedicated cake pop stand ready. There is nothing more heartbreaking than finishing a beautiful dip only to realize you have nowhere to set it down without flattening one side.
If you're stuck, a cardboard box with small holes poked in it works in a pinch, but the Styrofoam is more stable.
The step-by-step Path to a Velvety Finish
Mixing the Crimson Base
- Preheat your oven to 180°C and grease a 9x13 inch pan.
- Whisk the 345g flour, 300g sugar, 15g cocoa, and 1 tsp soda until the powder is a uniform pale brown.
- In a separate bowl, blend the 240ml oil, 240ml buttermilk, 2 eggs, and 1 tbsp red gel until it looks like liquid rubies.
- Fold the wet into the dry, adding the 1 tsp vinegar last to activate the soda.
- Bake for 30 minutes until a tester comes out clean and the edges pull away. Note: Let this cool completely before the next step.
Crumbing the Moist Sponge
- Tear the cooled cake into chunks and pulse in a food processor until it looks like fine, damp sand.
- Beat the 115g cream cheese, 60g butter, 120g sugar, and vanilla until silky and pale.
- Mix the frosting into the cake crumbs 1 tablespoon at a time until it holds a ball shape when squeezed.
- Roll into 26 even spheres (about 30g each) and chill on a tray for 40 minutes.
The Final Chocolate Dip
- Melt the 450g wafers with 2 tbsp coconut oil in 30 second bursts until it flows like warm honey.
- Dip 1 cm of a stick into the chocolate, then push it halfway into a chilled cake ball.
- Submerge the entire ball into the chocolate until the coating meets the stick.
- Tap your wrist gently to remove excess, then add the 20g nonpareils while still tacky.
Fixing Common Cracks and Coating Slips
Avoiding Exterior Surface Cracks
If your chocolate shells are cracking as they dry, your cake balls were likely too cold. When the cake expands as it warms up, it puts pressure on the brittle chocolate. Aim for "cool to the touch" rather than "icy." If it happens, you can often hide the cracks with a strategic drizzle of pink chocolate or a well placed heart sprinkle.
| Problem | Root Cause | Solution |
|---|---|---|
| Pop falls off stick | Stick not "glued" | Dip stick in chocolate before inserting into cake |
| Lumpy coating | Chocolate too thick | Stir in 1 tsp more coconut oil to thin it out |
| Sweating pops | Temp shock | Don't put finished pops in the freezer; use the fridge |
Correcting Lumpy Chocolate Coatings
Sometimes white chocolate can be temperamental and seize. If it starts to look grainy, it usually means a drop of water got in or it overheated. To fix this, you can try adding a teaspoon of vegetable shortening (not butter, as butter contains water) and stirring vigorously.
Common Mistakes Checklist
- ✓ Never use liquid food coloring for the coating; it will seize the chocolate immediately.
- ✓ Tap your wrist, not the stick, when removing excess chocolate to prevent the ball from vibrating off.
- ✓ Ensure the cake is completely cooled before crumbing, or the frosting will melt and create a greasy mess.
- ✓ Use a deep, narrow vessel for dipping to ensure a single, smooth motion covers the entire sphere.
Creative Flavor Twists and Dietary Adaptations
If you want to switch things up, you can easily pivot the flavor profile. While the red velvet is classic for Valentine's Day, a How to Bake recipe for a deep dark chocolate base is also a huge crowd pleaser. You can even use the same white chocolate coating but add a drop of oil based strawberry flavoring for a "chocolate covered strawberry" vibe.
| Original Ingredient | Substitute | Why It Works |
|---|---|---|
| All purpose flour | 1 to-1 gluten-free Blend | Rice flour bases mimic the crumb well but might need 10% more frosting binder. |
| Cream Cheese | Vegan Cream Cheese | Maintains the tang; ensure it is chilled as it softens faster than dairy. |
| White Chocolate | Dark Chocolate (70%) | Less sweet; creates a sophisticated "Black Forest" aesthetic. |
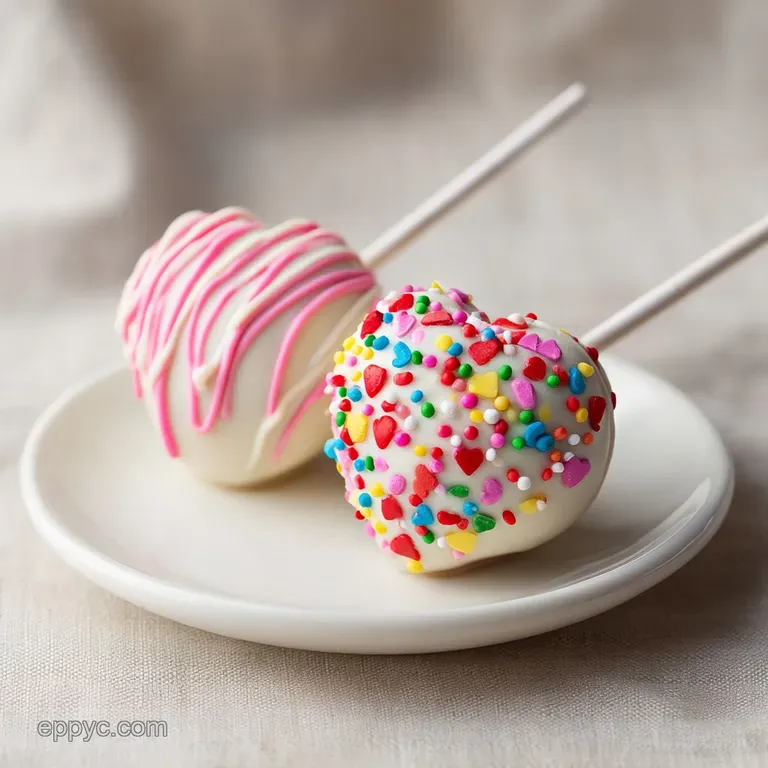
For the color strategy, think in three accents: Ruby Red (the interior), Pearl White (the main coating), and Petal Pink (the decorative drizzle). Adding these layers of color gives the pops a professional, high end appearance.
Wait for the white coat to set for 5 minutes before adding the pink drizzle so the colors don't bleed together.
Preserving the Snap: Storage and Freshness Tips
Storing these correctly is the difference between a crisp snap and a soggy bite. Keep them in an airtight container in the fridge for up to 5 days. If you're displaying them at a party, they can sit out at room temperature for about 2 to 3 hours, but keep them out of direct sunlight or they will start to "perspire."
For the zero waste enthusiasts, any leftover cake crumbs that didn't make it into balls are gold. I toast them in a low oven until crunchy and use them as a garnish for yogurt or as "red soil" on top of chocolate pudding. You can also freeze the undipped cake balls for up to 2 months.
Just thaw them in the fridge overnight before you plan to dip them, or the temperature shock will crack the chocolate.
Presenting Your Masterpiece with Artistic Flourish
To really make these pops stand out, think about the presentation. I love arranging them on a "Dessert Charcuterie Board" alongside fresh raspberries, dark chocolate squares, and some dried rose petals. The height of the pops adds a great vertical element to a flat tray.
The Sparkling Rosé Pairing
The acidity in a dry sparkling rosé cuts through the richness of the cream cheese binder and the sweetness of the white chocolate perfectly. It’s a sophisticated way to serve a whimsical dessert.
Heart Shaped Pastry Sculpting
If you're feeling extra artistic, don't just roll spheres. Flatten the chilled cake balls slightly and use a small heart shaped cookie cutter, or just pinch the bottom into a "V" and indent the top with a toothpick.
It takes a bit more patience to dip, but the "Easy Festive Dessert" label really shines when they're shaped like little hearts. Just remember to be extra gentle when tapping off the excess chocolate so you don't lose the definition of the shape.

Recipe FAQs
What not to do when making cake pops?
Do not use liquid food coloring for the coating or use cake balls that are too cold. Liquid coloring will seize the melted chocolate immediately, turning it into grainy cement. If the cake is frozen, the expansion upon warming will cause the chocolate shell to crack.
Is it better to use candy melts or chocolate for cake pops?
Use high-quality melting wafers or compound chocolate for the coating. Real couverture chocolate requires tempering for a crisp shell, which is complex; wafers contain stabilizers that make dipping easier and more reliable for a beginner.
What is a good dessert for February?
Cake pops featuring red velvet or rich dark chocolate are excellent for February. Their festive colors and handheld nature make them perfect for parties or romantic treats. If you enjoy deep chocolate flavors, try the techniques in our Decadent Chocolate Ice recipe for inspiration.
How far in advance can I make dipped cake pops?
You can safely store finished, dipped cake pops in an airtight container in the refrigerator for up to 5 days. If they start to "sweat," let them sit at room temperature for about 30 minutes before serving to allow the moisture to stabilize.
How do I prevent my cake balls from falling off the sticks?
Dip the tip of the lollipop stick into the melted chocolate first and let it set for a minute before inserting it into the cake ball. This creates a cold weld, essentially gluing the stick firmly in place before you dip the whole pop.
Is it true I must use a stand mixer for the frosting binder?
No, this is a common misconception. You can easily mix the cream cheese binder by hand with a sturdy whisk or spatula until smooth. Mastering the proper texture is about feel, similar to when you are working the fat into the flour for the Homemade Dulce de Leche recipe.
How should I thin white chocolate if it gets too thick for dipping?
Stir in 1 teaspoon of refined coconut oil or vegetable shortening at a time while the chocolate is warm. Do not use water or milk, as any moisture will cause the chocolate to seize immediately. The oil reduces viscosity without compromising the final snap.
Valentine Cake Pops Festive Recipe

Ingredients:
Instructions:
Nutrition Facts:
| Calories | 331 calories |
|---|---|
| Protein | 2.9 g |
| Fat | 18.4 g |
| Carbs | 36.5 g |
| Fiber | 0.6 g |
| Sugar | 28.2 g |
| Sodium | 148 mg |
