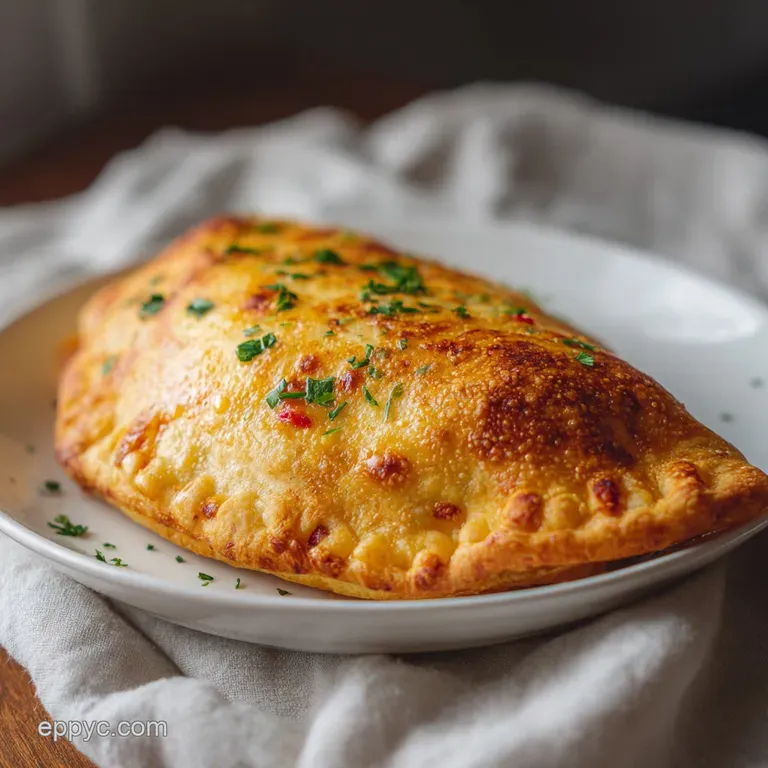
Baked Stromboli: Golden and Crispy
- Time: Active 20 minutes, Passive 25 minutes, Total 45 minutes
- Flavor/Texture Hook: Shatter crisp crust with a piquant, cheesy interior
- Perfect for: Game day crowds or a stress free weekend family dinner
- Mastering This Authentic Baked Stromboli Recipe
- Why the Crust Stays Crispy
- Analyzing Our Primary Ingredients
- Selecting Your Filling Components
- Tools for a Perfect Bake
- Step-by-Step Construction Guide
- Fixing Common Texture Problems
- Flavorful Twists and Swaps
- Storing and Reheating Leftovers
- Myths About Italian Deli Rolls
- Ideal Side Dish Pairings
- Very High in Sodium
- Recipe FAQs
- 📝 Recipe Card
Mastering This Authentic Baked Stromboli Recipe
The story of this dish doesn't actually begin in the rolling hills of Tuscany or the narrow streets of Naples. Instead, it finds its roots in a small town called Essington, Pennsylvania, just outside of Philadelphia.
Back in the 1950s, Nazzareno Romano, the owner of Romano’s Italian Restaurant, started experimenting with his pizza dough. He wanted something portable, something that felt like a sandwich but ate like a pizza.
He stuffed the dough with various meats and cheeses, rolled it up, and baked it until the outside was a deep, burnished brown.
The name "Stromboli" was actually inspired by the 1950 film of the same name starring Ingrid Bergman. It was a bit of a marketing fluke that turned into an American classic. For people who grew up in the tri state area, this isn't just a snack; it's a piece of local heritage.
It represents the innovation of Italian immigrants who took traditional flavors and reshaped them to fit the fast paced American lifestyle. When you pull one of these out of the oven, the aroma of toasted garlic and sizzling pepperoni fills the room, instantly signaling that it's time for a communal meal.
We often think of Italian food as being strictly ancient, but this dish proves that some of the best kitchen traditions are born from a bit of creative tinkering. It’s a heartfelt nod to the deli culture of the Northeast, where the quality of your salami and the stretch of your mozzarella define the success of your Sunday afternoon.
This recipe empowers you to bring that deli counter magic into your own kitchen with digital precision and a few clever structural tricks I've picked up along the way.
Why the Crust Stays Crispy
The Moisture Barrier: Layering the dry, cured meats like salami and ham directly against the dough creates a physical shield that prevents the oils and moisture from the peppers and cheese from soaking into the crust.
Strategic Steam Release: Cutting diagonal slits through the top layers of dough allows internal steam to escape rapidly, ensuring the interior doesn't turn into a soggy, steamed environment.
Cornmeal Thermal Buffer: A thin layer of cornmeal on the baking sheet provides tiny pockets of air under the dough, which promotes even browning and prevents the bottom from sticking or steaming.
Egg Wash Polymerization: The proteins in the egg wash create a thin, glossy film that traps heat against the surface of the dough, resulting in that signature shatter crisp texture.
| Cook Method | Prep Time | Resulting Texture | Best For |
|---|---|---|---|
| Standard Oven | 45 minutes | Uniformly crisp and golden | Traditional dinner |
| Convection Oven | 38 minutes | Extremely flaky and light | Maximum crunch |
| Toaster Oven | 50 minutes | Deeply browned, dense | Small batches |
Cooking in a traditional oven at 400°F (200°C) is the gold standard for this dish because it provides the steady, dry heat needed to penetrate the thick roll without burning the exterior.
While some people try to speed things up with higher temperatures, you run the risk of having a raw dough center surrounded by a blackened crust. Stick to the plan and let the heat do its work slowly and surely.
Analyzing Our Primary Ingredients
Choosing the right components is where the technology of flavor really comes into play. We aren't just looking for "meat and cheese"; we are looking for specific fat to protein ratios that will hold up under high heat.
A dry, aged provolone will behave much differently than a young, creamy one, and that choice dictates whether your roll stays together or collapses into a greasy puddle.
| Component | Science Role | Pro Secret |
|---|---|---|
| Pizza Dough (1 lb) | Provides the structural gluten matrix that contains the steam and fats. | Use dough at room temperature for maximum elasticity and easier rolling. |
| Genoa Salami (6 oz) | Acts as the primary flavor base and provides a high fat content for richness. | Thinly sliced meat allows for more layers, creating a better "bite" and texture. |
| Provolone Cheese (8 oz) | Offers a sharp flavor profile and a high melting point for structural stability. | Sliced provolone creates a cohesive layer that prevents the mozzarella from leaking. |
| Low Moisture Mozzarella (1 cup) | Provides the classic "cheese pull" without adding excess water to the dough. | Avoid fresh mozzarella balls; they release too much liquid for a baked roll. |
This combination of fats and proteins is designed to melt into a single, unified core. Using low moisture mozzarella is absolutely non negotiable here. I once tried using the fancy, water packed fresh mozzarella because I thought it would be a "premium" upgrade, but the result was a disaster the dough turned into a wet sponge within ten minutes.
Trust the science on this one; dry cheese is your best friend when you're wrapping it in dough.
Selecting Your Filling Components
For the most successful result, follow the measurements provided in the official data. We are building a specific volume that fits perfectly within a 10x14 inch rectangle of dough. Overstuffing is the number one cause of "blowouts" in the oven.
- 1 lb pizza dough: This is the foundation of our baked stromboli recipe. Why this? Yeast leavened dough provides the chew and rise needed for a sturdy roll.
- 6 oz Genoa salami: Thinly sliced for easy rolling. Why this? Its piquant, cured flavor stands up to the high baking temperature.
- 6 oz pepperoni: Use standard sandwich style or smaller circles. Why this? The paprika and oils season the entire roll from the inside out.
- 4 oz honey ham or capicola: For a sweet or spicy contrast. Why this? Adds bulk and a different protein texture to the center.
- 8 oz sliced provolone: This provides the sharp, Italian bite. Why this? Slices stay in place better than shreds during the rolling process.
- 1 cup shredded mozzarella: Use the low moisture part skim variety. Why this? It provides superior meltability without adding steam producing water.
- 1/2 cup roasted red peppers: Ensure these are patted bone dry. Why this? Adds a concentrated sweetness and a pop of bright color.
- 1 large egg + 1 tbsp water: Our essential egg wash. Why this? It acts as the "glue" for seasonings and ensures a golden finish.
- 1/4 cup Parmesan cheese: Grated finely for the topping. Why this? It toasts in the oven, adding a nutty, salty crust.
| Original Ingredient | Substitute | Why It Works |
|---|---|---|
| Genoa Salami | Soppressata | Similar fat content but adds a more aggressive, peppery heat. |
| Provolone | Mild Provolone | Note: Less sharp but melts much more smoothly. |
| Roasted Peppers | Sliced Black Olives | Provides brine and saltiness instead of sweetness. |
| Pizza Dough | store-bought Bread Dough | Denser crumb, will require slightly longer baking time. |
If you find yourself making this for a cozy night in, it's just as satisfying as a baked macaroni and cheese when you need that heavy hitting comfort food. The key is in the layering; if you swap ingredients, try to keep the moisture levels roughly the same to protect the integrity of the dough.
Tools for a Perfect Bake
You don't need a professional kitchen, but having the right digital and physical tools will empower your success. A heavy duty baking sheet is the most important piece of equipment.
If you use a thin, flimsy cookie sheet, it will warp in the 400°F (200°C) oven, which can lead to uneven cooking and a cracked crust.
A rolling pin is also vital for getting that 10x14 inch rectangle. If you try to stretch the dough by hand like a pizza, you'll end up with thin spots that will tear when you roll the meat inside. We want a consistent thickness of about 1/4 inch across the entire sheet.
A bench scraper is also a handy "secret weapon" for lifting the edge of the dough when you start the rolling process.
Finally, make sure you have a sharp serrated knife for the venting and the final slicing. A dull knife will squash the layers and squeeze out the cheese before it has a chance to set.
Using a digital timer is also a great way to stay on track, especially during the 10 minute resting period which is the hardest part of the entire process because the smell is so incredible.
step-by-step Construction Guide

- Preheat your oven to 400°F (200°C). Line a large rimmed baking sheet with parchment paper and sprinkle with a thin layer of cornmeal. Note: The cornmeal acts as a non stick agent and adds crunch.
- On a lightly floured surface, roll the pizza dough into a 10x14 inch rectangle, ensuring even thickness throughout.
- Layer the meats starting with salami, followed by ham and pepperoni, leaving a 1 inch border on all sides to create a moisture barrier. Note: This border is essential for a clean seal.
- Top the meats with sliced provolone, shredded mozzarella, and the chopped roasted red peppers.
- Carefully roll the dough tightly lengthwise. Pinch the seams and tuck the ends under to seal the fillings inside. Roll until firm and compact.
- Whisk the egg and water to create an egg wash. Brush the entire surface of the dough with the mixture.
- Sprinkle with oregano, garlic powder, and Parmesan cheese. Cut diagonal slits across the top until you can see the first layer of meat.
- Bake for 25 minutes until the crust is deep golden brown and fragrant.
- Let rest for 10 minutes before slicing and serving with marinara sauce. Note: Resting allows the cheese to set so it doesn't run out.
Rolling the dough is where many people get nervous. Think of it like rolling a sleeping bag. You want it tight enough that there aren't big air pockets inside, but not so tight that you're stretching the dough to its breaking point.
If the dough starts to snap back or feels too tight while rolling, let it sit for two minutes to relax the gluten, then continue. This patience is the difference between a beautiful loaf and a messy explosion.
Fixing Common Texture Problems
The most common issue with a baked stromboli recipe is the "Soggy Bottom." This usually happens because the oven wasn't properly preheated or the fillings had too much liquid. If you're using jarred peppers, you have to squeeze them in a paper towel until they feel almost dry.
Any water you leave in there will turn to steam and destroy your crust from the inside out.
Managing Internal Leakage
If your cheese is blowing out the sides, it's usually a sealing issue. When you pinch the seams, you need to be quite firm. You can even use a little bit of the egg wash as a "glue" on the 1 inch border before you roll it up.
This creates a protein based bond that holds strong even when the cheese inside starts to bubble and expand under the heat.
| Problem | Root Cause | Solution |
|---|---|---|
| Soggy bottom crust | Excess moisture from veggies or wet dough. | Pat peppers dry and use cornmeal on the pan. |
| Cheese leaking out | Poorly sealed seams or shallow vents. | Pinch seams firmly and cut deeper steam vents. |
| Dough is gummy inside | Underbaked center or rolled too thick. | Bake for the full 25 minutes and use a room temp dough. |
Common Mistakes Checklist
- ✓ Forgetting to let the dough reach room temperature (it will be too springy to roll).
- ✓ Using fresh mozzarella or "wet" cheeses that release water.
- ✓ Skipping the 10 minute rest after baking (the cheese will be like lava).
- ✓ Overcrowding the filling too close to the edges.
- ✓ Cutting vents that don't actually penetrate the dough (steam gets trapped).
Achieving structural integrity is all about balance. If you've mastered this, you might find yourself wanting to try other dough based projects. For a different but equally rewarding challenge, you might enjoy the patience required for an authentic French brioche. Both recipes rely heavily on understanding how fats interact with a gluten network to create a specific mouthfeel.
Flavorful Twists and Swaps
While the classic Italian deli meats are the gold standard, this format is incredibly versatile. You can adapt the fillings to suit different dietary needs or just whatever you have in the fridge. The key is to keep the volume of ingredients consistent with the 1 lb of dough.
If you increase the meat, you must increase the baking time slightly to ensure the middle gets hot.
If you want a "Garden Path" vegetarian version, swap the meats for sautéed spinach (squeezed very dry), sliced mushrooms, and sun dried tomatoes. Because vegetables release more water than cured meats, you'll want to pre cook them in a pan until all their moisture has evaporated.
This technology of "pre drying" your fillings is what keeps the vegetarian version from becoming a puddle.
For a spicy variation, use hot capicola and add a few shakes of crushed red pepper flakes to the cheese layer. You can also swap the provolone for a spicy pepper jack if you want to break away from the traditional Italian flavor profile.
Just remember that the goal is a balanced bite too much heat can mask the subtle sweetness of the dough.
Storing and Reheating Leftovers
If you have leftovers (which is rare!), they store beautifully. Wrap the cooled slices tightly in foil or place them in an airtight container. They will last in the fridge for up to 4 days. Whatever you do, avoid the microwave for reheating if you want to maintain that crisp texture.
A microwave will make the dough rubbery and the cheese oily.
The best way to reheat is in a 350°F (180°C) oven or a toaster oven for about 8-10 minutes. This brings the "shatter" back to the crust and melts the cheese evenly.
If you're in a hurry, an air fryer at 320°F (160°C) for 5 minutes also works wonders, as the rapid air circulation mimics the original baking environment perfectly.
For long term storage, you can freeze the entire baked roll or individual slices for up to 2 months. Thaw them in the fridge overnight before reheating in the oven. For zero waste, any leftover scraps of meat or cheese can be tossed into an omelet the next morning, and the cornmeal from the pan can be wiped off and composted.
Myths About Italian Deli Rolls
One of the biggest myths is that you need to sear the meats before putting them in the dough. This is actually counterproductive. Cured meats like pepperoni and salami are already "cooked" and preserved; pre searing them would just release all their flavorful oils onto your counter instead of into the dough where they belong.
The 25 minutes in the oven is more than enough time to render the fat and develop the flavor.
Another misconception is that the dough needs to be paper thin. If you roll the dough too thin, it won't have the structural strength to hold the heavy meats and cheese. You need that 1/4 inch thickness to provide a "chew" that balances the richness of the interior.
Think of the dough as the frame of a house; if it's too thin, the whole thing collapses.
Finally, people often think you can't make this ahead of time. You actually can! You can assemble the entire roll, wrap it tightly in plastic wrap, and keep it in the fridge for up to 4 hours. Just wait to add the egg wash and the Parmesan topping until right before you put it in the oven.
This makes it a perfect option for entertaining because you can do the "messy" work before your guests arrive.
Ideal Side Dish Pairings
Because this dish is so rich and savory, it calls for something bright and acidic to balance the palate. A simple arugula salad with a sharp lemon vinaigrette is my go to. The bitterness of the greens cuts through the fat of the salami and provolone perfectly.
If you want something heartier, a bowl of tomato basil soup is a classic companion that allows for even more dipping.
I also love following up a heavy, savory meal like this with a tangy citrus dessert to refresh the taste buds. The contrast between the salty, garlicky stromboli and a sharp lime or lemon finish is a great way to end the night. Of course, you can't go wrong with a side of extra marinara sauce. I like to warm the sauce up so it doesn't cool down the hot slices when you dip them.
If you are hosting a larger party, you can serve smaller slices alongside other finger foods. It pairs surprisingly well with something unexpected like smoky baked beans if you are leaning into a more "American pub" style menu. Whatever you choose, keep the sides simple so the star of the show can really shine.

Very High in Sodium
1583 mg 1583 mg of sodium per serving (69% 69% of daily value)
The American Heart Association recommends a limit of no more than 2,300mg of sodium per day, with an ideal limit of no more than 1,500mg per day for most adults.
Tips to Reduce Sodium
-
Choose Lower Sodium Processed Meats-25%
Replace Genoa salami, pepperoni, and honey ham/capicola with their lower sodium versions. This is the biggest contributor to sodium in your recipe.
-
Opt for Lower Sodium Cheeses-15%
Use reduced sodium provolone and mozzarella cheeses. Also, consider using a smaller amount of the high sodium Parmesan.
-
Control Sodium in Roasted Peppers-5%
If using jarred roasted red peppers, ensure they are packed in water or oil, not brine. Patting them dry removes excess liquid and any residual salt.
-
Boost Flavor with Herbs and Spices
Enhance the pizza's taste with fragrant herbs like basil, thyme, and a pinch more oregano. Garlic powder adds flavor without sodium.
-
Savory Egg Wash
The egg wash for the crust doesn't typically add significant sodium, but ensure no salt is added to it.
Recipe FAQs
What is the best temperature to bake a stromboli?
400°F (200°C) is the ideal temperature. This setting ensures the crust becomes deep golden brown and crispy while the cheese fillings melt perfectly within the 25-minute cook time.
What are the common mistakes when making stromboli?
Failing to properly vent the dough or using overly moist ingredients are the biggest errors. Always cut diagonal slits across the top to allow steam to escape, and stick to low-moisture mozzarella to prevent the center from becoming soggy.
How to keep stromboli from getting soggy in the oven?
Pat your roasted red peppers dry thoroughly before adding them. Additionally, leave a 1 inch border on all sides when layering your meat and cheese to create a secure moisture barrier during the rolling process.
Is pizza dough the same as stromboli dough?
Yes, they are essentially the same. You can use standard store-bought or homemade pizza dough for this recipe; just ensure it reaches room temperature before rolling so it doesn't snap back while you are shaping your 10x14 inch rectangle.
How to ensure the filling stays inside while baking?
Pinch the seams tightly and tuck the ends under after rolling. If you enjoyed mastering the binding technique here, you will find that these same principles of sealing and structural integrity apply well to other dough based recipes.
How to reheat leftovers to keep them crispy?
Use an oven or toaster oven set to 350°F (180°C). Heat the slices for about 8-10 minutes to restore the crust's texture and ensure the cheese melts evenly without becoming rubbery, which often happens in a microwave.
How to get a golden brown crust?
Brush the entire surface with an egg wash made from one large egg whisked with one tablespoon of water. This wash, combined with the sprinkled Parmesan cheese and dried oregano, creates a deep, appetizing color and adds a savory crunch to the exterior.
Baked Stromboli Recipe

Ingredients:
Instructions:
Nutrition Facts:
| Calories | 707 kcal |
|---|---|
| Protein | 33.4 g |
| Fat | 42.8 g |
| Carbs | 46.8 g |
| Fiber | 0.7 g |
| Sugar | 4.2 g |
| Sodium | 1583 mg |
