Bisquick Sausage Balls: Savory and Cheesy
- Time:10 minutes active + 15 minutes cook = 30 minutes total
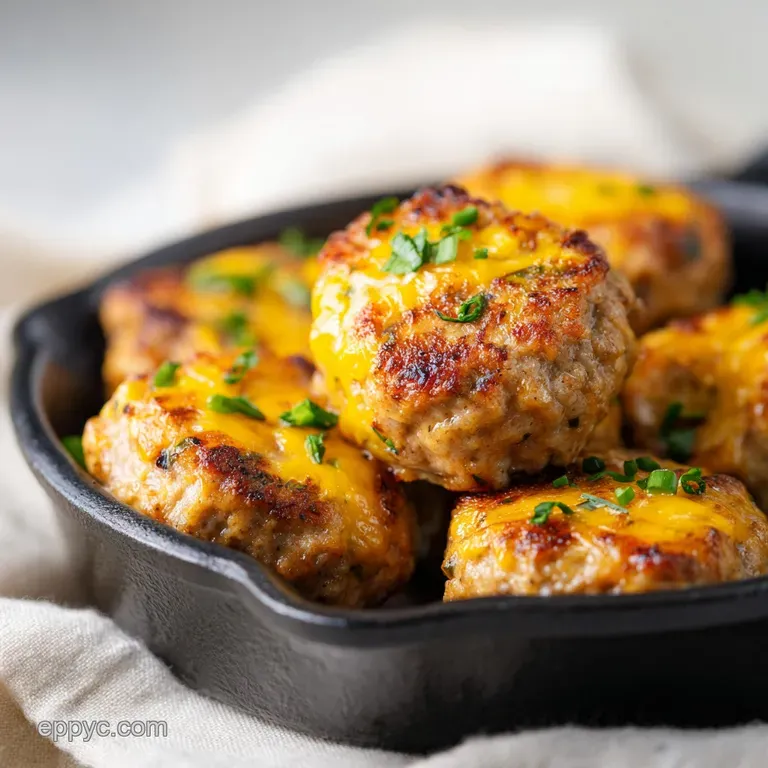
- Flavor/Texture Hook: Mahogany colored crust with a velvety, cheesy center
- Perfect for: Game day appetizers or quick holiday finger foods
That first sizzle when the tray hits the oven is what gets me every time. You know that smell? It's the sharp scent of cheddar melting into seasoned pork, mixed with a hint of smoked paprika that just fills the whole house.
I remember the first time I tried to "improve" this by making my own flour blend, and let me tell you, it was a disaster. I ended up with flat, greasy discs that tasted like unbaked dough.
I realized then that there's a reason the original method is so loved. It's all about that specific balance of moisture and lift. When you get them right, they have this slight snap to the exterior but stay juicy inside. If you're looking for a quick win, these are it.
Whether you're using a traditional recipe or the popular bisquick sausage balls 3 ingredients version, the result is always a crowd pleaser.
You can expect a snack that's hearty, salty, and incredibly satisfying. We're going to focus on getting that mahogany color without drying out the meat. Trust me, once you see them come out of the oven, you'll never go back to those frozen store-bought options.
Why This Method Works
It's not just about mixing things together; there's some clever chemistry happening in your bowl to keep these from becoming grease puddles.
- Leavening Action: The baking mix contains agents that create tiny air pockets, ensuring the bites aren't dense like a meatloaf.
- Fat Emulsification: The cheddar cheese blends with the pork fat, creating a velvety interior that prevents the meat from shrinking too much.
- Surface Caramelization: The proteins in the pork and the sugars in the mix undergo the Maillard reaction, giving you that mahogany crust.
- Moisture Control: The mix absorbs excess fat during baking, which keeps the balls from flattening out.
When you make sausage balls 3 ingredients style, you're relying on the ratio of fat to starch. If the fat is too high, they spread. If the starch is too high, they're dry.
| Fresh Approach | Shortcut Mix | Texture Result | Best For |
|---|---|---|---|
| Homemade Flour/Leavening | Bisquick Mix | More Variable | Culinary hobbyists |
| Fresh Grated Cheese | Pre shredded | Greasier/Less Melt | Super fast prep |
| Hand mixed | Stand Mixer | More Aerated | Large batches |
The difference between a homemade mix and a shortcut is mostly about consistency. The shortcut mix is engineered to be stable, which is why it's the gold standard for this specific snack.
The Essential Component List
Understanding what each part does helps you tweak the recipe without ruining the batch. These balls 3 ingredients base is a classic for a reason.
| Ingredient | Science Role | Pro Secret |
|---|---|---|
| Ground Pork Sausage | Structure & Fat | Use "lean" to prevent oil pooling |
| Baking Mix | Binder & Lift | Sift if you see large lumps |
| Sharp Cheddar | Flavor & Moisture | Freshly grated melts way better |
| Smoked Paprika | Color & Depth | Adds a "grilled" aroma |
The interaction between the cheese and the meat is where the magic happens. If the cheese is too warm, it incorporates too quickly and can make the dough sticky.
Equipment Needed
You don't need a professional kitchen for this, but a few tools make it way faster. I usually reach for a large stainless steel bowl because it's easier to clean after handling raw meat.
A cookie scoop is my biggest secret here. It ensures every piece is the same size, which means they all finish cooking at the exact same time. No one likes a tray where half are burnt and half are raw. You'll also need a sturdy baking sheet and parchment paper.
Trust me, don't skip the parchment, or you'll be scrubbing burnt cheese off your pan for an hour.
Ingredients & Substitutes
Here is exactly what you need. Stick to the measurements for the best rise.
- 2 cups (250g) Original Bisquick baking mix Why this? Provides the perfect lift and binding
- 1 lb (450g) lean ground pork sausage Why this? Leaner meat prevents the balls from flattening
- 2 cups (225g) sharp cheddar cheese, freshly grated Why this? Higher fat content for a velvety melt
- 2 tbsp (10g) fresh chives, minced Why this? Adds a fresh, oniony pop
- 1 tsp (2g) smoked paprika Why this? Gives a deep, mahogany color
| Original Ingredient | Substitute | Why It Works |
|---|---|---|
| Original Bisquick | All purpose flour + 1 tsp baking powder | Similar structure. Note: Lacks the seasoning of the mix |
| Pork Sausage | Ground Turkey Sausage | Leaner option. Note: Drier texture; may need 1 tbsp milk |
| Sharp Cheddar | Pepper Jack | Same melting point. Note: Adds a spicy kick |
| Fresh Chives | Dried Green Onions | Similar flavor. Note: Use 1 tbsp instead of 2 |
If you're using a substitute like turkey, be careful not to overbake. Turkey lacks the fat of pork, so it can go from "done" to "rubber" in about two minutes.
Step-by-step Cooking Process

Right then, let's get these in the oven.
- Preheat your oven to 350°F (175°C). Note: Ensure the rack is in the center for even heat
- Combine the lean sausage, freshly grated cheddar, and baking mix in a large bowl.
- Mix with your hands or a spoon until the dough is uniform. Note: If it feels too crumbly, add milk 1 tablespoon at a time
- Stir in the minced chives and smoked paprika.
- Using a cookie scoop, form the mixture into 1 inch (2.5cm) balls.
- Place them on a parchment lined baking sheet, spacing them about an inch apart.
- Bake for 12–15 minutes until they are mahogany colored on the outside.
- Remove from the oven immediately.
- Let the Sausage Balls rest for 5 minutes until the internal structure sets.
Solving Common Baking Issues
Most problems with these come down to temperature or ratios. If they're acting up, it's usually because the fat is separating.
Dry Texture Fix
If your bites feel like crackers, you've likely overbaked them or used meat that was too lean. This often happens in convection ovens which circulate heat faster.
Flattening Problem
When they spread into pancakes, it's usually because the cheese was too warm or the meat had too much fat. Cold ingredients are your friend here.
Burnt Bottoms
This happens when the baking sheet is too thin or you're using a dark colored pan that absorbs too much heat. Try lining your pan with two sheets of parchment.
| Problem | Root Cause | Solution |
|---|---|---|
| Greasy edges | Meat too fatty | Use lean sausage or blot with paper towel |
| Crumbly dough | Not enough binder | Add 1 tbsp milk or water |
| Pale color | Oven temp too low | Use an oven thermometer to verify 350°F |
Both Health Canada and the USDA recommend an internal temperature of 71°C (160°F). Use a meat thermometer to be sure.
Common Mistakes Checklist:
- ✓ Grated cheese by hand (pre shredded has cornstarch that ruins the melt)
- ✓ Used parchment paper to prevent sticking
- ✓ Kept ingredients cold until mixing
- ✓ Avoided over mixing the dough (prevents toughness)
- ✓ Allowed the 5 minute rest period
Creative Flavor Twists
Since the sausage balls 3 ingredients base is so neutral, you can really play with the add ins. I love adding a pinch of cayenne to the mix for a slow burn.
If you want something more "garden style," swap the paprika for dried oregano and add some finely diced green chilies. For a low calorie pivot, you can use a gluten-free baking mix, though the texture will be slightly denser. These are fantastic when served alongside a creamy Rotel Dip for a full party spread.
Keeping Your Snacks Fresh
These stay great in the fridge for about 4 days. Just keep them in an airtight container so they don't pick up other fridge smells.
For the freezer, I recommend freezing them on a tray first before bagging them. This prevents them from clumping into one giant meat ball. They'll last about 3 months in the freezer. When you're ready to eat, pop them in the oven at 325°F for 10 minutes to bring back that snap. If you're serving these for a holiday, they go great with a side of Turkey Dressing.
For zero waste, if you have leftover chives or cheese scraps, toss them into an omelet the next morning.
Ideal Side Dish Pairings
Because these are so rich, you need something acidic or fresh to cut through the fat. A sharp apple slaw or some pickled cucumbers work wonders.
If you're doing a full meal, a light garden salad with a lemon vinaigrette keeps the palate refreshed. Honestly, don't even bother with low-fat cheese for these the fat is what carries the flavor. Just balance it with a crisp vegetable on the side and you're golden.
Recipe FAQs
What is the secret to the best sausage balls?
Use freshly grated cheddar. Pre-shredded cheese contains cellulose that prevents smooth melting. If you enjoyed mastering the savory balance here, see how the same principle works in our breakfast sausage patties.
What is the difference between old Bisquick and new Bisquick?
The updated formula contains different leavening agents. This can occasionally result in a denser ball, so stick to the prescribed measurements for the best lift.
How many cups of Bisquick do you use for sausage balls?
Use exactly 2 cups. This provides the correct ratio to bind the sausage and cheese without making the snacks taste overly bready.
Will any pancake mix work for sausage balls?
No, avoid pancake mix. It contains sugar and flavorings that will make your savory sausage balls taste sweet.
How to fix dough that is too crumbly to roll?
Add milk one tablespoon at a time. Mix gently until the dough binds enough to form 1 inch balls.
Is it true I should bake these at 400°F to save time?
No, this is a common misconception. Baking at 350°F ensures the center cooks through before the outside burns.
How to store leftover sausage balls?
Keep them in an airtight container. Store in the refrigerator for up to 5 days and reheat in the oven for the best texture.
Bisquick Sausage Balls