Trailblazer Chili: Hearty Bean Chili for Adventurous Days
Picture this: it’s a chilly evening after an epic day hiking the trails. you’ve hiked up steep hills, soaked in the breathtaking views, and you’re feeling a little tired but totally accomplished.
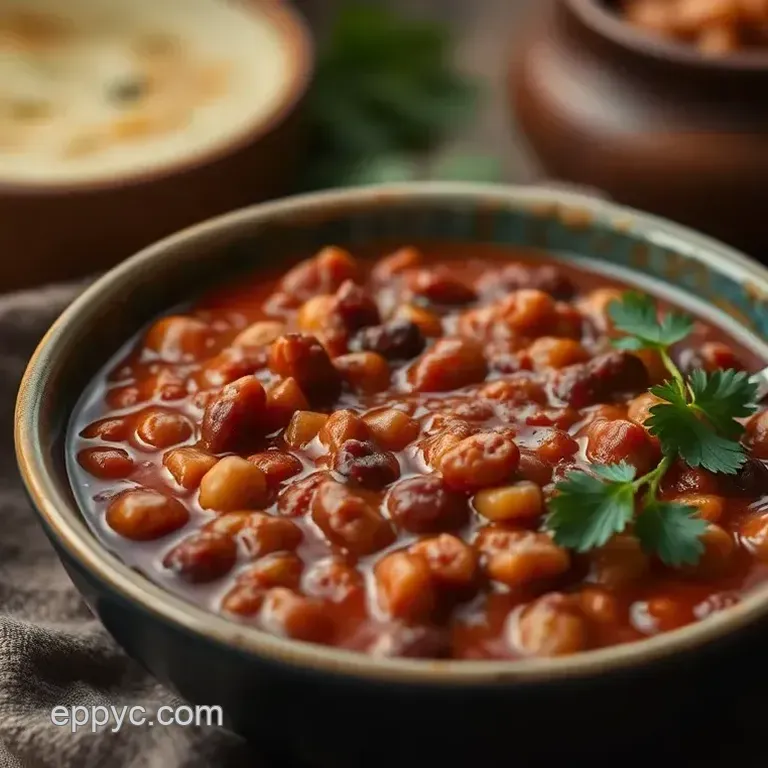
Now, the best part? it’s time to dig into a cooked chili with beans for trail adventures . honestly, there’s nothing quite like coming back from a long trek and getting to savor a warm, hearty bowl of chili.
Talk about comfort food for hikers, am i right?
Cooked chili with beans for trail adventures isn't just a meal; it's a ritual. i remember the first time i made it on a camping trip.
We huddled around the campfire, the smell of spices and simmering beans filled the air, and i swear even the stars seemed to shine a little brighter.
A dish like this stems from rich, traditional southwestern cooking. it’s the ultimate blend of flavor and goodness, effortlessly bringing people together under the open sky.
Recipe Overview
Back in the day, chili recipes were hearty meals for ranchers and cowboys moving through the southwest. over the years, it evolved into a staple for camping trips, picnics, and just cozy nights at home.
Fast forward to today, and this hearty chili recipe is a must for outdoor cooking. it’s easy to whip up, requiring only about 15 minutes of prep and 30 minutes to cook.
Seriously, in just 45 minutes , you can have a delicious meal ready to serve. and let’s be honest, who doesn’t love a one-pot meal for camping ?
Cost wise, it’s pretty friendly on the wallet too. with simple ingredients think beans, tomatoes, and spices this recipe can feed about four people without breaking the bank.
That’s exactly what you need when you’re out in the wild or just trying to save a few bucks while cooking at home.
Key Benefits
Now, let's chat about why you should absolutely make this chili. first off, it’s packed with health benefits . packed with high protein beans and chunky veggies, it's a nutritious trail food that’ll keep your energy up for all those outdoor adventurers.
Plus, you can customize the spice levels to match your mood, whether you’re feeling mild or all out smoky flavor!
Not to mention, this chili is a family friendly chili recipe that you can serve for any occasion from casual dinners to campfire stories under the stars.
And if you’re ever stuck with leftovers? no worries. it’s freezer friendly , so it can hang out in your fridge until you’re ready to take another bite.
Talk about meal prep chili that keeps giving!
What’s really magical about this dish is how it warms you up. perfect for cold weather , you can’t go wrong with a steaming bowl of chili after a chilly hike.
Plus, with different chili toppings ideas like cheese or cilantro, you can make it your own each time you serve it.
As you're gearing up to create your own version of this chili, know that it’s a canvas. toss in some fresh ingredients, play with flavors, and whip it up your way.
Ready? let’s dive into the ingredients that will help you craft this delightful meal!
Essential Ingredients Guide for Your Chili Adventure

When it comes to crafting a cooked chili with beans for trail adventures , the right ingredients can make all the difference, right? this isn’t just about chucking stuff into a pot.
Here’s your essential guide to picking the premium core components that will elevate any hearty chili recipes you attempt, especially when you’re cooking outdoors!
Premium Core Components
First off, let’s get down to specifics. Each ingredient should have detailed measurements . For instance:
- 1 tablespoon (15 ml) of olive oil
- 1 medium onion , diced
- 2 cloves garlic , minced
Knowing the right amounts means no guessing games which can totally ruin your outdoor cooking experience, trust me!
Quality indicators matter too. Choose fresh vegetables with vibrant colors and firm textures. Ditch anything that looks sad or wilty; that’s just a sign you’ll be serving up regret, not comfort food.
Now let’s talk about storage guidelines and shelf life . keep your spices in a cool, dark place. they last longer that way.
Most dried spices are good for about 2-3 years , but fresh herbs? you want those used within a few days to savor their full flavor.
Oh, and if you're bringing chili on a camping trip, a good cooler is a lifesaver!
For freshness tips , when you select tomatoes, look for ones that feel heavy for their size. a rule of thumb: toss the mushy ones they’re not helping anyone.
You want that sweet, juicy burst in every bite of your chili!
Signature Seasoning Blend
Ah, spice blends the heart of Southwest chili recipes . For that perfect pot, you need essential spice combinations like:
- Chili powder
- Cumin
- Smoked paprika
These spices come together to create an ultra flavorful base. and don’t forget about herbs! fresh cilantro is a must have. pair it with lime juice for a zesty kick that sets your chili apart.
Want to switch things up? try adding regional variations too. in new mexico, hatch chiles can really breathe life into your chili, while in texas, you might want to embrace that smoky flavor with some good ol’ bacon.
Yum!
Smart Substitutions
Here’s where it gets fun with common alternatives if you find yourself a bit short on supplies. no kidney beans? any other beans will suffice try black beans or even pinto beans .
Keep it adaptable, friends!
For those adapting to dietary needs, you can create a vegetarian chili by swapping out broth for vegetable or using lentils for a high protein, nutritious trail food option.
I mean, who can resist a chunky, cozy pot of chili while hiking?!
If you need emergency replacements , grab some canned chili in a pinch it’s no gourmet dish, but you can jazz it up with spices and fresh toppings to elevate it to something respectable.
Kitchen Equipment Essentials
Alright, equip yourself! You’ll need some must have tools :
- A sturdy large pot or Dutch oven
- A wooden spoon (it's got soul, trust me)
- And, of course, a knife and cutting board
But if you don't have a Dutch oven, don’t sweat it! A metal pot works wonders over a campfire too.
Preparation tips ? keep your vegetables chopped ahead of time. this not only saves you time but it makes your camping meal prep a breeze! and let’s face it, camping is about enjoying nature, not stressing in the kitchen.
For storage solutions , those meal prep containers are gold! they keep your chili fresh and transportable for your one pot meals for camping .
It's always nice to know you have something hearty waiting for you after a long hike.
Now that we've covered the essentials, you're one step closer to cooking up something amazing. With all these tips, your Cooked Chili with Beans will be ready to conquer the trails! Let’s roll up those sleeves and dive into the instructions next!
Professional Cooking Method: Preparing Hearty Chili for Outdoor Adventures
When it comes to outdoor cooking recipes, you want a dish that’s not just tasty but also hearty enough to fuel your adventures.
Enter the cooked chili with beans for trail adventures . this ain't just any ordinary chili; it's a robust, smoky mix that keeps you warm after a long hike.
Let's dive into how to turn out this deliciousness while keeping our cooking game professional!
Essential Preparation Steps
Before you even think about turning on the stove, let’s chat about mise en place . it’s french for “everything in its place.
” picture yourself having your diced veggies, spices, and cans ready to go. it saves you time and chaos nobody wants a chopping frenzy while your pot's heating up, right?
Time management is a game changer. while your chili is simmering (you’ll want that to happen for about 20 minutes ), you can prep toppings or clear your workspace.
It’s all about multitasking, folks!
Next up, organization strategies. have your ingredients grouped veggies here, spices there. that way, when you're cooking, it’s like a well choreographed dance.
Safety considerations are crucial, especially while dealing with hot pots. don't forget those oven mitts, or you’ll make a dangerous mess!
Step-by-step Process
Let’s break it down with some clear steps:
Sauté vegetables: heat up 1 tablespoon of olive oil in a large pot over medium heat. toss in your diced onion, garlic, bell pepper, and carrot.
Sauté until they're soft about 5 minutes .
Add spices: now, sprinkle in 2 tablespoons of chili powder , 1 teaspoon of cumin , and 1 teaspoon of smoked paprika .
Cook for another minute until fragrant. can't you just smell it already? yum!
Combine chili base: Pour in 1 can of diced tomatoes with their juices and 1 cup of vegetable broth . Bring that sucker to a simmer.
Incorporate beans: stir in your 15 oz cans of kidney and black beans , giving your chili a good stir.
Let it simmer for 20 minutes so those flavors can mingle and play nice.
Season and serve: Taste that goodness! Add salt and pepper to your liking. Serve it hot with toppings like shredded cheese or fresh cilantro.
Expert Techniques
Here’s where the pros shine. during your simmering time, consider quality checkpoints. look for that bubbling surface and smell the rich aromas.
These are signs you’re on the right track! if your chili is looking a bit too thick, don’t hesitate to add a splash more broth.
Struggling with your spice levels? no worries! spice can always be adjusted after cooking. just keep a close eye, and remember to start with a small pinch.
You can always add, but you can’t take away!
Success Strategies
Avoiding common mistakes can be a lifesaver. One major pitfall? Forgetting to adjust your spices. A little pinch too much of chili powder can turn your vegetarian chili recipes into a mouth burning affair!
Always do a final taste test before serving. it’s your final shot at perfection. and if you’re camping, make that chili ahead of time! it keeps well for a couple of days in the fridge, and it just gets better as it sits.
You’ll thank yourself when you’re at the campsite, not fiddling with a million ingredients.
For storage, consider using sturdy freezer friendly containers. Chili freezes beautifully and makes for quick camping meals later on. Just heat and enjoy!
Wrapping it Up
So there you have it! with our trailblazer chili recipe, you'll have a delicious, hearty chili that’s perfect for cold weather, outdoor dining favorites, or a cozy family dinner.
Easy to make but super satisfying, it'll keep you warm during hiking adventures.
As you gear up for your next excursion, remember that this isn’t just about cooking; it's about having a meal that warms your soul and fuels your journey.
Whether you're whipping this up for a backyard gathering or taking it camping, you're now equipped with the skills to make it shine!
In the next section, let’s explore some additional information on ingredient substitutions, chili toppings ideas, and even some fun stories I’ve had while cooking outdoors!
Look into Into the World of Flavor with Trailblazer Chili
Alright, friends! let’s take a moment to talk about one of life’s simplest pleasures: a hearty chili that keeps you warm after a long hike or a chilly camping night.
We're all about that cooked chili with beans for trail adventures here! imagine cozying up around the fire with a big bowl of this magic.
It’s packed with flavor and gives you that wholesome, nutritious trail food you need when adventuring into the great outdoors.
Let’s get down to the nitty gritty!
Pro Tips & Secrets
Cooking chili is as easy as pie (or should I say, easy as chili!). Here are some of my pro tips to help you get the most out of your chili creation.
- Quick Prep: Chop those veggies before your trip. On the morning of your adventure, just toss them into your pot, and you’ll be chillin’ in no time.
- Layer Up the Flavor: Don’t be shy with your spices! A little extra cumin and smoked paprika really sends the flavor into overdrive. Trust me, your taste buds will thank you!
- Presentation Matters: We eat with our eyes first, so don’t forget about garnishing with fresh cilantro or a dollop of sour cream. It looks pretty and tastes even better!
Perfecting Your Presentation
When you dish out your southwest chili recipe , presentation can elevate the experience. It might seem small, but trust me, it makes a difference!
Plating matters: a fun way to plate chili is to place it in a big, rustic bowl. you can layer it with toppings like shredded cheese and a sprinkle of chopped green onions right on top.
Color Combinations: Think about adding some chopped red peppers or yellow corn to your chili for a pop of color. It creates a visual feast!
Storage & make-ahead
Life gets busy, and sometimes we need a quick camping meal prep option. You'll be happy to know that this chili does really well in the fridge or freezer!
Storage tips: let your chili cool completely before transferring it to a freezer friendly container . it’ll last up to 3 months in the freezer, so you can make it ahead and enjoy it later.
Reheating is easy: just pop it in the microwave or heat it on the stove when you’re ready to eat.
Add a splash of water if you've frozen it to keep it from getting too thick.
Creative Variations
I love a recipe that's versatile, and this chili is no exception! Whether you’re a meat lover or a veggie fan, you can adapt this with ease.
Spice it Up: If you’re feeling adventurous, toss in some diced jalapeños for a spicy kick. You can control those customizable spice levels to suit your taste.
Vegetarian Chili Recipes: Swap out the broth for vegetable broth and skip the meat for a fantastic vegetarian chili . Trust me, it’ll pack a flavor punch!
Complete Nutrition Guide
Eating well while enjoying the great outdoors is a must! So, here’s a quick rundown on why this chili is not just tasty, but also nutritious .
High Protein Chili: With kidney and black beans, you’re hitting your protein goals while enjoying comfort food for hikers . Perfect balance, am I right?
Dietary Considerations: It's loaded with fiber from the beans, so it’s gonna keep you fuller for longer, making it a solid option for those long treks.
Expert FAQ Solutions
Okay, so maybe you've got a few questions bubbling in your mind. Don’t worry; I’ve got some answers!
Can I use fresh beans? Yo, definitely! Just remember to soak and cook them first!
What if my chili is too thick? It happens! Just throw in a little broth or water to loosen it up, and you’re golden.
Let’s Wrap it Up!
There you have it! the ultimate guide to cooked chili with beans for trail adventures . it’s an easy chili recipe with beans that you can whip up ahead of time or on the road.
Whether you’re hitting the trails or just want a delicious meal at home, this chili hits the spot every single time.
So gather your friends, head into nature, and don’t forget to pack some of this deliciousness. After all, what's better than sharing good food and great times? Happy cooking adventures, everyone!
Cooked Chili With Beans For Trail Adventures