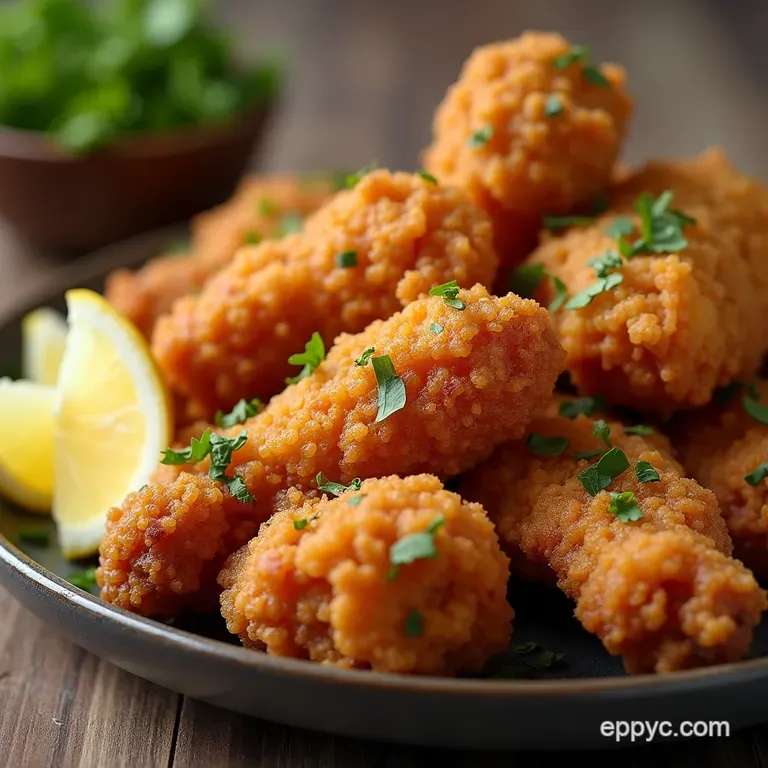
The Sunday Best Seriously Crispy Buttermilk Fried Chicken
- Unlocking Legendary Crunch: Why This Fried Chicken Recipe Reigns Supreme
- Beyond the Pale: Our Promise of Perfect Texture and Flavor
- Assembling Your Arsenal: The Buttermilk Brine & Coating Components
- Essential Tools for Flawless Frying Execution
- Phase One: The Slow Soak – Mastering the Buttermilk Infusion
- The Dredge Dance: Achieving Peak Crust Adhesion
- The Temperature Tightrope: Frying to Golden Perfection
- Troubleshooting Common Fried Chicken Pitfalls
- Elevating the Experience: Suggested Pairings and Serving Styles
- Recipe FAQs
- 📝 Recipe Card
Unlocking Legendary Crunch: Why This Fried Chicken Recipe Reigns Supreme
There are dishes, and then there are icons . Few foods command the universal adoration reserved for perfectly executed Fried Chicken . This isn't just about deep frying poultry; it’s about chemistry, patience, and technique.
Forget those flimsy, pale imitations you occasionally encounter; we are embarking on a culinary quest to achieve that deep, resounding crunch followed by meat so impossibly tender and moist it practically dissolves on the tongue.
This Fried Chicken Recipe is meticulously designed to deliver that Southern style masterpiece right in your home kitchen, proving that achieving the Best Fried Chicken Recipe is entirely within reach.
Beyond the Pale: Our Promise of Perfect Texture and Flavor
Our commitment here is twofold: achieving peak exterior crispness and guaranteeing supreme interior succulence. Many recipes falter by focusing too heavily on one aspect, resulting in dry meat beneath a tough crust or, conversely, a soggy exterior absorbing too much oil.
This method, yielding truly Juicy Fried Chicken , relies on specific preparation steps that happen long before the oil even heats up. We’ve optimized every element from the brining solution to the specific additions in our flour dredge to ensure uniformity of cook and an unmatched textural experience.
Setting the Stage for Culinary Triumph
Success in Homemade Fried Chicken begins with preparation, not frying. We are aiming for 6 to 8 generous servings, utilizing one whole chicken, expertly segmented into 10 pieces.
While the active preparation time is brisk around 25 minutes the real magic necessitates patience. You must dedicate a minimum of four hours, though we strongly advocate for an overnight soak, allowing time for the marinade to work its profound influence on the poultry fibers.
The Secret Weapon: Cultivating Deeply Marinated Flavor
To infuse deep flavor that permeates beyond the crust, we rely on a robust initial seasoning layer. This starts with the buttermilk brine. We combine four cups of full fat buttermilk with 2 tablespoons of Kosher Salt, 1 tablespoon of lightly crushed Black Peppercorns, and 1 teaspoon of Smoked Paprika.
This mixture creates a potent flavor base that penetrates the meat during its long rest.
Why Buttermilk is Non-Negotiable for Supreme Juiciness
The use of buttermilk in this context is more than just tradition; it's science. The lactic acid present in the buttermilk acts as a tenderizer, gently breaking down the proteins in the meat without making it mushy.
On top of that,, the thick viscosity of buttermilk clings tenaciously to the chicken, providing the perfect initial adhesive layer for the subsequent dry dredge. This gentle chemical interaction is the primary reason this Fried Chicken stays so incredibly moist, even after high heat cooking.
Assembling Your Arsenal: The Buttermilk Brine & Coating Components
Gathering your tools and ingredients precisely is key to moving seamlessly through the cooking process once the brine time is complete. For the coating, we are boosting the standard flour mixture.
The base requires three cups of All-Purpose Flour, but the secret ingredient for that aggressive, craggy texture is incorporating half a cup of Cornstarch. This addition helps create a lighter, shatteringly crisp shell.
To the flour and cornstarch, we introduce our secondary layer of seasoning: 2 tablespoons of Kosher Salt, 1 tablespoon of freshly ground Black Pepper, 1 tablespoon each of Garlic Powder and Onion Powder, 1 teaspoon of Cayenne Pepper for a subtle warmth, and 1 teaspoon of Dried Thyme.
Whisk this all together thoroughly in a wide, shallow dish so that every piece of chicken can be fully submerged in the dry mixture later.
Essential Tools for Flawless Frying Execution
While you can certainly execute this recipe with an adequate heavy pot, precision demands the right equipment. A heavy bottomed pot, such as a Dutch oven, is necessary to maintain heat stability. Crucially, you must possess a reliable candy or deep fry thermometer.
Guesswork is the enemy of Perfect Fried Chicken . Finally, have a sturdy wire rack set over a baking sheet ready for draining this allows air to circulate and prevents the bottom from steaming and turning soggy.
The Golden Ratio: Measuring Spices for the Ultimate Dry Dredge
The spice blend mentioned above is calibrated for maximum impact without overwhelming the natural flavor of the chicken. The balance of savory depth (garlic/onion powder) and mild heat (cayenne) is crucial. When dry dredging, ensure you are not shy; press the flour mix firmly onto the chicken.
The goal is to create a thick, textured layer that will develop those signature deep fried ridges.
Sourcing Your Poultry: Choosing the Right Cuts for Uniform Cooking
For a satisfying Fried Chicken Sandwich Recipe or a full dinner spread, utilizing various parts of the bird is recommended breasts (halved), thighs, drumsticks, and wings. When submerging these various pieces in the hot oil, remember that their cooking times will differ.
Thighs and breasts are thicker and require more careful monitoring to ensure the interior hits the safe 165° F ( 74° C) mark without scorching the exterior.
Selecting the Optimal Frying Medium: Oil Choices Explained
The correct oil choice dictates the final flavor and crispness. You require an oil with a high smoke point that remains neutral in flavor. Peanut oil is the classic choice, offering excellent stability. Vegetable shortening or a neutral vegetable oil like canola are also suitable alternatives.
You will need enough oil to achieve a depth of about two inches in your cooking vessel.
Related Recipes Worth Trying
- Best Chicken Fried Rice Recipe Restaurant Style at Home — Stop settling for soggy takeaway This Easy Chicken Fried Rice recipe guarantees perfectly separate grains infused with smoky wok hei flavour Learn how to...
- The Ultimate Creamy Marry Me Chicken Recipe Ready Fast — This easy Marry Me Chicken recipe delivers a rich sundried tomato cream sauce in under 45 minutes A foolproof weeknight winner that tastes utterly luxurious
- Easiest Crockpot Chicken Tacos Recipe for Weeknights — Need a dinner that practically cooks itself This easy crockpot chicken tacos recipe uses just a few ingredients for perfectly tender flavourful shredded...
Phase One: The Slow Soak Mastering the Buttermilk Infusion
Once your 10 chicken pieces are cut, they must meet the brine. Place them entirely into the buttermilk mixture, ensuring they are fully submerged in the salty, tangy bath. Seal the container and transfer it to the refrigerator.
This process, which ideally spans overnight, allows the salt to penetrate and the acid to tenderize the meat simultaneously. This is the foundational step for achieving that incredible Juicy Fried Chicken .
The Dredge Dance: Achieving Peak Crust Adhesion
After the long soak, retrieve the chicken. Allow the excess buttermilk to drip off naturally— do not pat the pieces dry. This remaining moisture is essential for binding the first layer of flour. Take one piece, thoroughly coat it in the seasoned flour mix, pressing hard.
Now, for the crucial step that separates good chicken from great: briefly dip the floured piece back into the residual buttermilk (think one quick dunk, 1-2 seconds max). Immediately return it to the dry flour mix and press again, ensuring you manipulate the coating to build up those craggy, rugged peaks.
Set these carefully coated pieces onto your waiting wire rack.
The Temperature Tightrope: Frying to Golden Perfection
This phase requires focus. Patience with temperature is the single most important factor in preventing greasy results, whether you are perfecting Fried Chicken Wings Recipe portions or large breasts.
Preparing Chicken Pieces for Maximum Brine Penetration
While the brine does the heavy lifting, letting the dredged pieces rest at room temperature for 20 to 30 minutes after coating is non-negotiable. This allows the moisture from the buttermilk to fully hydrate the flour coating.
If you skip this rest, the coating will inevitably slough off into the oil during frying.
Techniques for Craggy Coating: Double Dipping Strategies
As detailed previously, the double dredge flour, quick buttermilk dip, flour press is what builds the complex, multi layered crust responsible for the legendary crunch. Take your time ensuring the second coating adheres well, creating those distinctive, textured crags that capture the seasoning beautifully.
Maintaining the Perfect Oil Bath: Heat Monitoring for Consistent Results
Begin heating your oil slowly to 325° F ( 160° C) . Never allow the oil temperature to exceed 350° F ( 175° C) at the start.
Carefully lower 3 to 4 pieces of chicken into the oil using tongs, being mindful not to overcrowd the pot, as this sudden drop in temperature will result in oillogged, soggy chicken.
Fry larger pieces like thighs and breasts for 12 to 15 minutes, turning periodically until they achieve a deep, rich golden brown hue. Smaller pieces, like wings, will cook faster, requiring closer to 8 to 10 minutes.
The Resting Ritual: Ensuring Every Piece of Fried Chicken Stays Crisp
Once the internal temperature reaches 165° F ( 74° C) at the thickest point, immediately remove the chicken and place it on the waiting wire rack.
Do not place the hot chicken directly onto paper towels, as the steam trapped underneath will instantly degrade the crispness. Season immediately with a very light dusting of fine salt while the exterior is still aggressively hot.
Troubleshooting Common Fried Chicken Pitfalls
The most frequent error is oil temperature management. If your crust is burning rapidly but the interior remains raw, the oil is far too hot. Conversely, if the crust appears pale and the chicken feels heavy after cooking, the oil was too cold, and the meat absorbed excess fat.
Using that reliable thermometer and cooking in smaller batches ensures you maintain that crucial 325° F sweet spot.
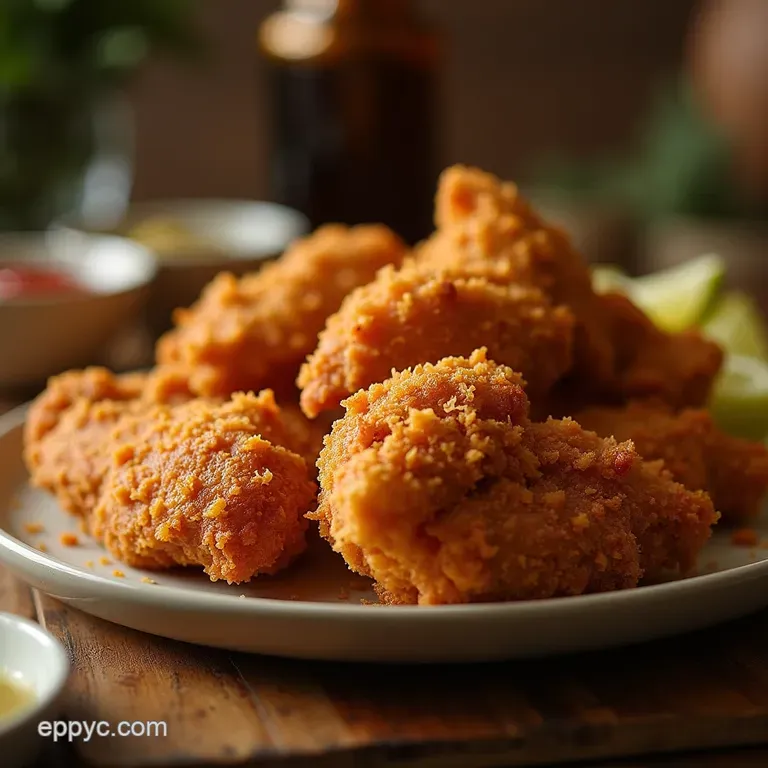
Elevating the Experience: Suggested Pairings and Serving Styles
The ultimate goal is a satisfying meal, and the right accompaniments enhance the Crispy Fried Chicken experience significantly.
Preventing Soggy Bottoms: Post Fry Moisture Management
As mentioned, the wire rack is your ally against sogginess. If you are cooking a very large batch, transfer the finished, perfectly crispy chicken pieces to a baking sheet and hold them in a very low oven around 200° F ( 95° C) until serving time.
This holds the heat without continuing to cook the meat or allowing the bottom crust to steam.
Storage Secrets: Reheating Crispy Chicken Without Losing Texture
To revive leftovers, avoid the microwave at all costs. The best method is a brief blast in a preheated 375° F ( 190° C) oven for about 8 to 10 minutes, or even better, placing the pieces in an Air Fryer Fried Chicken Recipe setting for 4 minutes to restore that original shattering crispness.
Flavor Twists: Introducing Heat or Herbs to the Classic Recipe
While the base recipe is a classic, feel free to experiment. For an intense spicy kick reminiscent of modern chicken chains, you can infuse the brine with a few dashes of your favorite hot sauce, or increase the cayenne in the dredge significantly.
Alternatively, for a more sophisticated profile, a blend of finely minced fresh sage and rosemary mixed into the final flour coat adds herbaceous depth.
Nutritional Spotlight: Understanding the Deep Fried Delight
It is important to acknowledge that this indulgence is rich. While the buttermilk marinade provides lean protein and essential tenderness, the cooking method inherently adds fat. This rich profile means it pairs best with sharp, acidic, or fresh sides think vinegary coleslaw or bright, tart pickles to balance the savory richness of the poultry itself.
Recipe FAQs
My Fried Chicken crust always falls off in the oil. What am I doing wrong?
That’s a classic kitchen nightmare, often called "shucking"! The buttermilk brine is your friend here, but you must avoid wiping the chicken dry. Make sure you are doing the crucial "double dredge," pressing the flour on firmly, and then this is vital letting the coated chicken rest for 20 30 minutes before frying.
This resting time allows the coating to hydrate and adhere properly.
What is the magic oil temperature for cooking the perfect Fried Chicken?
Temperature control is half the battle! You want to start your oil around 325°F (160°C). If the oil is too cool, the chicken soaks up grease and becomes soggy; if it's too hot, you’ll end up with burnt batter and raw meat inside. Use a thermometer and work in small batches to keep that temperature steady!
Can I make this recipe ahead of time, or how should I store leftovers?
While nobody beats freshly fried, this chicken is decent reheated. Store cooled leftovers in an airtight container in the fridge for up to three days. The best way to reheat is in a moderate oven (about 375°F/190°C) on a wire rack for 10-15 minutes until the exterior is crisp again; avoid the microwave!
If I don't have buttermilk, what's a decent substitute for the brine?
Don't fret if the fridge is bare of buttermilk; you can whip up a substitute in a jiffy! Just take regular milk (whole milk works best) and stir in about one tablespoon of white vinegar or lemon juice per cup of milk.
Let it sit for 5 to 10 minutes until it starts to look slightly thickened or curdled that acidity is what tenderises the meat beautifully.
Is this recipe suitable for cooking in an air fryer or oven instead of deep frying?
You certainly can adapt it, but be aware the texture won't be identical to traditional deep fried chicken. For the oven, you’d want to bake the coated pieces on a rack over a tray at 400°F (200°C), perhaps spraying lightly with oil for crispness.
Air fryers work better, usually requiring a slightly lower temperature than usual to ensure the inside cooks before the outside burns.
Crispy Buttermilk Fried Chicken

