Nobake Peanut Butter Dream Bars Crunchy Creamy and Utterly Addictive
Why These No-Bake Peanut Butter Dream Bars Reign Supreme
Peanut butter a proper staple, whether it's spread thickly on toast or, as we are featuring today, the glorious star of a truly cracking dessert. When the craving hits for something rich, comforting, and satisfying, there is simply no substitute for the perfect Peanut Butter Dessert .
Forget those fiddly, overly complicated creations that demand hours of oven time and intricate whisking techniques; we are honing in on something that is dead easy to assemble yet delivers maximum flavour impact.
These No-Bake Peanut Butter Dream Bars are designed to be foolproof, hitting that sublime intersection of crunchy, creamy, salty, and sweet. They are, quite frankly, dangerously moreish, and perfect for any occasion where you need a showstopper without setting your oven to temperature.
Decoding the Magic: Salty, Sweet, and Satisfying Textures
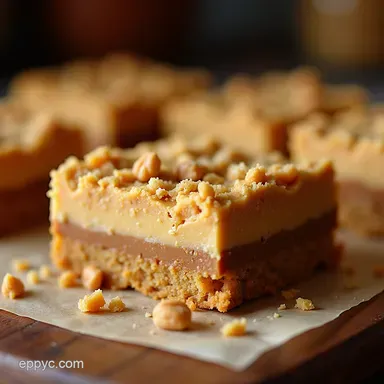
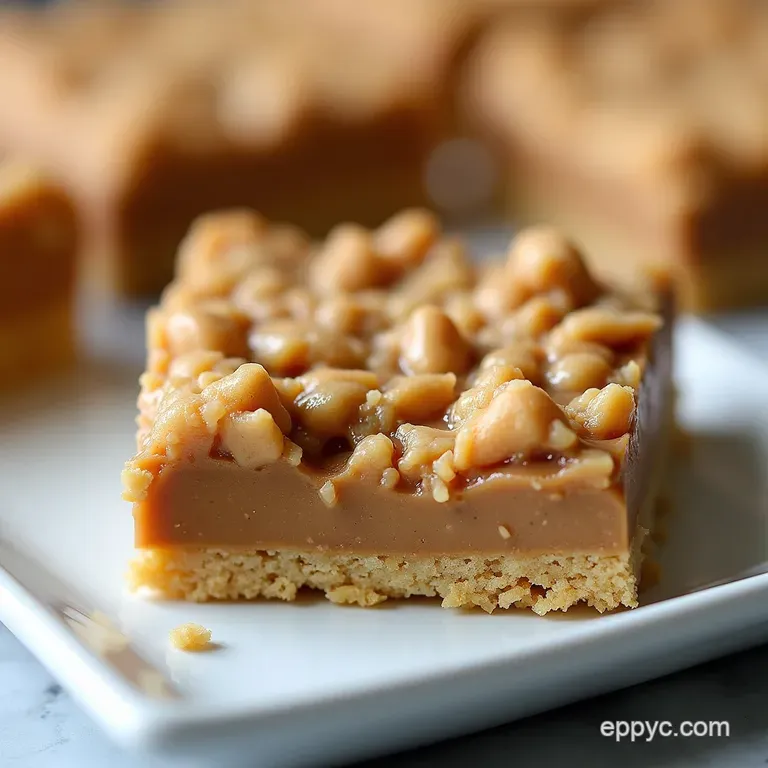
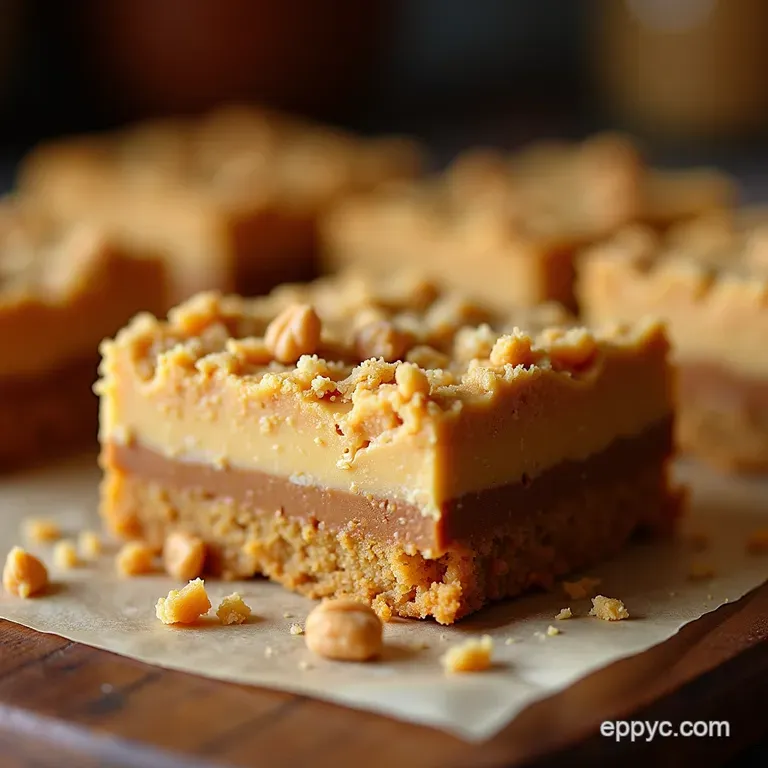
The success of this particular Peanut Butter Dessert Recipe lies entirely in its textural complexity. We are moving far beyond a simple peanut butter frosting. The foundation is a crisp, salty pretzel crust a genius move that contrasts sharply with the forthcoming layers.
This crunch gives way to a silky, cloud like filling, which is ultimately capped with a snappy, dark chocolate topping. This layering isn't accidental; it's engineered to ensure every single bite delivers that salty sweet dynamic that keeps you coming back for more.
If you are searching for Easy Peanut Butter Desserts , this layered structure elevates the experience far beyond the standard, single note treat.
Our Commitment to the Ultimate Peanut Butter Dessert Experience
My goal when developing this recipe was to create a quintessential, crowd pleasing Peanut Butter Dessert . It needs to taste intensely of that nutty goodness without being overly heavy or cloyingly sweet.
By using a touch of salt in the base and complementing it with bittersweet chocolate, we achieve balance. This depth of flavour profile is why this recipe stands out among other Peanut Butter Dessert Ideas you might find online.
It respects the core ingredients while maximizing textural contrast.
The Genius of Going Oven Free: Speed and Simplicity Guaranteed
The true brilliance of these bars lies in the 'no-bake' approach. This immediately categorizes them as one of the best Quick Peanut Butter Desserts available. The preparation time is minimal just about 25 minutes of active assembly.
The remaining time is entirely hands off chilling. This lack of baking eliminates any risk of burning or uneven cooking, making it an ideal project for novice bakers or seasoned cooks needing a fast, reliable option.
If you’re looking for Peanut Butter Desserts Easy to execute during a heatwave, this is your solution.
Setting Expectations for This Foolproof Confection
While these bars are simple, precision in the chilling process is key. Since we rely on fat (butter and peanut butter) to solidify rather than heat to set starches, proper refrigeration time is mandatory. We are aiming for 16 generous squares using an 8x8 inch pan.
You will need roughly 25 minutes of active work, followed by a minimum of four hours of chilling before you can achieve those perfect, clean slices. Patience during the final chill ensures the layers hold their integrity beautifully.
Related Recipes Worth Trying
- The Sunday Best Seriously Crispy Buttermilk Fried Chicken — Achieve truly juicy fried chicken with that perfect crunch using this classic buttermilk brine and doubledredge technique Your best homemade fried chicken...
- The Best Buttery Squash Casserole Recipe with Ritz Topping — Tired of watery bakes This easy Squash Casserole recipe features roasted squash in a creamy cheesy sauce topped with a buttery Ritz cracker crust Get the...
- StarSpangled Summer Trifle Towers Easy Red White and Blue Desserts — Looking for the perfect red white and blue desserts for 4th of July These layered parfaits feature lemon curd and fresh berriesan easy elegant makeahead treat
The Essential Components for Layered Perfection
To construct these magnificent No Bake Peanut Butter Desserts , we need three distinct sets of ingredients, each playing a vital role. We must balance the salt and crunch of the base, the smooth fat and sugar of the filling, and the bitter snap of the chocolate topcoat.
Understanding what each component does ensures you can substitute or adapt later without sacrificing the final result.
Gathering the Foundations: What You Need for the Crunchy Base
The crust provides necessary structural support and salinity. You will need about three cups of salted pretzels, crushed finely a food processor makes quick work of this, turning them into coarse crumbs.
These crumbs are bound together using half a cup of creamy peanut butter, melted unsalted butter (six tablespoons), and a quarter cup of granulated sugar. When mixed, this should resemble wet, slightly clumpy sand, perfect for packing down firmly.
Curating the Creamy Core: Selecting the Right Peanut Butter Consistency
For the luscious filling, you need a generous cup and a half of creamy peanut butter. It is crucial that this peanut butter is at room temperature; if it’s too cold, it won’t incorporate smoothly with the softened butter, resulting in a lumpy texture.
Coupled with half a cup of softened, unsalted butter and two cups of sifted powdered sugar, this creates the bulk of the creamy layer. A teaspoon of good vanilla extract enhances the flavour, and a couple of tablespoons of heavy cream will be used only if necessary to achieve that ideal, spreadable silkiness.
Mandatory Tools: Equipment Checklist Before You Start
Before diving into assembly, ensure your kitchen is ready. The most important piece of equipment is an 8x8 inch baking pan, which must be lined meticulously with parchment paper, leaving an overhang on two sides this sling is essential for lifting the entire set dessert out cleanly later.
A food processor or a sturdy zip-top bag with a rolling pin is necessary for crushing the pretzels. Finally, have your large mixing bowls, a rubber spatula for spreading, and the appropriate vessel for melting your chocolate topping ready to go.
Mastering the Assembly: step-by-step Bar Construction
The construction process follows a logical sequence, building from the bottom up. We start by creating a solid, chilled foundation, followed by the rich, creamy filling, and culminating with the glossy chocolate finish. This phased approach prevents the layers from bleeding into one another during the setting process.
Transforming Raw Ingredients into a Cohesive Peanut Butter Dessert
Once your ingredients are measured and ready, the magic of transforming them into a cohesive Peanut Butter Dessert begins. The secret here is temperature control we want the base cold, the filling smooth, and the topping liquid just before pouring.
Pressing the Perfect Foundation: Establishing the Solid Base Layer
Begin by crushing your pretzels until they resemble fine crumbs. In a bowl, thoroughly mix these crumbs with the specified amounts of peanut butter, melted butter, and granulated sugar until everything is evenly moistened. Transfer this mixture to your parchment lined 8x8 inch pan.
Use the flat bottom of a drinking glass or measuring cup to press this mixture down with significant, even force. You must compact it well so it doesn't crumble when cut. Pop this base into the refrigerator for about 15 minutes while you tackle the filling.
Whipping Up the Silky Filling: Achieving Peak Creaminess
In a large bowl, begin by beating the softened butter and the room temperature peanut butter together until they are visibly lightened and fluffy this takes about two minutes of electric beating.
Next, gradually incorporate the sifted powdered sugar, mixing initially on low speed to prevent a sugar cloud explosion in your kitchen. Once incorporated, beat in the vanilla. If the mixture seems too dense or stiff to spread easily, add heavy cream one tablespoon at a time until you achieve a consistency that flows nicely but still holds its shape.
Spread this filling evenly over your chilled base layer. Return the pan to the fridge for another 30 minutes to let the filling firm up slightly before the final layer goes on.
The Final Flourish: Applying the Chocolate Topcoat
For the topping, we are crafting a simple, glossy ganache. Combine one cup of dark or semi sweet chocolate chips with half a cup of heavy cream in a heatproof bowl. Heat the cream (either on the stovetop until just simmering or in the microwave in 30-second bursts) until very hot.
Pour the hot cream over the chocolate chips and let it sit completely untouched for five full minutes. This allows the residual heat to melt the chocolate gently. Then, whisk slowly from the centre outwards until the mixture is unified, glossy, and smooth.
Immediately pour this rich Peanut Butter Dessert Sauce Recipe component over the chilled peanut butter layer, spreading it quickly and gently to cover the entire surface. If you desire an extra flavour pop, sprinkle a few flakes of sea salt over the wet chocolate now.
The Critical Chill: Allowing the Bars to Set Properly
This is arguably the most important step for any No Bake Peanut Butter Desserts . The bars must chill undisturbed for a minimum of four hours, though overnight is even better.
This time allows the fats in the filling and the chocolate topping to solidify completely, ensuring the bars slice cleanly without squishing or separating.
Elevating Your Dream Bars: Pro Tips and Creative Twists
Once you have mastered the base recipe for these fantastic Peanut Butter Desserts Easy to manage, it’s time to experiment. A few minor tweaks can turn a great dessert into a truly unforgettable one.
Storage Wisdom: Keeping Your Peanut Butter Creation Fresh
These bars thrive in the refrigerator. Store them tightly covered in an airtight container. Because they are rich and contain a high percentage of fat, they maintain their texture beautifully when kept cool.
Troubleshooting Common No-Bake Hurdles
If your filling feels too crumbly, it means your butter or peanut butter wasn't soft enough during the beating stage. Next time, ensure they are truly room temperature. If the chocolate topping cracks excessively upon cutting, it means the ganache was too firm next time, slightly reduce the amount of chocolate or increase the cream by one tablespoon to keep the topping softer.
Next Level Variations: Swaps for Different Diets or Tastes
For those seeking Peanut Butter Dessert Recipes with modifications, consider swapping the pretzels for digestive biscuits (Graham crackers for US readers) if you prefer a smoother, sweeter crust.
If you need to adapt for a nut allergy, sunflower seed butter works surprisingly well, though you may need to slightly reduce the added cream in the filling as seed butters can sometimes be runnier than peanut butter.
Serving Suggestions: Presentation Ideas for the Showstopper
While perfect cut into squares, you can also serve these slightly softened at room temperature for an even gooier texture. Pair them with a robust, freshly brewed coffee; the bitterness cuts through the richness perfectly.
A small scattering of fresh raspberries on the plate adds a welcome acidic counterpoint to this intensely satisfying Peanut Butter Dessert .
Shelf Life Secrets: Best Practices for Refrigeration
When properly stored in an airtight container, these bars will remain delicious for up to one week in the refrigerator. They also freeze remarkably well; wrap individual slices tightly in plastic wrap, place them in a freezer safe bag, and they will last for up to two months.
Thaw them in the refrigerator for a few hours before serving.
Recipe FAQs
How do I stop the layers from mixing when I spread them in this Peanut Butter Dessert?
This is key to success, especially since we aren't baking! Make sure your pretzel base is pressed down firmly and fully chilled (at least 15 minutes). For the filling, ensure your butter is properly softened but not melted, which helps it hold its structure when you spread it over the cold base.
My chocolate topping isn't glossy; what went wrong with my Peanut Butter Dream Bars?
That usually happens if you over whisk the ganache once the cream is added it incorporates air, making it matte rather than shiny. Next time, pour the hot cream over the chips, leave it for five minutes without touching it, and then gently whisk right from the centre outwards until just combined.
Don't fuss with it too much!
Can I make this Peanut Butter Dessert ahead of time, or does it go off?
Absolutely, making these ahead is the way forward! They need a good 4 hours to set, but they actually taste better the next day once all the flavours have properly melded together. Store them tightly covered in the fridge; they keep brilliantly for up to five days.
I don't like pretzels. Can I use something else for the crunchy base in this recipe?
If pretzels aren't your bag, you can easily swap them out! Digestive biscuits (or graham crackers if you prefer the US style) work a treat and are a classic base. You’ll need roughly the same volume just blitz them the same way and proceed with the melted butter.
Is this Peanut Butter Dessert suitable for freezing if I make a huge batch?
Yes, they freeze like a dream, which is handy if you need to make them for a big party. Wrap the squares tightly in plastic wrap first, then pop them into an airtight container. They’ll keep well for about two months, just let them defrost on the counter for an hour before serving.
My filling seems too stiff to spread evenly is there a fix for this texture issue?
A stiff filling usually means the peanut butter or butter wasn't quite soft enough before beating, or you added too much powdered sugar. If it’s too stiff to spread neatly, gently warm a tablespoon of heavy cream (or milk) and beat it into the filling mixture until you achieve a smooth, spreadable consistency.
Don’t overheat it, mind!
Nobake Peanut Butter Dream Bars