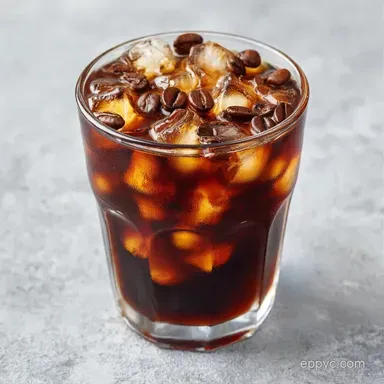
Homemade Cold Brew Coffee: Smooth and Low Acid
- Time: 10 min active + 12 to 24 hours steeping
- Flavor/Texture Hook: Smooth, chocolatey, and low acid
- Perfect for: Meal prep, busy mornings, and budget conscious caffeine lovers
Ever wonder why some coffee tastes like burnt rubber while others feel like chocolate milk? The difference usually comes down to temperature. Most of us are used to the aggressive heat of a drip machine, but that heat pulls out oils and acids that can make your stomach churn.
I remember the first time I tried making this at home. I thought it was just iced coffee, but the lack of bitterness was a shock. It felt like I was drinking a coffee concentrate that actually tasted sweet without any sugar.
This guide focuses on making a strong, clean brew using things you already have in your kitchen. We're skipping the fancy equipment and sticking to a simple jar and a filter.
Making the Best Cold Brew Coffee
Getting this right isn't about having a professional setup. It's about the ratio and the patience to let it sit. Because we aren't using heat, the coffee doesn't "cook", it just steeps.
The most important part is the grind. If you use fine powder, you'll end up with a muddy mess that's impossible to filter. You want coarse grounds that look like sea salt. This allows the water to move through the coffee without over extracting the bitter notes.
If you're on a budget, don't feel the need to buy the most expensive beans. A decent store brand medium roast works great here because the cold process smooths out the flavor anyway.
Getting the Texture Right
To hit the mark, keep these three precision checkpoints in mind: use exactly 100g of coffee, 950ml of filtered water, and a steep window of 12 to 24 hours.
If you want to save money, you can use pre ground coffee, but grinding your own makes a visible difference in clarity. Here is how the two methods stack up:
| Method | Flavor Profile | Effort | Cost |
|---|---|---|---|
| Freshly Ground | Bright, nuanced | Medium | Higher |
| Pre Ground | Consistent, muted | Low | Lower |
If you're unsure about how to start, use this decision shortcut: - Want a strong concentrate? Steep for 24 hours. - Want a lighter, ready to drink brew? Steep for 12 hours. - No paper filter? Use a clean linen tea towel.
The Basic Numbers
Before we start, let's look at why these specifics matter. This isn't about chemistry labs, it's about what happens in your jar.
- Coarse Grind
- Large particles slow down the extraction, which keeps the brew from becoming bitter.
- Filtered Water
- Removing chlorine and minerals lets the actual coffee flavor shine through.
- Room Temp Steep
- Steeping on the counter is faster and pulls more chocolatey notes than the fridge.
Since we're going for a budget friendly approach, you can swap a few things without losing the vibe. If you don't have a glass jar, a plastic pitcher works just as well.
| Original Ingredient | Substitute | Why It Works |
|---|---|---|
| Coarse Coffee (1 cup) | Medium Grind | Works, but Note: steep for 2 hours less to avoid bitterness |
| Filtered Water | Spring Water | Similar purity. Note: avoid distilled as it can taste flat |
Coffee and Water Needs
You only need two things for this. Keep it simple.
- 1 cup (100g) coarse ground coffee Why this? Coarse texture prevents sediment and bitterness
- 4 cups (950ml) filtered water Why this? Clean water ensures a crisp taste
The Simple Tool Kit
You don't need a $100 brewer. I've made this in everything from a mason jar to a cleaned out pickle container.
- Large glass jar or pitcher with a lid
- Long spoon for stirring
- Fine mesh strainer
- Cheesecloth or a paper coffee filter
Step by step Brewing

Right then, let's get into the process. It's mostly waiting, but these steps ensure you don't get a sandy texture.
- Add the coarse coffee grounds to the bottom of your glass jar.
- Slowly pour the filtered water over the grounds. Note: This prevents clumps from forming
- Stir gently with a long spoon until every particle is fully saturated.
- Seal the jar with a lid.
- Let it sit at room temperature for 12 to 24 hours.
- Pour the mixture through a fine mesh strainer until the large grounds are gone.
- Pass the liquid through a cheesecloth or a paper coffee filter. Note: This removes the "silt" for a crystal clear result
- Pour the final liquid into a clean bottle.
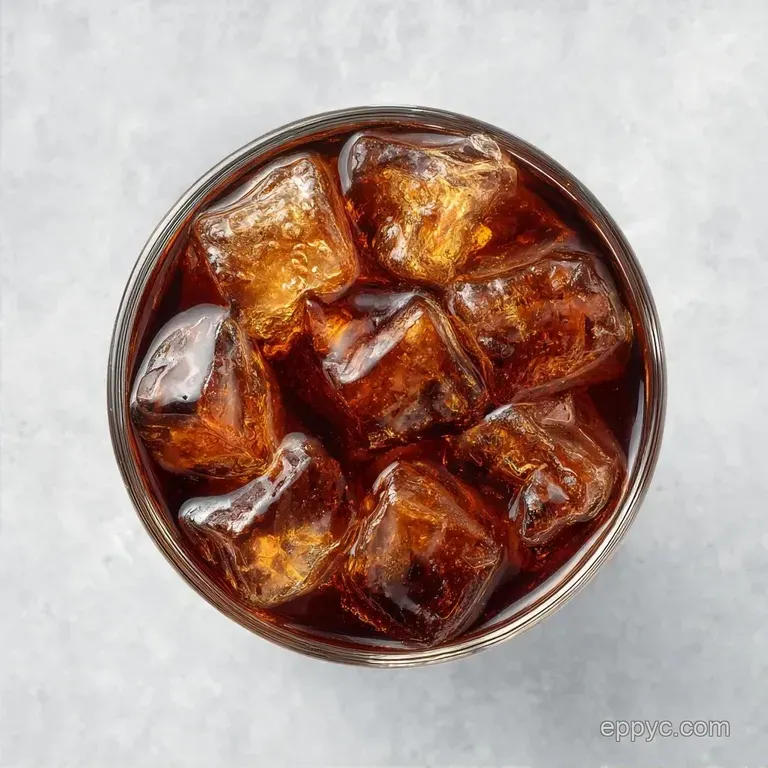
The resulting liquid is a concentrate. It's quite strong, so I usually mix it half and half with water or milk. If you enjoy other easy homemade coffee drinks, you'll find this base is the best starting point.
Fixing Common Brewing Issues
Even with a simple recipe, things can go sideways. Usually, it's just a matter of timing or grind size.
Troubleshooting Common Issues
| Issue | Solution |
|---|---|
| Why Your Brew Tastes Bitter | This happens when the coffee steeps too long or the grind is too fine. The water pulls out too many tannins, which creates that sharp, biting taste. |
| Why Your Brew Is Cloudy | Cloudiness comes from "fines" - tiny particles of coffee that slip through the first strainer. You need a second, finer filtration step to get that silky finish. |
| Why Your Brew Is Weak | If it tastes like coffee flavored water, you either didn't stir enough to saturate the grounds or you didn't steep it long enough. |
Easy Flavor Tweaks
Once you have the base, you can play around. Since this is a concentrate, flavors blend in really well.
For a creamy version, try adding a splash of oat milk and a drop of vanilla extract. If you're looking for something different, check out my iced coffee guide for more inspiration.
You can also brew this with decaf beans if you want the flavor without the jitters. For a cinnamon twist, add a cinnamon stick directly into the jar during the steeping process. It infuses the coffee with a warm, woody note.
Storage and Freezing Tips
This concentrate lasts in the fridge for about 7 to 10 days. Keep it in a sealed glass bottle to stop it from picking up "fridge smells" from your leftover onions.
If you have too much, don't let it go to waste. Pour the brew into ice cube trays and freeze them. Then, you can drop these coffee cubes into a glass of milk. As they melt, they chill the drink without watering it down.
To reheat, just pour a bit into a mug and microwave for 45 seconds. It won't be like a hot drip coffee, but it's a smooth way to start a winter morning.
Pairing Ideas
Because this coffee is low in acidity, it pairs well with rich, fatty foods.
A butter croissant is the classic choice. The flaky, salty pastry cuts through the deep chocolate notes of the brew. If you want something sweeter, a dark chocolate brownie works well. The bitterness of the cocoa mirrors the roasted flavor of the beans.
Coffee Myths
Some people think you need a special "cold brew" bean. You don't. Any coffee you enjoy hot will work, though medium to dark roasts usually taste better when cold.
Another myth is that cold brew is just "iced coffee." They're totally different. Iced coffee is brewed hot and then cooled, which keeps the acidity. Cold brew never touches heat, which is why it's so much smoother.
Recipe FAQs
How do you make cold brew coffee from home?
Combine coarse coffee grounds and filtered water in a glass jar. Stir to saturate, seal, and steep at room temperature for 12 to 24 hours before filtering through a strainer and cheesecloth.
What is the best ratio for cold brew coffee?
Use 1 cup of coarse grounds to 4 cups of filtered water. This ratio creates a concentrated brew that is versatile for serving. If you enjoyed the precision of extraction here, see how the same principle works in our Vienna Lager guide.
How do I make a black cold brew coffee drink?
Pour the mixture through a fine mesh strainer and then a paper filter. This double filtration process eliminates fine sediment to ensure a crystal clear black coffee.
Is cold brew good for diabetics?
Yes, provided it is consumed black. Without added sugars or creamers, it is a low-calorie option that does not impact blood glucose levels.
Is cold brew good for gastritis?
Yes, it is generally easier on the stomach. The cold steeping process results in lower acidity compared to traditional hot-brewed coffee, which reduces irritation.
Is it true that cold brew must be steeped in the refrigerator?
No, this is a common misconception. Steeping at room temperature for 12 to 24 hours is the preferred method for achieving a full, smooth flavor profile.
Why does my cold brew taste bitter?
Use a coarser grind or shorten the steeping time. Bitterness occurs when the water extracts too many tannins, usually because the coffee steeped for too long or the grind was too fine.
Homemade Cold Brew Coffee