Sausage Peppers Onions: Sheet Pan Roasted
- Time:10 minutes active + 28 minutes roasting = Total 43 minutes
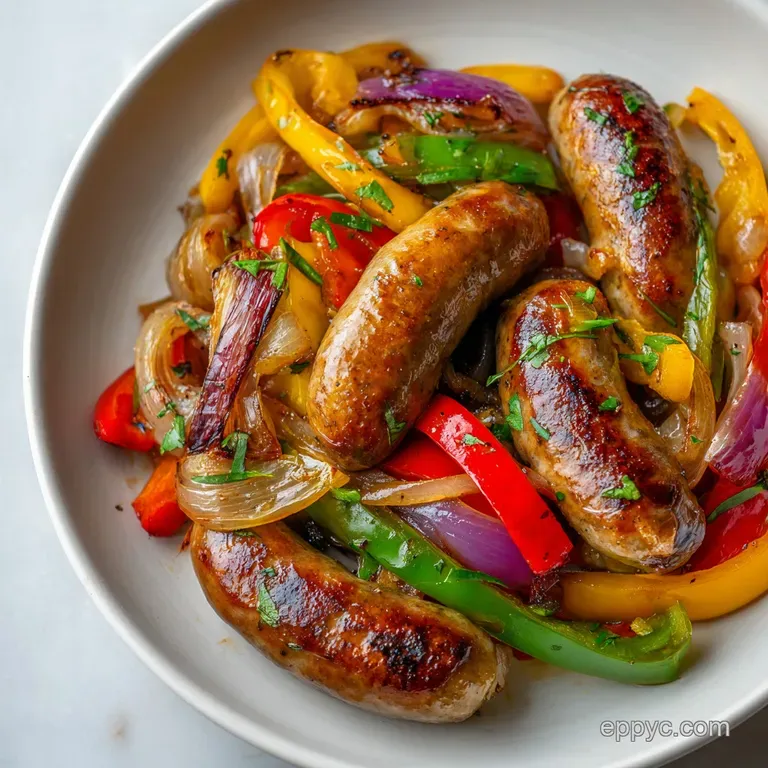
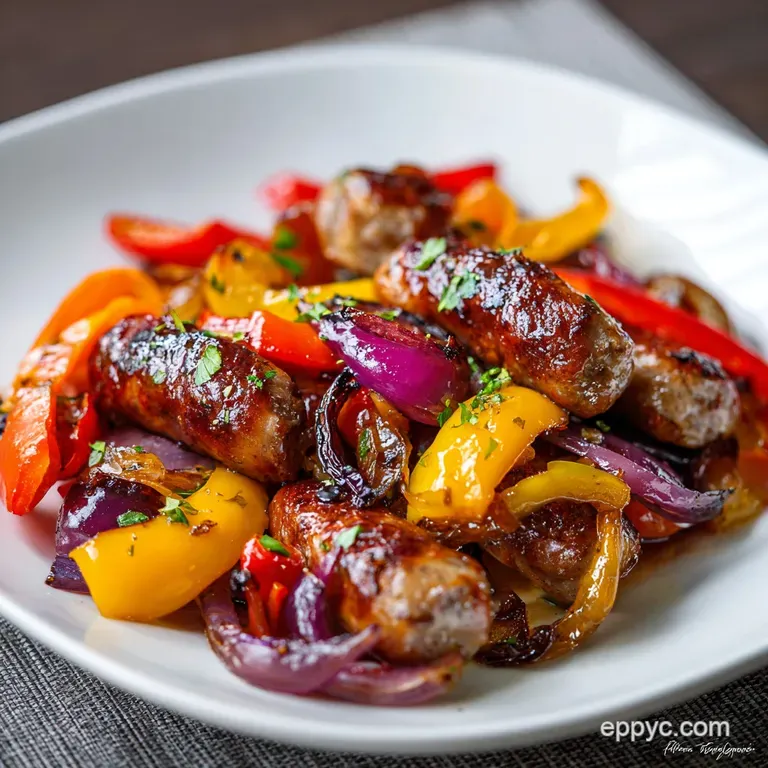
- Flavor/Texture Hook: Mahogany colored sausage skins with blistered, velvety peppers
- Perfect for: Stress free weeknight dinners and low cleanup meal prep
- Sheet Pan Sausage Peppers Onions
- The Secret to Better Texture
- The Essential Shopping List
- Tools You Actually Need
- The Step by Step Flow
- Solving Common Cooking Issues
- Troubleshooting Common Issues
- Easy Ways to Mix It
- Debunking Kitchen Myths
- Storage and Waste Tips
- Serving and Presentation Ideas
- Recipe FAQs
- 📝 Recipe Card
That specific scent is what hits you first, right? The smell of roasting bell peppers and onions mingling with the spicy, fatty aroma of Italian sausage. It's an absolute powerhouse of a scent that fills the entire house. I remember the first time I tried to make this on a stove, and it was a total disaster.
I spent forty minutes stirring a pan, and by the time the sausage was cooked, my peppers had basically turned into a soggy, pale mush. I felt like I was eating boiled vegetables with meat.
Forget everything you've heard about needing to sear your meat in a skillet to "lock in the flavor." You don't need to stand over a hot pan for an hour to get a great result. The oven does the hard work for you.
By roasting everything together at a high temperature, the vegetables caramelize and the sausage fat renders out, basting the peppers and onions in the same pan. It's a completely different experience than the stovetop approach, and honestly, once you go sheet pan, you never go back.
This recipe for Sausage Peppers Onions is all about efficiency. We're focusing on high heat and strategic spacing. I've learned that the biggest enemy of a good roast is crowding. If you pile your ingredients on top of each other, you're just steaming them.
But if you give them room to breathe, you get those beautiful charred blisters and a snap to the sausage skin that's just brilliant. Let's get into how to actually make this work every single time.
Sheet Pan Sausage Peppers Onions
To get this right, we have to look at what's actually happening in the oven. When we hit those peppers and onions with 200°C, we aren't just heating them, we're changing their structure.
- Water Evaporation
- High heat quickly drives moisture out of the cell walls of the peppers, allowing the natural sugars to concentrate and brown.
- Fat Basting
- As the sausages roast, the fat renders and drips onto the vegetables, essentially frying them in the oven.
- Maillard style Browning
- The intense heat of the broiler at the end creates a mahogany crust on the meat, which adds a deep, savory layer of flavor.
- Aromatic Infusion
- Roasting garlic with the vegetables prevents it from burning as quickly as it would in a pan, allowing its sweetness to meld with the oregano and basil.
According to research on roasting techniques at Serious Eats, the key to avoiding sogginess is ensuring that the surface area of the food has direct contact with the hot air. This is why a single layer is non negotiable.
| Method | Time | Texture | Best For |
|---|---|---|---|
| Sheet Pan | 28 mins | Charred & Plump | Easy cleanup / Large groups |
| Stovetop | 20 mins | Sautéed & Soft | Small portions / Quick sear |
| Slow Cooker | 6 hrs | Tender & Stewed | Set and forget / Soft texture |
The Secret to Better Texture
Understanding the ingredients helps you tweak the recipe without ruining the outcome. It's not just about following a list; it's about knowing what each part does.
| Ingredient | Science Role | Pro Secret |
|---|---|---|
| Italian Sausage | Fat Source | Use links with natural casings for that "snap" |
| Bell Peppers | Sugar/Acid | Mix red, yellow, and orange for a balanced sweetness |
| Olive Oil | Heat Conductor | Toss thoroughly to prevent the garlic from burning |
| Dried Oregano | Aromatic Base | Rub the dried herbs between your palms to wake up the oils |
The Essential Shopping List
Right then, let's look at what you need. I always suggest getting a mix of colored peppers. Not only does it look better on the plate, but different colors have slightly different sweetness levels.
- 1 lb Italian Sausages Why this? High fat content keeps the meat juicy during roasting
- 3 large bell peppers, sliced into strips Why this? Sliced strips provide more surface area for charring
- 1 large yellow onion, sliced into wedges Why this? Wedges hold their shape better than thin slices
- 2 tbsp olive oil Why this? High smoke point and neutral flavor
- 3 cloves garlic, minced Why this? Adds a sharp, pungent depth to the vegetables
- 1 tsp dried oregano
- 1 tsp dried basil
- 1/2 tsp red pepper flakes Why this? Cuts through the richness of the sausage fat
- 1/2 tsp salt
- 1/4 tsp black pepper
If you're out of a specific item, don't panic. You can swap things around quite easily without losing the vibe of the dish.
| Original Ingredient | Substitute | Why It Works |
|---|---|---|
| Italian Sausage | Kielbasa | Similar fat content. Note: More smoky and salty flavor |
| Bell Peppers | Mini Sweet Peppers | Similar sweetness. Note: Halve them lengthwise instead of strips |
| Yellow Onion | Red Onion | Same structure. Note: Adds a sharper, more colorful profile |
| Olive Oil | Avocado Oil | Very high smoke point. Note: Completely neutral taste |
I once tried using low-fat turkey sausages for this, and honestly, don't even bother. They dry out far too quickly in a 200°C oven. If you want a leaner option, just use a higher quality pork sausage with a bit less filler.
Tools You Actually Need
You don't need a professional kitchen for this, but a few specific tools make it easier. A large rimmed sheet pan is the MVP here. If your pan is too small, you'll be tempted to crowd the ingredients, and that's where the "soggy pepper" tragedy happens.
I also recommend using a large mixing bowl for the prep phase. Tossing the vegetables in the bowl ensures every single slice of pepper is coated in oil and herbs before it hits the pan. If you just drizzle oil over them once they're on the sheet, you'll have some burnt bits and some bland bits.
Finally, have some sturdy tongs ready. You'll need them to nestle the sausages and to move them around during the broiling phase.
The step by step Flow
Let's crack on with the cooking. This follows a simple "Prep, Roast, Sear" timeline.
- Preheat your oven to 400°F (200°C). Note: Let it fully reach temp so the roasting starts immediately
- In a large bowl, toss the sliced peppers and onions with olive oil, minced garlic, oregano, basil, red pepper flakes, salt, and pepper until thinly coated.
- Spread the seasoned vegetables in a single layer across a large rimmed sheet pan. Note: If it looks crowded, use two pans
- Nestle the whole sausages among the vegetables, leaving small gaps between each link.
- Roast in the oven for 20–25 minutes until sausages are plump and browned and peppers show charred blisters.
- Turn the broiler on high for the last 2–3 minutes, watching closely until sausage skins are mahogany colored and crisp.
- Remove from the oven and let the meat rest for 5 minutes before serving. Note: This lets the juices redistribute so they don't run out when you bite in
Chef's Note: If you want an extra layer of flavor, splash a tablespoon of balsamic vinegar over the vegetables right after they come out of the oven. The acidity cuts through the fat and makes the flavors pop.
Solving Common Cooking Issues
Even with a simple recipe, things can go sideways. Most problems with Sausage Peppers Onions come down to temperature and space.
Troubleshooting Common Issues
| Issue | Solution |
|---|---|
| Why are my peppers mushy | This almost always happens because of overcrowding. When the vegetables are too close together, they release steam that can't escape, which essentially boils the peppers in their own juice. Use a larg |
| Why is the sausage not cooked through | If you have a mountain of vegetables surrounding the sausages, the heat can't reach the meat effectively. Make sure there are gaps between the links. You can check for doneness using a meat thermomete |
| Why did the garlic burn | Garlic has very little water content and burns quickly. If you find your garlic is turning bitter and black, try leaving the cloves whole or smashing them instead of mincing them. This protects the ga |
Common Mistakes Checklist
- ✓ Did you avoid overcrowding the pan?
- ✓ Did you toss the veggies in oil before spreading them?
- ✓ Did you let the meat rest for 5 minutes?
- ✓ Did you use a rimmed pan to catch the rendered fat?
- ✓ Did you watch the broiler constantly?
Easy Ways to Mix It
This dish is incredibly versatile. Once you have the base down, you can turn this into a whole variety of meals. For a classic experience, load these into toasted hoagie rolls with a slice of provolone cheese.
If you're feeling like something more filling, I love serving this over a bed of creamy polenta or with some crusty sourdough bread to soak up all those pan juices. If you want to turn it into a full meal, this pairs brilliantly with my Italian Spaghetti Sauce served over al dente pasta.
For those who want more veg in their life, try adding chunks of potato to the pan. Just make sure to cut the potatoes into small 1 inch cubes so they cook in the same 25 minute window as the peppers. If you're in the mood for more pepper heavy dishes, you might also love my Stuffed Bell Peppers for a different take on the vegetable.
Decision Shortcut:
- If you want a sandwich → Use hoagie rolls and melted provolone.
- If you want a low carb meal → Serve over sautéed spinach or cauliflower mash.
- If you want a hearty dinner → Toss with penne pasta and a splash of pasta water.
Debunking Kitchen Myths
There are a few things people tell you about roasting meat that just aren't true.
Myth 1: Searing locks in juices. You'll hear this all the time, but it's a lie. Searing creates flavor (that's the browning), but it doesn't create a "seal." Moisture loss happens regardless of how you start the meat. The beauty of this roast is the flavor, not a fake seal.
Myth 2: You must use a skillet for "authentic" sausage and peppers. While the skillet method is traditional, it's not the only way. over High heat roasting actually mimics the char you get from a grill or a very hot pan, and it's far more consistent for the vegetables.
Myth 3: Frozen peppers work exactly the same. They don't. Frozen peppers release a massive amount of water when they thaw in the oven. If you use frozen, you'll almost certainly end up with a soggy pan. Stick to fresh for that blistered texture.
Storage and Waste Tips
If you have leftovers, you're in luck because this dish actually tastes better the next day. Store the meat and vegetables in an airtight container in the fridge for up to 4 days.
To reheat, I avoid the microwave if possible because it makes the sausages rubbery. Instead, pop them back in a skillet over medium heat or in the oven at 180°C for 10 minutes. This brings back some of that snap to the skin.
For freezing, this holds up well for about 2 months. Let it cool completely before freezing to avoid ice crystals. When you thaw it, reheat it in a pan with a tiny bit of extra olive oil to refresh the fat.
Zero Waste Tips:
- Don't throw away the onion skins! Collect them in a bag in the freezer and use them to make a deep, golden vegetable stock.
- If you have a few stray pepper strips left, chop them finely and stir them into an omelet the next morning.
- Save the rendered fat from the pan. Use it to sauté some kale or spinach for a side dish; it's packed with Italian sausage flavor.
Serving and Presentation Ideas
While this is a "rustic" meal, you can still make it look great. Instead of just dumping it on a plate, try arranging the sausages in the center and piling the colorful peppers and onions around them.
A sprinkle of fresh parsley or some shaved parmesan cheese over the top adds a pop of color and a hit of freshness that balances the roasted flavors. If you're serving it as an appetizer, slice the sausages into rounds and serve them on a platter with toothpicks and a side of spicy mustard.
Finally, don't forget the bread. Whether it's a toasted baguette or a soft roll, having something to mop up the oil and juices from the sheet pan is a must. It's the best part of the meal, and it ensures nothing goes to waste.
Recipe FAQs
Do you cook the sausage or peppers first?
No, roast them together. Toss the vegetables in oil and spices first, then nestle the sausages among them to cook simultaneously on one sheet pan.
What do you eat sausage, peppers, and onions with?
Serve them in toasted hoagie rolls or over pasta. For a heartier meal, these pair well with a rich spaghetti sauce.
Do you cook peppers and onions before meat?
No, they cook at the same time. By roasting the sausages and vegetables together at 400°F, the meat juices flavor the vegetables while everything finishes at once.
What seasoning to put on peppers and onions?
Use a blend of dried oregano, basil, red pepper flakes, salt, and pepper. Mix these with minced garlic and olive oil to coat the vegetables before roasting.
Why are my roasted peppers mushy?
You likely overcrowded the sheet pan. When vegetables are too close together, they steam instead of roast; ensure they are spread in a single layer with gaps.
How to reheat leftovers without making them rubbery?
Heat in a skillet over medium heat or in the oven at 180°C for 10 minutes. Avoid the microwave to maintain the snap of the sausage skin.
Is it true the broiler step is optional?
No, this is a common misconception. The high heat broiler for the last 2 3 minutes is essential for achieving a mahogany color and crisp skin on the sausages.
Sausage Peppers Onions

