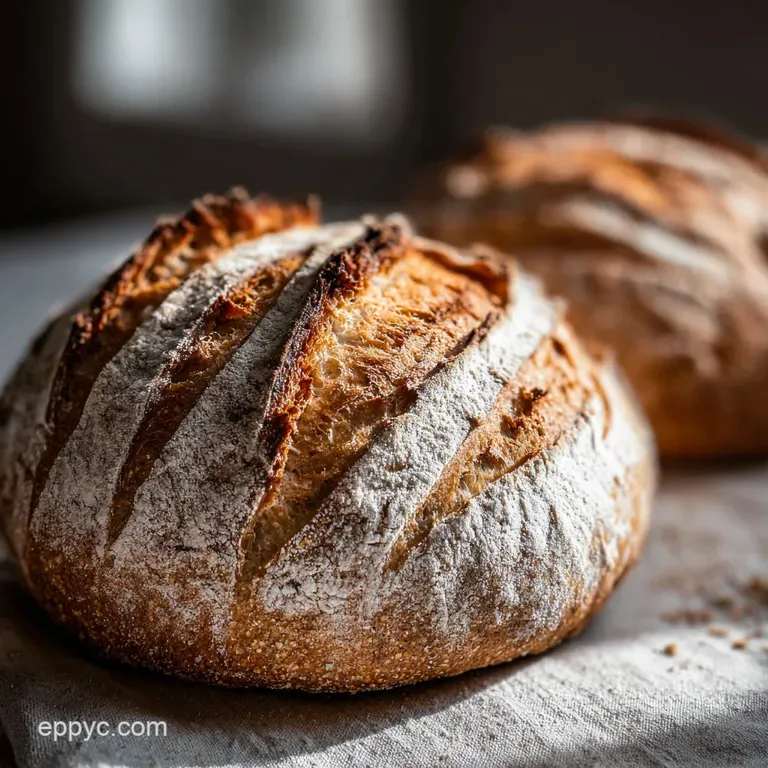
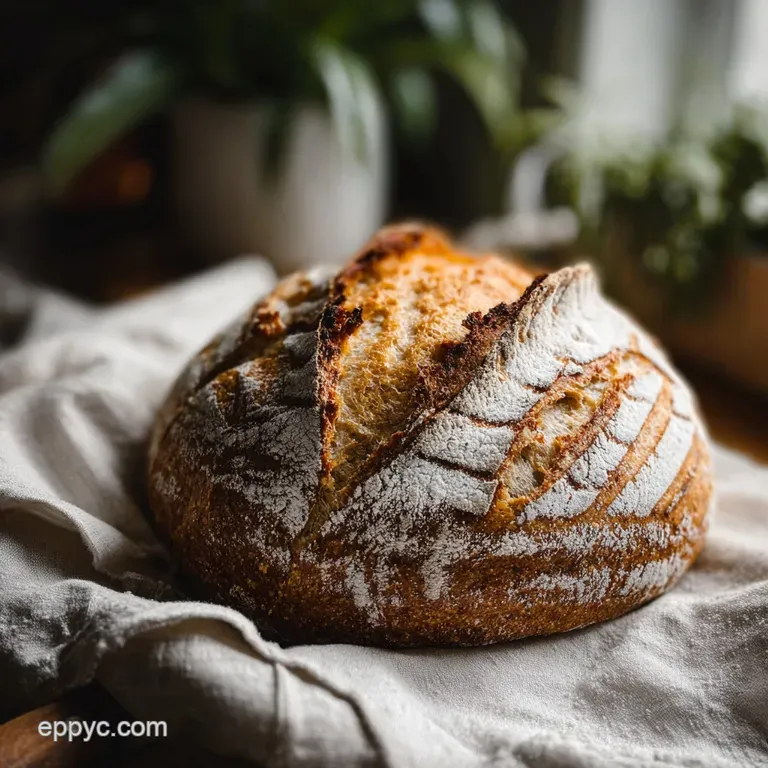
Sourdough Bread: Deep Flavor
- Time: Active 45 minutes, Passive 24 hours 45 mins, Total 25 hours 30 mins
- Flavor/Texture Hook: Shatter crisp crust with a tangy, airy center
- Perfect for: Weekend baking enthusiasts and slow living kitchen days
The Easiest Recipe for Sourdough Bread
There is a specific sound that happens about five minutes after you pull a fresh loaf out of the oven. It's a faint, rhythmic crackling, like tiny glass shards breaking underfoot. Bakers call it "the song of the bread," and the first time I heard it in my own kitchen, I practically did a victory lap around my island.
For months, my loaves looked more like sad, gummy frisbees than the artisanal masterpieces I saw on my digital feeds. I was obsessing over the wrong things, like expensive proofing baskets, while ignoring the simple physics of the dough.
The breakthrough happened when I stopped treating the process like a rigid chore and started viewing it as a partnership with my wild yeast. I started using a digital scale for everything no more "cups" of flour that vary by the day and suddenly, the results were consistent.
This pan de masa madre isn't just a side dish; it's a living thing that rewards your attention with a smell that beats any expensive candle. We're going to use minimal tools and a reliable timeline that fits into your life, even if you've got a packed schedule.
Vital Recipe Statistics
Before we get our hands messy, we need to understand the structural blueprint of what we're building. Sourdough isn't just about mixing; it's about managing time and temperature to ensure the wild yeast has the strength to lift heavy flour.
This isn't a quick bake, but the hands on work is actually quite minimal if you use technology to your advantage set those phone timers and let the biology do the heavy lifting.
The Physics of the Rise
Gas Retention: Fermentation produces carbon dioxide which gets trapped inside a reinforced gluten network, creating those iconic air pockets. This process requires a specific hydration level to allow the dough to expand without tearing the delicate protein bonds.
| Thickness | Internal Temp | Rest Time | Visual Cue |
|---|---|---|---|
| Standard Boule | 97°C | 60 minutes | Deep mahogany crust |
| Large Batard | 98°C | 90 minutes | Hollow sound when tapped |
| Small Rolls | 95°C | 20 minutes | Golden and firm |
When you're deciding how to bake this, the environment matters just as much as the ingredients. I've found that using a heavy pot is the secret to that bakery style "ear" on the crust. The steam trapped inside keeps the surface supple for longer, allowing the bread to expand fully before the heat sets the final shape.
| Method | Time | Texture | Best For |
|---|---|---|---|
| Dutch Oven | 45 minutes | Ultra crispy shatter | Traditional artisan look |
| Open Stone | 40 minutes | Thinner, softer crust | Daily sandwich bread |
| Stovetop Pot | 50 minutes | Thick, chewy base | Minimalist tool users |
If you find yourself running low on time, you can actually manipulate the temperature. Moving your dough to a warmer spot (around 26°C) can shave hours off the bulk ferment, but be careful speed often comes at the cost of that signature de masa madre tang that we all crave.
Essential Baking Components
Success starts with the quality of your grains and the health of your starter. I always tell people that your starter is like a pet; it needs regular feeding to perform its best. If your starter isn't doubling in size within a few hours of feeding, wait another day before starting this recipe pan masa madre paso a paso.
Component Analysis
| Ingredient | Science Role | Pro Secret |
|---|---|---|
| Bread Flour | Protein structure | Use flour with at least 12% protein for a tall, strong rise |
| Active Starter | Leavening agent | Use at its peak "bubbly" state for maximum lift and flavor |
| Sea Salt | Gluten regulator | Tightens the protein network and prevents the yeast from over fermenting |
For this recipe, we are using specific weights to ensure the hydration is exactly where it needs to be for a manageable yet airy loaf.
- 35g active sourdough starter: This is the engine of your bread. Why this? A small amount allows for a slow, flavor developing fermentation period.
- 435g bread flour (divided): High protein is non negotiable here. Why this? It provides the strength needed to hold large air bubbles.
- 385g water (divided): Use filtered water if your tap smells like chlorine. Why this? Chlorine can inhibit the natural yeast and slow down your rise.
- 100g whole wheat flour: This adds a nuttier dimension. Why this? Whole grains provide more nutrients for the yeast to feast on.
- 10g fine sea salt: Don't skip or reduce this! Why this? Salt controls the rate of fermentation and seasons the crumb.
| Original Ingredient | Substitute | Why It Works |
|---|---|---|
| Bread Flour | All Purpose Flour | Lower protein means a softer, less airy crumb. Note: Reduce water by 20g. |
| Whole Wheat Flour | Rye Flour | Adds an intense earthy flavor and stickier dough texture. |
| Sea Salt | Kosher Salt | Similar salinity. Note: Ensure it is fine grain so it dissolves easily. |
If you are looking for a sweeter twist on a homemade loaf, you might find inspiration in my Raisin Cinnamon Bread recipe, which uses some of these same fundamental shaping techniques but with a dessert focused flavor profile.
Necessary Kitchen Equipment
You don't need a basement full of gadgets to make incredible bread. I spent years thinking I needed a professional steam injection oven, but honestly, a simple heavy pot does 90% of the work. The digital scale, however, is the one tool I will never compromise on.
Volume measurements are for cookies; weight measurements are for bread.
- Digital Scale: Essential for accuracy to the gram.
- Large Mixing Bowl: Glass or ceramic works best to see fermentation.
- Dutch Oven: A 5 quart cast iron pot (like Lodge) is the gold standard.
- Parchment Paper: Prevents sticking and makes transferring easy.
- Sharp Blade: A dedicated bread lame or a clean razor blade for scoring.
Chef's Tip: If you don't have a proofing basket (banneton), line a medium sized bowl with a clean linen kitchen towel and dust it heavily with rice flour. It works perfectly and prevents the dough from sticking as it rests.
The Complete Baking Method
This process is broken down into distinct phases. Don't let the 25 hour timeline scare you; most of that is just the dough sitting on your counter or in the fridge while you do other things.
Phase 1: Building the Levain
- Mix the levain. Combine 35g starter with 35g bread flour and 35g water. Note: This creates a fresh, energetic yeast population for the main dough.
- Let it rise. Keep in a warm spot for 4 to 6 hours until bubbly and doubled in volume.
Phase 2: Mixing and Autolyse
- Combine main ingredients. Mix 350g water with your active levain, then stir in 400g bread flour and 100g whole wheat flour.
- Rest the dough. Let the shaggy mass sit for 30 minutes until the flour is fully hydrated.
- Add salt. Sprinkle 10g salt and the remaining water over the dough and squeeze it in with your hands.
Phase 3: Strength Building
- Perform stretch and folds. Every 30 minutes, grab a corner of the dough, pull it up, and fold it over itself. Repeat 4 times.
- Bulk ferment. Let the dough sit undisturbed for 4 to 6 hours until it looks jiggly and has grown by 50%.
Phase 4: Shaping and Baking
- Shape the loaf. Gently fold the dough into a ball on a floured surface and place it in a lined bowl.
- Cold retard. Place the bowl in the fridge for 12 to 15 hours. Note: This develops the sour flavor and makes the dough easier to score.
- Bake the bread. Preheat your Dutch oven at 260°C. Score the top with a blade and bake for 20 minutes with the lid on, then 25 minutes with the lid off until the crust is dark brown and crackling.
Fixing Common Bread Errors
Even seasoned bakers have "off" days where the dough just doesn't cooperate. Usually, it comes down to temperature or timing. If your kitchen is cold, your yeast is going to move like it's stuck in molasses. If it's a humid summer day, that dough might turn into a puddle before you can even get it in the oven.
Why Your Bread is Flat
If your loaf comes out looking like a pancake, it’s usually due to under proofing or weak gluten structure. You need to ensure those stretch and folds are done firmly to build the "muscles" of the dough.
Why the Crust is Soft
A soft, leathery crust often happens if you don't let the loaf cool properly. Steam is still escaping the bread after it leaves the oven; if you cut it too early, that moisture gets trapped in the crust.
| Problem | Root Cause | Solution |
|---|---|---|
| Dense Crumb | Weak starter | Ensure starter doubles in 4 hours before mixing. |
| Burned Bottom | Direct heat | Place a baking sheet on the rack below the Dutch oven. |
| No "Ear" | Shallow scoring | Cut at a 45 degree angle about 1cm deep. |
Common Mistakes Checklist
- ✓ Using "dead" starter that hasn't been fed in days.
- ✓ Skipping the cold retard (this is where the flavor lives!).
- ✓ Using water that is too hot (anything over 35°C can kill the yeast).
- ✓ Cutting the bread while it's still warm (it will be gummy!).
- ✓ Not preheating the Dutch oven for at least 45 minutes.
Simple Ingredient Substitutions
The beauty of pan de masa madre casero facil is that once you know the basics, you can experiment. Adding seeds or changing the flour ratio can completely change the vibe of your brunch or dinner table.
Savory Mediterranean Style
Add 50g of chopped sun dried tomatoes and a teaspoon of dried oregano during the second set of stretch and folds. This creates a vibrant, aromatic loaf that pairs beautifully with olive oil.
Vegan Ingredient Options
While most sourdough is naturally vegan, some people like to add fats for a softer crumb. You can swap 20g of water for a high-quality olive oil. This will give you a velvety texture that stays fresh a bit longer on the counter.
If you find yourself with extra bread that's starting to go stale, don't toss it! This sourdough makes the most incredible base for an Oven Baked French recipe because the sturdy crumb can soak up the custard without falling apart.
Storage and Reheating Tips
Storing sourdough is an art in itself. Because there are no preservatives, it will dry out faster than store-bought loaves, but the natural acidity of the de masa madre helps it resist mold for quite a while.
- Countertop: Store cut side down on a wooden cutting board for 24 hours. For longer, use a linen bag or a brown paper bag. Avoid plastic, which turns the crust rubbery.
- Freezing: This bread freezes beautifully. Slice the loaf completely, then freeze the slices in a freezer safe bag. You can pop a frozen slice directly into the toaster for a "fresh" taste anytime.
- Zero Waste: Save your "discard" from feeding your starter! You can add it to pancake batter or cracker recipes. If you have stale crusts, pulse them in a blender for the best sourdough breadcrumbs you've ever had.
Ideal Flavor Pairings
A thick slice of sourdough bread is a canvas for flavor. If I'm keeping it simple, I go for salted cultured butter and a drizzle of local honey. The contrast between the salty butter, sweet honey, and tangy bread is absolute perfection.
For a more substantial meal, use this bread for an open faced avocado toast topped with a poached egg and red pepper flakes. The structural integrity of the crust ensures it won't collapse under the weight of the toppings. If you're hosting a dinner party, serve it alongside a hearty stew or a charcuterie board.
There are many pan de masa madre beneficios, but the best one is simply how it brings people together around the table.
To Ensure Maximum Flavor Development
The cold fermentation in the fridge is the most important step for taste. This is when the lactic acid bacteria work their magic, creating that complex tang that you just can't get from commercial yeast. It also breaks down the gluten further, which many people find easier on their digestion.
Bakery Grade Secret
If you want that ultra shiny, blistered crust, spray the top of your loaf with a fine mist of water right before you close the Dutch oven lid. The extra moisture gelatinizes the starches on the surface, creating those tiny, beautiful bubbles known as "micro blistering." Trust me, it looks like it came straight from a high end San Francisco bakery.

Sourdough Bread FAQs
Is sourdough bread healthy?
Yes, it can be. Sourdough's long fermentation process can break down gluten and phytic acid, making it easier to digest and its nutrients more bioavailable. This can lead to a lower glycemic index compared to conventional bread.
What is sourdough bread called in the US?
It's called sourdough bread. While regional names might exist, "sourdough" is the universally understood term in the United States for bread made with a wild yeast starter.
What is the difference between sourdough bread and regular bread?
Sourdough uses a starter, regular bread uses commercial yeast. Sourdough's leavening comes from a fermented culture of wild yeast and bacteria, resulting in a distinct tangy flavor and chewy texture. Regular bread relies on cultivated baker's yeast for a quicker rise and milder taste.
What are the benefits of sourdough bread?
Improved digestibility and nutrient absorption. The fermentation in sourdough breaks down complex carbohydrates and anti nutrients, making it potentially easier on the stomach and increasing the availability of minerals like iron and zinc. This can also lead to a more stable blood sugar response.
Can I use all-purpose flour instead of bread flour in sourdough?
Yes, but it will change the texture. Using all-purpose flour, which has less protein, will result in a softer crumb and a less open interior structure compared to bread flour. You might also need to adjust the hydration slightly, potentially reducing the water by about 20g to avoid a sticky dough.
How do I get a really crispy sourdough crust?
Bake in a preheated Dutch oven and use steam. The trapped steam during the initial baking phase in a Dutch oven allows the dough to expand fully before setting the crust. For an extra boost, you can spray the top of the loaf with water just before closing the lid for a super shiny, blistered crust.
What is the best way to store sourdough bread?
At room temperature, cut-side down, or freeze slices. For short term storage, keep it on a cutting board cut-side down for up to 24 hours; for longer, use a linen or paper bag. Avoid plastic wrap as it makes the crust soggy.
Freezing individual slices allows you to toast them directly from frozen for a fresh taste.
Sourdough Bread

Ingredients:
Instructions:
Nutrition Facts:
| Calories | 165 calories |
|---|---|
| Protein | 6 g |
| Fat | 0.8 g |
| Carbs | 34 g |
| Fiber | 2 g |
| Sugar | 0.2 g |
| Sodium | 325 mg |
