Whipped Coffee: Fluffy 3-Ingredient Dalgona
- Time: 5 min active + 1 min prep
- Flavor/Texture Hook: Stiff, golden mahogany peaks
- Perfect for: A show stopping afternoon treat
I once spent ten minutes whisking by hand only to end up with a thin, brown puddle that sank immediately into the milk. It was a total letdown. I wanted that striking contrast of colors, but I just had a sad, muddy latte.
The issue was the temperature of my water and the speed of my whisk. If the coffee doesn't dissolve instantly, the bubbles can't hold. I realized that the artistry of the drink depends entirely on the stability of the foam.
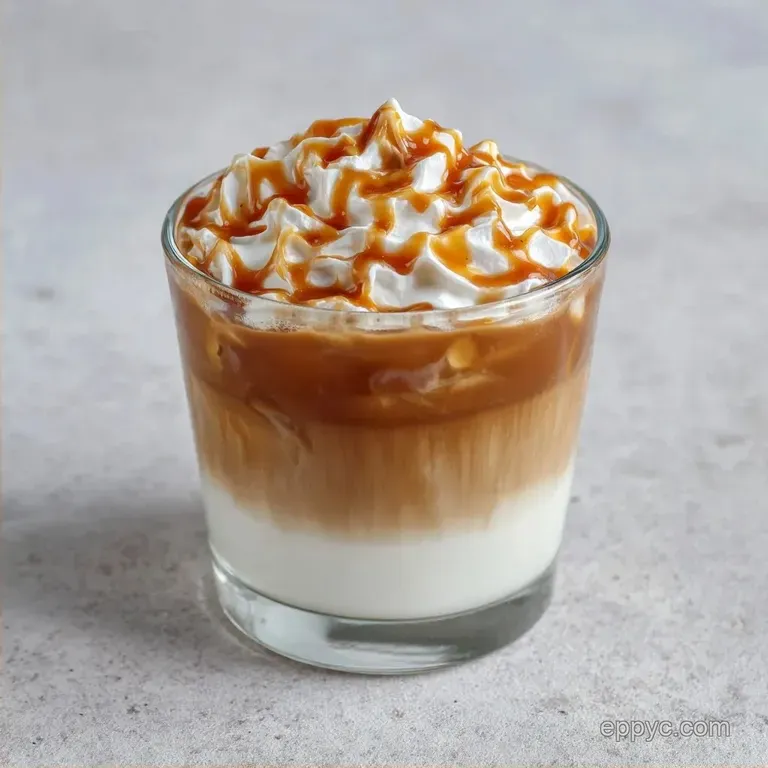
Now, I treat this drink like a piece of pastry art. When you get the ratio right, you get a beautiful, stiff peak that feels like a cloud. This Whipped Coffee is all about the joy of the visual contrast between the stark white milk and the golden foam.
Making Thick Whipped Coffee That Stays Up
The trick to a stable foam is the interaction between the coffee oils and the sugar. When you beat them together, you're essentially creating a meringue without the eggs.
Sugar Stability: The sugar acts as a stabilizer, holding the air bubbles in place so they don't pop. Heat Solubility: Boiling water ensures the coffee granules dissolve completely, which lets the proteins trap air more efficiently.
The science is simple. Beating the mixture incorporates air, and the sugar creates a thick syrup that walls off those air pockets.
| Method | Time | Texture | Best For |
|---|---|---|---|
| Hand Whisk | 15 mins | Soft peaks | A quiet morning workout |
| Electric Mixer | 2 mins | Stiff peaks | Show stopping results |
| Milk Frother | 3 mins | Medium foam | Quick weekday drinks |
The Foam Texture Logic
To get that specific look, you need to understand how the ingredients behave. It isn't just about mixing, it's about aeration.
| Ingredient | What It Does | Best Swap |
|---|---|---|
| Instant Coffee | Provides the structure and caffeine | Freeze dried coffee (stronger flavor) |
| Granulated Sugar | Stabilizes the air bubbles | Brown sugar (adds a molasses note) |
| Boiling Water | Dissolves granules for a smooth base | Hot milk (creates a creamier foam) |
Essential Ingredient Guide
You only need a few items, but the quality of the coffee makes a huge difference. I prefer a strong, dark roast for the best color balance.
- 2 tbsp (10g) instant coffee granules Why this? Necessary for the foam structure
- 2 tbsp (25g) granulated sugar Why this? Keeps the foam from collapsing
- 2 tbsp (30ml) boiling water Why this? Ensures instant dissolution
- 2 cups (480ml) milk Why this? Provides a clean, white base
- Ice cubes Why this? Keeps the drink chilled and crisp
- 1 tsp (5ml) vanilla extract Why this? Rounds out the bitterness
If you're out of granulated sugar, you can use honey, but the foam will be slightly softer. For the milk, oat milk works surprisingly well because of its natural creaminess.
Needed Kitchen Tools
You can do this by hand, but I highly recommend an electric hand mixer. It saves your arms and gives you those professional, stiff peaks in a fraction of the time.
- Electric hand mixer (like a KitchenAid)
- Medium mixing bowl
- Two tall glasses
- Measuring spoons
- A sturdy spoon for swirling
Step-by-step Guide

The goal here is a golden mahogany color that looks like a cloud sitting on a lake of milk.
- Combine 10g instant coffee, 25g sugar, and 30ml boiling water in your mixing bowl.
- Stir briefly with a spoon. Note: Make sure all granules are saturated before whipping.
- Use the electric mixer on medium high speed.
- Whip the mixture for about 2 minutes until the color shifts from dark brown to a pale, golden mahogany.
- Stop once you see stiff peaks that do not slump when you lift the beater.
- Fill two glasses with ice cubes.
- Pour in 480ml milk, leaving about two inches of space at the top.
- Add 5ml vanilla extract to the milk and stir.
- Dollop the Whipped Coffee foam carefully on top of the milk.
- Use a spoon to swirl the foam slightly. Note: This creates a marbled effect for better artistry.
Solving Foam Failures
If your foam isn't behaving, it usually comes down to the ratio or the tool. I've seen people try to use brewed coffee, which never works because it lacks the concentrated solids of instant coffee.
Troubleshooting Common Issues
| Issue | Solution |
|---|---|
| Coffee not getting fluffy | This usually happens if the water wasn't hot enough or if you're using too much water. The mixture needs to be a thick paste to hold air. If it's too liquid, the bubbles just float to the top and pop. |
| Why is the foam too runny | You might have under whipped it. Keep going until the color lightens significantly. The change from dark brown to golden is your visual cue that the structure is set. |
| How to reduce the bitterness | Adding a pinch of salt or a drop of vanilla to the milk base helps balance the intensity of the instant coffee. |
Tasty Flavor Variations
Once you have the base down, you can play with the colors. For a show stopping look, try adding a dusting of cocoa powder on top for a dark brown accent against the gold.
For a rich mocha experience, stir a teaspoon of cocoa powder into the coffee mixture before whipping. It turns the foam a deeper chocolate hue. If you want a dairy-free alternative, coconut milk is a great choice. It adds a tropical note that pairs well with the coffee.
If you're in the mood for something baked to go with your drink, try my homemade orange cake recipe. The citrus brightness cuts through the richness of the coffee foam beautifully.
| Original Ingredient | Substitute | Why It Works |
|---|---|---|
| Granulated Sugar | Maple Syrup | Similar sweetness. Note: Foam is less stable |
| Dairy Milk | Almond Milk | Lighter flavor. Note: Thinner consistency |
| Vanilla Extract | Cinnamon | Adds warmth. Note: Best for autumn vibes |
Storing Your Foam
You can actually make the foam in a big batch. Keep it in an airtight container in the fridge for up to 3 days. When you're ready to serve, just scoop it onto fresh milk.
To avoid waste, if you have leftover foam, don't toss it. It makes a great topping for a bowl of vanilla ice cream or a slice of cake with silky crumb. It basically becomes a coffee flavored whipped cream.
Best Pairing Ideas
This drink is quite sweet and intense, so it pairs best with something salty or slightly tart. I love serving it with a side of almond biscotti or a slice of lemon loaf.
The joy of this drink is in the presentation. I suggest using clear glassware so you can see the layers. Add a sprig of mint or a single coffee bean on top of the foam for a professional touch.
Decision Shortcut:
- If you want a stronger caffeine hit, use 15g of coffee instead of 10g.
- If you want a softer, more pourable drink, whisk by hand for 5 minutes.
- If you want a colder experience, freeze some of the milk into cubes first.
Right then, you're all set. This Whipped Coffee is such a fun way to bring some artistry into your morning. It turns a simple caffeine fix into a little moment of joy. Just remember to keep that water boiling and your mixer humming, and you'll have a show stopping drink every time.
Trust me, once you see those golden peaks, you'll never go back to a regular latte.
Recipe FAQs
How to make simple whipped coffee?
Combine instant coffee, sugar, and boiling water. Whip on medium high speed until the mixture turns pale golden mahogany and forms stiff peaks, then dollop over ice and milk.
What makes whipped coffee so fluffy?
The proteins in instant coffee and the sugar. These ingredients trap air bubbles during whipping to create a stable, meringue like structure.
Can I make whipped coffee with regular brewed coffee?
No, this is a common misconception. Brewed coffee lacks the concentrated stabilizers found in instant granules necessary to maintain stiff peaks.
How to make Dalgona coffee without a blender?
Whisk the coffee, sugar, and water vigorously by hand. Use a handheld whisk and beat continuously for several minutes until the foam thickens and lightens in color.
Why is my coffee foam too runny?
You likely under whipped the mixture. Keep whipping until the color shifts from dark brown to golden to ensure the structure is fully set.
How to reduce the bitterness of the foam?
Add a drop of vanilla extract to the milk. This subtle addition balances the intense coffee flavor without compromising the foam's stability.
Can I store the foam for later?
Yes, keep it in an airtight container. It stays fresh in the fridge for 3 days and pairs wonderfully with a slice of vanilla cake.
Whipped Coffee Recipe