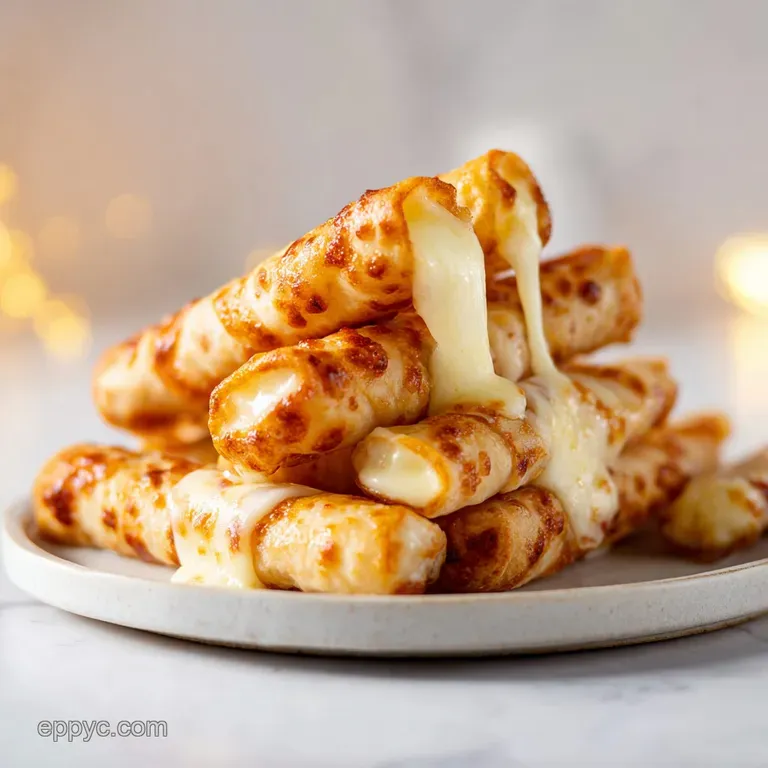
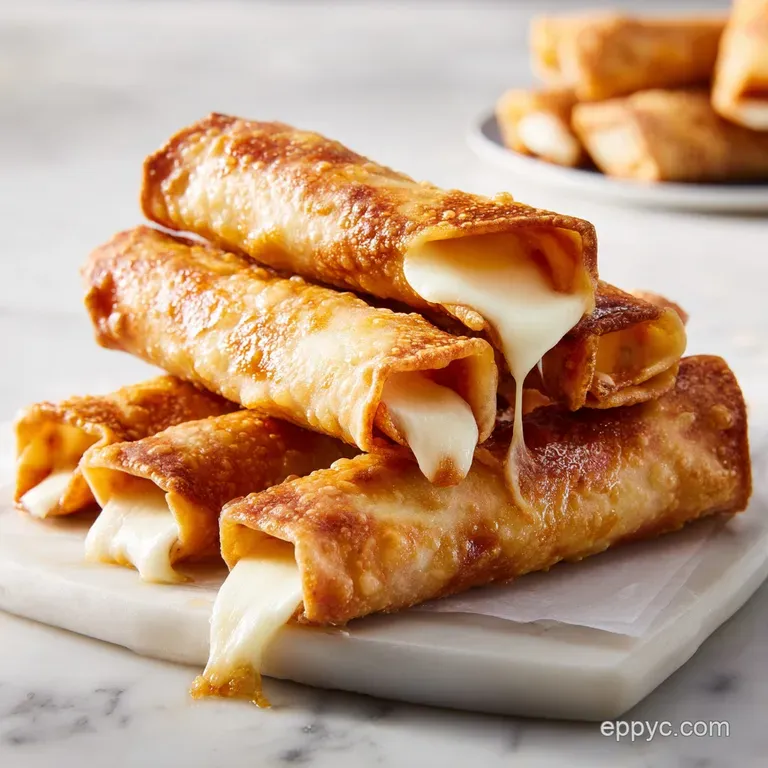
Cheesy Taco Sticks: Garlic Butter Crunch
- Time:10 minutes active + 15 minutes cooking = Total 25 minutes
- Flavor/Texture Hook: Garlic butter crunch with a velvety cheese pull
- Perfect for: Game day appetizers, quick movie snacks, or an easy party win
Cheesy Taco Sticks
The first thing that hits you isn't even the taste, it's that heavy, garlic butter aroma that fills the whole kitchen the second they hit the oven. I remember making these for a chaotic Sunday football game a few years back.
My living room was packed, the energy was high, and I needed something that people could grab with one hand without needing a plate or a fork. I watched my friends practically hover over the oven door, waiting for that exact moment when the dough turned a deep, mahogany brown.
When I pulled the tray out, the sizzle was still audible. I served them on a big wooden board, and the silence that fell over the room as the first person pulled one apart, revealing a long, stretchy string of mozzarella and seasoned beef, was pure gold.
It's one of those rare recipes that feels like a cheat code because it uses a few shortcuts to create something that tastes like it took hours of effort.
You can expect a snack that is intensely savory and satisfying. These Cheesy Taco Sticks aren't just a fancy taco, they're a concentrated burst of flavor wrapped in a flaky shell. Whether you're feeding a crowd of hungry teenagers or just treating yourself to a cozy night in, this recipe delivers a high impact result with very little stress.
Secrets to the Crunch
I spent way too much time wondering why some homemade sticks end up soggy on the bottom while others stay crisp. It turns out, it's all about managing the moisture and the heat.
The Moisture Barrier: Simmering the beef until the liquid becomes a thick glaze prevents the dough from getting steamed from the inside out. If the filling is too wet, the dough never crisps, it just wilts.
The Butter Seal: Brushing the garlic butter on the outside creates a fat barrier that helps the dough brown faster. This means the outside reaches that shatter crisp texture before the cheese inside can over expand and burst through the seams.
Thermal Shock: Using a high oven temperature (400°F) ensures the dough sets quickly. This locks the filling in place and creates those distinct, flaky layers that make crescent rolls so satisfying.
| Feature | Crescent Roll Shortcut | Fresh Homemade Dough |
|---|---|---|
| Prep Time | 2 minutes | 2-3 hours (including rise) |
| Texture | Flaky, buttery, light | Chewy, bread like, dense |
| Effort | Low (unroll and go) | High (kneading and proofing) |
| Best For | Quick appetizers | Gourmet dinner party |
Component Analysis
Right then, let's look at what's actually happening inside each ingredient. Not every cheese or meat works here, and there's a reason for that.
| Ingredient | Science Role | Pro Secret |
|---|---|---|
| Lean Ground Beef | Protein Base | Less fat means fewer "grease leaks" in the dough |
| String Cheese | Structural Core | Maintains a cylindrical shape better than shredded |
| Crescent Dough | Enclosure | High butter content creates the desired flaky layers |
| Garlic Butter | Browning Agent | Adds a savory aromatic layer and promotes Maillard browning |
The Building Blocks
When you're gathering your things, don't feel like you need to overcomplicate this. Keep it simple, but be specific with the ingredients to ensure the texture stays right.
- 1 lb lean ground beef Why this? Prevents excess oil from making the dough soggy
- 1 packet (30g) taco seasoning Why this? Provides a consistent salt and spice balance
- 1/3 cup water Why this? Hydrates the seasoning into a thick paste
- 1 can (8 oz) refrigerated crescent roll dough Why this? Fast, reliable flakiness
- 8 sticks mozzarella string cheese Why this? The "pull" factor and easy rolling
- 2 tbsp melted butter Why this? For that golden, bakery style finish
- 1/2 tsp garlic powder Why this? Deepens the savory profile of the butter
If you're looking for a swap, coconut milk is great for some dishes, but here we need fats that hold up to heat. For the beef, you can use ground turkey, though it's leaner and can be a bit drier, so maybe add a teaspoon of olive oil. If you can't find string cheese, thick mozzarella batons work, but you'll lose some of that structured shape. According to USDA FoodData, lean ground beef provides the essential protein without the heavy saturated fats that can compromise the crispiness of the wrap.
Step-by-step Assembly
Let's crack on with the actual cooking. I like to think of this in three phases: the base, the wrap, and the finish.
Phase 1: Searing the Savory Base
- Brown the lean ground beef in a skillet over medium high heat until no pink remains. Note: Drain any excess fat to keep the sticks from leaking.
- Stir in the taco seasoning and water.
- Simmer the mixture until the liquid has reduced to a thick glaze. Note: If it's too runny, your dough will tear.
Phase 2: Assembling the Taco Sticks
- Unroll the crescent dough and separate it into the pre cut triangles.
- Place a tablespoon of the seasoned beef mixture at the wide end of each triangle.
- Lay one mozzarella string cheese stick parallel to the beef.
- Fold the sides in and roll tightly toward the point, pinching the seams shut. Note: Ensure the cheese is fully encased so it doesn't escape.
Phase 3: Achieving the Golden Bake
- Whisk your melted butter and garlic powder together in a small bowl.
- Brush the garlic butter generously over the top of each stick.
- Bake at 400°F (200°C) for 12-15 minutes until mahogany colored. Alternatively, air fry at 375°F (190°C) for 8-10 minutes, flipping halfway through.
Chef's Note: If you're using an air fryer, don't crowd the basket. Give them space so the air can circulate, or you'll end up with pale spots on the sides.
Fixing Common Issues
Even the best of us have those moments where the cheese decides to make a break for it. Most of the time, it's a simple fix.
Troubleshooting Common Issues
| Issue | Solution |
|---|---|
| Why Your Cheese Leaked Out | This usually happens because the seams weren't pinched tight enough or the beef was too wet, which steamed the dough and created holes. Make sure you press the edges firmly with your fingers. |
| Why Is the Bottom Soggy | If you put the sticks on a cold baking sheet or didn't drain the beef fat, the bottom will steam instead of fry. I recommend using parchment paper or a silicone mat to help the heat distribute. |
| Why Did the Dough Tear | Overfilling is the main culprit here. While it's tempting to pile on the beef, too much pressure will rip the crescent dough. Stick to one tablespoon of filling. |
Common Mistakes Checklist:
- ✓ Did you drain the beef fat before adding seasoning?
- ✓ Is the filling a thick glaze rather than a soup?
- ✓ Are the seams pinched completely shut?
- ✓ Did you brush the butter on before baking?
- ✓ Is your oven fully preheated to 400°F?
Managing the Batch
If you're making these for a huge party, you can't just multiply everything blindly. Some things don't scale linearly.
Scaling Down: If you only need 4 sticks, halve the beef and seasoning. Since you can't easily halve a crescent roll can, just use the remaining dough for some quick garlic knots. Reduce the bake time by about 2 minutes, as a smaller batch heats up faster.
Scaling Up: For 24 or 32 sticks, work in batches. Do not overcrowd your baking sheet, or the sticks will steam each other and lose their crunch. Increase the taco seasoning and salt to about 1.5x instead of 2x - sometimes the spices can become overwhelming when scaled up.
If you're baking two trays at once, lower the temp to 375°F (190°C) and rotate the pans halfway through to ensure an even mahogany finish.
The Decision Shortcut: - If you want a faster result, use the air fryer. - If you want a more uniform, bakery style look, use the oven. - If you're prepping for a school lunch, bake them fully, cool, and reheat in a toaster oven.
Kitchen Myths
There are a few things people say about "meat in-dough" recipes that just aren't true. Let's set the record straight.
The "Seal In" Myth: Some believe searing the beef "seals in the juices." In reality, searing is about flavor - the browning creates a rich taste. The juices leave the meat regardless, but we want the beef to be a concentrated glaze for these Cheesy Taco Sticks so the dough stays crisp.
The "Cold Dough" Myth: You might hear that you should let the dough warm up to room temperature. Actually, for crescent rolls, keeping them cool helps the butter stay solid until it hits the oven, which is what creates those distinct, flaky layers.
Storage and Scraps
Don't let the leftovers go to waste, and don't just throw them in a plastic bag where they'll get soggy.
Storage: Keep these in an airtight container in the fridge for up to 3 days. To get that shatter crisp texture back, avoid the microwave. Instead, pop them back in the oven at 350°F (175°C) for 5 minutes.
Freezing: You can freeze these before or after baking. If freezing unbaked, flash freeze them on a tray for 2 hours before moving them to a bag. This prevents them from sticking together.
Bake from frozen at 375°F (190°C) for an extra 5 minutes.
Zero Waste: If you have leftover taco beef, mix it into some scrambled eggs for breakfast or use it as a base for a quick taco salad. If you have a bit of crescent dough left over, roll it into small balls, brush with the garlic butter, and bake them as mini rolls. For a really hearty side, you could serve these alongside some Twice Baked Potatoes for a full comfort food feast.
Plating Your Snacks
Presentation is everything when you're trying to impress people at a party. These are rustic, but you can make them look high end with a few tweaks.
I love serving these on a dark slate board or a wooden platter. It makes the mahogany color of the crust pop. Arrange them in a pyramid shape to give the plate some height. Since these are quite rich, you need something acidic to cut through the fat.
Pair them with a side of zesty salsa, sour cream, or a creamy Rotel Dip recipe for a classic Mexican inspired spread. If you want to go all out, add a few slices of fresh avocado and a sprinkle of chopped cilantro over the top for a burst of color.
If you're looking for something even more indulgent to serve alongside, a Cheddar Bacon Dip works surprisingly well, though it's a lot of cheese! Just keep it simple, keep the heat high, and enjoy the process of rolling these homemade Cheesy Taco Sticks. Trust me, once you see that first cheese pull, you'll never go back to regular tacos for party night.
Recipe FAQs
Why is the cheese leaking out of my taco sticks?
Pinch the seams tighter. This usually happens when the edges aren't sealed firmly or the beef mixture is too wet, which steams holes into the dough.
Why are the bottoms of the sticks soggy?
Drain the beef fat thoroughly. Soggy bottoms occur when excess grease or a cold baking sheet causes the dough to steam instead of crisp.
How to cook these in an air fryer?
Air fry at 375°F (190°C) for 8 10 minutes. Flip the sticks halfway through to ensure an even, golden brown finish.
How to reheat leftovers without them getting soggy?
Bake at 350°F (175°C) for 5 minutes. Avoid the microwave, as the oven is the only way to restore the shatter crisp texture.
Can I freeze these for later?
Yes, both before and after baking. Flash freeze unbaked sticks on a tray for 2 hours first to prevent clumping. These pair great with another party snack for guests.
Is it true that I should use shredded cheese instead of string cheese for a better melt?
No, this is a common misconception. String cheese provides a consistent, gooey core that is easier to roll and less likely to leak than loose shreds.
How to prevent the crescent dough from tearing during assembly?
Avoid overfilling the dough. Limit the beef to one tablespoon per triangle to ensure the wrap can close securely without ripping.
Cheesy Taco Sticks

