The Proper Pubstyle Red Wine Chuck Roast Tender As You Like

The Noble Transformation of the Humble Chuck Roast
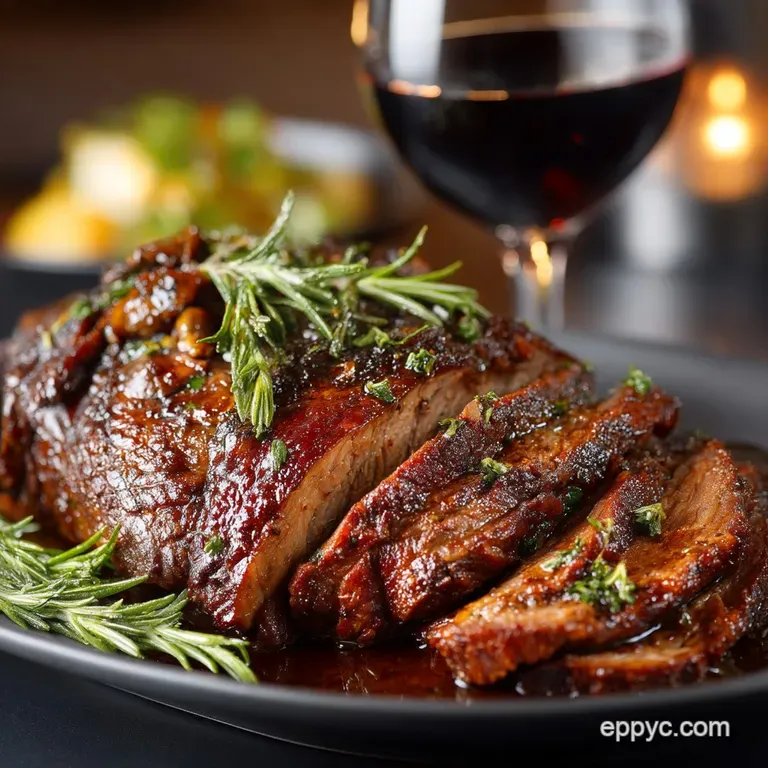
There is no culinary event quite as rewarding as serving a magnificent, slow cooked pot roast. This ultimate comfort food achieves perfection when prepared with the humble Chuck Roast , a cut often overlooked in favour of pricier options.
This recipe is an adaptation of the classic, robust English pub dinner, designed to coax maximum flavour from the meat. By committing to the low-and-slow method, we ensure that the tough connective tissue inherent in this cut breaks down completely, transforming the beef into a dish so tender it literally falls apart under the lightest touch.
Expect a cooking time of just over four hours total, resulting in eight servings of deeply savory, deeply satisfying nourishment.
What Makes This Pot Roast Truly Pub-Worthy
A "pub-worthy" pot roast isn't merely tender; it must possess an intense, layered depth of flavour and a rich, mahogany colour. We achieve this by committing to two core processes: aggressive searing and patient deglazing.
The resulting liquid base, enriched by 1.5 cups of dry red wine (Merlot or Cabernet Sauvignon are ideal) and high-quality beef stock, provides the perfect environment for flavour infusion over hours.
The medium difficulty level of this chuck roast recipe stems primarily from the need to manage heat during the initial searing and the careful reduction of the final, concentrated sauce.
The Secret to Deep, Mahogany Crust Searing
To produce the robust foundation required for this dish, the sear cannot be rushed. This step is non-negotiable, as it sets the stage for all subsequent flavours. The key is to eliminate all moisture: you must pat your 3 to 3.5 lb boneless chuck roast thoroughly dry with paper towels.
Moisture causes the beef to steam rather than sear, hindering the crucial Maillard reaction. Once dried, season generously with salt and pepper and dredge lightly in two tablespoons of all-purpose flour.
Using a high heat oil (like olive or canola oil) in your heavy pot, sear the meat for a full four to five minutes per side over medium high heat until a deep, dark brown crust is achieved.
This crust creates the essential fond —the delicious browned bits sticking to the pot that form the bedrock of the final gravy.
The Essential Roster of Red Wine Pot Roast Ingredients
The success of a slow braised meal hinges on the quality of the supporting ingredients. While the star is the net-tied beef, the flavour profile is built upon a balanced liquid and aromatic base.
For the liquid, we require 1.5 cups of a dry red wine and 3 cups of robust, low-sodium beef stock to ensure the final seasoning isn't compromised. The aromatics begin with a rustic mirepoix : one large yellow onion, three medium carrots, and two celery stalks, all roughly chopped.
We introduce complexity with four minced garlic cloves and one tablespoon of concentrated tomato purée. Finally, the slow braise is elevated by four to five sprigs of fresh thyme and two dried bay leaves, which perfume the liquid beautifully during the long cook time.
Related Recipes Worth Trying
- Velvety Roasted Tomato Red Pepper Soup RecipesPerfect for Fall Comfort — This easy soup recipe uses slowroasted veg to create a deeply flavored silkysmooth finish Forget watery broth this is true velvet Perfect healthy soup...
- Best Prime Rib Roast Recipe Rosy Center Flavorful Crust — Stop worrying about that pricey roast This guide shows you how to cook prime rib roast in the oven for a perfect rosy center every time
- Whipped Feta Roasted Pepper Dip The Easiest Party Dip — Looking for quick and easy dips This 10minute Whipped Feta Dip is a creamy party dip that beats anything storebought Perfect for chips
Tools of the Trade for Slow Braising Success
Patience is the most important tool, but the right equipment ensures even cooking and maximum flavour development. The most critical item is a heavy bottomed pot, ideally a 5 to 6 quart capacity Dutch Oven .
The density of cast iron guarantees that heat is distributed evenly throughout the entire cooking process, preventing scorching and maintaining a consistent braising temperature in the oven.
You will also need sturdy tongs for turning the roast during searing, and crucially, a wire rack for resting the seared meat and the finished product this prevents the formation of a soggy bottom crust.
Selecting Your Champion Cut: Quality Chuck Roast Matters
The chuck comes from the shoulder of the steer and is famed for its high collagen content, which is exactly why it is perfect for low-and-slow cooking. This tough connective tissue melts into gelatin during the braise, lubricating the muscle fibres and creating that signature fall apart texture.
If you're shopping internationally, the chuck roast other names include shoulder pot roast or clod roast. In Canada , particularly in metropolitan areas like Montreal and Toronto , you may occasionally find this cut labelled paleron in French butcher shops, which is the chuck roast in French term referring to the shoulder blade area.
Always look for a cut with good marbling.
Building the Braising Liquid Base: Wine and Broth Choices
The selection of your braising liquid determines the entire flavour character. Using a dry red wine (like Cabernet) is essential, as its tannins and acidity help tenderize the beef and deepen the colour of the gravy. We combine the 1.5 cups of red wine with 3 cups of beef stock.
We opt for low-sodium stock because the liquid will reduce significantly during cooking, concentrating the flavour and salt levels. The magic happens during the deglazing phase, where the wine is added to scrape up the fond, transforming the browned residue into complex, dissolved flavour.
Prep Before You Cook: The Vegetable Mise en Place
Achieving a seamless cooking process relies on having your ingredients prepped and ready. This initial step, known as mise en place , involves roughly chopping your onion, carrots, and celery.
Because these vegetables will cook for over three hours, a rough chop (about one-inch pieces) is preferred over a fine dice, as they will completely soften and melt into the sauce, contributing body and natural sweetness before being strained out.
Mince the four garlic cloves and measure the tomato purée; these will cook quickly and should be added last before the deglazing begins.
Non-Negotiable Kitchen Gear for Roasting
Beyond the Dutch Oven, two additional items are absolutely essential. First, a quality, heat resistant slotted spoon is necessary for sautéing the aromatics and retrieving the herbs and beef once braising is complete. Second, a fine mesh sieve is critical for straining the braising liquid.
Attempting to scoop out the vegetables compromises the velvety texture of the final gravy; the liquid must be strained cleanly before reduction to ensure a smooth, restaurant quality sauce.
Step-by-step: Achieving Fall Apart Tenderness
The process of creating the perfect pot roast is divided into three distinct stages: building the flavour, the slow transformation, and the finishing touch.
Phase One: Searing the Beef for Maximum Flavor Depth
After seasoning and lightly dredging the dried 3-3.5 lb beef in the flour, heat the 3 tablespoons of oil until shimmering. Sear the meat for four to five minutes per side until the crust is deep brown.
Immediately remove the beef using tongs and set it aside on a wire rack to prevent it from stewing in its own residual heat. Reduce the stovetop heat to medium and add the chopped onions, carrots, and celery. Sauté for five to seven minutes, using the oil in the pot to scrape up the beef fond .
Deglazing the Pan and Building the Aromatic Foundation
Once the vegetables have softened, add the minced garlic and tomato purée, cooking for just one minute until fragrant. This toasting intensifies the tomato's sweetness. Next, pour in the 1.5 cups of red wine.
Bring this liquid to a rapid simmer, using a wooden spoon or spatula to scrape the bottom of the pot vigorously, dissolving all the browned bits. Allow the wine to reduce by half a process that takes about five minutes to concentrate its deep, fruity notes before adding the stock.
The Long, Slow Journey: Oven Braising Time and Temperature
Return the seared beef to the pot, nestling it among the sautéed vegetables. Add the 3 cups of beef stock, the bay leaves, and the fresh thyme sprigs. The liquid should cover about two-thirds of the roast. Bring the liquid back up to a gentle simmer on the stovetop, then cover the Dutch Oven tightly.
Transfer the pot to a preheated oven set to 325°F (160°C). Braise for 3 hours to 3 hours 30 minutes. The meat is done when it offers absolutely no resistance to a fork.
If you prefer the convenience of a chuck roast slow cooker , you can achieve similar results by cooking on the Low setting for 8 to 10 hours, ensuring the liquid does not evaporate completely.
The Finishing Touch: Resting and Thickening the Gravy
Once the beef is fork tender, carefully remove it from the braising liquid and place it on a carving board, tenting it loosely with foil for a mandatory 15-minute rest. While the meat rests, discard the bay leaves and thyme sprigs.
Pour the entire braising liquid through a fine mesh sieve into a separate saucepan, pressing the softened vegetables to extract every last drop of flavorful juice before discarding the solids. Bring the strained liquid to a boil over high heat, skimming off any visible surface fat.
Reduce this rich gravy for five to ten minutes until it coats the back of a spoon and tastes wonderfully concentrated. Adjust the final seasoning. Slice the rested beef or shred it and coat generously with the hot, reduced gravy.
Chuck Roast Troubleshooting and Serving Suggestions
How to Fix a Pot Roast That Isn't Tender Enough
The single most common issue encountered when cooking a chuck roast is insufficient tenderness. If, after the initial 3. 5 hours, your roast is still tough or chewy, it simply means the collagen has not yet fully broken down into gelatin.
Do not panic and do not slice it . Return the roast to the oven, covered, and continue braising for another 30 to 60 minutes. The meat will suddenly turn from tough to meltingly tender once it hits the optimal internal temperature and the collagen dissolves.
Patience is the cure for a tough pot roast.
Perfect Pairings: Side Dishes to Complement the Red Wine Sauce
The deep, rich character of this red wine sauce demands simple, comforting, and absorbent accompaniments. A classic choice is proper, buttery mashed potatoes or a lighter celeriac mash, both perfect for soaking up every drop of the luxurious gravy.
To balance the plate, serve simple, steamed seasonal greens like kale, savoy cabbage, or tenderstem broccoli dressed only with a knob of butter and salt flakes. For those embracing the traditional British feel, crispy, towering Yorkshire puddings are a welcome addition.
Nutritional Breakdown and Meal Prepping Notes
This slow cooked chuck roast recipe , based on eight servings, is surprisingly high in protein (around 45g) and provides moderate, satiating calories (450 500 kcal). Since the beef is strained and the sauce is reduced, the carbohydrate count remains relatively low (10-15g).
This dish is excellent for meal prepping; the flavours deepen significantly overnight. Store leftovers in an airtight container for three to four days in the refrigerator. For longer storage, freeze the sliced beef and the gravy separately in freezer safe bags for up to three months.
Expert Tip: If you have time, chill the sauce completely before freezing or reheating; the fat will solidify, making it effortless to skim off the top.
Variations: Beyond Red Wine Alternative Braising Liquids
While the red wine version is classic, the chuck roast is remarkably versatile and can adapt to many flavour profiles. For a different, darker tone, try the Lager and Mustard Braise: substitute the red wine for a quality dark beer or stout (like Guinness), and add one tablespoon of English mustard powder and a teaspoon of Worcester sauce for complexity.
Alternatively, a brighter, Mediterranean Braise can be achieved by using dry white wine, adding citrus zest, pitted olives, and sun-dried tomatoes during the final hour of cooking.
If you need a simple, non-alcoholic preparation, substitute the wine with extra beef stock, ensuring you add a splash of red wine vinegar toward the end to maintain necessary acidity.
Recipe FAQs
Crikey, I’ve braised it for hours, but why is my meat still tough?
Don't panic! Unlike steaks, chuck roast actually gets tougher before it gets tender. If it’s tough, it simply hasn’t finished cooking yet; the collagen hasn’t fully broken down into lovely, gelatinous goodness.
Keep it covered and return it to the low oven it usually needs a minimum of three hours and sometimes closer to four, depending on the thickness of the joint. You’re aiming for 'fork tender', where it falls apart with zero resistance.
I've only got a brisket can I use that instead of the Chuck Roast?
Absolutely, brisket (especially the flat cut) is a suitable substitute, as is short rib, but the classic Chuck Roast is the champion for this traditional pot roast recipe. Brisket has less marbling and may dry out slightly faster, so ensure it stays mostly submerged in the braising liquid.
If using short ribs, reduce the total cooking time slightly, as they are smaller cuts.
This looks like a proper Sunday job; can I make the whole thing ahead of time?
It’s practically mandatory! Pot roasts are notorious for tasting even better the next day, as the flavours have a chance to properly settle and meld. Cook the roast fully, let it cool completely, and store the meat and gravy separately in airtight containers in the fridge for up to 3-4 days.
When reheating, ensure you do it slowly on the hob or in the oven to maintain that meltingly tender texture.
What's the secret to making sure the red wine gravy turns out proper thick and shiny?
The secret is reducing the liquid after the braise, not before. Once you've strained the liquid, bring it to a rolling boil and let it bubble away until it coats the back of a spoon this concentrates the flavour dramatically.
Pro tip: If you refrigerate the liquid beforehand, the fat solidifies on top, making it easy to skim off, ensuring your gravy is rich, glossy, and not greasy.
I don't have a Dutch oven. Can I use a slow cooker or pressure cooker for this recipe?
Certainly, adapting this to other equipment is easy peasy. For a slow cooker, follow the prep and searing steps, but reduce the beef stock to about 2 cups, then cook on Low for 6-8 hours.
For an electric pressure cooker (Instant Pot), sear the meat and aromatics using the sauté function, then pressure cook for 60-75 minutes on High before allowing a full natural pressure release.
Tender Red Wine Chuck Roast

