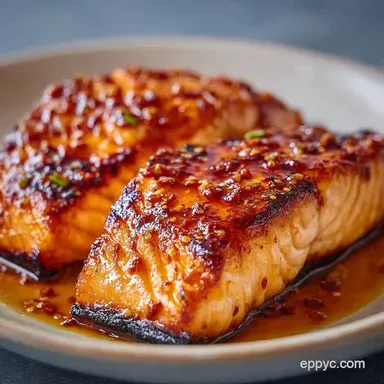
Oven Honey Glazed Salmon: Sticky and Juicy
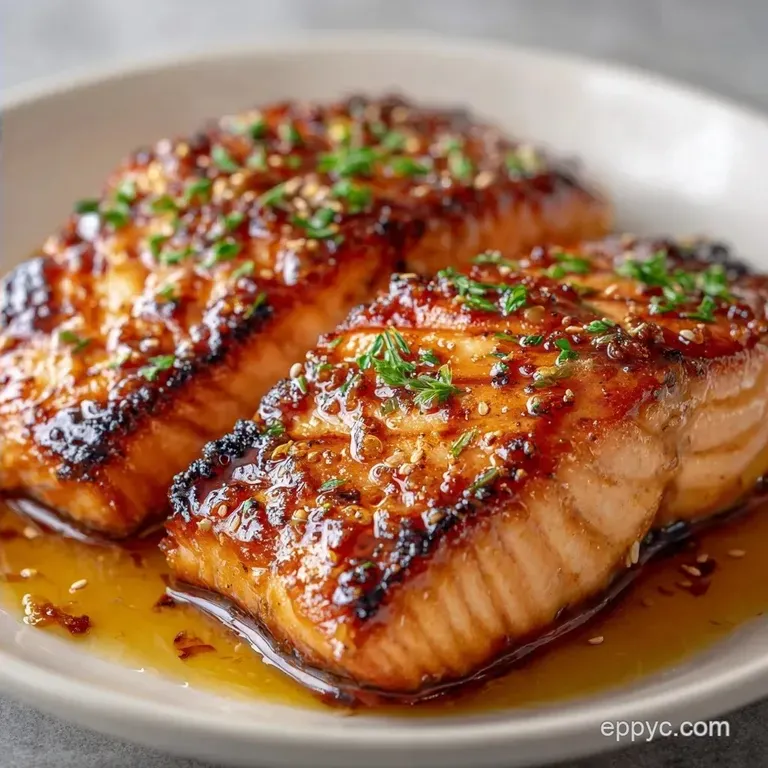
- Time: 10 min active + 15 min baking
- Flavor/Texture Hook: Velvety, sticky glaze with a salty sweet finish
- Perfect for: Fast weeknight dinners or an easy date night meal
- The Secret to Oven Honey Glazed Salmon
- Component Analysis
- Shopping List Breakdown
- Essential Kitchen Tools
- From Prep to Plate
- How to Fix Common Problems
- Troubleshooting Common Issues
- Variations & Substitutions
- Adjusting for Size
- Debunking Salmon Myths
- Preservation Secrets
- Serving Suggestions
- Recipe FAQs
- 📝 Recipe Card
The smell hits you the second the garlic and honey start to bubble in the oven. It's that specific, sweet, toasted aroma that fills the whole kitchen and makes everyone move toward the stove.
I remember the first time I tried making glazed fish in the oven, I just dumped the sauce on and hoped for the best, but it ended up as a watery puddle at the bottom of the pan.
The secret is all in the honey. Honey isn't just for sweetness here; it acts as the glue that holds the garlic and coconut aminos to the fillet. It creates a thick, glossy coat that protects the fish from the direct heat of the oven, essentially trapping the moisture inside while the sugars on top caramelize into a deep brown.
You can expect a result that looks like it came from a bistro but takes almost no effort. This Oven Honey Glazed Salmon focuses on a high temperature blast to get that "lacquer" look without overcooking the center.
If you follow the temperature guide, you'll get fish that flakes easily with a fork and a glaze that actually sticks to the meat.
The Secret to Oven Honey Glazed Salmon
Sugar Browning: Honey contains fructose and glucose that caramelize quickly at 400°F, creating a sticky crust.
Acid Balance: Lemon juice breaks down the heavy sweetness of the honey, preventing the glaze from tasting like candy.
Moisture Barrier: The oil and honey combine to form a seal, which keeps the salmon from drying out during the quick bake.
Salt Synergy: Coconut aminos provide a salty, umami base that enhances the natural richness of the salmon fats.
| Method | Time | Texture | Best For |
|---|---|---|---|
| Oven | 15 mins | Evenly cooked, glossy | Large batches, low stress |
| Stovetop | 8 mins | Crispy edges, seared | Single fillets, fast sear |
Component Analysis
| Ingredient | Science Role | Pro Secret |
|---|---|---|
| Honey | Glaze Thickener | Use a mild clover honey to avoid overpowering the fish |
| Coconut Aminos | Umami Base | Less salty than soy, giving a smoother flavor profile |
| Lemon Juice | pH Balancer | Freshly squeezed only; bottled juice tastes metallic |
| Garlic | Aroma Layer | Mince it into a paste for a more uniform glaze |
Shopping List Breakdown
For the fish, grab center cut fillets. They have a consistent thickness, which means they all finish cooking at the same time. If you get tapered pieces, the thin end will be dry by the time the thick part is done.
For the Salmon
- 4 salmon fillets (6 oz each)Why this? Standard size for a 15 minute bake
- 1/2 tsp Kosher saltWhy this? Coarser grains prevent over salting
- 1/4 tsp Black pepperWhy this? Freshly cracked adds a woody heat
For the Healthy Glaze
- 3 tbsp HoneyWhy this? Creates the signature sticky lacquer
- 2 tbsp Coconut AminosWhy this? Soy free and lower sodium than soy sauce
- 1 tbsp Fresh lemon juiceWhy this? Cuts through the fat of the salmon
- 3 cloves Garlic, mincedWhy this? Adds a pungent, savory depth
- 1 tsp Olive oilWhy this? Helps the glaze emulsify and stick
Right then, if you're looking for a different flavor profile, my Soy Sauce Glazed Salmon is another great way to use these ingredients with a saltier kick.
Essential Kitchen Tools
You don't need a fancy setup for this. A large rimmed baking sheet is the most important part. If you use a pan with low sides, the glaze might bubble over the edge and create a smoky mess in your oven.
I always use parchment paper. It's not just about the cleanup, though that's a huge plus. Salmon skin is notorious for sticking to metal pans, and when you try to lift the fillet, you risk tearing the fish or losing that beautiful glaze.
A small whisk or a fork works for the sauce, and a silicone brush is the best way to apply the glaze. If you don't have a brush, a spoon works, but you'll end up with "globs" instead of a smooth, professional coating.
From Prep to Plate
- Preheat oven to 400°F (200°C) and line a large rimmed baking sheet with parchment paper. Note: Preheating ensures the glaze starts bubbling immediately
- Pat the salmon fillets completely dry with a paper towel and season lightly with salt and pepper. Note: Excess moisture creates steam, which prevents browning
- In a small bowl, whisk together the honey, coconut aminos, lemon juice, minced garlic, and olive oil until smooth and glossy.
- Place the fillets skin side down on the baking sheet and generously brush half of the glaze over the top of each fillet.
- Bake for 12-15 minutes. until the fish is opaque and the glaze is bubbling
- For the final 2 minutes of cooking, brush on the remaining glaze.
- Turn on the broiler until the top is bubbling and mahogany colored.
- Remove from the oven when internal temperature reaches 135°F (57°C). Note: Carryover heat will bring it to 140-145°F
Chef's Note: Don't be afraid of the broiler. It's the only way to get that deep, charred honey look. Just stay right there and watch it, as honey goes from "perfect" to "burnt" in about 30 seconds.
How to Fix Common Problems
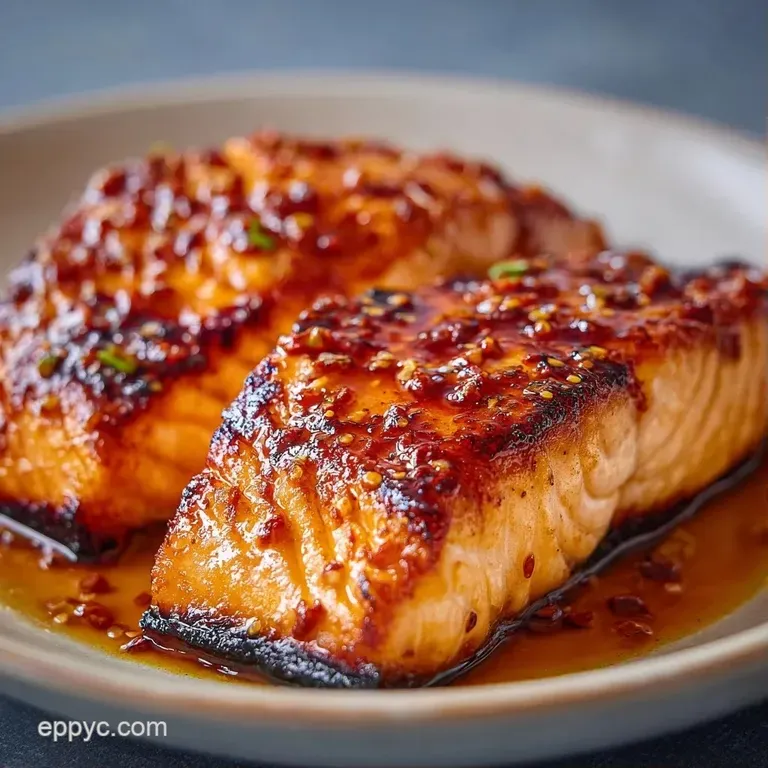
Troubleshooting Common Issues
| Issue | Solution |
|---|---|
| Why Your Salmon Is Dry | This usually happens because of the "safe" temperature myth. Many people cook salmon until it's 145°F inside the oven, but the fish keeps cooking after you take it out. |
| Why the Glaze Is Runny | If your glaze doesn't thicken, you might have used too much lemon juice or your oven wasn't hot enough. The sugars need high heat to reduce and stick. |
| Why the Fish Sticks | If the salmon is glued to the pan, you likely skipped the parchment paper or used a non stick spray that didn't hold up to the honey's sugar. Parchment is the only real insurance policy here. |
Common Mistakes Checklist
- ✓ Patting fillets bone dry before seasoning
- ✓ Using a meat thermometer for precision
- ✓ Brushing the glaze in two separate stages
- ✓ Lining the pan with parchment paper
- ✓ Letting the fish rest for 3 minutes before serving
Variations & Substitutions
If you want a spicy kick, you can swap the regular honey for a Hot Honey Recipe. The chili infusion works incredibly well with the richness of the salmon and the acidity of the lemon.
For those looking for a deeper sweetness, you can replace 1 tablespoon of the honey with brown sugar. This creates a more "molasses" style flavor and a slightly grainier, more rustic crust.
If you need a Paleo or Soy Free option, the coconut aminos already cover you. However, if you don't have aminos, you can use a mix of balsamic vinegar and a pinch of extra salt, though the flavor will shift toward a more Mediterranean profile.
Decision Shortcut
- If you want more heat → add 1/2 tsp red pepper flakes to the glaze.
- If you want it more savory → increase garlic to 5 cloves.
- If you want a tangier finish → add a squeeze of fresh lime at the end.
| Original Ingredient | Substitute | Why It Works |
|---|---|---|
| Honey (3 tbsp) | Maple Syrup (3 tbsp) | Similar sugar content. Note: Adds a woody, autumnal flavor |
| Coconut Aminos | Soy Sauce (low sodium) | Same umami profile. Note: Saltier, so reduce added salt |
| Lemon Juice | Apple Cider Vinegar | Provides acidity. Note: More pungent, less citrusy |
Adjusting for Size
When you're cooking for just one or two people, don't just halve the time. The oven still needs to bring the fish up to temperature. If you're doing 2 fillets instead of 4, reduce the total bake time by about 2-3 minutes, but keep the temperature at 400°F.
If you're scaling up for a party, do not crowd the pan. If the fillets are touching, they will steam instead of roast, and you'll lose that mahogany crust. Use two separate baking sheets.
For large batches, I recommend reducing the glaze slightly in a saucepan before brushing it on. This ensures the sauce is already thick, so you don't have to rely solely on the oven to reduce the liquid.
Debunking Salmon Myths
The "Seal in Juices" Myth: Some people say you must sear salmon in a pan first to "lock in" the moisture. This isn't how it works. Searing adds flavor and color, but the moisture loss happens regardless of the method. The oven method is actually gentler on the proteins.
The "Skin is Waste" Myth: Many toss the skin, but it's actually the most nutrient dense part. When baked at 400°F, the skin becomes a savory base that supports the fillet and adds a nice contrast to the sweet glaze.
The "Room Temp" Myth: You'll hear that fish must be room temperature before cooking. For a quick 15 minute bake, this is unnecessary and can actually be a food safety risk. Just pat it dry and go.
Preservation Secrets
Store any leftovers in an airtight glass container in the fridge for up to 3 days. To keep the glaze from getting soggy, store the salmon on a piece of parchment paper inside the container.
I don't recommend freezing cooked salmon. The texture changes and becomes mushy once thawed. If you have extra raw fillets, freeze them individually wrapped in vacuum sealed bags or tight plastic wrap.
For zero waste, don't throw away the leftover glaze in the bowl. You can simmer it in a small pan for 2 minutes until it thickens even more, then drizzle it over roasted broccoli or sautéed spinach.
Serving Suggestions
To keep the meal balanced, serve this with white rice and crisp vegetables like cucumber, radish, or avocado. The freshness of the vegetables cuts through the richness of the honey glaze.
Another great pairing is a simple quinoa salad with parsley and feta. The saltiness of the cheese plays off the sweetness of the Oven Honey Glazed Salmon perfectly.
If you're feeling fancy, serve the fillets over a bed of wilted kale or baby spinach. The heat from the fish will slightly soften the greens, and any extra glaze from the pan will act as a natural dressing.
Recipe FAQs
How long to cook honey glazed salmon in the oven?
Bake for 12-15 minutes at 400°F. Remove the fillets when the internal temperature reaches 135°F to ensure the fish remains moist and tender.
Is it better to bake salmon at 350 or 400 in the oven?
Use 400°F. Higher heat is necessary to caramelize the honey and reduce the glaze into a sticky coating without overcooking the fish.
Do you put honey on salmon before or after cooking?
Apply it both before and during. Brush half the glaze on the fillets before baking, then apply the remaining half during the last 2 minutes for a mahogany finish.
How to bake salmon for gastritis?
Bake the fillets at 400°F on parchment paper. Using a gentle oven roast instead of pan-frying reduces the amount of charred fats and heavy oils that can trigger sensitivity.
What are some baked salmon seasoning recipes?
Whisk together honey, coconut aminos, lemon juice, garlic, and olive oil. This combination creates a sweet savory balance that enhances the natural richness of the salmon.
Is it true that salmon must be cooked to 145°F to be safe?
No, this is a common misconception. Pulling the fish at 135°F prevents it from drying out, as the internal temperature continues to rise while the salmon rests.
What are some good side dishes for honey glazed salmon?
Pair it with a bright, creamy vegetable. This sweet glaze complements the rich flavors of creamy hollandaise asparagus perfectly.
Oven Honey Glazed Salmon